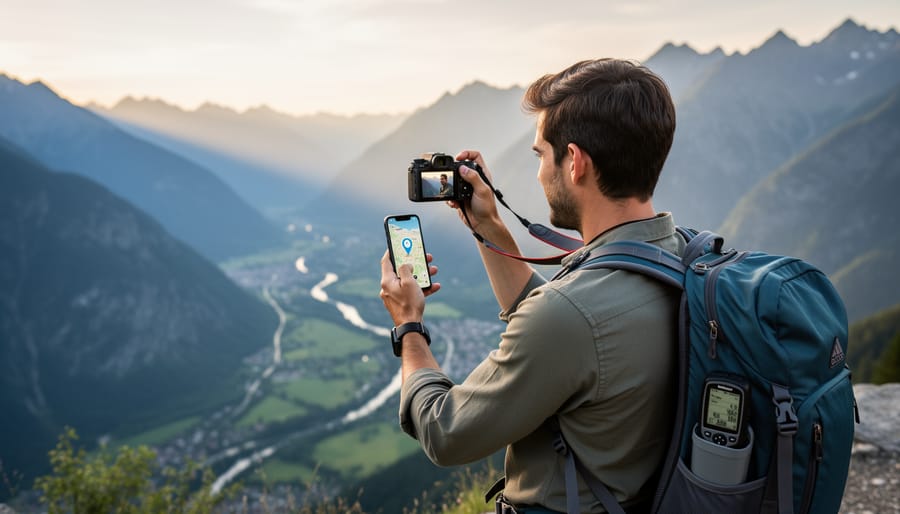
Every photograph captures a moment in time, but camera geotagging adds the crucial element of place, embedding GPS coordinates directly into your image files. Whether you’re documenting a landscape photography expedition across Iceland, organizing thousands of vacation photos, or providing clients with precise location metadata for real estate shoots, geotagging transforms your images from simple pictures into geographically-aware data points that tell a complete story.
Modern cameras and smartphones make geotagging remarkably straightforward. Enable the GPS function in your camera’s menu settings, and your device will automatically record latitude, longitude, and sometimes altitude data in each photo’s EXIF metadata. This embedded information allows photo management software to sort images by location, plot them on maps, and help you recall exactly where that perfect sunset or wildlife encounter occurred years later.
For cameras without built-in GPS, external solutions abound. Dedicated GPS loggers track your route throughout the day, recording timestamped waypoints that sync with your photos during post-processing. Smartphone apps like Geotag Photos Pro serve the same purpose, running quietly in your pocket while you shoot. The critical factor is time synchronization: your camera’s clock must match your GPS device’s time precisely, or the matching algorithm will pair your images with incorrect locations, sometimes miles from where you actually stood.
Professional photographers increasingly rely on geotagging for client deliverables, while travel photographers use it to maintain accurate records for articles and licensing. The technology even enables features like automatic copyright protection based on sensitive locations and privacy controls that strip GPS data from photos before sharing online. Understanding how geotagging works and implementing it correctly elevates your photography workflow from simple image capture to comprehensive visual documentation.
What Camera Geotagging Actually Does (Beyond Dropping Pins)
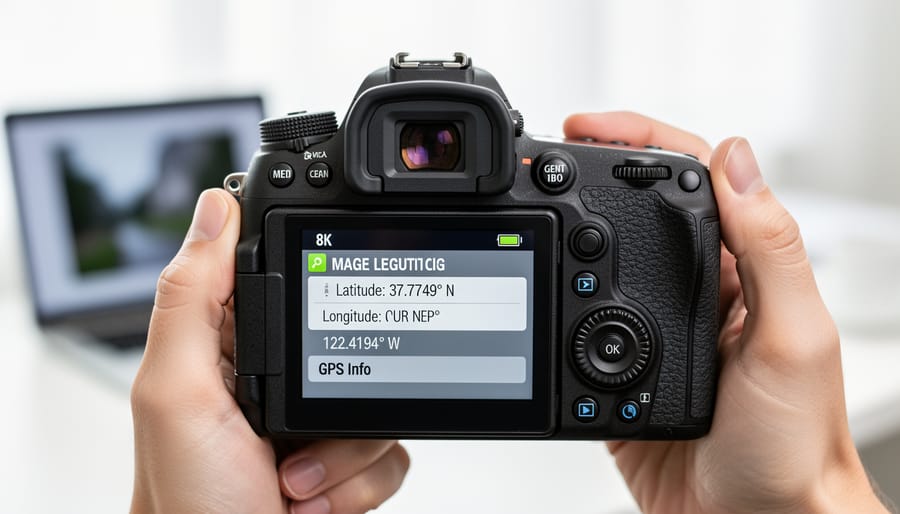
At its core, camera geotagging is simply the process of embedding GPS coordinates into your photos. Think of it as your camera quietly writing down exactly where you were standing when you pressed the shutter button. This information gets stored in your photo metadata, specifically in what’s called EXIF data, the same invisible record-keeping system that already tracks settings like aperture, shutter speed, and ISO.
But geotagging does much more than drop pins on a map. Each geotagged photo becomes a time-stamped record of your journey, creating an automatic travel log that’s impossible to recreate from memory alone. Imagine returning from a month-long road trip through Iceland with thousands of images. Without geotags, you might struggle to remember whether that particular waterfall was near Vik or Akureyri. With geotagging enabled, your photo management software instantly organizes everything by location, showing you exactly where each shot was captured.
The technology itself comes in three main flavors. Some cameras have built-in GPS receivers, continuously tracking satellite signals and stamping coordinates onto every image. It’s convenient but can drain batteries faster. Smartphones, naturally, excel at this since they combine GPS, Wi-Fi, and cellular triangulation for accurate positioning. Many modern mirrorless cameras now offer GPS camera integration through smartphone connectivity, using your phone as the GPS source while your camera handles the actual photography. Finally, external GPS units attach to your camera’s hot shoe or connect wirelessly, offering a middle ground with dedicated hardware that doesn’t tax your camera’s battery.
Wildlife photographers particularly value geotagging for documenting rare species sightings. Recording exact coordinates helps researchers track migration patterns and habitat use. Travel photographers use geotags to create compelling photo maps for clients or personal travel blogs. Even real estate photographers benefit, as geotagged property photos automatically organize by location, simplifying workflow when shooting multiple listings across a city.
The beauty is that once enabled, geotagging happens automatically in the background, building a rich geographical archive without requiring any extra effort during your shoot.
The Hidden Problem That Ruins Your Geotags
When Your Camera Clock Lies to You
Your camera thinks it’s still Tuesday morning in New York, but you’re actually shooting a sunset in Tokyo on Wednesday evening. Sound familiar? Camera time drift is one of those sneaky problems that only reveals itself when you’re sitting at home wondering why all your beach photos from Hawaii are tagged to locations somewhere in the Pacific Ocean.
The most common culprit is crossing time zones. You land in Paris, eager to start shooting, but forget to update your camera’s clock. The result? Your GPS track log records your afternoon stroll through Montmartre at what your camera believes is 9 AM Eastern Time, and suddenly your geotagging software matches your Eiffel Tower shots to images you took six hours earlier at a café you never visited.
Daylight saving time changes create similar headaches, especially during those twice-yearly transitions. Your camera doesn’t automatically spring forward or fall back, leaving you with a persistent one-hour offset that can misalign your entire photo collection if you’re using GPS track logs.
Dead batteries present another challenge. Replace your camera’s battery or let it drain completely, and many models reset their internal clocks to a default date, sometimes reverting to the camera’s manufacturing date. Imagine discovering that your recent wildlife expedition photos are timestamped as if they were taken in 2019.
These timing mismatches might seem minor, but they compound quickly when you’re processing hundreds of photos from a multi-day trip, turning what should be an automated geotagging process into a frustrating detective game.
How Time Sync Affects GPS Track Matching
When you use a separate GPS logger to track your journey and later want to match those locations to your photos, timing becomes everything. Think of it like solving a puzzle: your GPS device creates a trail of breadcrumbs showing where you were at specific moments, while your camera records when each photo was taken. The only way to connect the dots is by matching timestamps.
Here’s how it works in practice. Let’s say your GPS logger records that you were at coordinates 45.5231° N, 122.6765° W at exactly 2:47:32 PM. If your camera’s timestamp shows a photo taken at 2:47:32 PM, the geotagging software will assign those GPS coordinates to that image. Sounds simple enough, right?
The problem arises when your camera’s clock doesn’t match your GPS logger’s clock. If your camera is even a few minutes off, your photos will be tagged to the wrong locations. Imagine photographing a stunning waterfall, only to have your software place that shot a mile down the trail because your camera clock was running five minutes slow.
This is why synchronization matters so much. Most GPS loggers use satellite time, which is highly accurate. Your camera, however, relies on its internal clock, which can drift over time. Before heading out on a shoot, always sync your camera’s clock to the exact time, preferably using an online time source or your smartphone. Some photographers make it a habit to photograph their GPS device’s screen at the start of a shoot, providing a reference point for later correction if needed.
Three Ways Cameras Add Location Data to Your Photos
Built-In GPS: The Set-It-and-Forget-It Option
If you want geotagging without any extra steps or accessories, a camera with built-in GPS is your dream solution. These cameras come equipped with an integrated GPS module that automatically embeds location data into your photos as you shoot. Press the shutter, and your image file receives precise latitude and longitude coordinates without you lifting another finger.
The convenience factor here is undeniable. You never need to worry about forgetting an external GPS unit at home, syncing devices before a shoot, or matching timestamps later. The camera handles everything internally, making it genuinely set-it-and-forget-it. For travel photographers constantly moving between locations or documentary photographers covering events across multiple venues, this automatic approach eliminates an entire workflow step.
However, this convenience comes with trade-offs worth considering. GPS modules are notorious battery drains, and having one constantly running inside your camera will reduce your shooting time per charge, sometimes significantly. You’ll also notice longer startup times as the GPS needs to acquire satellite signals when you power on the camera. On cloudy days or in urban canyons surrounded by tall buildings, satellite acquisition can be frustratingly slow.
The bigger limitation is availability. Relatively few camera models include built-in GPS, and those that do typically sit in specific product lines. Nikon has historically been more committed to this feature, with models like the D5300, D7500, and select Z-series mirrorless cameras including GPS. Some Canon PowerShot compact cameras offer it, while Olympus included GPS in certain Tough series cameras. Sony’s approach has been inconsistent, with GPS appearing in some Alpha models but absent in others.
If you’re specifically shopping for a new camera and geotagging is a priority, built-in GPS might influence your decision, but don’t compromise on core photography features just to get automatic location tagging.
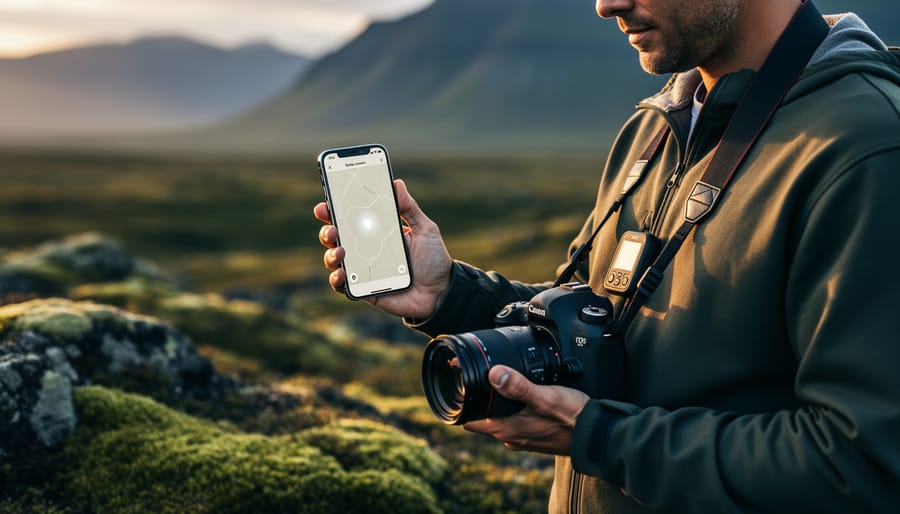
Smartphone Connectivity: Your Phone as GPS Source
If your camera doesn’t have built-in GPS, you’re not out of luck. Modern cameras increasingly offer a clever workaround: tapping into your smartphone’s location data via Bluetooth or Wi-Fi. It’s an elegant solution that leverages the GPS receiver you’re already carrying in your pocket.
The basic concept is straightforward. You install the camera manufacturer’s app on your phone, pair it with your camera, and the app continuously transmits location data to your camera as you shoot. Canon’s Camera Connect, Nikon’s SnapBridge, and Sony’s Imaging Edge Mobile all offer this functionality, though implementation details vary by model and manufacturer.
For casual users, this approach offers several advantages. There’s no additional hardware to buy, no extra batteries to manage, and your phone likely has a more powerful GPS chip than what camera manufacturers typically include. You’re also getting the benefit of assisted GPS (A-GPS), which uses cellular network data to speed up satellite acquisition and improve accuracy in challenging environments like urban canyons.
The real-world experience, however, can be mixed. Bluetooth connectivity is generally more battery-efficient but may disconnect unpredictably, especially if you’re also using your phone for other tasks. Wi-Fi offers more stable connections but drains both devices faster. I’ve had sessions where everything worked flawlessly, and others where the connection dropped repeatedly, leaving gaps in my geotagged timeline.
Range limitations present another consideration. Step too far from your phone while scouting a location, and you’ll lose the connection. For photographers who prefer to travel light and leave their phone in a bag, this tethered relationship can feel restrictive. Despite these quirks, smartphone connectivity remains the most accessible entry point for photographers wanting to experiment with geotagging without additional investment.
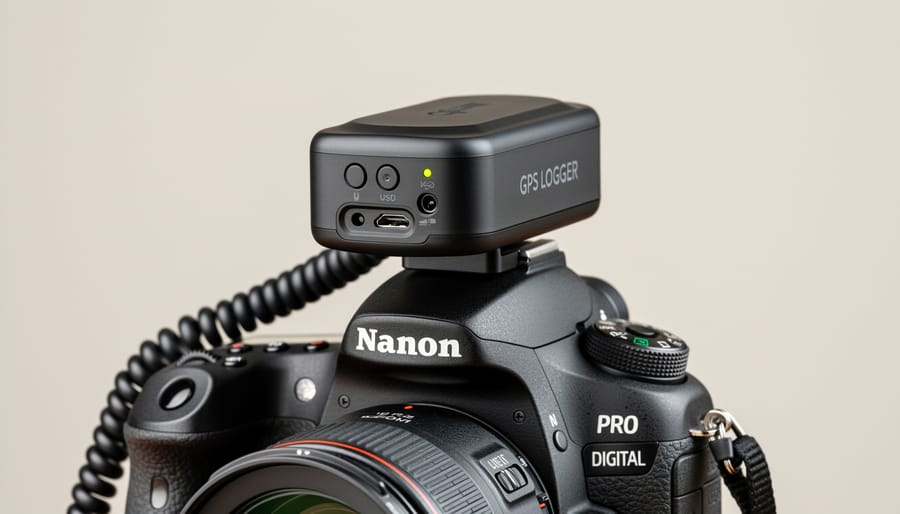
External GPS Loggers: The Professional’s Choice
For photographers who need the most accurate location data or shoot with cameras lacking built-in GPS, external GPS loggers offer a professional-grade solution. These pocket-sized devices work independently from your camera, continuously recording your position throughout the day. Later, specialized software matches this GPS track to your photos based on when each shot was taken.
The beauty of this approach lies in its versatility. Unlike camera-integrated GPS that drains your battery and may struggle with satellite reception, a dedicated logger operates efficiently for days on a single charge. You simply turn it on at the start of your shoot, slip it in your pocket or bag, and forget about it. The device silently logs your position every few seconds, creating a detailed breadcrumb trail of your movements.
Popular options include the Garmin GLO 2, which offers exceptional accuracy through support for multiple satellite systems, and the Columbus V-1000, favored by travel photographers for its extended battery life and simple operation. The di-GPS Pro caters to professional workflows with advanced features like automatic photo matching and cloud synchronization.
The workflow requires an extra step compared to built-in GPS. After your shoot, you’ll import both photos and GPS track data into software like Lightroom, GeoSetter, or the manufacturer’s application. The software analyzes timestamps and precisely matches each photo to its location. This process typically takes just minutes and provides accuracy often superior to smartphone-based solutions.
One crucial consideration: your camera’s clock must be accurately set. Even a few minutes of drift can result in mismatched locations. Many photographers synchronize their camera time using their phone or GPS receiver before important shoots to ensure perfect alignment during post-processing.
Setting Up Your Geotagging Infrastructure the Right Way
Syncing Your Camera Time (The Foundation Everything Else Needs)
Before you even think about GPS devices or geotagging software, you need to nail down one fundamental detail: your camera’s clock. I know it sounds almost too simple, but I’ve seen countless photographers frustrated by photos that refuse to match their GPS tracks, only to discover their camera time was off by several minutes or even hours.
Here’s why this matters so much. Geotagging works by matching the timestamp on your photo with the corresponding moment in your GPS track log. If your camera says you took a shot at 2:15 PM, your geotagging software looks for where you were at exactly 2:15 PM according to your GPS device. Even a two-minute discrepancy can place your mountain summit photo halfway down the trail.
The good news? Many GPS devices and smartphone apps display GPS time, which is incredibly accurate since it comes directly from satellites. Set your camera to match this down to the second. I usually do this right before a shoot begins—turn on your GPS device, let it acquire satellites, then adjust your camera’s clock to match precisely.
Time zones deserve special attention. Keep your camera set to a consistent time zone throughout your shoot, preferably UTC or your home time zone. Changing time zones mid-trip creates confusion later. Your GPS track log records in UTC anyway, and most geotagging software handles the conversion automatically.
One practical tip: take a photo of your GPS device’s screen showing the current time at the start of your shoot. This gives you a reference point if you later suspect your camera drifted during a long day of shooting.
Choosing the Right Geotagging Method for Your Photography Style
Your ideal geotagging method depends on how and where you shoot. Let’s explore which approach works best for different photography styles.
If you’re a travel photographer constantly on the move, smartphone GPS integration offers the perfect balance. Your phone stays in your pocket throughout the day, logging your journey while your camera captures moments. This method shines when you’re hopping between locations—imagine documenting a day in Barcelona, moving from Park Güell to the Gothic Quarter. The GPS track captures every transition, and syncing later takes just minutes.
Wildlife and landscape photographers face unique challenges. You might spend hours in remote locations with spotty GPS signals or need to minimize battery drain during long waits. Here, a dedicated GPS unit attached to your camera’s hot shoe proves invaluable. These devices provide reliable tracking even under dense forest canopies where smartphones struggle, and their extended battery life means you won’t miss that perfect golden hour shot because your phone died.
For sports and event photographers working within defined venues, manual geotagging afterward makes the most sense. You already know you spent the entire afternoon at the stadium or concert hall—there’s no need for continuous tracking draining your resources. Simply tag all images from that session with the venue’s coordinates in post-processing.
Studio photographers rarely need geotagging at all, though it can help if you shoot at multiple studio locations. A quick manual tag identifying which studio hosted each session aids organization without adding complexity to your workflow.
The key is matching the method to your movement patterns. High mobility demands automated solutions, while stationary shoots benefit from simpler manual approaches. Consider your typical shooting day and choose accordingly.
Software Tools That Make Geotagging Painless
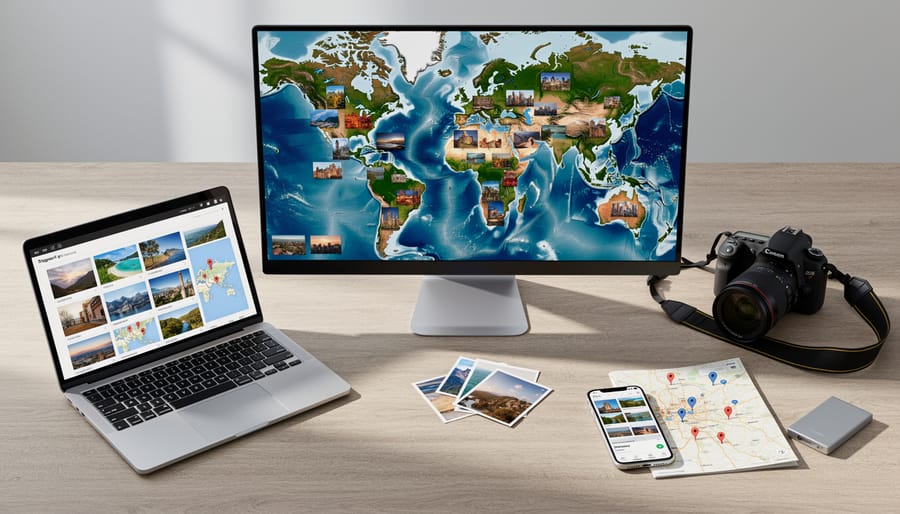
The good news is you don’t need specialized knowledge to add location data to your photos anymore. Today’s photo organization software has made geotagging remarkably straightforward, whether you’re processing a few dozen vacation shots or cataloging thousands of images from a multi-day expedition.
Adobe Lightroom Classic remains the gold standard for photographers already invested in the Adobe ecosystem. Its map module lets you drag and drop photos onto locations, perfect for manual geotagging when you forgot to enable your camera’s GPS. It also reads GPS data automatically from images that already have it, displaying everything on an interactive map. The beauty here is seamless integration with your existing editing workflow.
For photographers seeking free alternatives, GeoSetter offers surprisingly robust features for Windows users. This dedicated tool excels at batch processing, letting you apply location data to entire folders at once. You can load GPS tracks from your smartphone or dedicated GPS logger, and GeoSetter automatically matches timestamps to assign coordinates. It’s particularly useful if you’re working with older images that never had location data.
Adobe Bridge provides middle-ground functionality, allowing basic location viewing and editing without Lightroom’s subscription commitment. Meanwhile, specialized tools like Geotag Photos Pro and HoudahGeo cater to specific needs like advanced track log management or offline map caching.
Choosing the right tool depends on your existing workflow tools and geotagging frequency. Casual photographers adding occasional location data might prefer Lightroom’s integrated approach, while those regularly processing GPS tracks from external devices often appreciate GeoSetter’s dedicated functionality. The key is finding software that fits naturally into how you already work, making geotagging feel like a natural extension rather than an additional chore.
Common Geotagging Mistakes (And How to Avoid Them)
Even experienced photographers sometimes stumble when it comes to geotagging. Understanding these common mistakes can save you hours of frustration and prevent those “where was this again?” moments down the road.
The most frequent error is forgetting to enable location services on your camera or smartphone before a shoot. I’ve heard countless stories from photographers who returned from incredible trips only to discover their images had no location data whatsoever. The solution is simple but requires discipline: make checking your GPS settings part of your pre-shoot routine, just like formatting your memory cards. Before you leave for any photography session, verify that location services are active and that your device has acquired a GPS signal.
Another widespread mistake involves time synchronization issues, particularly when using external GPS loggers or smartphone apps to track your route. If your camera’s internal clock doesn’t match the time stamps in your GPS track log, the software won’t be able to match photos to locations correctly. This becomes especially problematic when crossing time zones during travel. The fix is straightforward: before starting your GPS tracker, synchronize your camera’s clock to GPS time or at least to the exact time your tracking device is using. Some photographers take a photo of their GPS device’s screen showing the time as a reference point for later correction.
Privacy concerns create problems when photographers inadvertently share location data they meant to keep private. Posting images from your home studio or revealing the locations of sensitive wildlife nesting sites can have real consequences. Before sharing any images online, use photo editing software or dedicated metadata tools to review and selectively remove location information when necessary. Many social media platforms strip this data automatically, but it’s better to control it yourself.
Battery drain catches many photographers off guard, especially during long shooting sessions. GPS receivers consume significant power, and running out of battery means losing geotagging capability partway through your shoot. Always carry spare batteries and consider disabling GPS during inactive periods, re-enabling it only when you’re actively photographing.
Finally, some photographers assume their geotagged photos are automatically backed up with their metadata intact. Unfortunately, certain cloud storage services and photo transfer methods can strip or corrupt location data. Always verify that your backup workflow preserves all EXIF information, and test it with a few images before trusting it with your entire archive.
When Geotagging Becomes a Privacy Concern
While geotagging offers tremendous organizational benefits, it also raises significant privacy concerns that every photographer should understand. Every time you share a geotagged image online, you’re potentially broadcasting sensitive location information to anyone who knows how to access it.
Consider these common scenarios where geotagging becomes problematic. Posting photos of your children at their school or playground reveals patterns that could compromise their safety. Sharing images taken at home pinpoints your exact address and, combined with vacation photos, advertises when your house is empty. Professional photojournalists working in sensitive areas or with vulnerable subjects must be especially cautious, as embedded GPS coordinates could endanger the people they’re documenting.
The good news is that you have control over this data. Most cameras allow you to disable GPS functionality entirely through the settings menu. For smartphones, you can deny camera apps location access while still using other GPS-dependent features. This selective approach lets you choose when location tracking matters.
If you’ve already captured geotagged images, you can remove this information before sharing. Both Windows and macOS offer built-in tools to strip metadata. On Windows, right-click the image, select Properties, navigate to Details, and choose “Remove Properties and Personal Information.” Mac users can use Preview’s Tools menu to remove location data. Dedicated applications like ExifTool provide more comprehensive control for batch processing.
When sharing online, remember that social media platforms handle metadata differently. Instagram and Facebook typically strip EXIF data automatically, but this shouldn’t be your only line of defense. Always verify what information you’re sharing, especially on photography-focused platforms where preserving metadata is often the default.
Develop a habit of reviewing location data before posting. Ask yourself whether revealing that specific location serves a purpose or poses a risk. This mindful approach to geotagging protects your privacy without sacrificing the organizational benefits that made you enable the feature initially.
Accurate geotagging doesn’t happen by accident. It’s the result of thoughtful preparation, proper infrastructure, and attention to the details that many photographers overlook. As we’ve explored throughout this guide, the foundation of reliable location data starts long before you press the shutter button. It begins with ensuring your camera’s clock is properly synchronized, your GPS device has a clear view of the sky, and your workflow includes verification steps to catch errors before they become problems.
The practices we’ve discussed might seem like extra work initially, but they quickly become second nature. Setting your camera time to GPS-synced references, understanding how your equipment communicates, and choosing the right geotagging method for your shooting style are investments that pay dividends every time you sit down to organize or share your images.
Looking ahead, the metadata infrastructure you build today becomes increasingly valuable over time. Accurate geotags transform your photo library from a chaotic collection into a searchable, mappable archive. They enable you to reconstruct journeys, discover patterns in your shooting locations, and tell richer stories through your images. When you combine precise location data with thoughtful organization, your photographs become more than memories—they become a geographical narrative of your creative vision.