The real estate market has fundamentally shifted toward virtual experiences, making 360-degree cameras essential tools rather than luxury add-ons for property professionals. Traditional static photos no longer satisfy today’s buyers who expect immersive, walk-through experiences before scheduling in-person visits. The right 360 camera can transform how you showcase properties, significantly reduce time-to-sale, and justify premium listing fees.
Choosing a 360-degree camera for real estate photography differs dramatically from selecting one for travel vlogging or adventure sports. You need specific capabilities: rapid room-to-room capture workflows, consistent indoor lighting performance, seamless integration with platforms like Matterport or Zillow 3D Home, and image quality that accurately represents property dimensions without excessive distortion. A $300 entry-level camera might suffice for apartment rentals, while luxury real estate demands professional-grade equipment costing several thousand dollars.
The investment pays dividends quickly. Real estate listings with virtual tours receive 87% more views than those without, according to industry data, and properties sell up to 31% faster when buyers can preview spaces remotely. For agents managing multiple listings monthly, the efficiency gains alone justify the equipment cost within weeks.
This guide cuts through marketing hype to examine cameras that actually perform in real estate environments. We’ll explore specific models across different price ranges, evaluate their performance in challenging lighting conditions typical of interior spaces, and detail the complete workflow from capture to platform upload. Whether you’re a solo agent photographing your first listings or a specialized real estate photographer building a service business, you’ll find practical recommendations matched to your budget, technical skill level, and business objectives.
What Makes 360-Degree Cameras Different for Real Estate Work
Traditional cameras capture what’s in front of the lens—a single perspective frozen in time. For real estate, this creates an endless cycle of repositioning, shooting multiple angles, and still leaving potential buyers wondering what’s just outside the frame. This is where 360-degree cameras fundamentally change the game.
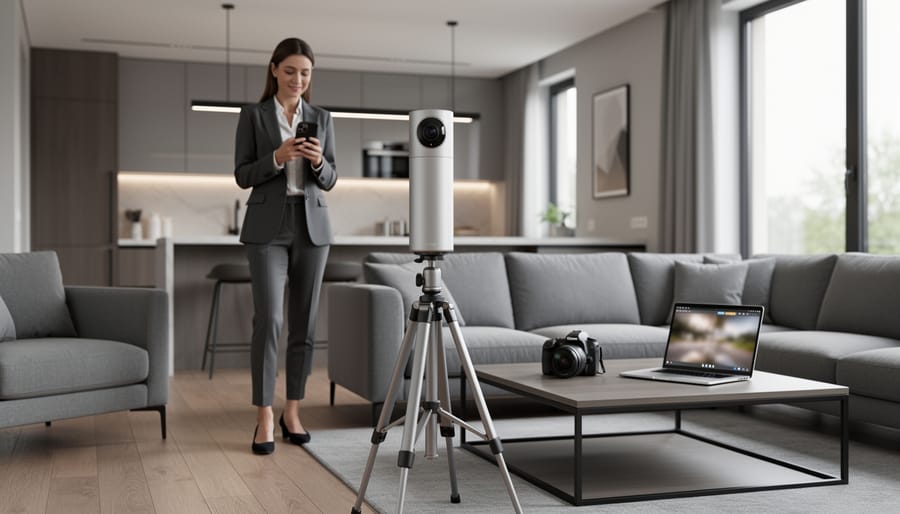
Think of a 360 camera as capturing everything, all at once. When you position one in the center of a living room and press the shutter, you’re recording the entire space—floor to ceiling, wall to wall, including yourself if you don’t step away quickly enough. The resulting image or video becomes an interactive experience where viewers control their perspective, looking up at crown molding, down at hardwood floors, or spinning around to see how the kitchen connects to the dining area.
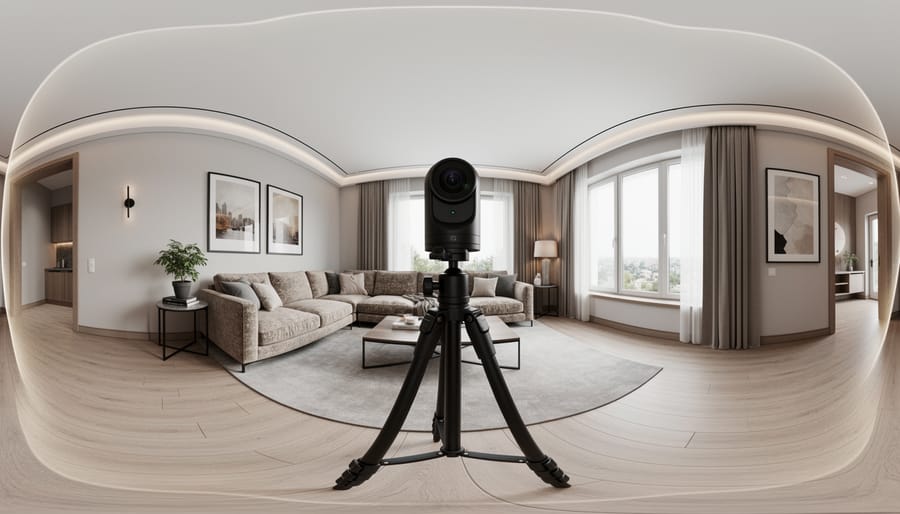
This complete coverage solves a persistent challenge in property marketing: helping distant buyers truly understand spatial relationships. A series of traditional photos might show a beautiful kitchen and an impressive living room, but 360 tours reveal how these spaces flow together. Buyers can virtually stand in the doorway and turn their heads naturally, just as they would during an in-person showing.
The efficiency gains are remarkable too. Instead of shooting 15-20 traditional photos per room from different corners and angles, you might capture just two or three 360-degree positions. For real estate agents juggling multiple listings, this streamlined workflow means spending less time behind the camera and more time closing deals.
Virtual tours created with 360 cameras also keep potential buyers engaged significantly longer than static photo galleries. When someone can explore a property at their own pace, clicking through rooms and examining details that interest them specifically, they’re building a genuine connection with the space. This pre-qualification means the buyers who do schedule in-person showings arrive already excited about the property, having virtually walked through it multiple times from their couch.
Key Features That Actually Matter for Property Photography
Resolution and Image Quality Requirements
Resolution isn’t just a spec sheet number when you’re shooting properties—it’s what separates a professional virtual tour from a blurry disappointment. For real estate applications, you’ll want to aim for at least 8K total resolution (that’s roughly 8000 x 4000 pixels when unwrapped). Here’s why: potential buyers will zoom into details like countertop finishes, flooring textures, and ceiling fixtures. If your image falls apart when they zoom in, you’ve lost their trust.
Think about how your photos will be used across multiple platforms. That stunning beach house listing needs to look crisp on Zillow’s mobile app, but your broker might also want a 24×36 print for the office window display. A camera capturing 5.7K might work for basic web tours, but you’ll struggle with print materials or large format displays at open houses.
The sweet spot for most real estate photographers is between 8K and 12K resolution. Cameras like the Ricoh Theta Z1 (23MP) or Insta360 X3 handle this beautifully, giving you flexibility without creating monster file sizes that crash your client’s website.
Speaking of file size, you’ll need to balance quality with practicality. Raw 360-degree images can easily hit 100MB or more, which is problematic for web hosting and page load times. Most virtual tour platforms automatically compress uploads, but starting with good source material gives you control. Consider shooting in the highest resolution your camera offers, then creating optimized versions for web use—typically compressed to 10-20MB without visible quality loss for online viewers.
Low-Light Performance for Interior Shots
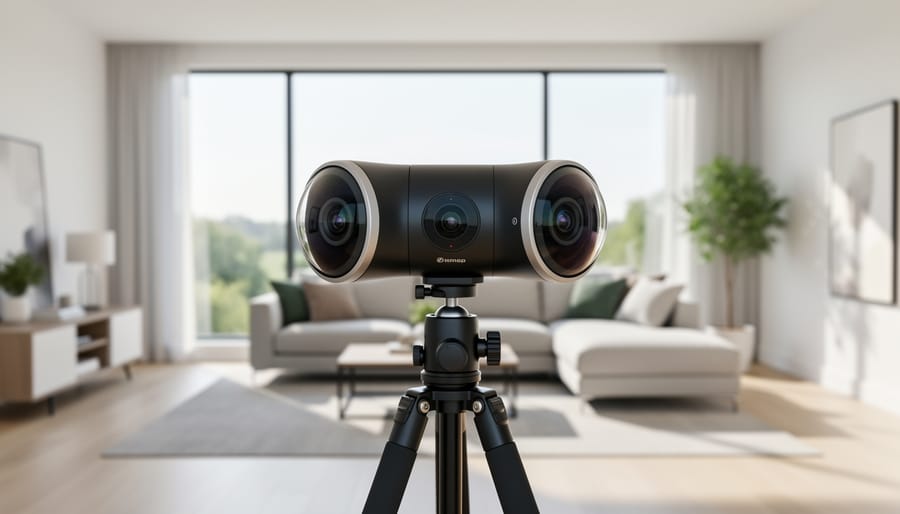
Real estate interiors present unique lighting challenges that can make or break your 360-degree photos. Picture this: you’re photographing a living room where one wall has floor-to-ceiling windows flooding the space with sunlight, while the opposite corner sits in deep shadow. This dramatic contrast is where sensor size becomes your best friend or worst enemy.
Larger sensors (typically 1/2.3-inch or bigger) capture more light information, preserving detail in those shadowy corners while preventing blown-out highlights from windows. For real estate work, this translates directly into more usable photos with less post-processing headaches. Think about photographing a basement suite or a cozy bedroom with limited natural light—cameras with poor low-light performance create grainy, unappealing images that won’t attract potential buyers.
Consider a practical scenario: you’re shooting a heritage home with original wood paneling that absorbs light. A camera with ISO capabilities up to 3200 or higher, combined with good noise reduction, maintains the rich texture of the wood without introducing distracting grain. While professional lighting solutions help, your camera needs to handle mixed lighting conditions independently since you won’t always have time for elaborate setups between appointments.
The investment in superior low-light performance pays off when clients consistently praise your virtual tours for their clarity and inviting atmosphere, regardless of the property’s natural lighting conditions.
Workflow Integration and Software Compatibility
The camera hardware is just the beginning—how well it plays with your existing tech stack can make or break your efficiency. Most modern 360 cameras designed for real estate come bundled with proprietary software that handles automated stitching, but the quality varies dramatically. Premium options like the Ricoh Theta X and Insta360 X3 deliver near-perfect stitches right out of the box, saving you hours of manual correction work that budget models often require.
When setting up your 360 camera, compatibility with virtual tour platforms should be high on your checklist. Matterport cameras naturally integrate seamlessly with their own platform, but if you’re using Zillow 3D Home, iGUIDE, or Kuula, verify your camera’s file format compatibility. Many real estate photographers have learned this lesson the hard way after purchasing equipment that required tedious file conversions.
MLS system integration is another practical consideration. Some cameras offer direct upload features to major listing platforms, while others require intermediate steps through desktop software. For example, certain models sync wirelessly with CloudPano or 3DVista, letting you generate shareable tours within minutes of leaving a property. This workflow advantage translates directly to faster turnaround times and happier clients who need listings live yesterday, not next week.
Stabilization and Mounting Options
Getting stable, professional shots with a 360 camera requires a different approach than traditional photography. Since these cameras capture everything around them, you need to consider how mounting equipment appears in the final image.
Most real estate photographers rely on lightweight tripods that extend between 5 to 6 feet, positioning the camera at roughly eye level while minimizing the tripod’s footprint in the shot. Look for models with slim legs and compact center columns. Many photographers invest in specialized tripods designed for 360 cameras, which feature thinner profiles that are easier to remove in post-processing.
Monopods offer another solution, particularly for quickly capturing multiple rooms. Extended overhead, they create a nearly invisible support that appears as a thin line, which most 360 camera software automatically removes. This works exceptionally well in smaller spaces where tripod legs might dominate the floor area.
Modern 360 cameras include built-in stabilization features that help smooth out any minor movements during capture, though these work best when combined with proper mounting. For the cleanest results, use your camera’s self-timer function rather than pressing the shutter manually, allowing any vibrations to settle before capture.
Pro tip: Many photographers keep a lightweight carbon fiber tripod specifically for property tours, as it combines stability with easy portability when moving between rooms. The investment pays off in consistently professional results across entire listings.
Budget Considerations: What You’re Really Paying For
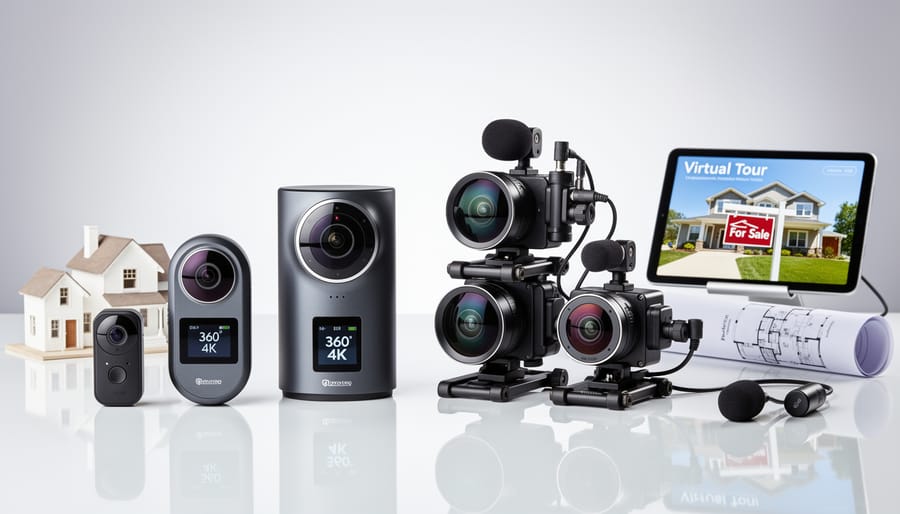
Understanding 360-degree camera pricing for real estate work means looking beyond the sticker price to understand what actually impacts your bottom line. The market breaks down into three distinct tiers, each serving different needs and business models.
The entry-level range ($200-$400) includes cameras like the Ricoh Theta SC2 and Insta360 ONE X2. These are perfect if you’re a real estate agent shooting your own listings or just starting a property photography side business. You’ll sacrifice some image quality and advanced features, but for standard residential listings, they deliver perfectly acceptable results. The trade-off? Expect more time in post-processing and less flexibility in challenging lighting conditions. One agent I know shot 50+ listings with a Theta SC2 before upgrading, proving these cameras can absolutely pay for themselves.
Mid-range options ($400-$800) represent the sweet spot for most professional real estate photographers. Cameras like the Ricoh Theta Z1 and Insta360 ONE X3 offer significantly better image sensors, higher resolution output, and improved HDR capabilities. This tier handles mixed lighting scenarios much better—think rooms with bright windows and dark corners. The improved image quality means less time fixing problems later and more professional-looking virtual tours that help properties sell faster. If real estate photography generates regular income for you, this investment typically pays for itself within a dozen shoots.
The premium tier (over $800) includes specialized cameras like the Matterport Pro2 and high-end Insta360 models. These justify their cost through time savings, superior image quality, and integrated workflow solutions. A Matterport system, for instance, creates complete 3D models with measurements—features that command premium pricing from luxury property clients. However, most photographers don’t need this level initially.
Here’s where you can save: bundled accessories often duplicate what you already own, extended warranties on solid-state devices rarely pay off, and proprietary software subscriptions sometimes have free alternatives. Invest your budget in the camera body and a quality tripod instead—these directly impact your final product quality.
Camera Types and Which One Fits Your Real Estate Business
All-in-One Consumer Cameras
If you’re a real estate agent handling your own photography or just starting out professionally, consumer-grade 360 cameras offer an accessible entry point without breaking the bank. These all-in-one devices typically range from $300 to $600 and require minimal technical knowledge to operate.
The Ricoh Theta Z1 stands out in this category with its larger 1-inch sensor that produces noticeably better image quality than competitors, particularly in dim interiors. While it won’t match DSLR results, it captures respectable 23-megapixel stills that work well for online listings. The Insta360 ONE X2 offers excellent stabilization and intuitive smartphone controls, making it ideal for quick walkthroughs of smaller properties.
These cameras shine in their simplicity. Most connect directly to your smartphone, allowing you to shoot, preview, and upload to platforms like Zillow or Realtor.com within minutes. This speed matters when you’re juggling showings and need photos posted quickly.
The limitations are real, though. Consumer 360 cameras struggle in low light, producing noisy images in darker rooms. Their fixed exposures mean you can’t bracket shots for HDR processing, and the small sensors simply can’t capture the dynamic range of high-end equipment. They work best for apartments, condos, and well-lit homes under 2,500 square feet where lighting conditions are favorable and client expectations match the budget-friendly approach.
Professional-Grade Standalone Systems
When you’re shooting dozens of properties monthly and your reputation depends on flawless deliverables, consumer-grade cameras won’t cut it. Professional-grade standalone systems represent a significant investment, typically ranging from $3,000 to $10,000, but they deliver the image quality and reliability that serious real estate photography demands.
High-end models like the Matterport Pro2 or the Ricoh Theta Z1 offer larger sensors, RAW capture capabilities, and superior low-light performance that becomes critical in poorly lit basements or narrow hallways. These cameras integrate seamlessly with professional photography equipment workflows, allowing you to maintain consistent color profiles across your entire portfolio.
The real advantage lies in their durability and support ecosystems. When you’re climbing ladders, setting up in construction zones, or rushing between five property shoots in a day, weather-sealed bodies and manufacturer warranties matter. Many professional systems also include proprietary stitching software optimized for architectural photography, dramatically reducing post-processing time.
Consider the ROI calculation: if you charge $200 per virtual tour and complete 20 shoots monthly, a $5,000 camera investment pays for itself within two months. Beyond the financial math, these systems position you competitively for commercial clients and luxury listings where image quality directly impacts sale prices. The difference between an amateur panorama and a professionally captured 360-degree tour can mean thousands in commission for your clients, making you an invaluable partner rather than just another vendor.
Smartphone-Compatible 360 Attachments
You’ve probably seen those affordable add-ons that promise to transform your smartphone into a 360 camera for under $100. While tempting for real estate work, these smartphone-compatible attachments occupy a narrow niche between experimental tools and professional solutions.
The reality is straightforward: attachments like the Insta360 Nano or older Ricoh Theta models that clip onto your phone struggle with the lighting challenges inherent to real estate photography. Their tiny sensors produce noticeable noise in dim interiors, and dynamic range suffers dramatically when capturing windows alongside darker room elements. Image resolution typically caps out at levels that look acceptable on mobile screens but fall apart when clients view tours on desktop monitors.
That said, they’re not entirely without merit. For rental property managers documenting dozens of units monthly, these attachments offer a quick documentation solution where perfection isn’t the priority. They’re also genuinely useful for preliminary walk-throughs before scheduling a formal shoot, helping you identify problem areas or plan your shot list.
Some agents also find them valuable for social media stories or quick updates showing properties already under contract. Just understand the trade-off: you’re sacrificing image quality and professional polish for convenience and portability. For client-facing virtual tours on MLS listings or your website, dedicated 360 cameras consistently deliver results that better represent both the property and your brand.
Common Pitfalls When Buying Your First 360 Camera for Real Estate
Walking into the world of 360-degree real estate photography can feel like stepping onto solid ground, only to realize there are unexpected holes along the way. Let me share some common mistakes that trip up newcomers, so you can sidestep them entirely.
The biggest pitfall? Focusing solely on the camera’s sticker price. I’ve seen photographers celebrate finding a budget-friendly 360 camera, only to discover they need a separate rotating tripod head, premium editing software subscriptions, cloud storage plans, and extra batteries that cost nearly as much as the camera itself. One agent I know bought a $300 camera thinking she’d save money, then spent another $400 on necessary accessories within the first month. Always calculate the total cost of ownership, including tripods designed for 360 work, memory cards with fast write speeds, and any required software.
Another frequent mistake is choosing a camera with impressive specifications that doesn’t play nicely with your existing workflow. A photographer colleague recently purchased a high-end 360 camera that captured stunning imagery but required proprietary software that only ran on Windows. He worked exclusively on Mac. The workaround solutions ate up hours of his billable time. Before purchasing, test how the camera’s files integrate with your current editing tools and delivery platforms. Some MLS systems and virtual tour providers only accept certain file formats or require specific export settings.
Many newcomers also underestimate the learning curve. Unlike traditional real estate photography where you can hide imperfections through careful framing, 360 cameras capture everything in every direction simultaneously. That means the photographer appears in the shot unless properly positioned, reflective surfaces become tricky, and lighting inconsistencies are magnified. One shooter told me he booked three property shoots the week his camera arrived, assuming he’d figure it out on the job. The results were unusable, and he had to reshoot everything.
Finally, there’s the resolution trap. Some photographers gravitate toward the highest megapixel count without considering how clients will actually view the tours. A 12K camera might seem impressive, but if your clients only need web-based virtual tours viewed primarily on smartphones, you’re paying for capability you’ll never use while dealing with massive file sizes that slow down your entire workflow.
Beyond the Camera: Essential Accessories for Real Estate Shoots
Getting great shots with your 360 camera is only half the equation. The right supporting gear transforms amateur-looking tours into polished, professional presentations that help properties stand out.
A quality tripod is your foundation. Unlike traditional photography where you might handhold certain shots, 360 cameras magnify every shake and vibration across the entire sphere. I recommend investing in a tripod that extends to at least 5-6 feet—this height keeps the camera at eye level while minimizing its visibility in the final stitch. Look for models with a small head footprint since anything large will create annoying artifacts in your nadir (the floor area directly below the camera). Budget $50-150 for a reliable option that balances stability with portability.
Monopods deserve special mention for real estate work. A telescoping monopod lets you capture overhead perspectives that showcase room layouts beautifully, and it practically disappears in post-processing thanks to its thin profile. Many photographers keep both a tripod and monopod in their kit, choosing based on ceiling height and room size.
Lighting equipment separates good virtual tours from exceptional ones. While many 360 cameras handle bright spaces well, dimly lit basements or north-facing rooms need assistance. A couple of battery-powered LED panels ($40-80 each) provide controllable, flicker-free illumination that balances interior lighting with window views. Position them outside the camera’s immediate field of view, or better yet, use them to pre-light spaces then remove them before shooting.
Don’t overlook camera accessories like extra batteries and high-speed memory cards. Real estate shoots often involve 30-50 captures per property, and running out of power mid-session is frustrating for everyone involved. Similarly, fast SD cards prevent buffer delays between shots.
A basic cleaning kit rounds out your essential photography gear. Those dual lenses attract fingerprints and dust like magnets, and even minor smudges create distracting artifacts across your entire panorama.
Investing in a 360-degree camera for real estate can genuinely transform how you showcase properties and engage potential buyers. Whether you’re a solo agent capturing a handful of listings each month or running a dedicated property marketing agency, there’s a camera tier perfectly matched to your workload and budget. The key is honest assessment—consider how many properties you’ll shoot monthly, whether you need to deliver same-day tours, and how much post-processing time you can realistically devote to each project.
For those just starting out, entry-level models offer an affordable gateway without sacrificing the fundamental benefit of immersive virtual tours. Meanwhile, professionals handling luxury properties or high-volume portfolios will find the investment in mid-range to professional equipment pays dividends through time savings, image quality, and client satisfaction.
Before making your purchase, take advantage of return policies by testing your chosen camera with a real listing. Walk through the property as you normally would during a shoot, noting how the workflow feels and whether the image quality meets your standards. Check compatibility with your existing virtual tour platform, and don’t hesitate to reach out to other real estate photographers in online communities—their experiences can provide invaluable insights that no spec sheet can offer.
The right 360-degree camera isn’t just equipment; it’s an investment in delivering modern, competitive property marketing that today’s buyers expect.