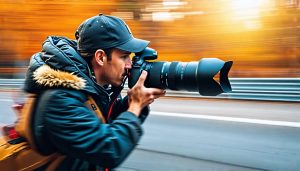
Position your flash anywhere beyond your camera’s hot shoe, and you’ve unlocked the single most transformative technique in modern photography. Off-camera flash separates adequate snapshots from compelling images by giving you complete control over light direction, quality, and mood—something your pop-up flash or on-camera speedlight can never achieve.
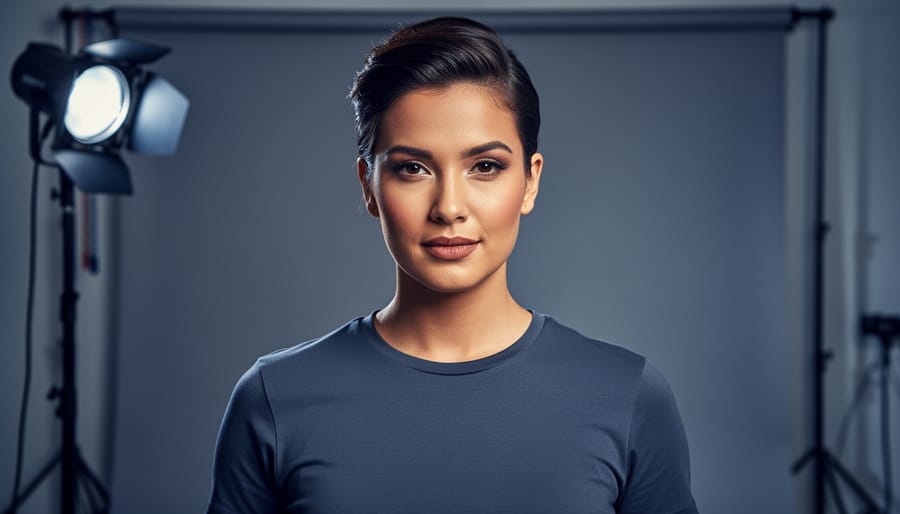
The difference is dramatic and immediate. Instead of that flat, harsh light that screams “amateur snapshot,” you can sculpt dimension across a portrait subject’s face, eliminate unflattering shadows under the eyes, or replicate the soft window light of a high-end studio—all with a single flash unit positioned three feet to your left. Professional photographers have known this secret for decades: the quality of light depends far more on its position relative to your subject than its power output.
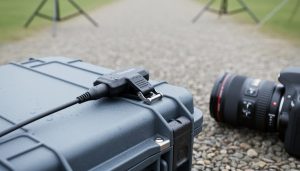
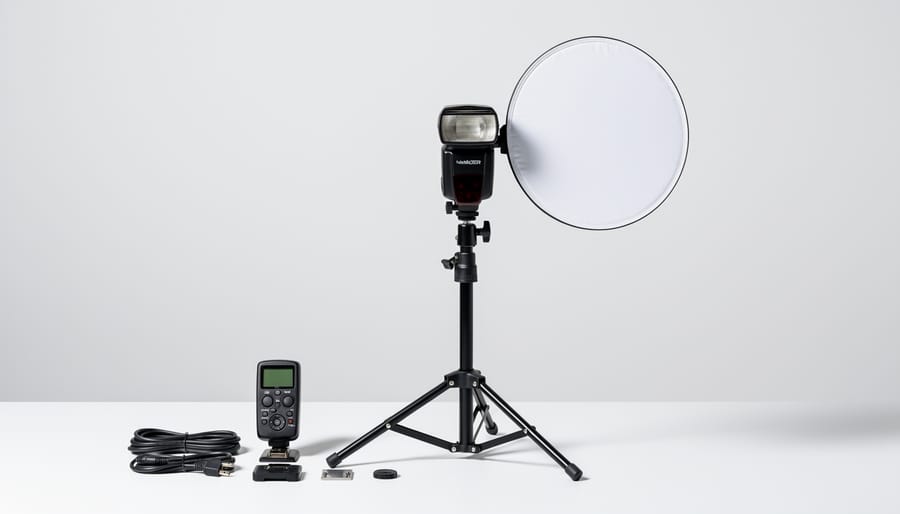
Getting started requires surprisingly little investment. A basic wireless trigger system, a single speedlight, and a light stand form your essential toolkit, often costing less than a mid-range lens. From there, you’ll learn foundational techniques like Rembrandt lighting for dramatic portraits, rim lighting to separate subjects from backgrounds, and how to balance ambient exposure with flash output for natural-looking results.
The learning curve is gentler than you might expect. Unlike mastering complex camera settings or expensive modifiers, off-camera flash follows consistent principles that work whether you’re photographing a wedding, product shots for your business, or creative portraits. Once you understand how light behaves when moved off-axis, you’ll see photographic opportunities everywhere.
What Off-Camera Flash Actually Means (And Why It Changes Everything)

The Problem with On-Camera Flash
We’ve all been there—you’re at a party or event, snap a photo with your camera’s built-in flash, and the result is, well, disappointing. Your subject looks washed out, their face is unnaturally bright against a dark background, and there might even be that dreaded red-eye effect staring back at you.
The fundamental issue with on-camera flash is its position. When your light source sits directly above or next to your lens, it creates flat, dimensionless lighting that eliminates the natural shadows that give faces depth and character. Think about how different someone looks under overhead fluorescent office lighting versus standing near a window—that’s the difference proper light direction makes.
Those harsh shadows you sometimes see directly behind subjects? That’s another telltale sign of on-camera flash, especially when shooting close to walls or backgrounds. The light travels straight forward, creating an unflattering halo effect that screams “amateur snapshot.”
Red-eye occurs because the flash is so close to the lens axis that light reflects off the blood vessels in your subject’s retina. While many cameras have red-eye reduction modes, they’re often ineffective and annoying for your subjects.
The bottom line is this: on-camera flash is convenient, but it severely limits your creative control and often produces results that look amateurish, regardless of how expensive your camera is.
How Moving Your Flash Solves These Issues
When you position your flash away from the camera, you fundamentally transform how light interacts with your subject. The most immediate benefit is dimensional lighting. Instead of flat, head-on illumination that makes everything look two-dimensional, off-camera flash creates depth through highlights and shadows that reveal texture and form. Think about how sunlight streaming through a window creates natural dimension on a person’s face—that’s the quality you’re recreating.
Shadow control becomes your creative tool rather than your enemy. With on-camera flash, shadows fall directly behind your subject, creating unflattering halos on walls. By moving your flash to the side or above, you direct shadows where they enhance rather than distract. A portrait shot with flash positioned 45 degrees to the right, for example, creates flattering cheek shadows that add definition and character.
The creative possibilities expand dramatically once you’re not tethered to the camera’s position. You can backlight subjects for dramatic rim lighting, place flash low for edgy effects, or employ single light techniques that mimic expensive multi-light setups. You’re essentially painting with light, choosing exactly where illumination appears in your frame to tell your visual story.
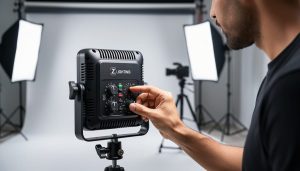
Essential Equipment You’ll Need to Get Started
The Flash Unit Itself
When you’re ready to take your lighting off-camera, you’ll need to choose between two main types of flash units: speedlights and strobes. Speedlights are those compact, portable flashes that can mount on your camera’s hot shoe. They’re battery-powered, lightweight, and perfect for photographers who need mobility. Strobes, on the other hand, are larger, more powerful units that typically require AC power or heavy battery packs. They’re the workhorses of studio photography, delivering consistent power and faster recycling times.
For most photographers starting with off-camera flash, speedlights offer the best balance of portability and capability. Look for units with TTL (Through The Lens) metering, which automatically calculates the proper flash output based on your camera’s settings. While TTL is convenient, manual control is equally important. Being able to dial in exact power levels gives you complete creative control and consistent results, especially when shooting multiple frames of the same scene.
Power output matters more than you might think. A flash with a guide number of at least 45-58 (in meters at ISO 100) provides enough punch for most situations. For beginners on a budget, third-party options like Godox or Yongnuo offer impressive features at friendly prices. Mid-range shooters should consider brand-specific speedlights from Canon, Nikon, or Sony for seamless integration. Professional photographers shooting weddings or events might invest in multiple high-end speedlights or consider the jump to portable strobes like the Profoto B10, which bridge the gap between speedlight convenience and studio strobe power.
Wireless Triggers and Communication Systems
Getting your off-camera flash to fire reliably when you press the shutter is where the magic of wireless communication comes in. You’ve got three main options, each with distinct advantages and limitations.
Radio triggers are the workhorses of professional photography. These systems use radio frequencies to communicate between your camera and flash, offering impressive range—typically 100 meters or more—and the ability to work through walls, around corners, and in bright sunlight. Popular options like PocketWizard, Godox, and Profoto Air systems have proven their reliability in countless wedding ceremonies and outdoor shoots. The trade-off? They require batteries in both transmitter and receiver units, and you’ll need to ensure compatibility between brands.
Optical triggers, sometimes called “dumb slaves,” detect the light from another flash and fire in response. They’re incredibly affordable and require no batteries, making them perfect for budget-conscious photographers. However, they demand line-of-sight between flashes and can struggle in bright ambient light or when other photographers are shooting nearby. I’ve seen optical triggers work flawlessly in controlled studio environments but fail miserably at outdoor events when the sun overwhelms their sensors.
Built-in wireless systems like Canon’s radio transmission or Nikon’s Advanced Wireless Lighting use your camera’s native communication protocols. These offer seamless integration and menu-based control but lock you into specific brand ecosystems. The convenience is undeniable—no extra transmitters to forget at home—but you’ll pay premium prices for compatible flashes.
For reliability in professional situations, radio triggers win every time, though optical systems remain viable for static, controlled environments.
Light Stands, Modifiers, and Support Gear
Once you’ve got your flash and trigger sorted, you’ll need gear to position and shape that light. Think of these accessories as the bridge between owning a flash and actually controlling light creatively.
Start with a sturdy light stand. Your first stand doesn’t need to be expensive, but it should extend to at least 7-8 feet and feel stable when fully extended. I learned this lesson the hard way when a cheap stand toppled over during an outdoor portrait session, sending my flash tumbling onto concrete. A decent stand from brands like Manfrotto or Neewer will cost between $30-60 and last for years.
Here’s the thing about light stands: they’re only as secure as their base. Always use sandbags or weight bags, especially outdoors or in busy environments. A 15-pound sandbag costs around $20 and has saved my gear countless times from gusty winds and accidental bumps. You can even make your own by filling heavy-duty ziplock bags with sand or rocks and placing them in a camera bag.
For light modifiers, umbrellas are your budget-friendly starting point. A 43-inch white shoot-through umbrella costs about $15 and instantly softens harsh flash light. Reflective umbrellas bounce light back toward your subject, giving you slightly more control over direction. As you progress, consider investing in a collapsible softbox, which provides more directional control and a more professional-looking catchlight in your subject’s eyes.
Build your support kit progressively. Begin with one reliable stand, a basic umbrella, and sandbags. Add specialized modifiers as specific shooting scenarios demand them.
Core Techniques That Transform Your Photography
Mastering Flash Positioning and Angles
Understanding how to position your flash is just as important as owning the gear itself. The angle and placement of your light source can dramatically transform a subject from flat and uninspiring to dimensional and captivating. Let’s explore the fundamental positioning techniques that will elevate your off-camera flash work.
The 45-degree rule serves as your starting point for dramatic portrait lighting. Position your flash approximately 45 degrees to the side of your subject and 45 degrees above eye level. This creates natural-looking shadows that add depth and dimension to faces. You’ll notice how the light wraps around facial features, defining cheekbones and creating a pleasing gradient from highlight to shadow. This technique works beautifully for corporate headshots, environmental portraits, and any situation where you want professional-looking results without drawing attention to the lighting itself.
Rembrandt lighting takes the 45-degree concept further by creating that signature triangle of light on the shadowed cheek. Move your flash slightly higher and more to the side until you see a small inverted triangle appear beneath the eye on the darker side of the face. This classic technique adds mood and sophistication, perfect for character portraits and creative editorial work.
Side lighting places your flash at 90 degrees to your subject, creating bold, contrasty images with half the face illuminated and half in shadow. Use this approach when you want drama and edge in your images, like in fitness photography or artistic portraits.
Backlighting positions the flash behind your subject, creating separation from the background through rim lighting or hair lights. This technique adds depth to your compositions and works exceptionally well in outdoor portraits during golden hour, where you can balance ambient light with your flash for ethereal results.

Balancing Ambient Light with Flash
The secret to creating natural-looking flash images lies in understanding one fundamental principle: you control ambient light separately from flash. Think of it as painting with two different light sources, each responding to different camera settings.
Here’s how it works: your shutter speed, aperture, and ISO together control how much ambient light reaches your sensor. Meanwhile, your flash power and aperture control the flash exposure. Notice that aperture affects both, which is why many photographers start by setting their ambient exposure first, then add flash to taste.
Let me walk you through the process. First, ignore your flash entirely. Set your camera to manual mode and adjust your shutter speed, aperture, and ISO until you get the ambient exposure you want. Maybe you want a dramatic, moody scene where the ambient light is underexposed by one or two stops. Or perhaps you’re shooting outdoors and want the background properly exposed. This becomes your baseline.
Once you’ve locked in your ambient exposure, turn on your flash. Now you’re only adjusting flash power to light your subject. If the flash is too bright, reduce the power or move it farther away. Too dim? Increase power or move it closer. Your ambient exposure remains constant because you’ve already dialed it in.
Here’s a real-world example: I’m photographing a couple at sunset. I set my camera to f/4, 1/200s, ISO 400, which gives me a beautifully exposed sky but leaves the couple in silhouette. By adding off-camera flash at quarter power positioned to camera left, I illuminate the couple without blowing out that gorgeous sunset behind them.
Remember, shutter speed primarily controls ambient light intensity (within your sync speed limits), while flash power controls your subject’s brightness. Master this relationship, and you’ll create images where flash enhances rather than overpowers the scene.
Using Multiple Flash Units for Complex Lighting
Once you’ve mastered working with a single off-camera flash, adding additional lights opens up a world of creative possibilities. Multi-light setups allow you to shape your subject with precision, creating dimension and separation that mirrors professional studio work.
The most common approach is the three-light setup. Your main light, or key light, does the heavy lifting by providing the primary illumination and establishing the mood. Position it at roughly 45 degrees from your subject to create flattering shadows. The fill light, typically set at lower power (about one to two stops dimmer than your main), softens those shadows without eliminating them completely. Place it opposite your main light to achieve balanced, natural-looking results.
A hair light or rim light adds that professional polish by separating your subject from the background. Position this light behind and slightly above your subject, angled down to create a subtle highlight along the hair and shoulders. This separation technique transforms flat images into three-dimensional portraits.
Starting simpler, a two-light setup works beautifully for most situations. Try placing your main light to one side with a fill card or second flash opposite, creating dimension without overwhelming complexity. For product photography, many photographers use one light for the subject and another to illuminate the background, achieving clean separation.
Remember that each light should serve a specific purpose. Avoid randomly adding flashes just because you own them. Start with your main light, evaluate what you need, then add additional units strategically. This methodical approach prevents lighting confusion and maintains natural-looking results.
Common Mistakes (And How to Avoid Them)
Overpowering Your Subject
When your flash overpowers the scene, you’ll notice telltale signs: blown-out highlights on your subject’s face, harsh shadows with sharp edges, and an unnatural separation between your subject and the background. The image looks flat despite the dramatic lighting, and skin tones appear washed out or unnaturally bright.
The fix is straightforward. Start by reducing your flash power—drop it by a full stop or two. Most speedlights allow adjustments in third-stop increments, giving you precise control. If you’re already at minimum power, increase your distance from the subject or add a diffuser to soften and reduce the light’s intensity.
Here’s a practical approach: take a test shot, check your histogram, and look for clipping on the right side indicating overexposure. Adjust incrementally until the light looks natural and complements the ambient exposure. Remember, mastering portrait lighting fundamentals means your flash should enhance the scene, not dominate it. When balanced correctly, viewers shouldn’t immediately notice you used flash at all.
Ignoring Light Quality and Modifiers
One of the biggest mistakes when working with off-camera flash is firing bare, unmodified light directly at your subject. This creates harsh shadows, unflattering skin tones, and an obvious “flash look” that screams amateur. The quality of light matters just as much as its direction and intensity.
Think about natural light on an overcast day versus harsh noon sun. The same principle applies to flash. A bare speedlight acts like that unforgiving midday sun, creating hard-edged shadows and specular highlights. Light modifiers solve this by increasing the apparent size of your light source relative to your subject, creating softer, more gradual transitions between highlights and shadows.
Softboxes work beautifully for portraits and controlled shoots, wrapping light around your subject with directional control. Umbrellas offer quick setup and broader coverage, perfect for event photography techniques where speed matters. Bouncing your flash off walls or ceilings provides natural-looking illumination but requires consideration of surface color and proximity.
Choose your modifier based on the look you want and your shooting environment. Indoor portraits benefit from softboxes, while on-location work might demand the portability of collapsible umbrellas or simple bounce cards.
Sync Speed and Technical Issues
Understanding sync speed is crucial for avoiding the dreaded black bars in your images. Your camera’s maximum sync speed, typically around 1/200th to 1/250th of a second, represents the fastest shutter speed at which the entire sensor is exposed simultaneously. Exceed this, and you’ll capture the shutter curtain mid-movement.
High-speed sync (HSS) solves this limitation by pulsing the flash rapidly as the shutter travels, allowing you to shoot at faster speeds. This is invaluable for freezing action in bright conditions or using wide apertures with creative backdrop setups outdoors, though it does reduce flash power.
Common technical hiccups include misfires, often caused by loose connections or incompatible equipment. Check your trigger batteries first—they’re usually the culprit. Inconsistent exposure can result from variable flash recycling times or distance changes. Enable TTL metering or allow your flash adequate recycling time between shots. If you’re experiencing total failures, verify your trigger and flash are on the same channel and frequency.
Practical Scenarios Where Off-Camera Flash Excels
Portrait Photography in Any Location
One of the most powerful applications of off-camera flash is transforming any location into a professional portrait studio. Whether you’re shooting in a client’s living room, a park at midday, or an urban alleyway, portable flash setups give you complete control over your lighting environment.
The key is understanding that your flash becomes your main light source, allowing you to overpower or balance ambient light as needed. For outdoor portraits in harsh sunlight, position your flash to one side of your subject and adjust your camera settings to slightly underexpose the background. This technique creates dimension and drama while eliminating unflattering shadows on your subject’s face. I’ve shot countless outdoor sessions at noon—typically the worst time for natural light—and created beautifully lit portraits that clients assume were captured during golden hour.
For indoor locations with mixed or inadequate lighting, a single speedlight on a light stand with a shoot-through umbrella can work wonders. Position it at a 45-degree angle to your subject, slightly above eye level, to create flattering shadows that add depth. If you’re working in tight spaces, bounce your flash off nearby walls or ceilings to soften the light naturally.
The beauty of this approach is portability. Your entire setup fits in a backpack, letting you create professional results anywhere without hauling heavy studio equipment.

Event and Wedding Photography
Off-camera flash transforms event and wedding photography by adding dimension and drama without the harsh, flat look of direct on-camera flash. The key is balancing technical precision with the ability to work quickly and unobtrusively in fast-moving environments.
For reception photos and dancing, position your flash on a stand at a 45-degree angle to your subjects, roughly 8-10 feet away. This creates directional light that separates people from backgrounds while maintaining a natural feel. Set your flash to TTL mode initially, then switch to manual once you’ve dialed in the right exposure for consistent results as guests move around the dance floor.
First dance shots benefit from cross-lighting techniques. Place one flash behind and to the side of the couple as a rim light to create separation, while your main flash provides frontal illumination. This setup adds depth and romance to an already emotional moment.
For detail shots like rings, centerpieces, and place settings, a single off-camera flash fired through a small softbox gives you magazine-quality results. Hold the flash at arm’s length or use a small light stand, positioning it to create subtle shadows that reveal texture and dimension. This approach works beautifully during cocktail hour when you’re capturing those important details couples have invested so much time planning.
Product and Commercial Work
Product photography demands precise lighting control, and off-camera flash excels here. The key is positioning your flash to minimize unwanted reflections on glossy surfaces while highlighting product details. For reflective items like watches or bottles, try placing a large softbox to one side at a 45-degree angle, which creates attractive gradients rather than harsh hotspots.
Creating clean, pure white backgrounds requires overexposing the background by about two stops more than your subject. Position one flash behind the product aimed at a white backdrop, then use a second flash with a diffuser for the product itself. This separation gives you independent control over both elements.
For smaller products, a simple tabletop setup works beautifully. Place your product on a translucent white surface like plexiglass, position a flash underneath pointing up for a seamless white look, and add a softbox above or to the side for shape and dimension. This technique eliminates shadows and creates that professional floating effect you see in catalogs. Start with manual mode at 1/4 power and adjust from there based on your results.
Building Your Skills: Where to Go from Here
The journey from understanding off-camera flash to mastering it happens one shoot at a time. Think of developing your lighting skills like learning a new language—you need consistent practice, patience with yourself, and real-world application to become fluent.
Start with simple exercises that build confidence. Set up a single light source and photograph the same subject from different angles, moving your flash to various positions around your subject. Notice how shadows shift and how the quality of light changes with distance. Take notes on what settings you used for each shot. This hands-on experimentation teaches you more than any tutorial can.
Challenge yourself with the one-light rule for a month. Restrict yourself to a single flash and one modifier. This limitation forces you to truly understand what that light can do and develops problem-solving skills. Once you’ve exhausted the possibilities, add a second light and discover how they interact.
For continued learning, consider joining online photography communities where members share their lighting setups and critique work constructively. YouTube channels dedicated to lighting techniques offer free, practical demonstrations you can replicate at home. When you see a photograph with lighting you admire, try to reverse-engineer it—where might the lights have been positioned? What modifiers created that particular quality?
Your personal lighting style will emerge naturally from repeated practice. Pay attention to what consistently draws you in. Do you gravitate toward dramatic contrast or soft, even illumination? Do you prefer complex multi-light setups or elegant simplicity? There’s no right answer, only what resonates with your vision.
Remember that professional photographers spent years developing their craft. Give yourself permission to create imperfect images while learning. Every failed shot teaches you something valuable about light, and every successful one builds your confidence to push further.
Taking your flash off-camera opens up a world of creative possibilities that on-camera flash simply can’t match. You gain control over shadows, depth, and mood in ways that transform ordinary snapshots into compelling images. The difference between flat, unflattering light and dimensional, professional-looking photographs often comes down to this single choice.
The beauty of off-camera flash is that you don’t need to invest thousands of dollars to see dramatic improvements in your work. Start with a single speedlight, a basic wireless trigger, and a light stand. That’s enough to begin exploring directional lighting and understanding how light shapes your subjects. As you gain confidence, you can add modifiers, additional lights, and more sophisticated equipment.
What matters most isn’t the price tag on your gear but your willingness to experiment. Set up simple scenarios at home. Practice positioning your light at different angles. Try a portrait session with just one light source. Every setup teaches you something new about how light behaves and how your camera responds.
Remember, even seasoned photographers started with basic equipment and awkward first attempts. The learning curve might feel steep initially, but each shoot brings you closer to instinctively knowing where to place your light for the effect you envision. Your investment in practice time will always outweigh any gear purchase in terms of improving your final images.