By
By 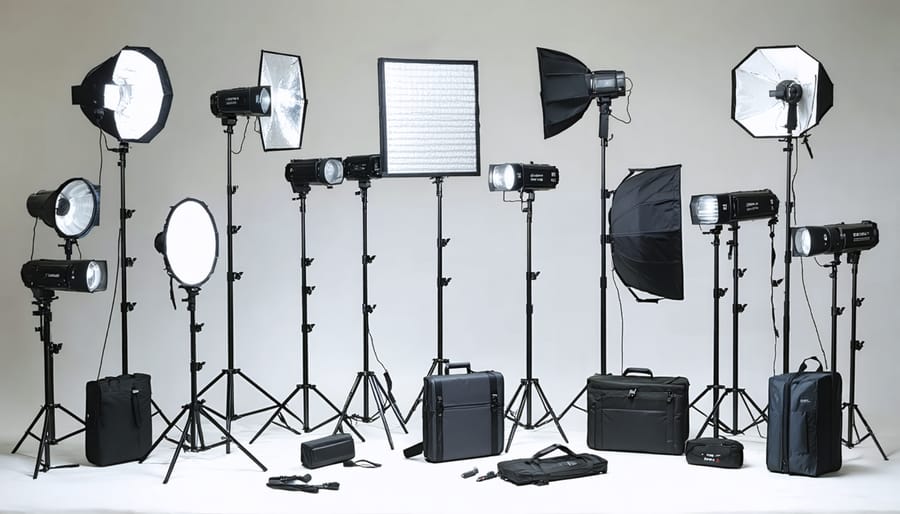
Transform your product photography with precision lighting that captures every detail, texture, and surface perfectly. Understanding photography lighting basics isn’t just about brightness—it’s about creating professional-grade images that drive sales and engagement.
A well-designed lighting kit serves as the cornerstone of successful product photography, making the difference between amateur snapshots and commercial-quality images. Whether you’re shooting jewelry that demands crisp highlights, textiles that need even illumination, or reflective surfaces requiring careful light control, your lighting setup dictates the final result.
Modern product photography demands a versatile lighting kit that can adapt to various challenges: minimizing shadows, eliminating unwanted reflections, and creating the perfect balance of highlights and shadows. From portable LED panels for on-location shoots to professional studio strobes for consistent output, today’s photographers have access to tools that can transform any space into a professional studio.
The right lighting kit doesn’t just illuminate—it tells your product’s story, emphasizes its best features, and helps create images that convert browsers into buyers. Let’s explore how to build and master a lighting setup that delivers professional results every time.
Essential Components of a Product Photography Lighting Kit
Main Light Sources
When setting up your product photography lighting kit, you’ll typically choose from three main light source types, each with its own strengths and applications.
| Light Type | Best For | Power Output | Portability | Key Advantage |
|---|---|---|---|---|
| LED Panel Lights | Beginners, video + stills | Low to medium | Good | Real-time preview |
| Strobes | High-volume shoots | High | Limited | Power and consistency |
| Speedlights | Small products, location work | Medium | Excellent | Compact and flexible |
LED panel lights have become increasingly popular due to their versatility and ease of use. These continuous lights let you see exactly how your lighting affects the subject in real-time, making them perfect for beginners. Modern LED panels offer adjustable color temperature and brightness, while running cool and consuming minimal power. The NEEWER NL660 Bi-Color LED Panel Light, for instance, features 330 white and 330 yellow long-lasting LED bulbs and sells from $119.99. They’re especially useful for video content creation alongside still photography.
Strobe lighting, or studio flash units, remains the professional standard for product photography. These lights provide powerful, consistent output and fast recycling times, making them ideal for high-volume shoots. While more expensive than other options, strobes offer precise control over light intensity and superior color accuracy. Many models include modeling lights to preview your lighting setup before taking the shot.
Speedlights offer a compact and portable solution for product photography. These battery-powered flash units are versatile enough to work both on and off-camera. While they’re not as powerful as studio strobes, speedlights are excellent for small to medium-sized products and can be particularly effective when used with light modifiers. Their portability makes them perfect for location shoots or photographers working with limited space.
Consider starting with LED panels if you’re new to product photography. They offer the gentlest learning curve while providing professional-quality results at accessible price points.
Light Modifiers
Lighting modifiers are essential tools that transform harsh, direct light into softer, more flattering illumination for your product shots. The right modifier can make the difference between amateur-looking images and professional results.
Softboxes are the workhorse of product photography, creating beautiful, soft light that wraps around your subjects. They come in various sizes and shapes, with larger softboxes producing softer light ideal for bigger products. Square softboxes offer even illumination across your entire setup, while strip boxes create elegant highlights on reflective surfaces like glass or metal. Many LED panel kits now include softboxes, giving you a complete solution right out of the box.
Diffusers serve as lightweight alternatives to softboxes, perfect for both studio and on-location shoots. These translucent panels scatter light particles, reducing harsh shadows and creating a more natural-looking result. They’re particularly effective when photographing small to medium-sized products with glossy surfaces that would otherwise show harsh reflections.
Reflectors are remarkably versatile and cost-effective tools that every product photographer should own. White reflectors bounce soft, neutral light into shadow areas. Silver ones provide bright, specular highlights that add dimension. Gold reflectors add warm tones to your products, which can be especially flattering for certain items. The 5-in-1 reflector kits offer excellent value, combining multiple surfaces in one portable package.
Umbrellas come in two main varieties: shoot-through and reflective. Shoot-through umbrellas diffuse light broadly, making them perfect for larger product setups where you need wide, even coverage. Reflective umbrellas offer more controlled light direction and are excellent for creating dramatic highlights while maintaining soft overall illumination.
Budget-Friendly vs Professional Lighting Setups
Entry-Level Kit Options ($200-500)
Starting your product photography journey doesn’t require breaking the bank. With the market offering numerous budget-friendly lighting solutions you can create professional-looking images with an entry level lighting kit.
A solid starter setup typically includes two main lights, basic modifiers, and stands. The NEEWER NL660 Bi-Color LED Panel Light offers adjustable brightness with 330 white and 330 yellow long-lasting LED bulbs. Available from $119.99, it provides a cost-effective foundation for budget lighting setups. For a complete kit, the NEEWER 2 Pack Bi-color 660 LED Video Light and Stand Kit includes two 3200-5600K CRI 96+ dimmable lights with U bracket and barndoor, plus two 75-inch light stands. This kit typically runs around €260.99 on sale (regular €329.99), providing continuous lighting that makes it easier for beginners to visualize their results in real-time.
Pros
- Entry-level kits provide everything needed to start shooting immediately without additional purchases.
- Budget lighting options have improved dramatically in quality and reliability over recent years.
- Continuous LED lights allow beginners to see exactly how light affects their subject before shooting.
- Most starter kits include stands and basic modifiers, eliminating guesswork about compatibility.
Cons
- Lower power output may limit your ability to shoot larger products or use smaller apertures.
- Build quality typically doesn’t match professional-grade equipment in durability or longevity.
- Basic modifiers included in starter kits often require upgrades for more advanced techniques.
- Limited expandability can mean outgrowing your kit as your skills and needs develop.
Another excellent option is the Godox SK400II Studio Strobe Kit. For about $450, you’ll get two powerful flash units, stands, softboxes, and a wireless trigger. While slightly more complex than continuous lighting, strobes offer more power and faster recycling times, giving you room to grow as you develop your skills.
For those preferring portability, the Flashpoint eVOLV 200 Pro Kit presents a versatile solution. At roughly $500, it includes two battery-powered strobes that can work both in-studio and on location. The kit’s compact size doesn’t compromise on power or features, making it perfect for photographers who need flexibility.
When choosing your first kit, consider factors like:
– Power output requirements for your typical subjects
– Available space for setup and storage
– Whether you need portability
– Type of products you’ll be photographing
– Future expansion possibilities
Remember, even basic kits can produce professional results when used correctly. Focus on mastering light placement and modification techniques rather than getting caught up in having the most expensive equipment.
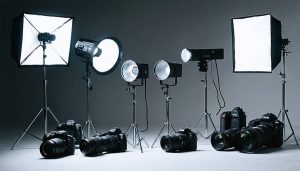
Professional studio lighting setup showing various light sources including LED panels, strobes, and speedlights
Professional Grade Equipment ($500+)
When stepping into professional product photography, investing in professional lighting equipment becomes essential for achieving commercial-grade results. The Profoto B10X Plus kit stands out as an industry standard, offering exceptional color accuracy and powerful 500Ws output. Its battery-powered operation and robust build quality make it perfect for both studio and location shoots.
For consistent, studio-based work, the Broncolor Siros 800 L WiFi/RFS 2.1 is worth considering. Its advanced color temperature control and fast recycling times are invaluable when shooting high-volume product catalogs. The built-in WiFi connectivity allows integration with capture software, streamlining your workflow.
Continuous lighting enthusiasts should look at the Aputure 600d Pro LED light. Its daylight-balanced output and exceptional color rendering index (CRI) of 96+ make it ideal for both stills and video production. The Bowens mount compatibility opens up countless modifying options, from soft boxes to beauty dishes.
Don’t overlook the importance of light modifiers at this level. The Broncolor Para 88 reflector, though expensive, produces a distinctive wrap-around light quality that’s particularly flattering for reflective products like jewelry and automobiles.
For maximum control, consider the Godox AD1200 Pro strobe system. Its power output rivals many studio packs, yet maintains portability. The included wireless trigger system offers 32 channels and multiple groups, perfect for complex lighting setups involving multiple lights and modifiers.
At this price point, durability and reliability are as crucial as performance. These professional-grade systems are built to withstand daily use in demanding commercial environments while delivering consistent, repeatable results.
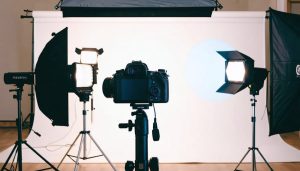
Collection of light modifiers including softboxes, diffusers, and reflectors
Setting Up Your Product Photography Lighting
Basic Three-Point Lighting
Three-point lighting is the foundation of professional product photography, and once you master studio lighting techniques, you’ll be able to create stunning product images consistently. Let’s break down each component and how to set them up effectively.
Start with your key light, which serves as your primary light source. Position it at approximately 45 degrees from your product and slightly above it. This creates the main illumination and defines the primary shadows. For product photography, a softbox or large umbrella works best as your key light, providing soft, even illumination that highlights your product’s features without creating harsh shadows.
Next, set up your fill light on the opposite side of your key light, also at roughly 45 degrees but with lower intensity – typically half the power of your key light. This light’s job is to soften the shadows created by the key light, making them more appealing without eliminating them completely. A reflector can often work well as a fill light, especially when you’re just starting out or working with a limited budget.
Finally, position your backlight (also called a rim light) behind and slightly above your product, pointing toward its back edge. This creates separation between your product and the background, adding depth to your image. The backlight should be slightly brighter than your fill light but not as powerful as your key light. A small strip light or standard flash with a snoot works well for this purpose.
Remember to adjust the power ratios between these lights based on your specific product and desired outcome. A common starting point is a 4:2:3 ratio (key:fill:back), but don’t be afraid to experiment. Test different positions and intensities until you achieve the perfect balance that showcases your product’s best features while maintaining natural-looking dimensionality.
Advanced Lighting Techniques
Mastering advanced lighting techniques becomes crucial when shooting challenging subjects in product photography, especially reflective products and transparent products. These specialized setups will help you tackle even the trickiest items.
For reflective products like jewelry or metallic items, the key is controlling what appears in the reflection. Create a light tent using diffusion material or a dedicated softbox. Position your main light at a 45-degree angle, then use black cards or flags to block unwanted reflections. A useful trick: white foam boards with small holes cut out for your lens create clean, controlled highlights while minimizing unwanted reflections.
Glass and transparent products demand a different strategy. The goal is defining the edges and shape while maintaining transparency. Try strip lights positioned behind the product to create edge definition. A light table or lightbox provides elegant separation from the background, while careful positioning of fill lights reveals the product’s form without creating distracting hot spots.
Products with mixed materials, like watches or cosmetics packaging, benefit from multiple lighting zones. Set up your main light for overall shape, then add accent lights to highlight specific features. Small LED panels or fiber optic lights offer precise control over highlight placement.
Distance matters significantly with challenging materials. Moving lights closer creates harder reflections and more defined edges, while increasing distance softens the effect. Experiment with light modifiers like grids and snoots to pinpoint exactly where you want the light to fall.
The secret to success often lies in subtraction rather than addition. Sometimes removing a light or blocking unwanted reflections improves your image more than adding another source. Keep a collection of black and white cards handy for fine-tuning your setup, and make minute adjustments until you achieve the perfect balance.
Common Lighting Mistakes and Solutions
Even experienced photographers can encounter lighting challenges in product photography. Understanding these common lighting mistakes and how to fix them will save you time and dramatically improve your results.
| Lighting Problem | Cause | Solution |
|---|---|---|
| Harsh Shadows | Direct, unmodified light source | Use diffusers or softboxes |
| Hot Spots & Glare | Reflective surfaces catching direct light | Apply polarizing filters, adjust light angle |
| Uneven Lighting | Single light source without fill | Add fill light or reflectors |
| Color Casts | Mixed light temperatures | Match color temperature across all lights |
| Poor Background Separation | Insufficient depth or edge definition | Adjust backlight, increase subject-to-background distance |
| Texture Loss | Flat, frontal lighting | Angle lights 30-45 degrees to reveal surface detail |
Harsh Shadows
Unwanted harsh shadows distract from the product and create an unprofessional look. The fix is straightforward: diffuse your light source with a softbox or umbrella. For budget setups, a white foam board placed opposite your main light works surprisingly well as a reflector. Natural light shooters can achieve soft results by shooting near a large window with a simple diffuser.
Hot Spots and Glare
Reflective products like jewelry, glass, or electronics create bright spots that blow out important details. Position your light at roughly 45 degrees from the product rather than head-on. Polarizing filters on both your lights and lens can eliminate stubborn glare. For highly reflective items, a light tent creates even, diffused illumination that wraps around the entire product.
Uneven Lighting
When one side of your product looks significantly brighter than the other, you need better balance. Add a fill light at reduced power (typically one-half to one-third of your key light intensity) or place reflectors strategically to bounce light into shadow areas. The key is subtle enhancement, not creating a second competing light source.
Color Cast Issues
Mixed lighting temperatures produce unwanted color shifts that are difficult to correct in post-processing. This is one of the most common product photography tips that beginners overlook. Use lights with matching color temperature throughout your setup. If you must mix sources, color correction gels can balance them. Always shoot with a gray card nearby to set accurate white balance.
Background Separation Problems
Flat images result when products blend into their backgrounds without definition. Create depth by adding a backlight (rim light) that highlights product edges. Maintain adequate distance between your subject and background, and use flags or gobos to control spill light. These techniques produce the clean separation that professional product shots require.
Texture Loss
Frontal lighting flattens surfaces and hides important product textures. Position your main light 30 to 45 degrees from the side to create subtle shadows that reveal texture. Multiple lights at different angles can enhance surface details further, but start simple and add complexity only when needed.
Testing different lighting positions and modifications is essential for each product type. Take test shots and adjust incrementally. Most lighting mistakes have simple solutions once you recognize the pattern.
Maintenance and Care of Your Lighting Equipment
Proper maintenance of your lighting equipment not only extends its lifespan but also ensures consistent performance during shoots. Start by handling all components with clean, dry hands and storing them in a cool, dust-free environment when not in use. Always use protective cases or padded bags designed specifically for lighting equipment to prevent accidental damage during transport.
Pay special attention to your bulbs and LED panels – never touch them with bare hands, as oils from your skin can create hot spots and reduce their lifespan. If accidentally touched, clean them with a microfiber cloth and isopropyl alcohol. Regularly inspect power cables for wear or damage, and replace any that show signs of fraying or exposed wiring.
For softboxes and diffusers, gentle cleaning with a slightly damp cloth keeps them free from dust and maintains their light-modifying properties. Allow them to dry completely before storage to prevent mold growth. Keep modifiers folded properly to avoid creasing, which can affect light distribution.
Check and tighten all mounting hardware periodically, including light stand locks and bracket screws. A loose connection can lead to expensive accidents. For battery-powered units, follow proper charging protocols and store batteries at around 40% charge if not using them for extended periods.
Consider creating a maintenance schedule and keeping a log of when components were last checked or serviced. This proactive approach helps prevent equipment failures during crucial photo shoots.
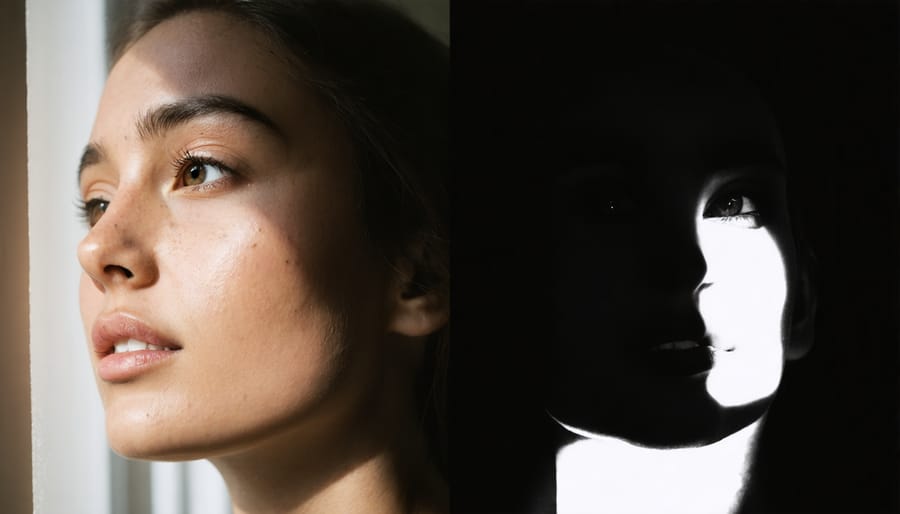
Building your product photography lighting kit doesn’t have to be overwhelming or expensive. As we’ve explored throughout this guide, starting with essential equipment and gradually expanding based on your specific needs is the most practical approach. Remember that a basic kit with a key light, fill light, and some diffusion materials can achieve professional results when used correctly.
The key is to invest in versatile equipment that can adapt to different shooting scenarios. Begin with a reliable continuous LED light or speedlight, add essential modifiers like softboxes or umbrellas, and ensure you have proper stands and mounting equipment. As your skills and requirements grow, you can incorporate more specialized tools like strip lights, color gels, or advanced wireless triggers.
Practice is crucial in mastering your lighting setup. Experiment with different lighting positions, modifiers, and techniques to understand how they affect your final images. Don’t be afraid to start small – many successful product photographers began with minimal equipment and developed their style through experimentation and learning.
Keep in mind that even the most expensive lighting kit won’t guarantee great photos without understanding the fundamentals of lighting and composition. Focus on mastering the basics with the equipment you have, and let your kit grow organically as your needs evolve.
Ready to start shooting? Your perfect product photography lighting kit awaits – begin building it today and watch your product images transform from ordinary to extraordinary.

 By
By