By
By 
The fastest fix for film reciprocity failure is compensation: when shooting long exposures beyond one second, add extra time to your shutter speed according to your film stock’s reciprocity curve. Most modern black-and-white films need roughly 25-50% more exposure at 10 seconds, while some color films fail dramatically after just two seconds.
Before you blame your developing process or assume your camera is broken, run this quick diagnostic. Pull out a shot you took with a shutter speed longer than one second. If it’s underexposed despite correct metering, and especially if the colors look shifted or muted in the case of color film, you’re looking at classic reciprocity failure. The longer the exposure, the worse the problem gets.
Reciprocity failure occurs because the photochemical law that governs film exposure (expose twice as long, get twice the density) breaks down during extended exposures. The silver halide crystals in film emulsion stop responding predictably when light hits them very slowly over many seconds or minutes. What your meter says should be a perfect 30-second exposure at f/16 might actually need 60 seconds or more to achieve proper density.
This isn’t a defect. It’s physics, and every film stock handles it differently. Some films hold up beautifully to two-minute star trails. Others fall apart past five seconds. The good news? Once you understand which films behave how and learn the compensation math, reciprocity failure becomes completely predictable and manageable. You’ll move from frustrating underexposed night shots to consistently nailing long exposures on the first frame.
Recognizing Reciprocity Failure in Your Images
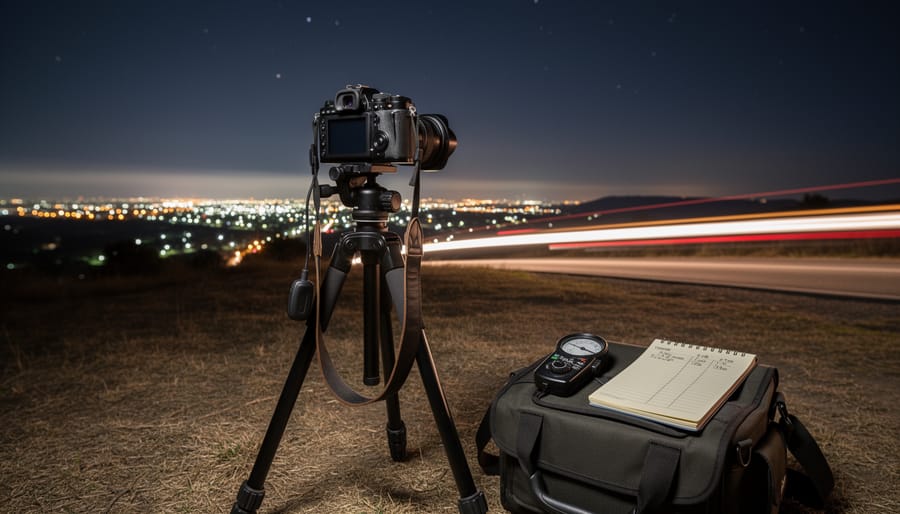
You’ve nailed your exposure settings, double-checked your meter reading, and released the shutter for that moody twilight scene. But when your negatives come back, something’s off, the image is darker than it should be, shadows have turned to mush, and the whole frame feels flat. If this sounds familiar, you’ve likely run into reciprocity failure.
The telltale sign is underexposure that doesn’t match your metering. You calculated everything correctly, yet the film didn’t capture enough light. This happens because your meter assumes the reciprocity law holds true, but during long exposures, film stops responding in a predictable way. What should have been a perfectly exposed negative ends up a stop or more too dark.
Look for these visual clues that reciprocity failure has struck:
- Shadow areas that appear blocked up or muddy, losing the detail you saw when composing
- Overall flatness and reduced contrast compared to shorter exposures of similar scenes
- Color shifts in color negative or slide film, often cyan, magenta, or greenish casts that weren’t present in the light
- Density that falls off more than expected, especially in the darkest tones
These issues show up most often in specific shooting situations. Night photography is a prime culprit, street scenes under sodium vapor lamps, illuminated buildings against dark skies, or star trails all push exposure times well beyond the one-second threshold where reciprocity starts breaking down. Astrophotography on film almost always demands reciprocity compensation. Long exposures of flowing water, whether you’re shooting silky waterfalls at dusk or capturing the motion of waves at sunset, frequently cross into reciprocity territory. Cityscape photographers working during blue hour or after dark will see it regularly, especially those who master large format cameras with their inherently slower maximum apertures.
Color casts are particularly frustrating with slide film, where there’s no printing stage to correct the shift. Even color negative film, which offers more latitude in printing or scanning, will show noticeable color weirdness in the densest shadow regions when reciprocity failure hits hard.
What Causes Reciprocity Failure

Understanding reciprocity failure requires a quick look at the fundamental relationship between light and photographic exposure. The reciprocity law states that exposure equals intensity multiplied by time, meaning a bright light for a short duration should produce the same exposure as a dim light for a longer duration, as long as the total amount of light energy remains constant. In theory, doubling your exposure time while halving the light intensity should yield identical results. This linear relationship holds true across most normal photographic situations, but it breaks down at the extremes.
- Reciprocity Law
- The principle that photographic exposure is determined by light intensity multiplied by exposure time, with equivalent total light producing equivalent results. This relationship fails at very long or very short exposures.
- Silver Halide Crystals
- Light-sensitive compounds in film emulsion (typically silver bromide, silver chloride, or silver iodide) that undergo chemical changes when struck by photons. These crystals vary in size and sensitivity across the emulsion.
- Latent Image Formation
- The invisible chemical change that occurs in silver halide crystals when exposed to light, creating development centers that later become visible metallic silver during chemical processing.
- Exposure Threshold
- The minimum amount of light energy required to create a developable latent image in a silver halide crystal. At very long exposures, this threshold effectively increases due to competing chemical processes.
Film emulsion consists of millions of silver halide crystals suspended in gelatin. When photons strike these crystals during exposure, they trigger a chemical reaction that creates a latent image, an invisible pattern of altered silver that becomes visible during development. This process works efficiently within normal shutter speed ranges because the photons arrive in sufficient quantity and intensity to overcome each crystal’s activation threshold.
During very long exposures, however, the photons arrive too slowly and sporadically. The silver halide crystals require a certain minimum rate of photon hits to initiate stable latent image formation. When light trickles in over tens of seconds or minutes, some of the chemical changes within the crystals actually reverse or dissipate before development can make them permanent. It’s similar to trying to heat water with a candle instead of a stove, the total energy might be equivalent, but the rate of delivery matters.
This limitation is purely chemical, rooted in the physical behavior of film emulsion. Digital sensors don’t experience reciprocity failure because they measure photons electronically with consistent efficiency regardless of how quickly they accumulate. If you primarily shoot digital but occasionally experiment with film, perhaps because you want to build a darkroom and explore traditional processing, you’ll need to adjust your exposure approach for those long nighttime or low-light film captures.
When Reciprocity Failure Kicks In
Most films start to exhibit reciprocity failure once your shutter speed drops below one second. This threshold isn’t a hard line, it’s more like a gradual slope where the film’s response curve begins to bend away from the predictable reciprocity relationship. At one second, you might see minimal effects that barely register in your final image. Push that to ten seconds, and you’ll likely need to add a full stop or more of compensation. Beyond thirty seconds, some films can require two or three stops of additional exposure.
The specific point where reciprocity failure becomes noticeable varies dramatically between film stocks. Traditional black-and-white films like Kodak Tri-X and Ilford HP5 Plus typically show measurable failure starting around one second, with increasing compensation needed as exposures extend. Some modern emulsions perform better, Ilford Delta films, for instance, are engineered to maintain more consistent response at longer exposures, often requiring less compensation than their traditional counterparts for the same metered time.
Color films generally show reciprocity failure earlier and more severely than black-and-white stocks. Slide films are particularly sensitive, with some requiring compensation for exposures as short as half a second. Color negative films sit somewhere in the middle, though they also introduce color shifts alongside underexposure as exposures lengthen.
The age and storage conditions of your film also influence when reciprocity failure becomes problematic. Film that’s been sitting in a warm environment for years will typically show reciprocity issues earlier than fresh, properly refrigerated stock. This is why photographers who work extensively with long exposures often stick to recently manufactured film and keep detailed notes about how different batches perform.
How to Fix Reciprocity Failure: Compensation Strategies

Step 1: Meter Your Scene Normally
Start with a meter reading as if reciprocity failure doesn’t exist. Point your camera’s built-in meter at the scene, or use a handheld meter in incident or spot mode, depending on your lighting conditions. For night scenes with bright highlights and deep shadows, spot metering off a mid-tone gives the most reliable baseline. Record this initial reading, let’s say your meter suggests f/8 at 30 seconds. This “reciprocity-naïve” exposure becomes your starting point for compensation calculations. If you’re uncertain about metering technique in tricky light, learning to meter like a pro will make the entire reciprocity workflow more reliable. Write down your settings before moving to the next step.
Step 2: Consult Your Film’s Reciprocity Data
Once you have your metered exposure time, you need to find out how much compensation your specific film requires. This information isn’t guesswork, manufacturers test their films and publish reciprocity data that tells you exactly how much extra time to add.
Start with the film box itself. Many films print basic reciprocity guidelines directly on the packaging, usually as a table showing metered exposure times and corresponding adjusted times. If your box doesn’t include this data, check the manufacturer’s technical datasheet. Kodak, Ilford, Fujifilm, and other major brands publish detailed PDF datasheets on their websites that include comprehensive reciprocity charts.
The charts typically list your metered exposure time in one column and the adjusted exposure time (or compensation in stops) in another. For example, a chart might show that if your meter reads 10 seconds, you should actually expose for 20 seconds, that’s a one-stop compensation. Some charts express this differently, stating “+1 stop” or “2× the metered time,” but they mean the same thing.
Keep digital copies of these charts on your phone or print laminated reference cards for the films you use most often. When you’re standing in the dark with a tripod, having this data immediately accessible makes the difference between nailing the shot and wasting film.
Step 3: Calculate Your Adjusted Exposure
Once you know how much compensation your film needs, the next step is turning that information into an actual adjusted exposure. This is where the theory meets the practical reality of setting your camera.
You have two main options for applying compensation: increasing your exposure time or opening your aperture. Most photographers prefer adjusting time since you’ve already composed and focused at a specific aperture, and changing it might affect your depth of field or sharpness. Here’s how to work through the calculation:
- Start with your metered exposure time. Let’s say your meter indicates 30 seconds at f/8.
- Check your film’s reciprocity chart and find the compensation needed. For this example, Kodak Portra 400 requires +1 stop of compensation at 30 seconds.
- Apply the compensation by doubling your exposure time for each stop needed. One stop equals double the time, so 30 seconds becomes 60 seconds. If the chart called for +2 stops, you’d go to 120 seconds (doubling twice: 30→60→120).
- Set your camera to the new adjusted time. In this case, switch from 30 seconds to 60 seconds, keeping your aperture at f/8.
If you hit your camera’s maximum shutter speed (often 30 seconds before switching to bulb mode), you can compensate by opening your aperture instead. Going from f/8 to f/5.6 gives you that same +1 stop while keeping the exposure at 30 seconds. You can also split the difference: add half the time and open the aperture by half a stop if your situation allows.
The math gets simpler with practice. Many photographers create quick reference cards with common metered times and their compensated equivalents for their favorite films, eliminating mental calculation in the field.
Step 4: Bracket Your Exposures
Even with perfect reciprocity calculations, bracketing remains your safety net for long exposures. Film manufacturer data represents averages from controlled conditions, your actual film may be older, stored imperfectly, or respond differently in cold temperatures or high humidity. A roll that’s been sitting in your fridge for three years won’t behave identically to fresh stock.
Bracket at minimum ±1 stop around your calculated compensated exposure. For a 60-second calculated exposure, shoot one frame at 60 seconds, one at 30 seconds (1 stop), and one at 120 seconds (+1 stop). If the exposure exceeds two minutes or you’re working with unfamiliar film stock, expand to ±1.5 or even ±2 stops.
The cost is minimal, three frames instead of one, but the insurance is invaluable. You’ll nearly always get at least one properly exposed negative, and comparing your bracket results builds real-world knowledge of how your specific films perform. After a few sessions, you’ll recognize patterns: perhaps your refrigerated Tri-X consistently needs an extra half-stop, or that box of Ektar runs slightly faster than spec. This experiential data becomes more reliable than any chart.
Correcting Color Shifts
Long exposures don’t just underexpose color film, they often introduce unwanted color casts, typically toward magenta, cyan, or green depending on the film stock and exposure duration. The most reliable fix happens at capture: use color-compensating (CC) filters over your lens to neutralize the shift before it’s recorded on the negative. Kodak’s datasheets often specify which CC filters to add at different exposure times, for example, Portra 160 may require a CC10M (magenta) filter for exposures beyond 10 seconds. Pack a basic CC filter set if you shoot long exposures regularly, and test combinations with your specific films to build a personal reference.
If you didn’t filter during shooting, you have backup options. When scanning negatives, adjust color balance curves to correct the cast digitally, though severe shifts may resist clean correction. Similarly, RA-4 color printing allows color correction during the enlargement stage using filtration packs in the enlarger head. These post-capture methods work for moderate casts, but they can’t fully rescue extreme reciprocity-induced shifts, prevention at exposure remains your best tool.
Reciprocity Characteristics of Common Film Stocks
Not all films respond to reciprocity failure in the same way. If you shoot long exposures regularly, getting familiar with how your preferred film stocks behave can save you from repeated disappointments and help you choose the right emulsion for the job.
Black-and-white films generally handle extended exposures more forgivingly than color films. Kodak Tri-X 400 starts showing reciprocity effects around 1 second but remains relatively predictable, at 10 seconds, you’ll typically need to add about half a stop; at 60 seconds, plan on adding one to one-and-a-half stops. The grain structure stays consistent, which makes Tri-X a reliable choice for night street photography. Ilford HP5 Plus behaves similarly, though some photographers report it needs slightly less compensation at the 10-second mark. Both films maintain good shadow detail even when you’ve undercompensated slightly, giving you some latitude for error.
Ilford Delta films (Delta 100, 400, 3200) employ tabular grain technology that improves reciprocity performance compared to traditional emulsions. Delta 100 in particular shows minimal failure until about 2 seconds, and even at 120 seconds you’ll only need around one stop of compensation. This makes the Delta line excellent for technical applications where precise exposure matters.
Color negative films introduce the complication of color shifts alongside exposure compensation. Kodak Portra (160, 400, 800) maintains its popularity partly because it handles long exposures reasonably well for a color film, you’ll see a slight warm/magenta shift starting around 1 second that becomes more pronounced as exposures extend. Kodak Ektar 100, with its saturated color palette and fine grain, is less forgiving: reciprocity kicks in earlier and the resulting cyan-green cast can be challenging to correct even in scanning.
| Film Stock | Threshold | 1 sec | 10 sec | 60 sec | 120+ sec |
|---|---|---|---|---|---|
| Kodak Tri-X 400 | ~1 sec | No adjustment | +0.5 stop | +1 to +1.5 stops | +2 stops |
| Ilford Delta 100 | ~2 sec | No adjustment | +0.3 stop | +0.7 stop | +1 stop |
| Kodak Portra 400 | ~1 sec | +0.3 stop | +0.7 stop | +1.5 stops | +2+ stops |
| Fujichrome Velvia 50 | <1 sec | +0.5 stop | +1.5 stops | +2.5 stops | +3+ stops |
Slide films demand the most attention because their narrow exposure latitude means reciprocity errors show up harshly. Fujichrome Velvia 50, beloved for landscape work, exhibits reciprocity failure earlier than most films, already at half a second you’ll want to add a third of a stop. By the time you reach 60 seconds, you’re looking at two-and-a-half stops of compensation plus noticeable color shifts toward magenta. Provia 100F behaves somewhat better but still requires careful calculation and color filtration for accurate results.
These compensation values serve as starting points rather than absolute rules. Film age, storage conditions, and development variations all influence how your particular roll responds. Keep notes on what actually works with your workflow and adjust your personal compensation guidelines accordingly.
Preventing Reciprocity Issues Before They Happen

The smartest approach to reciprocity failure is avoiding it when you can. While long exposures sometimes demand compensation regardless, thoughtful planning reduces how often you’re scrambling with calculations in the dark.
Start by matching your film stock to your intended work. If you’re planning a night photography project or know you’ll be shooting extended exposures regularly, choose films with documented good reciprocity characteristics. Ilford Delta films and Kodak T-Max handle long exposures better than traditional emulsions like HP5 or Tri-X. Among color stocks, Kodak Ektar maintains relatively consistent performance, while slide films generally demand more aggressive compensation. When reciprocity data matters to your shoot, it should influence your film choice just as much as grain or color palette.
Speed matters more than you might think. A faster film, ISO 800 versus ISO 100, can be the difference between a 4-second exposure requiring no compensation and a 30-second exposure demanding significant adjustment. Yes, you’ll trade some grain and sharpness, but you gain predictability and easier exposure calculations. Similarly, if your composition allows it, shooting at f/2.8 instead of f/8 can keep you in the reciprocity-friendly zone below one second.
Timing your shoot strategically makes a real difference. Blue hour, the period just after sunset or before sunrise, provides enough ambient light to keep exposures shorter while still delivering that moody, long-exposure aesthetic. You might capture the same silky water effect with a 2-second exposure at blue hour that would require 60 seconds in full darkness, eliminating reciprocity headaches entirely.
Build these habits into your long-exposure workflow:
- Keep printed reciprocity charts for your regular films in your camera bag or taped inside your film case
- Note actual exposure times and compensation in a small notebook, your real-world data beats manufacturer charts
- Carry a small flashlight with a red filter for reading charts without killing your night vision
- Pre-calculate common compensation scenarios before you’re in the field (10s becomes X, 30s becomes Y)
- When possible, test new film stocks during daytime long exposures with ND filters before committing to night shoots
These small preparation steps mean you’re problem-solving at home rather than guessing in freezing temperatures at midnight. Prevention isn’t about avoiding long exposures, it’s about controlling the variables so reciprocity becomes one predictable element rather than an unknown that ruins your negatives.
Common Questions About Film Reciprocity Failure
Does pushing or pulling film change how reciprocity failure works?
No, pushing or pulling affects development time, not the fundamental reciprocity characteristics of the emulsion. You still need to apply the same reciprocity compensation for long exposures, then push or pull during development as planned.
Can I fix reciprocity failure in post-processing instead of compensating during the shoot?
Not really. Reciprocity failure causes genuine underexposure at the film level, detail that was never captured can’t be recovered through scanning adjustments or darkroom techniques. You might rescue slight underexposure, but severe reciprocity failure leaves you with thin negatives and blocked-up shadows that no amount of post-processing can fully salvage.
Why doesn’t digital photography have reciprocity failure?
Digital sensors capture light through a completely different mechanism, photoelectric conversion rather than chemical reactions in silver halide crystals. This process remains linear across a much wider range of exposure times, though some digital cameras do show minor issues at extremely long exposures (hot pixels, noise), these aren’t reciprocity failure in the traditional sense.
Does reciprocity failure make grain worse?
Yes, indirectly. When you compensate for reciprocity failure by extending exposure time further, you’re working the film harder and often pushing it closer to its limits, which can increase visible grain and reduce sharpness. Underexposed negatives from inadequate reciprocity compensation that you then try to salvage in printing will show even worse grain.
These questions come up constantly because reciprocity failure intersects with so many other aspects of film photography. The key thing to understand is that it’s a front-end problem, you can’t fix it yourself after the fact through clever darkroom work or scan adjustments.
Instant films, incidentally, do experience reciprocity failure, though manufacturers rarely publish detailed compensation data. Polaroid and Instax films both show reciprocity breakdown beyond about one second, which is why night shots with instant film often disappoint. The self-contained development process makes testing and compensation trickier since you can’t bracket as freely as with roll film.
One question that doesn’t get asked enough: does film age affect reciprocity? The answer is yes. Older film stock, especially if stored improperly, can show reciprocity failure at shorter exposure times than fresh film. If you’re shooting expired film for long exposures, add an extra stop of compensation beyond what the datasheet recommends and bracket aggressively.
Quick Reference: Your Reciprocity Workflow
When you’re set up for a long exposure, run through this workflow every time until it becomes automatic. First, take your meter reading as you normally would, noting the indicated shutter speed. If that reading falls beyond one second, reciprocity compensation comes into play.
Check your film’s specific data immediately, either from the manufacturer’s chart tucked in your camera bag or a reference app on your phone. Apply the recommended compensation by extending your exposure time (most common) or opening your aperture if you have room. For a 30-second metered exposure on Kodak Portra 400, you’d shoot 60 seconds after applying the one-stop compensation.
Now bracket. Shoot your calculated exposure, then one stop over and one stop under. This safety net accounts for film batch variations, aging stock, and the reality that reciprocity data represents averages, not guarantees. If you’re shooting color film and notice consistent color shifts with certain stocks, note which CC filters help for next time.
After each shoot, jot down what you metered, what you actually shot, and which frame looked best when you get your scans back. These notes transform published reciprocity data into personalized knowledge you can trust in the field. Within a few rolls, you’ll develop instincts for your favorite films that surpass any chart.
Reciprocity failure might seem like an obstacle when you first encounter it, but it’s really just another characteristic of film that you learn to work with, like understanding grain structure or choosing the right developer. Unlike a random malfunction, reciprocity follows predictable patterns. Once you know your film stock’s behavior and build a compensation workflow into your shooting routine, long exposures become just as reliable as any other technique.
The key is treating your first few long-exposure sessions as learning opportunities rather than expecting perfect results immediately. Keep notes on what you shot, your metered time, your compensated time, and how the negatives turned out. After a few rolls, you’ll develop an intuition for how your preferred films respond. You might discover that Tri-X needs less compensation than the datasheet suggests with your particular developer, or that Portra’s color shifts are minimal enough that you can skip filtration in most situations.
What makes this knowledge worthwhile is what it unlocks. Film’s response to extended time creates rendering that digital sensors can’t replicate, the way highlights roll off differently, how certain wavelengths accumulate at their own pace, the organic quality of grain responding unevenly across the frame. These aren’t technical flaws. They’re expressive possibilities that become available once you’ve done the math and bracket your exposures with confidence.
Master reciprocity compensation, and those night cityscapes, star trails, and misty seascapes stop being gambles. They become repeatable creative choices that define your work.
 By
By