By
By 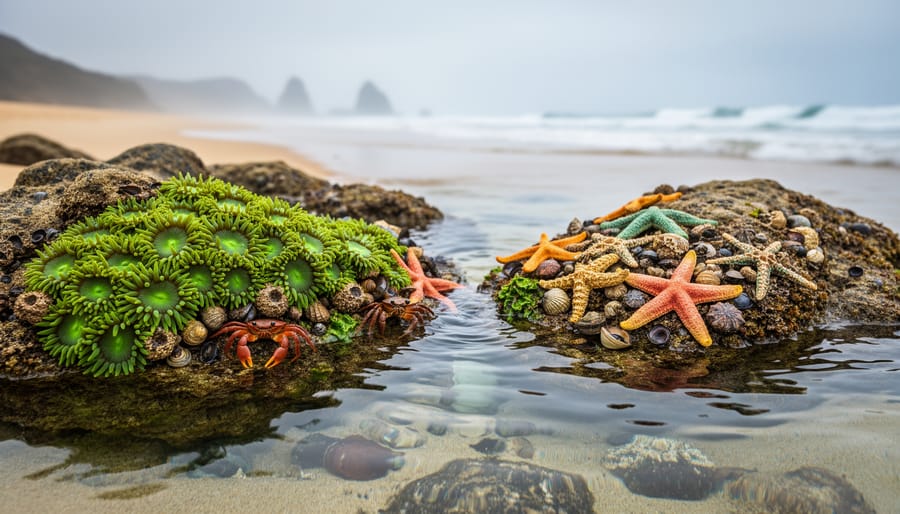
A biodiversity picture captures multiple species, ecological relationships, or habitat complexity within a single frame, showing the interconnected web of life rather than isolating individual subjects. These images work because they tell a complete ecosystem story: a tide pool teeming with anemones, crabs, and starfish; a rainforest canopy where orchids, insects, and birds share the same branch; or a coral reef displaying dozens of fish species alongside the living coral itself. The technique requires a shift in composition thinking, moving from single-subject portraiture to environmental storytelling that documents the conservation photography impact scientists and advocates need.
Most photographers instinctively zoom in, isolating one animal or plant against a blurred background. That approach certainly has its place, but it strips away context. Biodiversity photography does the opposite. It pulls back to show relationships, scales appropriately to reveal density and variety, and uses depth of field strategically to keep multiple planes sharp. The goal is evidence of richness, not just beauty.
The challenge lies in making complexity readable. Too much information creates visual chaos; too little fails to demonstrate true diversity. You need to balance technical control with compositional intelligence, knowing when to use wide angles for habitat scale and when macro techniques can reveal surprising diversity in tiny spaces. This guide walks through the gear, field techniques, and ethical considerations that turn a crowded scene into a powerful statement about the variety of life our planet still holds.
Understanding What Makes a Biodiversity Picture Effective
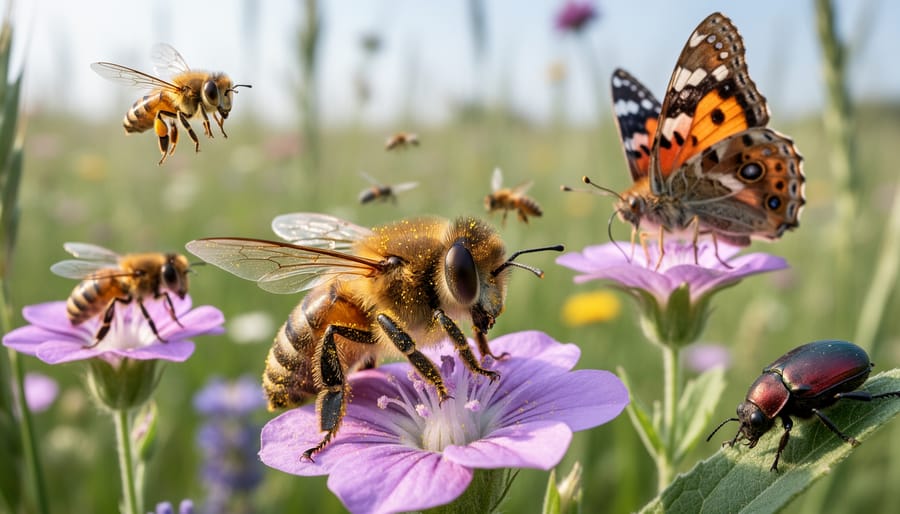
A biodiversity picture goes beyond capturing a beautiful animal or plant, it tells a story about ecological relationships, environmental health, and conservation urgency. While a standard nature photograph might showcase a single charismatic species in isolation, an effective biodiversity image reveals the web of life: multiple species interacting, habitat complexity, or visible environmental pressures that contextualize why this ecosystem matters.
The difference becomes clear when you compare two butterfly photos. A close-up of a monarch on a white background is striking, but a frame showing that monarch feeding on native milkweed while a bee visits a nearby wildflower, all against a backdrop of threatened prairie habitat, communicates biodiversity. That second image shows pollinator diversity, plant-animal relationships, and implicitly references habitat loss, all elements that conservation organizations can use to illustrate why protecting that prairie serves multiple species.
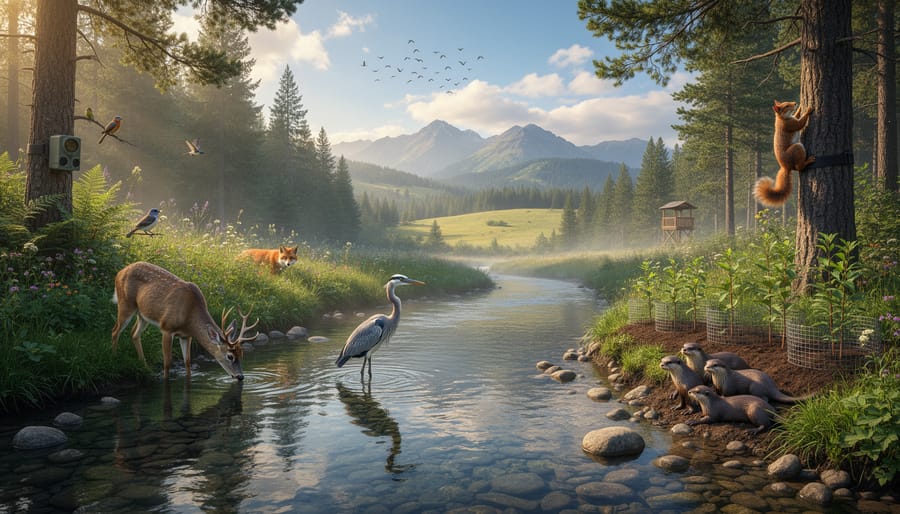
Real-world conservation campaigns demonstrate this principle repeatedly. The images that drove protection for Yellowstone’s wolf reintroduction didn’t just show wolves, they showed elk herds responding to predator presence, riverbank vegetation recovering, and cascade effects through the ecosystem. Similarly, coral reef documentation that reveals bleached sections alongside healthy colonies, with fish populations clustered in remaining refuge zones, tells a more complete biodiversity story than perfectly framed shots of individual fish species.
Visual elements that strengthen biodiversity impact include foreground-to-background depth showing habitat layers, multiple species visible in one frame, signs of ecosystem processes like pollination or predation, and honest inclusion of threats rather than sanitized wilderness fantasies. A picture of seabirds nesting on a cliff becomes more powerful when it also shows plastic debris in nests or oil sheen on water, the full reality conservation efforts must address.
The most effective images balance aesthetic appeal with documentary honesty. They draw viewers in through composition, light, and color, then hold attention by revealing ecological complexity. When a photograph makes someone ask “what’s happening here?” and “why does this matter?”, you’ve created something conservation groups can actually use to build public support and funding.
Essential Gear and Materials for Biodiversity Photography
Camera Settings for Accurate Species Documentation
Set your camera to manual mode or aperture priority so you retain full control over exposure, underexposed shadows can lose critical species detail, while blown highlights erase texture needed for identification. Shoot RAW whenever possible. RAW files preserve the full dynamic range and color information conservation organizations need for accurate species documentation, scientific publications, and archival purposes. JPEG compression discards data and bakes in white balance decisions that limit later adjustments when verifying species features or habitat conditions.
For focus, use single-point AF positioned precisely on the subject’s eye or most diagnostic feature, plumage patterns, wing venation, scale texture, rather than relying on automatic area modes that might prioritize the wrong element. Many essential nature settings apply here: fast shutter speeds freeze movement, moderate apertures (f/5.6, f/8) balance sharpness with depth of field, and higher ISOs are acceptable if they prevent motion blur that ruins identification. When working close, reference macro close-up tips for managing shallow depth and critical focus placement.
Enable EXIF metadata recording and set your camera’s clock accurately, timestamps establish when rare species were observed, which matters for conservation monitoring. If your camera supports it, embed GPS coordinates automatically. Otherwise, note locations manually immediately after shooting. Use continuous shooting mode to capture behavioral sequences, but verify each frame’s sharpness and exposure in playback before moving on. Conservation value depends on technical quality, not just compelling composition.
Safety and Ethical Considerations
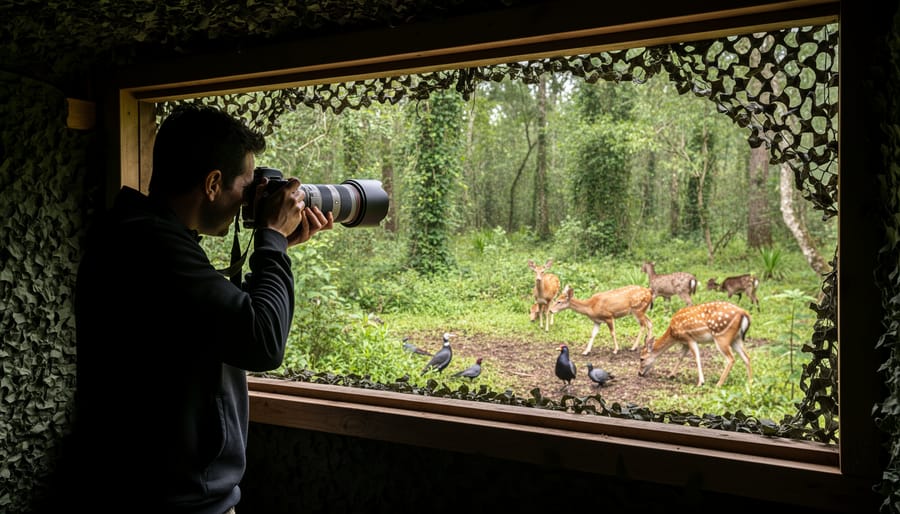
Before you venture into the field, understand that your safety and the welfare of wildlife come first, no photograph is worth a personal injury or harm to the ecosystem you’re documenting. Keep a respectful distance from all animals, especially predators, venomous species, and mothers with young. Research the specific risks of your location: some areas harbor aggressive territorial birds during nesting season, others have hidden hazards like unstable terrain near waterways where amphibian diversity thrives.
Always check whether you need permits before photographing in protected areas, national parks, or private lands. Many biodiversity hotspots have specific rules about where you can walk, what equipment you can bring, and which species are off-limits during vulnerable periods. Ignoring these regulations can result in fines, but more importantly, it undermines conservation efforts you’re trying to support.
Know when to walk away. If an animal changes its behavior because of you, stops feeding, becomes agitated, moves away from shelter, or displays alarm calls, you’re too close. Trampling vegetation to get a clearer shot destroys microhabitats that insects, reptiles, and ground-nesting birds depend on. In sensitive ecosystems like coral reefs, wetlands, or alpine meadows, stay on designated paths and avoid disturbing substrate.
Baiting or using calls to lure wildlife might seem like a shortcut to a compelling image, but these practices can disrupt natural behaviors, attract predators to vulnerable prey, or condition animals to associate humans with food (creating dangerous situations). Similarly, moving branches, relocating animals for better light, or altering a scene misrepresents the ecosystem and violates the fundamental trust viewers place in conservation photography. Your role is to document biodiversity as it exists, not to stage it.
Step-by-Step Process: Capturing Your Biodiversity Picture
Step 1: Research Your Location and Target Species
Before you set foot in the field, spend time understanding where biodiversity concentrates in your region. Start with online resources like eBird hotspot maps, iNaturalist observation data, and local nature conservancy websites, these show exactly where species diversity peaks near you. A wetland hosting forty bird species offers richer biodiversity storytelling than a generic forest trail.
Dig into seasonal patterns for your target area. Amphibian breeding in spring, wildflower blooms in early summer, and migratory bird stopovers in fall create narrow windows of peak diversity. Check historical sighting data to predict when multiple species overlap, that’s your opportunity to document ecosystem interactions in one shoot.
Choose whether you’re documenting a specific ecosystem type (coral reef, old-growth forest, prairie remnant) or tracking particular indicator species that signal habitat health. Indicator species like salamanders or native pollinators tell bigger conservation stories than common generalists. Download field guides or apps like Merlin Bird ID and Seek to help with on-site species identification, ensuring you can accurately document what you photograph for conservation value.
Step 2: Scout and Compose for Ecosystem Context
Arriving at your location, resist the temptation to immediately zoom in on a single subject. Instead, spend fifteen to twenty minutes observing the broader scene. Look for natural frames, an opening in vegetation, a clearing where light penetrates, or an elevated vantage point that reveals layers of habitat.
Position yourself to capture foreground species against their living backdrop. A butterfly on a flower becomes a stronger biodiversity record when you step back and include the meadow ecosystem supporting it. Use a wider aperture (f/8 to f/11) to keep both the primary subject and surrounding habitat reasonably sharp, showing the interconnected whole rather than an isolated portrait.
Watch for interaction points: pollinators visiting blooms, birds feeding in fruiting trees, or predator-prey relationships. These behavioral moments within habitat context demonstrate ecosystem function, not just species presence.
Consider what the background communicates. Does it show healthy forest structure or signs of degradation? Including human elements, a distant road, agricultural boundary, or development, can strengthen the conservation narrative by illustrating the pressures biodiversity faces without making the image feel preachy.
Step 3: Employ Patient, Non-Intrusive Techniques
Patience is the foundation of non-intrusive biodiversity photography. Rather than chasing animals or forcing close encounters, settle into position and let wildlife come to you. A portable hide or blind, anything from a commercial pop-up tent to a camouflage tarp draped over a simple frame, conceals your shape and movement, allowing animals to resume natural behaviors within minutes instead of hours. If a hide isn’t practical, use existing cover: position yourself behind vegetation, rocks, or fallen logs that break your silhouette.
Work with natural light by arriving early or staying late, when low-angle sun illuminates subjects without harsh shadows and when many species are most active. Avoid using flash in sensitive environments; the burst can startle animals and disrupt nocturnal creatures’ vision. Many proven wildlife field techniques emphasize stillness, turn off camera beeps, move slowly, and breathe quietly. If an animal shows stress signals (alarm calls, frozen posture, interrupted feeding), back away immediately. Your goal is documentation, not interaction; the best biodiversity pictures come from subjects that forget you’re there.
Step 4: Capture Multiple Frames Showing Diversity
A single stellar photograph of one species tells part of the story, but biodiversity thrives in variety. Once you’ve positioned yourself in a productive location, resist the urge to pack up after nailing that perfect bird shot. Instead, shift your attention across different organisms and scales within the same ecosystem.
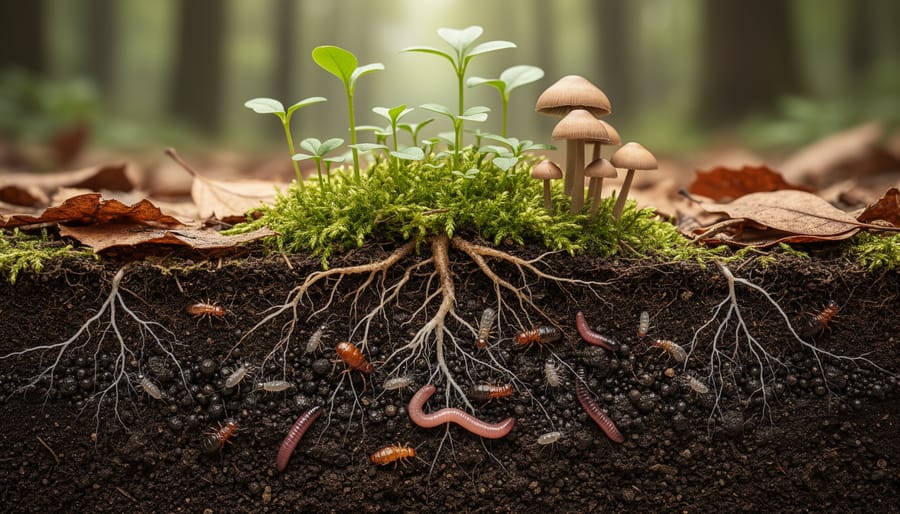
Spend time photographing the insects on bark, fungi growing beneath the canopy, plants at ground level, and birds in the branches above. This layered approach demonstrates the interconnected web of life that defines biodiversity. A conservation organization can use one image to highlight a flagship species, but a set showing multiple taxa from the same habitat proves ecosystem health and complexity.
Vary your compositions too, wide shots establishing habitat structure, mid-range frames showing species interactions, and tight macros revealing detail. This range gives editors flexibility and tells a richer conservation story than any single photograph could achieve alone.
Step 5: Document Metadata and Location Details
The picture you just captured is only half the story, what transforms it into a conservation asset is the data you record alongside it. Start with GPS coordinates: enable geotagging in your camera or smartphone, or manually note the latitude and longitude. Conservation databases rely on precise locations to track species distributions and habitat changes over time.
Next, document what you photographed while identification is fresh. Note species names if you’re certain (common and scientific), or describe distinguishing features for later verification. Record the exact time and date, many species show seasonal or daily patterns critical to conservation research.
Environmental conditions matter too. Jot down weather (temperature, cloud cover, recent rainfall), habitat type (old-growth forest, wetland edge, coral reef), and any observed behaviors or interactions. If you spotted multiple individuals, count them. This context helps scientists understand not just what lives where, but how ecosystems function.
Most modern cameras embed basic metadata in image files automatically, but supplement this with field notes or smartphone apps designed for citizen science. Even rough notes scribbled immediately are more reliable than memory hours later.
Verification: Evaluating and Refining Your Results
Once you’re back from the field, resist the urge to immediately post your favourite shot. Effective biodiversity documentation requires systematic review against specific criteria that conservation organizations actually use when sourcing images.
Start by culling your images with species clarity as the primary filter. Can you, or more importantly, a biologist reviewing your work, confidently identify the organism to at least genus level? Blurred wings, obscured markings, or poor lighting that masks diagnostic features render otherwise beautiful images useless for scientific purposes. Zoom to 100% and check that critical identification points, facial patterns on amphibians, wing venation on insects, leaf arrangements on plants, are sharp and well-exposed.
Next, evaluate whether your composition shows meaningful ecosystem context. A stunning bird portrait might win Instagram likes, but a frame that includes its nesting habitat, food sources, or evidence of human encroachment tells the conservation story. Look for images where the wider environment is readable, not just backdrop blur. If you captured the same subject in multiple scenarios, choose the version that reveals relationships, the pollinator on a native flower, the predator near its prey species, the endemic plant beside invasive competitors.
Apply this quality checklist to each keeper:
- Species features clear enough for expert identification without guessing
- Habitat elements visible and representative of the actual ecosystem type
- No signs of animal stress, baiting, or disturbed vegetation in frame
- Technical sharpness where it matters, eyes, diagnostic markings, foreground subjects
- Visual narrative that suggests why this biodiversity matters or faces threats
For post-processing, enhance judiciously. Lifting shadows to reveal a salamander’s spots or adjusting white balance to accurate foliage colour is legitimate. Cloning out a distracting twig is generally acceptable. But never remove evidence of threats, add species that weren’t present, or manipulate colours so dramatically that field identification becomes misleading. Conservation images carry an implicit claim of truthfulness, your edits should clarify reality, not fabricate it.
Compare your selects against established biodiversity photography from sources like the Wildlife Photographer of the Year conservation category or images used by The Nature Conservancy. Notice how the strongest examples balance aesthetic appeal with information density, they’re compelling to non-scientists while remaining valuable to researchers. If your image couldn’t plausibly appear in a field guide or habitat assessment report, reconsider whether it truly documents biodiversity or just captures a pretty animal.
Next Steps: Sharing Your Work for Conservation Impact
Your biodiversity pictures become conservation tools the moment you share them strategically. Start by uploading observations to citizen science platforms where your images contribute directly to species distribution data. iNaturalist turns your photos into research-grade records once community members verify species identifications, feeding databases that inform habitat protection decisions and track population changes. eBird accepts bird photos alongside checklists, creating timestamped evidence of species presence that scientists use worldwide.
Conservation organizations actively seek compelling biodiversity imagery for campaigns, reports, and fundraising materials. Contact local land trusts, wildlife rehabilitation centers, and habitat preservation groups directly, many operate with minimal budgets and welcome high-quality visuals they can’t afford from stock agencies. Specify usage rights clearly: Creative Commons licenses (particularly CC BY or CC BY-NC) allow broad educational use while maintaining attribution, or negotiate one-time permissions for specific projects if you prefer control.
Regional biodiversity monitoring programs often need photographic documentation. Check with your state natural heritage program, university ecology departments, or federal wildlife agencies about contributing to species surveys or habitat assessments. These partnerships let you save wildlife with photos while learning from field biologists.
Educational impact multiplies when you share context alongside images. Write brief descriptions explaining the ecosystem relationship you captured, the conservation status of featured species, or threats visible in the frame. Environmental educators, nature centers, and interpretive programs value images paired with accurate ecological storytelling they can use in presentations and displays.
Build relationships with conservation photojournalists and documentary projects covering biodiversity issues in your region. Contributing images to long-term visual records of changing landscapes creates historical documentation that gains value over decades, showing habitat loss or recovery in ways that influence policy and public awareness far beyond a single campaign.
Common Questions About Biodiversity Photography
Most photographers stepping into biodiversity work share similar concerns, whether their current gear is adequate, how to identify unfamiliar species, and where they can legally photograph without scientific credentials. These questions often hold people back from contributing valuable conservation images, yet the answers are more accessible than many assume.
Do I need expensive gear to photograph biodiversity effectively?
No. A modern smartphone or entry-level DSLR with a kit lens can document species and ecosystems successfully, especially for macro subjects and wide habitat shots. Conservation organizations value accurate documentation over technical perfection, and citizen science platforms accept images from any device that clearly shows identifying features.
How do I identify species I photograph if I’m not a biologist?
Apps like iNaturalist and Merlin Bird ID provide AI-assisted identification, while uploading your images to these platforms connects you with expert communities who verify species. Many conservation photographers shoot first and identify later with help from field guides and online taxonomy databases.
Can I photograph in national parks and protected areas?
Yes, most protected areas allow photography from public trails and designated areas without permits, though rules vary by location. Commercial use, off-trail access, drone photography, and close approaches to nests or dens typically require advance permission from park authorities or land managers.
How do I balance artistic composition with scientific documentation needs?
Shoot both. Capture tight, well-lit frames showing diagnostic features like wing patterns or leaf arrangements for documentation, then compose wider artistic interpretations showing the species in context. Conservation groups need both types, identification images for databases and compelling visuals for public engagement.
Another practical concern involves contributing images when you lack formal training in ecology or taxonomy. Conservation photography doesn’t require academic credentials, it requires careful observation, ethical field practices, and willingness to share your work with organizations that can use it. Start by photographing biodiversity in your immediate area, upload observations to citizen science platforms where experts provide feedback, and gradually build knowledge through field experience rather than waiting for formal qualifications.
The technical challenges of photographing small, fast, or distant organisms become manageable with practice. Shooting insects and plants teaches patience and macro technique. Birds and mammals develop your tracking and anticipation skills. Each subject type builds competencies that transfer across biodiversity photography, meaning early struggles with one group make subsequent subjects easier to approach successfully.
Biodiversity photography isn’t reserved for professionals with expensive gear or exotic travel budgets. Your local park, backyard garden, or neighborhood greenspace harbors more species diversity than you might expect, and those ecosystems need documentation just as urgently as remote rainforests. The camera you already own, paired with patience and the techniques outlined here, can produce images that genuinely contribute to conservation science and public awareness.
Every picture you share with platforms like iNaturalist or local environmental groups becomes part of a larger effort to track species populations, identify threatened habitats, and build support for protection measures. Conservation organizations actively seek visual evidence from citizen photographers because it fills critical gaps in monitoring data. Your single image of a native pollinator or invasive species might influence a land management decision or education campaign.
Start this weekend. Choose one nearby location, spend an hour observing carefully, and apply what you’ve learned about context, diversity, and ethical practice. Then share your results with a conservation database or community group. That simple act transforms photography from personal hobby into meaningful environmental action, one picture at a time.





 By
By