Point your telescope-mounted camera at a galaxy millions of light-years away, and you’ll quickly discover that night sky photography basics won’t cut it anymore. Deep space astrophotography demands a fundamental shift in both equipment and technique—you’re no longer capturing the Milky Way arching over a landscape, but instead revealing celestial objects so faint that a single exposure captures almost nothing visible.
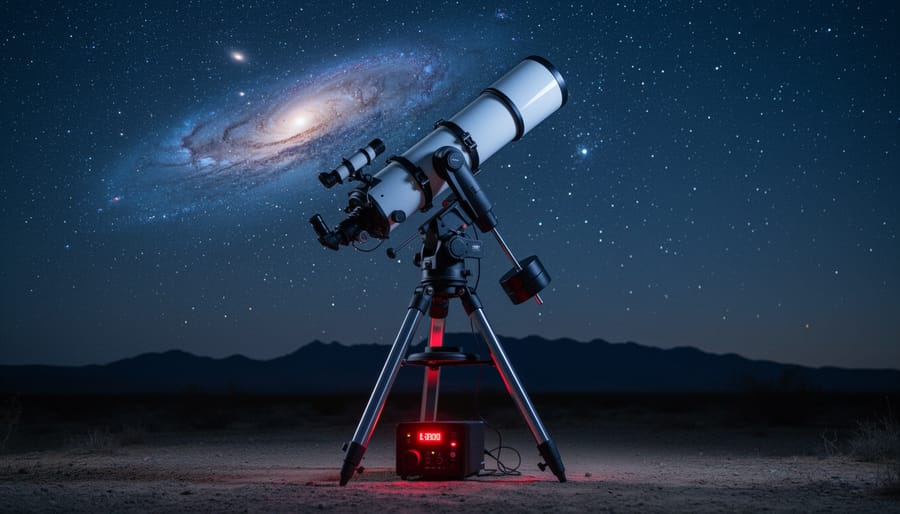
Invest in an equatorial mount that tracks the sky’s rotation with precision, allowing exposures of several minutes rather than the 20-30 seconds typical of wide-field nightscapes. This single piece of equipment transforms impossibly faint nebulae and distant galaxies into photographable subjects by compensating for Earth’s movement.
Stack dozens or even hundreds of individual exposures using specialized software to build signal while reducing noise—a 3-hour imaging session might consist of 60 three-minute exposures that combine into a single detailed image. This process uncovers detail that no single photograph could ever reveal.
Master the concept of integration time, which refers to your total cumulative exposure across all stacked frames. While a landscape astrophotographer might be satisfied with a single 30-second shot, deep space work often requires 5-10 hours of total integration time on a single target to pull faint details from the darkness.
The learning curve is steep, and your first attempts will likely disappoint. That fuzzy gray blob barely recognizable as the Andromeda Galaxy won’t resemble the stunning images you’ve admired online. But each imaging session teaches you something new about polar alignment, autoguiding, calibration frames, and the delicate balance between signal and noise that defines this challenging but rewarding discipline.
What Makes Deep Space Astrophotography Different
If you’ve successfully photographed the moon or planets, you might think deep space objects are just the next logical step. Here’s the reality check: they’re an entirely different beast, and the techniques that worked brilliantly for lunar craters will fail spectacularly when pointed at a distant galaxy.
The fundamental difference comes down to light, or more accurately, the desperate lack of it. When you photograph the moon, you’re capturing reflected sunlight from an object just 240,000 miles away. It’s so bright you might actually need to use fast shutter speeds to avoid overexposure. Jupiter and Saturn, while much farther, still reflect enough sunlight to capture in single exposures of a few seconds.
Deep space objects exist on an incomprehensible scale beyond our solar system. The Andromeda Galaxy, one of the brightest targets available, sits 2.5 million light-years away. That nebula you want to photograph? It might be thousands of light-years distant. These objects emit or reflect infinitesimally small amounts of light that reach Earth, making them nearly invisible to both our eyes and cameras.
This is where standard photography breaks down completely. You can’t simply increase your exposure time to compensate. A single long exposure will capture so much light pollution, atmospheric glow, and sensor noise that your target drowns in the background. The solution requires a completely different approach: capturing dozens or even hundreds of shorter exposures and combining them through specialized stacking software.
Consider this real-world example: photographing the Orion Nebula might require 50 exposures of three minutes each, totaling two and a half hours of actual imaging time. Compare that to snapping a crisp photo of the moon in 1/250th of a second. The time investment alone represents a fundamental shift in approach.
Deep space astrophotography also demands that you track your targets precisely as Earth rotates. While you might get away with a sturdy tripod for lunar photography, DSOs require motorized equatorial mounts that can follow objects across the sky with arc-second precision throughout those long imaging sessions. Without this tracking capability, stars become trails within seconds, rendering your images useless for stacking.
The equipment, techniques, and patience required represent not just an upgrade from planetary imaging, but a complete reinvention of your photographic process.
The Essential Gear You Actually Need
Camera Bodies and Sensors
Choosing the right camera body for deep space astrophotography can feel overwhelming, but understanding a few key differences will point you in the right direction.
The biggest decision you’ll face is whether to use a modified or unmodified camera. Stock cameras come with infrared (IR) filters that block hydrogen-alpha wavelengths—the rich red emissions found in many nebulae. A modified camera has this filter removed or replaced with a specialized astrophotography filter, allowing you to capture those stunning crimson details in targets like the Orion Nebula or Heart Nebula. The trade-off? Modified cameras aren’t ideal for daytime photography since colors will appear shifted. Many astrophotographers keep a dedicated modified camera just for night sky work.
Cooling is another game-changer. Dedicated astronomy cameras with active cooling significantly reduce sensor noise during long exposures, producing cleaner images with less grain. While regular DSLRs and mirrorless cameras work perfectly fine for beginners, cooled cameras excel when you’re ready to push into fainter objects requiring hours of total exposure time.
Sensor size matters too. Full-frame sensors capture wider fields of view, perfect for large nebulae or the Andromeda Galaxy. Crop sensors provide more magnification per focal length, helpful for smaller targets like planetary nebulae. Neither is better—just different tools for different subjects.
For example, an unmodified Canon or Sony mirrorless camera can beautifully capture the Pleiades star cluster or Andromeda Galaxy. Understanding proper camera settings maximizes results regardless of which system you choose. Meanwhile, a modified DSLR reveals spectacular nebula details that would otherwise remain hidden.
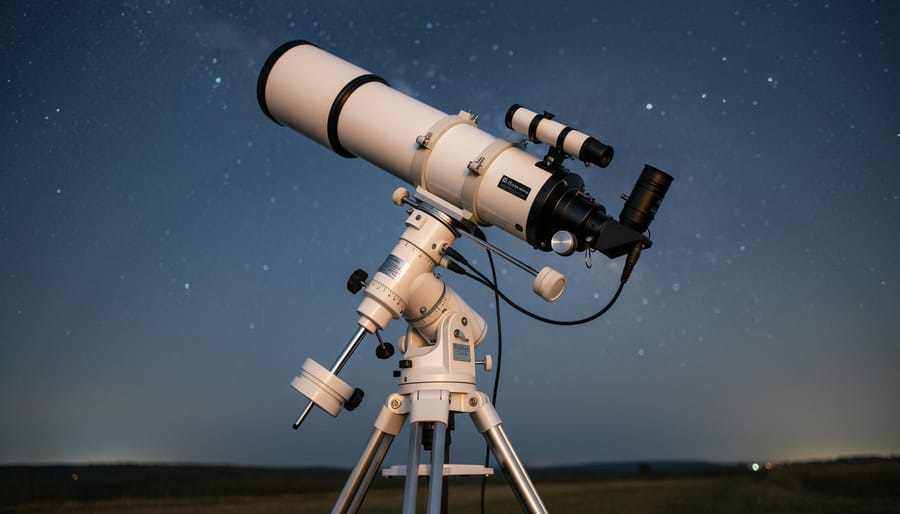
Telescopes and Optical Systems
Choosing the right telescope is perhaps the most critical decision in deep space astrophotography, and understanding the three main optical designs will guide your investment wisely.
Refractor telescopes use glass lenses to gather light, offering crisp, high-contrast images with minimal maintenance. Premium APO (apochromatic) refractors correct for chromatic aberration, producing pin-sharp stars across the frame—perfect for capturing intricate nebula details. However, quality refractors become expensive as aperture increases, making larger models cost-prohibitive for beginners.
Reflector telescopes use mirrors instead of lenses, providing larger apertures at more affordable prices. A 6-inch or 8-inch Newtonian reflector gives you excellent light-gathering power for dim galaxies and nebulae. The trade-off? They require regular collimation (mirror alignment) and are more sensitive to temperature changes. Many astrophotographers start here because the aperture-to-cost ratio is unbeatable.
Understanding focal length considerations becomes essential when selecting targets. Short focal lengths (400-600mm) excel at large targets like the Andromeda Galaxy or Orion Nebula, while longer focal lengths (1000mm+) suit smaller subjects like planetary nebulae or distant galaxies.
Aperture determines how much light you collect—critical for faint deep space objects. However, larger apertures demand more precise tracking and sturdy mounts.
For your first dedicated setup, consider an 80mm APO refractor or 6-inch reflector. These provide manageable learning curves while delivering genuinely impressive results on classic targets. Many astrophotographers continue using these even after upgrading, as different focal lengths suit different subjects perfectly.
Tracking Mounts: Your Most Critical Investment
Here’s the truth about deep space astrophotography: your tracking mount matters more than your camera. While a basic tripod works fine for Milky Way shots, capturing distant galaxies demands pinpoint accuracy over exposures lasting minutes or even hours. This is where equatorial mounts become non-negotiable.
Unlike simple alt-azimuth mounts, equatorial mounts align with Earth’s rotational axis, allowing them to follow celestial objects across the sky with a single motor movement. Think of it as creating a platform that rotates at exactly the same speed as the stars appear to move. Without this precision, stars become elongated trails within seconds at typical deep space magnifications.
Polar alignment is your first critical step. This process involves pointing the mount’s axis precisely at the celestial pole. Even slight misalignment creates field rotation during long exposures, turning pinpoint stars into arcs. Quality mounts like the Sky-Watcher EQ6-R Pro or iOptron CEM40 include polar alignment scopes and electronic assistance to achieve accuracy within arc-minutes.
However, even perfectly aligned mounts have minor tracking errors from gear imperfections and atmospheric refraction. This is where autoguiding systems enter the picture. A small guide camera watches a reference star, sending real-time corrections to your mount. Popular options like the ZWO ASI120MM Mini paired with PHD2 software can achieve tracking accuracy below one arc-second, essential for clean, round stars in your final images.
Budget considerations? Entry-level computerized equatorial mounts start around 800 dollars, while professional-grade systems exceed 3,000 dollars before accessories.
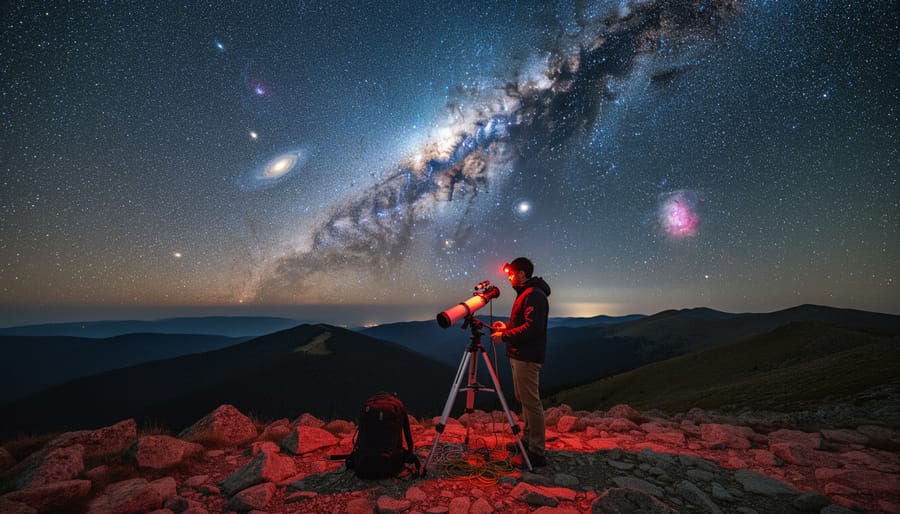
Finding the Right Natural Environment
Your journey into deep space astrophotography begins long before you ever press the shutter button. Success in capturing those ethereal nebulae and distant galaxies depends fundamentally on finding truly dark skies, and that means venturing beyond the familiar glow of our cities and towns.
Start your location scouting by exploring light pollution maps like Light Pollution Map or Dark Site Finder. These invaluable tools use color coding to indicate sky darkness, with black and gray zones representing the darkest locations. For deep space imaging, you’ll want to target areas classified as Bortle Class 3 or darker. While you might capture some targets from Bortle Class 4 or 5 locations, the difference in background sky quality becomes immediately apparent in your final images. The darker the sky, the more subtle details you’ll be able to reveal in faint nebulosity and galaxy arms.
When scouting potential locations, consider more than just darkness. You’ll need a relatively flat, stable surface for your equipment and a clear view of the sky section you plan to photograph. Southern exposures are particularly valuable for Northern Hemisphere photographers, as many popular deep space targets pass through the southern sky. Scout locations during daylight first, checking for obstacles like power lines, trees, or terrain that might block your view as objects move across the sky throughout the night.
Weather planning separates successful imaging sessions from wasted trips. Use tools like Clear Outside or Astrospheric, which provide astronomy-specific forecasts including cloud cover, transparency, and seeing conditions. Transparency refers to the clarity of the atmosphere, while seeing indicates how steady the air is. For deep space work, transparency matters more than seeing, unlike planetary imaging where the reverse is true. Many seasoned astrophotographers have learned that applying nature photography techniques for weather prediction helps anticipate optimal conditions.
Seasonal planning determines what targets you can capture. The Milky Way core and associated nebulae dominate summer skies, while winter brings incredible galaxies and the Orion Nebula. Create a target list based on what’s visible during your local dark sky season. Moon phases are equally critical. Plan your deep space sessions during the new moon or when the moon sets early, as even a crescent moon can significantly brighten the sky.
Remember that pristine environments often mean remote locations without facilities. Pack layers for temperature drops that can be dramatic after sunset, even in summer. Bring red headlamps to preserve your night vision, plenty of battery power, and provisions for several hours in the field. Your dedication to finding these unspoiled natural environments directly translates into the quality and depth of your final images.
The Technical Process: From Setup to First Light
Polar Alignment and Tracking Accuracy
Imagine spending hours capturing a distant galaxy, only to find your stars have turned into short trails instead of perfect points. This frustrating scenario happens when your mount isn’t properly polar aligned with Earth’s rotational axis. For multi-hour deep space exposures, even a tiny misalignment will cause your target to drift, ruining the shot.
Traditional polar alignment uses a polar scope—a small telescope built into your mount. You’ll align Polaris (or Sigma Octantis in the Southern Hemisphere) with specific markings that account for its offset from true celestial north. This method works reliably and requires no technology beyond the scope itself, though it demands patience and clear visibility of the pole star.
Modern methods offer impressive accuracy through software like SharpCap or PHD2. These programs analyze star drift over short periods, providing precise correction values. Plate-solving applications can achieve alignment within arcminutes by comparing your camera’s view against star databases. While these tools require a laptop and learning curve, they excel in situations where the polar scope view is obstructed or you’re imaging near the celestial equator.
Real-world advice: Start with a rough polar alignment using a compass, then refine with your chosen method. For exposures under two minutes, traditional alignment suffices. Beyond that, digital methods become invaluable for achieving the sub-arcminute accuracy needed for pinpoint stars across your entire imaging session.
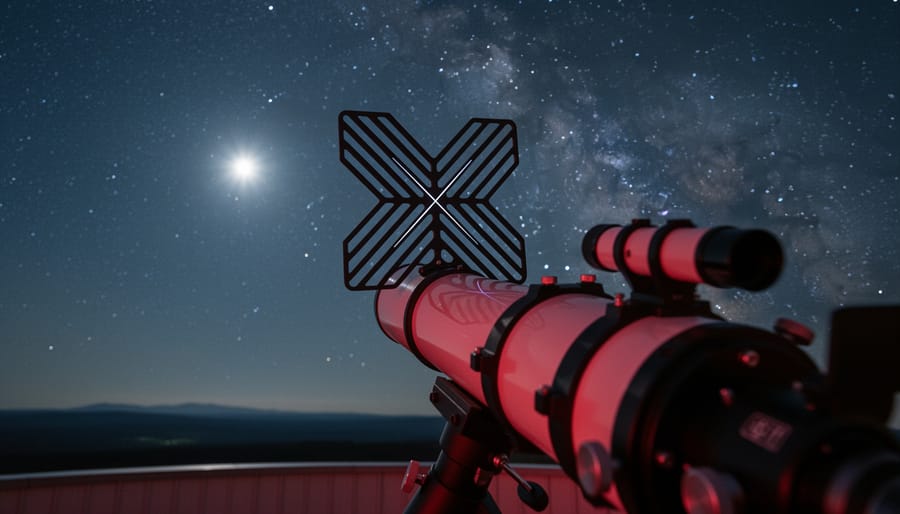
Focusing in the Dark
Achieving pin-sharp focus on a dim celestial object millions of light-years away is arguably one of the most frustrating challenges in deep space astrophotography. Your camera’s autofocus simply won’t work on these faint targets, and judging focus through a viewfinder in darkness is nearly impossible.
This is where a Bahtinov mask becomes your best friend. This inexpensive focusing aid fits over your telescope or lens and creates distinctive diffraction spikes around stars. When perfectly focused, these spikes form a symmetrical X-pattern with a central spike running precisely through the middle. Any focus error becomes immediately visible as the central spike shifts left or right, giving you objective feedback rather than relying on guesswork.
Many astrophotographers make the mistake of focusing on a bright star, then moving to their target without checking focus again. Temperature changes throughout the night cause your equipment to expand and contract slightly, shifting focus over time. Check and adjust focus every hour or two to maintain sharpness.
Electronic focus aids built into some cameras can also help. Use your camera’s live view at maximum magnification on a moderately bright star. Some imaging software displays real-time focus metrics, showing you numerically when you’ve achieved optimal sharpness. The key is developing a systematic focusing routine you perform consistently before each imaging session.
Exposure Strategy and Integration Time
Unlike daytime photography where a single click might capture your subject perfectly, deep space astrophotography relies on collecting light over extended periods through a technique called stacking. Think of it as building your image layer by layer, like an artist gradually adding depth to a painting.
The process involves capturing many shorter exposures, called sub-exposures or subs, rather than one extremely long shot. Why? Because shorter frames reduce the impact of tracking errors, satellite trails, and airplane interference. Each sub-exposure typically ranges from 30 seconds to 10 minutes, depending on your equipment and sky conditions.
Your total integration time is the sum of all these individual exposures. For example, capturing 100 frames at 3 minutes each gives you 300 minutes, or 5 hours, of total integration. This is where the magic happens—specialized software stacks these frames together, averaging out noise while amplifying the faint signal from your target.
Let’s talk real numbers. A bright target like the Orion Nebula might produce stunning results with just 2-3 hours of total integration time. However, faint galaxies like the Whirlpool Galaxy often need 5-10 hours minimum for good detail. Extremely faint targets can require 20+ hours spread across multiple nights.
Here’s a practical example: photographing the Andromeda Galaxy with a DSLR and telescope, you might shoot 120 frames at 2 minutes each (4 hours total). An experienced imager targeting a dim planetary nebula might accumulate 150 frames at 5 minutes each across several nights, totaling over 12 hours of integration.
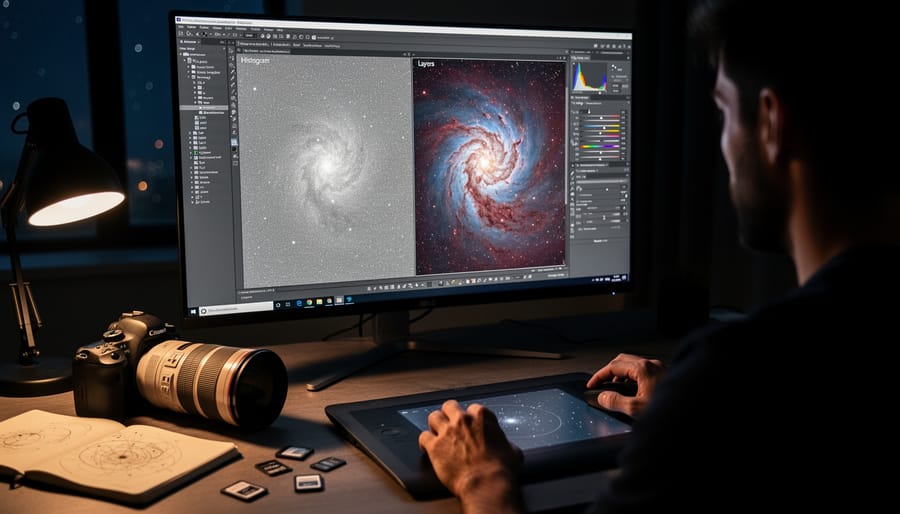
Post-Processing: Where the Magic Actually Happens
Let’s be honest: your raw deep space astrophotography files will look disappointingly underwhelming straight out of the camera. That faint smudge barely visible against the noise? That’s your nebula. This isn’t a failure of your equipment or technique—it’s simply how capturing extremely faint light works. The real transformation happens in post-processing, and understanding this workflow is absolutely essential to deep space astrophotography.
The foundation of quality deep space images starts with calibration frames. These aren’t glamorous, but they’re critical. Dark frames capture your sensor’s thermal noise by taking exposures with the lens cap on, matching your light frame exposure times. Bias frames record your camera’s electronic noise with the fastest shutter speed possible. Flat frames, taken against an evenly illuminated surface, correct for vignetting and dust spots on your sensor or filters. Think of these as creating a profile of your equipment’s imperfections so you can mathematically remove them from your actual images.
Next comes image stacking, where you’ll combine dozens or even hundreds of exposures. Software like DeepSkyStacker (free and excellent for beginners), PixInsight, or Siril analyzes your calibration and light frames, then aligns and combines them. This process dramatically improves your signal-to-noise ratio—essentially, the random noise averages out while the consistent signal from your target strengthens. A single 30-second exposure might look hopelessly noisy, but stack 100 of them and suddenly detail emerges.
The most delicate step is stretching—pulling that faint signal out of the darkness without destroying star color or introducing artifacts. Unlike daytime photography where you simply adjust exposure sliders, deep space images require careful histogram stretching. You’ll gradually pull the mid-tones upward while protecting the highlights (stars) and managing the background. Popular approaches include the histogram transformation tools in PixInsight or the levels and curves adjustments in Photoshop, applied iteratively in small increments.
The key is patience and subtlety. Aggressive stretching reveals noise and creates blocky, unnatural-looking images. Proper technique preserves the delicate color information in stars and nebulosity—those blues, reds, and golds that make these images stunning.
Does this mean deep space astrophotography is “fake”? Not at all. You’re simply revealing light that’s genuinely there but too faint for our eyes or cameras to perceive in a single exposure. The photons captured are real; processing just makes them visible.
Common Challenges and How to Overcome Them
Let me be honest: deep space astrophotography will humble you. Even experienced photographers face recurring challenges that can derail an entire imaging session. Understanding these obstacles and having practical solutions ready makes the difference between frustration and success.
Dew formation is perhaps the most common nemesis. When your optics cool below the dew point, moisture condenses on lenses and corrector plates, ruining hours of imaging. I learned this the hard way during my first Orion Nebula session when I noticed my stars looking progressively softer. The solution is simple but essential: dew heaters. These inexpensive bands wrap around your telescope and camera lens, maintaining temperatures just above ambient. Pair them with a dew shield for maximum protection, and always check your optics periodically throughout the night.
Tracking errors will test your patience repeatedly. Your mount might perform flawlessly for an hour, then suddenly produce elongated stars. Wind is often the culprit, especially with longer focal lengths. I’ve stabilized my tripod by hanging my camera bag from the center column and deploying a windbreak using my car or portable barriers. When possible, keep your telescope tube orientation low to minimize wind resistance.
Satellites and aircraft are unavoidable intrusions. Modern imaging software can reject these trails during stacking, but prevention helps. Check satellite tracking websites before your session to avoid major passes during critical exposures. When planes do interrupt, simply discard that sub-exposure and continue.
Light pollution gradients create uneven backgrounds that appear as orange or green glows across your frames. While gradient removal tools in processing software can address this, the best strategy is positioning your target away from the horizon nearest to urban areas. Shoot targets at least 45 degrees above the horizon when possible.
Equipment failures happen at the worst moments. Battery depletion, loose cables, and mount malfunctions strike when you’re tired and cold. My field kit now includes spare batteries for everything, extra USB cables, and basic tools. Create a pre-session checklist and test your entire rig before departing. Starting your imaging sequence an hour after sunset, rather than scrambling in darkness, prevents most technical disasters.
These challenges never completely disappear, but preparation transforms them from session-enders into minor inconveniences.
Starting Your Deep Space Journey: A Realistic Roadmap
The most successful deep space astrophotographers didn’t start by imaging distant galaxies. They built their skills methodically, mastering each stage before moving forward. Here’s a realistic progression that won’t overwhelm your wallet or patience.
Begin with untracked widefield Milky Way photography using the camera and lens you already own. Spend several months learning how light pollution affects your images, understanding exposure triangles in extreme low-light conditions, and applying basic composition techniques to nightscapes. This foundation costs nothing extra but teaches you critical lessons about focus, noise management, and the importance of dark skies.
Once you’re consistently capturing sharp Milky Way shots, invest in a star tracker. This opens the door to tracked wide-field deep sky objects like the Andromeda Galaxy, Orion Nebula, and Pleiades cluster using your existing camera lens. Expect to spend 6-12 months at this stage, learning stacking software, managing field rotation, and understanding polar alignment. The relatively forgiving nature of wide-field imaging means you’ll achieve rewarding results while developing essential skills.
The jump to telescopic imaging represents the biggest leap in complexity and investment. Plan at least a year mastering tracked wide-field work before considering a telescope setup. When you do advance, start with a modest refractor or reflector rather than immediately purchasing high-end equipment. The learning curve for guiding, precise polar alignment, collimation, and advanced processing is steep.
Be honest about time investment. A single deep space image might require 3-5 hours of imaging time spread across multiple nights, plus several hours of processing. Many beginners underestimate this commitment and become discouraged. Set realistic goals: capturing one well-processed deep sky object monthly represents excellent progress. Remember, every expert astrophotographer struggled through the same challenges you’ll face. Patience and persistence matter far more than expensive equipment.
Deep space astrophotography isn’t just a hobby—it’s a journey that connects you to the universe in ways few other pursuits can match. Yes, the learning curve is steep, and your first attempts at capturing that faint nebula might look nothing like the stunning images that inspired you. But that’s precisely what makes this field so rewarding. Each night under dark skies teaches you something new, whether it’s mastering polar alignment, understanding how different filters affect your data, or simply learning to read the weather patterns that dictate your imaging sessions.
The challenges you’ll face—equipment malfunctions at 2 AM, tracking errors that ruin an entire night’s work, processing sessions that seem to go nowhere—are all part of the process. Every astrophotographer, from beginners to those publishing in astronomy magazines, has been exactly where you are now. The difference is they kept going, and so should you.
There’s something profoundly humbling about spending hours collecting photons that began their journey millions of years ago, long before humans walked the Earth. When you finally process that image and see details emerge from what seemed like noise, you’re not just creating a photograph—you’re capturing ancient light, telling a story written in the stars.
So embrace the clear nights, the learning process, and the inevitable setbacks. Keep your eyes on the skies, your batteries charged, and your curiosity alive. The cosmos is waiting for you to capture its beauty.