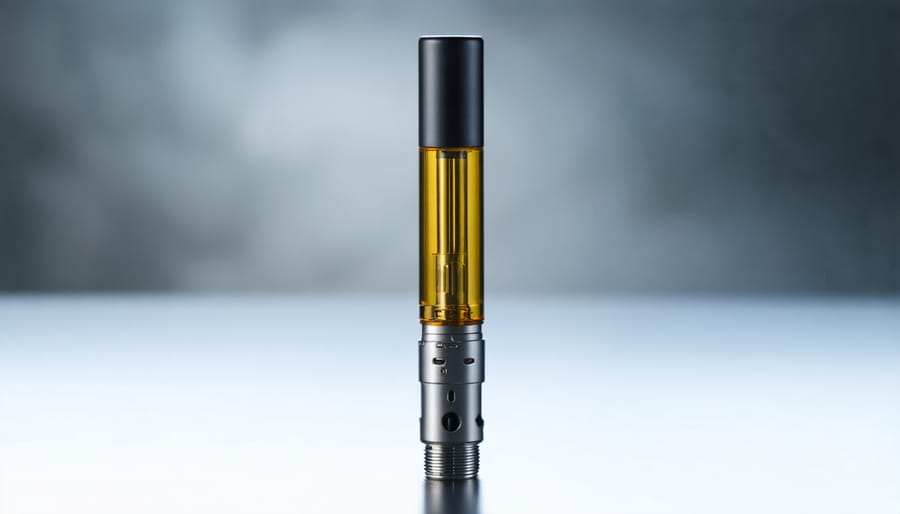
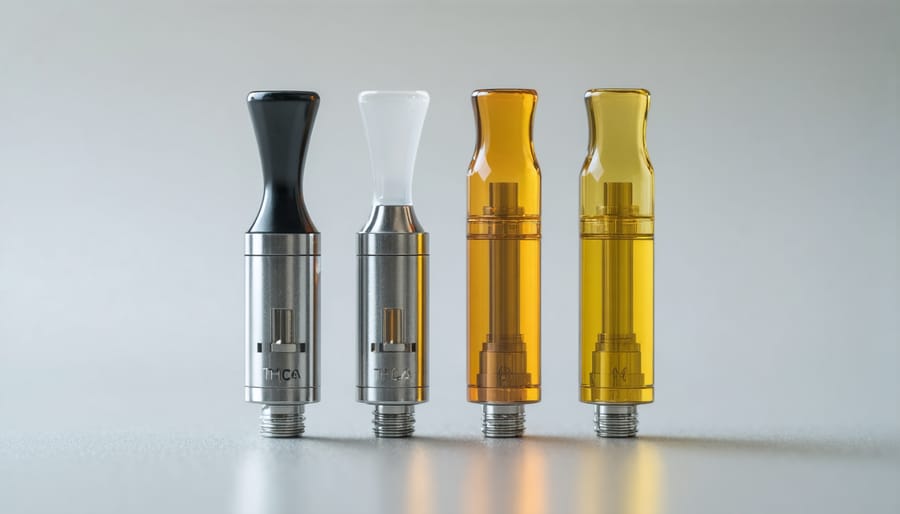
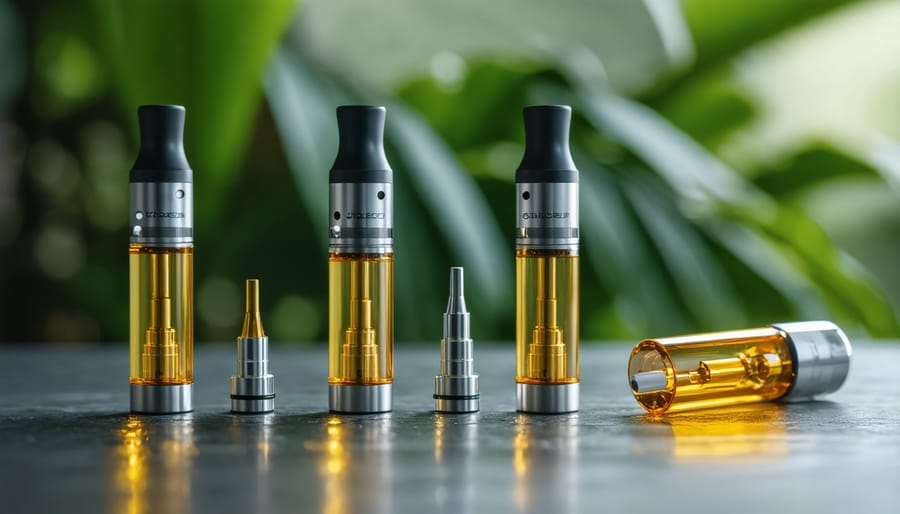
Photographing THCP disposables for sale demands specialized techniques that go far beyond standard product photography—these sleek vape cartridges present a perfect storm of challenges with their reflective metallic components, transparent oil chambers, and compact dimensions that can make or break your commercial shots.
Master diffused lighting setups using softboxes or light tents to eliminate harsh reflections on glass and metal surfaces while still maintaining the luminous quality of the THCa oil inside. Position your key light at a 45-degree angle and use white bounce cards to fill shadows without creating competing highlights that muddy the cartridge’s premium appearance.
Shoot with a macro lens (100mm or longer) to capture intricate details like threading, mouthpiece design, and oil clarity without distortion, maintaining at least 12 inches between lens and product. Set your aperture between f/8 and f/11 to ensure both the front and back elements remain sharp while creating subtle depth that separates the cartridge from its background.
Control your background ruthlessly—use seamless white or black paper, graduated acrylic sheets, or complementary cannabis-themed props that enhance rather than distract. The background should showcase the cartridge’s elegance while conveying brand identity through color psychology and compositional balance.
Apply proven vape photography techniques in post-processing by removing dust particles, balancing oil color temperature, and selectively dodging glass highlights to create dimension. These refinements transform competent product shots into compelling e-commerce imagery that drives conversions and establishes brand credibility in an increasingly competitive market.
Understanding Your Subject: What Makes THCa Cartridges Photographically Unique
The Reflective Challenge
Glass and metal components present one of the trickiest aspects of vape cartridge photography—they act like mirrors, reflecting everything in your shooting environment. That overhead softbox you carefully positioned? It’ll appear as a bright rectangle on the cartridge’s surface. Your camera? It might make an unwanted cameo in the metal threading.
The key is anticipating these reflections before you start shooting. Walk around your setup and view it from your camera’s perspective. Look for what’s bouncing back at you—ceiling lights, windows, even your own clothing can create distracting highlights. Many photographers learn this lesson the hard way after spending an hour shooting only to discover their reflection visible in every frame.
Consider using a polarizing filter to minimize some surface glare, though it won’t eliminate all reflections. Strategic positioning helps too—angle your lights at 45 degrees rather than straight on to reduce direct bounce-back. Some shooters even wear black clothing to minimize unwanted reflections from their body. The transparent nature of THCa oil inside the cartridge adds another layer of complexity, as reflections can occur both on the outer glass and within the liquid itself. Taking test shots early helps identify problem areas while you still have time to adjust your setup.
Showcasing the Product Content
The liquid inside your THCa cartridge is often its most visually compelling feature—that golden-amber oil tells a quality story before the customer even makes a purchase. Capturing its color and clarity requires some strategic lighting decisions and camera positioning.
Backlighting is your best friend here. Position a diffused light source behind the cartridge to illuminate the oil from within, revealing its true color and transparency. A simple LED panel with white diffusion material works beautifully, or even a smartphone flashlight in a pinch for testing your setup. This technique transforms the viscous liquid into a glowing centerpiece that immediately communicates purity and potency.
For maximum detail, apply macro photography secrets to capture the subtle variations in oil density and any bubbles or textures that add authenticity. Shoot at your lens’s sweet spot—typically around f/8 to f/11—to maintain sharpness across the oil column while keeping the cartridge hardware nicely defined.
Consider bracketing your exposures when photographing the oil. The translucent nature can trick your camera’s metering system, so take shots at different exposure values. You’ll often find the slightly underexposed version preserves the richness of the amber hues better than what your camera initially suggests.
Essential Gear for THCa Cartridge Photography
Camera and Lens Recommendations
You don’t need a flagship camera body to capture stunning THCa vape cartridge images—what matters most is sensor quality and manual control. Full-frame cameras like the Sony A7 series or Canon EOS R models offer excellent dynamic range for handling reflective surfaces, but crop-sensor bodies such as the Fujifilm X-T4 or Sony A6600 work beautifully too, especially since the smaller sensor actually increases your effective magnification when shooting tiny products.
For lenses, a dedicated macro is essential. The Canon RF 100mm f/2.8L Macro IS USM delivers exceptional sharpness and a 1.4x magnification mode that’s perfect for capturing intricate details like threading or oil viscosity. On a budget, the Tamron 90mm f/2.8 Macro (available in multiple mounts) punches well above its price point and has been my go-to for countless product shoots.
If you’re shooting with a crop sensor, consider the Sigma 70mm f/2.8 Macro—it provides the perfect working distance to position lights without crowding your setup. The working distance between lens and cartridge is crucial; shorter focal lengths like 50mm macros require you to get so close that lighting becomes nearly impossible to manage effectively.
For smartphone shooters exploring this niche, add-on macro lenses from Moment paired with an iPhone 14 Pro or Samsung S23 Ultra can yield surprisingly professional results, though you’ll sacrifice some control over depth of field and lighting precision.
Must-Have Accessories
While a quality camera and lens form the foundation of your setup, several accessories will significantly elevate your THCa vape cartridge photography and make your workflow smoother.
**A sturdy tripod is non-negotiable** for this type of work. Even the steadiest hands can’t match the sharpness achieved with a tripod, especially crucial when shooting at narrow apertures for maximum depth of field. Look for one with a center column that can be inverted or positioned horizontally—this allows you to shoot directly downward for flat lay compositions, a popular style for cannabis product photography.
**Remote triggers or cable releases** eliminate the last source of camera shake during exposure. For just $15-30, you’ll get noticeably sharper images, particularly important when capturing fine details like threading, branding elements, or the translucent quality of the oil inside the cartridge. Many modern cameras also offer smartphone apps for wireless triggering, giving you the added benefit of viewing your composition from different angles.
**Polarizing filters deserve special attention** when photographing vape cartridges. These glass and metal objects create problematic reflections that can obscure important details. A circular polarizing filter helps you control these reflections by rotating it while viewing through your camera. You’ll see reflections disappear and reappear as you turn the filter, allowing you to find the sweet spot that reveals product details without unwanted glare.
Don’t overlook **a collapsible reflector set**—typically including white, silver, gold, and black surfaces. These inexpensive tools (usually $20-40 for a 5-in-1 kit) give you precise control over fill light and shadow depth, essential for creating professional-looking images without investing in multiple light sources.
Mastering Light: The Make-or-Break Element
Softbox vs. Natural Light Approaches
Choosing between softbox and natural light really comes down to consistency versus flexibility. Softbox setups give you complete control—the light stays exactly where you want it, regardless of time or weather. This matters when you’re shooting multiple THCa cartridge products that need to match perfectly for a cohesive catalog. You’ll get predictable reflections, consistent color temperature, and the ability to shoot at midnight if deadlines demand it. Many photographers start with affordable lighting solutions before investing in premium gear.
Natural light, however, creates beautifully soft gradients that are harder to replicate artificially. A cartridge photographed near a north-facing window on an overcast day can have an organic quality that resonates with brands emphasizing natural wellness. The catch? You’re working within nature’s schedule, and you’ll need to adjust your setup as conditions change throughout the day.
For commercial work requiring batch consistency, softboxes win. For lifestyle or editorial shots where mood trumps uniformity, natural light shines. Many photographers use hybrid approaches—softboxes as the main light with natural light providing subtle fill.
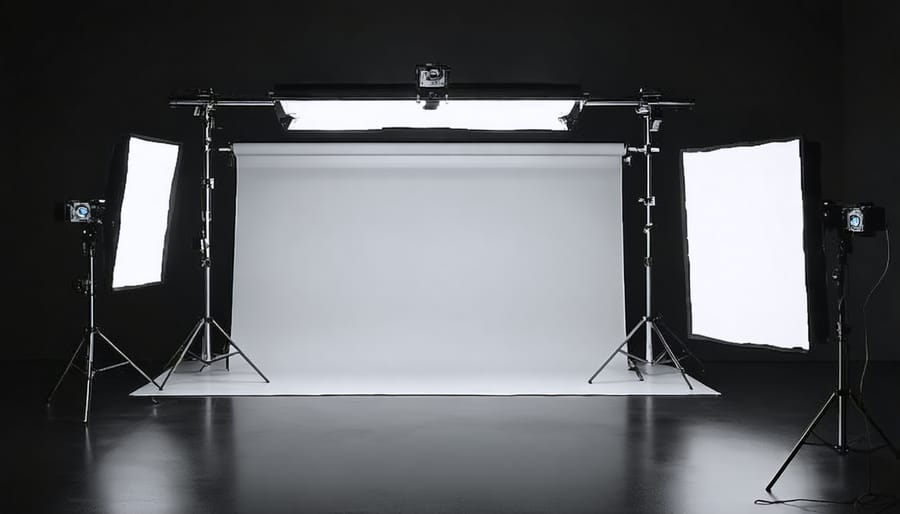
The Three-Light Setup That Works Every Time
Let me walk you through a three-light setup that consistently delivers professional results with THCa vape cartridges. This configuration gives you complete control over reflections, highlights, and depth—essential when photographing these small, reflective products.
**Key Light Placement**
Position your main light source at a 45-degree angle to the cartridge, slightly elevated. I typically place mine about 18-24 inches away from the subject. Use a softbox or diffusion panel here—this is crucial for managing those troublesome reflections on the glass or plastic housing. The key light establishes your primary illumination and creates the foundational highlight on one side of the cartridge. If you’re working with a particularly reflective cartridge, consider using a larger softbox (24×24 inches minimum) to create an even, wraparound light quality.
**Fill Light Setup**
Your fill light goes opposite the key light at approximately 30-45 degrees. Keep this light’s power at roughly 50-70% of your key light’s intensity—you want to soften shadows without eliminating them entirely. This maintains the three-dimensional quality that makes your cartridge look tangible rather than flat. A white reflector can sometimes substitute for a powered fill light if you’re working with limited equipment.
**Backlight for Separation**
The backlight is your secret weapon for making cartridges pop off the background. Position it behind and slightly above your subject, aimed toward the back edges. This creates that professional rim light effect that separates the cartridge from the backdrop and adds visual interest. Keep the power relatively low—just enough to create definition without overpowering your primary lighting.
Diffusion Techniques for Glass and Metal
Softening light is essential when photographing reflective surfaces like THCa vape cartridges. The goal is to create broad, even illumination that wraps around the product without creating distracting hot spots.
A simple diffusion setup involves placing white translucent material—such as frosted shower curtains, tracing paper, or professional diffusion panels—between your light source and the cartridge. Position the diffuser close to the product for softer results; the closer it is, the larger and softer your effective light source becomes.
For metal components, try using a large white foam board or bedsheet as a reflective surface. Place your light source behind or beside this material so the cartridge reflects the diffused surface rather than the bare bulb. This technique creates smooth gradients instead of harsh specular highlights.
Glass elements benefit from “gradient lighting,” where you position diffused lights at angles that create gentle transitions from light to dark across the transparent material. This defines the glass edges while maintaining clarity. Experiment with light positions until you achieve that sweet spot where the cartridge’s shape is clearly defined without overwhelming reflections obscuring the product details or internal components.
Composition Strategies That Sell
The Hero Shot: Isolated Product Photography
The hero shot is your cartridge’s first impression—a clean, distraction-free image that showcases the product against a pure white background. This classic e-commerce approach might seem straightforward, but THCa cartridges present unique challenges due to their reflective metal components and transparent oil chambers.
Start by positioning your cartridge vertically on a white sweep or plexiglass surface. Use a softbox or diffused light source positioned at 45 degrees to minimize harsh reflections on the metal threading and mouthpiece. A second fill light opposite your main source helps eliminate shadows while maintaining dimension. If you’re seeing unwanted reflections, try using a white bounce card or diffusion panel to wrap light around the product gently.
Pay special attention to the oil inside—you want it visible and rich in color without overexposing the surrounding glass. Slightly underexposing your initial shot often preserves these details better, which you can adjust during post-processing.
Consider shooting tethered to your computer so you can immediately check for dust, fingerprints, or reflection issues at 100% magnification. A streamlined product photography workflow becomes essential when shooting multiple SKUs, allowing you to maintain consistency across your entire catalog while maximizing efficiency.
Lifestyle and Context Shots
While technical product shots showcase specifications, lifestyle photography tells a story that connects with your target audience. These contextual images transform a simple vape cartridge into an aspirational product that fits seamlessly into your customer’s desired lifestyle.
Start by identifying your brand’s positioning. Are you targeting wellness-focused consumers seeking relaxation after yoga? Consider shooting your cartridge alongside a rolled mat, meditation cushion, and natural lighting streaming through sheer curtains. For a more social, sophisticated audience, style your product with premium glassware, coffee table books, or minimalist home décor elements.
Props should enhance rather than overshadow your product. Keep backgrounds slightly out of focus using a wide aperture (f/2.8 to f/4) to maintain visual hierarchy while still establishing context. Natural materials like wood, stone, and linen create authentic backdrops that photograph beautifully without competing for attention.
Environment matters tremendously for believability. Shoot in actual spaces where your product might be used—a modern apartment, outdoor patio, or cozy reading nook. Golden hour lighting adds warmth and relatability that harsh studio lighting can’t replicate.
Remember that regulations vary by region regarding cannabis advertising. Keep lifestyle shots tasteful and avoid depicting actual consumption or suggesting medical benefits. Focus instead on the premium nature of your product and the lifestyle it complements. A hand reaching for the cartridge on a nightstand tells a story without crossing compliance boundaries while creating emotional connection with potential customers.

Camera Settings and Technical Execution
Aperture and Depth of Field Considerations
Finding the sweet spot for aperture with vape cartridges requires balancing two competing needs: maintaining sharpness throughout the entire product while creating visual separation from your background. For most cartridge photography, you’ll want to work in the f/8 to f/11 range. This provides enough depth of field to keep the cartridge crisp from front to back—critical since these products are typically two to three inches tall—while still allowing the background to soften pleasantly.
If you’re shooting at an angle or want more dramatic background blur, f/5.6 can work beautifully, but be mindful of your focus point. Place it approximately one-third into the cartridge from the front edge to maximize sharpness across the product. Going wider than f/4 risks losing critical details like threading or branding on the far side of the cartridge.
Conversely, stopping down past f/16 introduces diffraction, which softens your image overall—counterproductive when you’re trying to showcase product quality. In real-world shooting, f/8 consistently delivers commercial-grade results: everything stays sharp, backgrounds remain distinguishable but not distracting, and you maintain enough light-gathering ability for reasonable ISO settings and shutter speeds.
Focus Stacking for Maximum Sharpness
When photographing THCa vape cartridges, achieving complete sharpness from the mouthpiece to the base can be challenging due to the shallow depth of field required for macro work. Focus stacking solves this problem by combining multiple images taken at different focus points into one perfectly sharp composite.
Start by mounting your camera on a sturdy tripod—any movement between shots will ruin the stack. Set your aperture between f/8 and f/11; while you might think a wider aperture like f/2.8 would create more blur to stack through, moderate apertures actually produce cleaner results with less diffraction.
Take your first shot focused on the nearest point of the cartridge (typically the mouthpiece). Then, manually adjust your focus ring slightly toward the middle of the product and capture another frame. Continue this process, taking 8-15 shots depending on your cartridge’s size and your working distance, until you’ve focused through to the furthest point. The key is overlapping each focal plane by about 30-50%—think of it like shingling a roof where each piece overlaps the next.
In post-processing, use software like Adobe Photoshop or Helicon Focus to automatically align and blend your images. Load your image sequence as layers, then select all layers and choose “Edit > Auto-Align Layers” followed by “Edit > Auto-Blend Layers” with the “Stack Images” option selected. The software analyzes each frame and keeps only the sharpest areas, creating one comprehensive image where every detail remains tack-sharp—from threading details to the oil inside.
Post-Processing Workflow for Product Photos
Essential Adjustments in Lightroom
Once you’ve imported your THCa cartridge images into Lightroom, start with the **White Balance tool** to ensure accurate color reproduction—this is critical since consumers need to see the true color of the oil and hardware. If you shot with a gray card, use the eyedropper to click on it for instant correction. Otherwise, adjust the Temperature and Tint sliders until the cartridge appears neutral and the oil shows its genuine amber or golden hue.
Next, tackle **Exposure and Contrast**. For reflective glass and metal components, you’ll often need to pull back the Highlights slider significantly (sometimes to -50 or more) to recover detail in bright reflections. Simultaneously, lift the Shadows slightly to reveal texture in darker areas without introducing noise. The Whites and Blacks sliders help you establish clean endpoints—hold Alt (or Option) while dragging to see which areas are clipping.
The **Lens Corrections panel** is essential for removing any distortion or vignetting, especially if you shot close-up with a macro lens. Enable Profile Corrections automatically, then check “Remove Chromatic Aberration” to eliminate color fringing around the cartridge edges.
Finally, use the **Spot Removal tool** for quick cleanup of dust particles or fingerprints you missed during shooting. This initial pass sets the foundation for more detailed editing in Photoshop if needed.
Photoshop Refinements
Once you’ve nailed your in-camera technique, Photoshop becomes your final quality control station. The goal here isn’t to rescue a bad shot—it’s to refine an already solid image.
Start with reflection management. Use the healing brush or clone stamp tool to remove any unwanted reflections that slipped past your polarizer. Work at 100% zoom and be surgical about it. I’ve found that creating a new layer for these corrections lets you dial back the opacity if things start looking unnaturally flat.
For background replacement, the pen tool is your best friend when dealing with cartridges. The precise edges matter here—soft selection tools rarely cut it with glass and metal. Trace carefully around the cartridge, convert to a selection, and mask rather than delete. This non-destructive approach saves you if you need to adjust the edge later.
Final polish should be subtle. Dodge and burn to enhance the cartridge’s dimensionality, bringing out highlights on threading and adding depth to the oil. A slight curves adjustment can punch up contrast without crushing shadows. The cardinal rule? If someone viewing your image can tell you’ve edited it, you’ve gone too far. Your cartridge should look better than reality while still feeling authentic.
Common Mistakes and How to Avoid Them
Even experienced photographers stumble when they first tackle THCa vape cartridges. The most common mistake? Fighting against reflections instead of controlling them. I’ve seen countless product shots ruined because photographers placed their light sources directly in front of the cartridge, creating harsh hotspots and obscuring the product details entirely. The solution is positioning your lights at 45-degree angles to the cartridge and using diffusion panels to create soft, even illumination that shows off the golden THCa oil without overwhelming glare.
Another frequent error is inconsistent white balance. These cartridges often contain amber or golden liquid, and many photographers accidentally shift the color too warm or too cool during shooting or editing. This misrepresents the actual product and can mislead customers about oil quality and purity. Always shoot with a gray card in your first frame, then use it to set a custom white balance in post-processing. This ensures the THCa oil appears accurate across your entire product line.
Many photographers also underestimate the importance of scale. Vape cartridges are small, and without proper context, viewers can’t gauge their actual size. Including a subtle size reference—like placing the cartridge near common objects in lifestyle shots—helps customers understand what they’re purchasing.
Finally, there’s the depth of field miscalculation. Shooting too wide open (like f/1.8) might create beautiful bokeh, but it leaves critical parts of the cartridge out of focus. For product photography, aim for f/8 to f/11 to ensure the entire cartridge remains sharp from threading to mouthpiece. If you need that shallow depth of field aesthetic for marketing materials, shoot it separately—but always capture a fully sharp version first for your e-commerce needs.
Mastering THCa vape cartridge photography isn’t about having the most expensive gear—it’s about understanding how light interacts with challenging materials and developing creative solutions to common problems. Throughout this guide, we’ve explored techniques for managing reflections, balancing transparency with detail, and creating compelling compositions that showcase these products effectively. The beauty of product photography lies in its combination of technical precision and artistic vision, and these cartridges offer the perfect opportunity to develop both skills.
Start by implementing just one or two techniques from this article in your next shoot. Perhaps begin with the diffusion methods we discussed to tackle those pesky reflections, or experiment with different background materials to see what complements your specific cartridges best. Take notes on what works and what doesn’t—your personal experience will become your most valuable resource.
Remember that even professional photographers encounter obstacles with reflective, transparent products. The difference is their willingness to problem-solve creatively, trying multiple lighting setups and angles until something clicks. Give yourself permission to experiment, review your results critically, and refine your approach. With practice and patience, you’ll develop an intuitive sense for photographing these challenging products that sets your work apart.