By
By 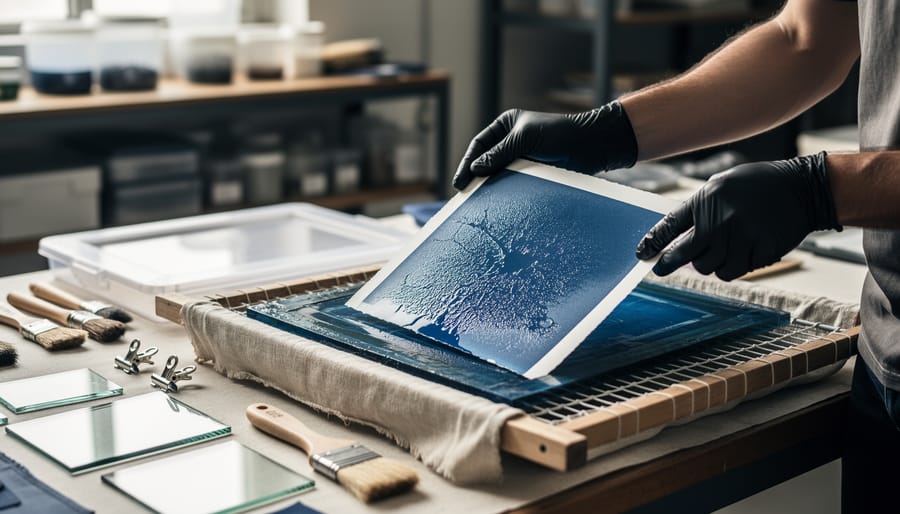
Photographic printmaking fuses camera-based imagery with hands-on printmaking techniques, transforming digital or analog photographs into tactile, one-of-a-kind artworks through processes like cyanotype, gum bichromate, platinum/palladium printing, and screen printing. Unlike sending a file to a lab for standard prints, this practice requires you to coat paper or fabric with light-sensitive emulsions, expose them under UV light or in a darkroom, and develop each piece manually. The result is art that carries the photographer’s direct touch, with textures, tonal variations, and unpredictable quirks that no inkjet can replicate.
This isn’t new territory. Many of the techniques photographers use today are rooted in historic photo processes from the 19th century, methods that predate modern film and digital sensors. What has changed is accessibility. You no longer need a fully equipped darkroom or chemistry degree to start experimenting. Kits for cyanotype and Van Dyke brown are available online, many alternative processes work under sunlight, and community darkrooms or printmaking studios offer workspace and guidance for more advanced techniques.
Whether you’re looking to break out of the digital workflow, add archival heirloom quality to your portfolio, or simply enjoy the meditative, experimental nature of working with your hands, photographic printmaking offers a creative path that blends technical skill with artistic expression. This guide walks you through what the practice involves, what you need to get started, and where to find the resources that will help you develop your first print.
What Photographic Printmaking Is (and Isn’t)
Photographic printmaking sits at the intersection of two distinct artistic traditions. It takes your photographic image, whether captured on film or created digitally, and translates it onto paper, fabric, metal, or other surfaces using hands-on printmaking techniques that have existed for centuries. Unlike hitting “print” on a desktop inkjet or sending files to a professional lab, photographic printmaking requires you to physically coat substrates, expose them to light, apply pressure through a press, or hand-pull ink across screens.
The hybrid nature means you’re working with both photographic sensibilities and printmaking craft. You might start with a digital photograph, convert it to a transparency or film negative, then use that to expose a copper plate for photogravure or coat watercolor paper with light-sensitive cyanotype chemistry. Each technique, screenprinting with photo emulsion, lithography, etching, alternative processes, brings its own material signature. The ink sits differently on the surface. The paper texture becomes part of the image. Imperfections aren’t errors but evidence of the handmade process.
What photographic printmaking isn’t: mass production. It’s not about generating hundreds of identical prints quickly or achieving flawless digital consistency. A photogravure print made from your landscape photograph will have subtle plate tone variations, embossed edges, rich blacks that standard photo prints can’t match. Cyanotype prints of your portrait work will shift in hue depending on water quality, paper type, and exposure time. That variability is the point.
Contemporary photographers like Meghann Riepenhoff use cyanotype and camera-less techniques to create large-scale works where ocean waves and ice directly expose the paper, merging photography with performance and chance. Others, like Chuck Close in his earlier printmaking phases, translated photographic portraits into massive screenprints and etchings that emphasize pattern and mark-making over photographic illusion. These artists aren’t simply reproducing photographs, they’re reimagining them through physical processes that add layers of meaning, texture, and artistic interpretation.
This isn’t a replacement for your digital workflow. It’s an expansion of what you can do with photographic images once you’re willing to get your hands dirty, literally.
Common Photographic Printmaking Techniques
Cyanotype and Alternative Processes
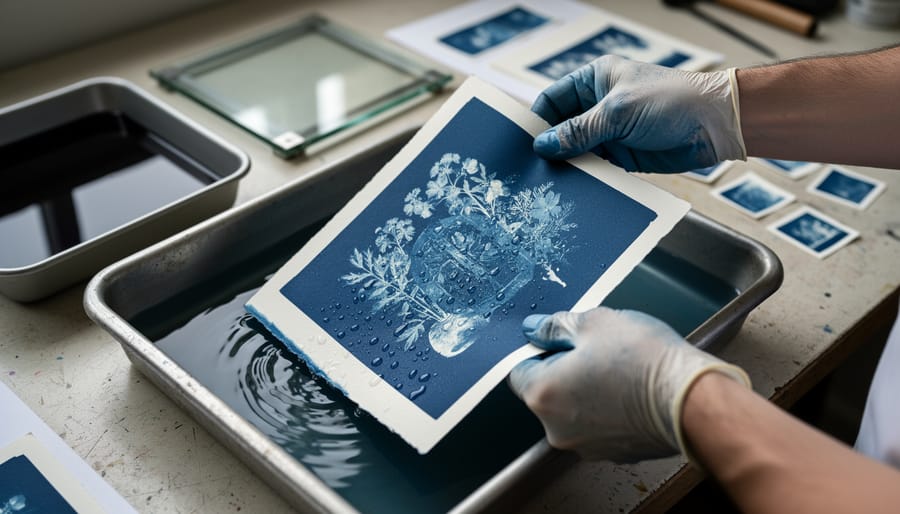
Cyanotype stands out as one of the most approachable entry points into photographic printmaking. You coat paper or fabric with a light-sensitive iron solution, place your negative or object directly on top, and expose it to UV light, sunlight works perfectly. Where the light hits, the coating turns that signature Prussian blue; where your negative blocks light, the paper stays white. After a simple water rinse, you have a permanent print with rich tonal gradations and a tactile, hand-coated quality no inkjet can replicate.
Beyond cyanotype, alternative processes like Van Dyke brown (which yields warm sepia tones) and salt printing follow similar contact-printing workflows but produce entirely different color palettes and surface textures. You’re not limited to blue.
Photographer Meghann Riepenhoff has built an acclaimed fine-art practice around cyanotype, creating large-scale seascapes by exposing coated paper directly in ocean waves. The water, sand, and light collaborate to form unrepeatable images that merge photography with performance and chance. Her work demonstrates how these historic techniques remain vital tools for contemporary image-making, offering photographers a hands-on alternative to the screen-based workflow. You control the chemistry, the exposure, and the final object, something many photographers find creatively liberating in 2026.
Screen Printing (Silkscreen) with Photographic Emulsion
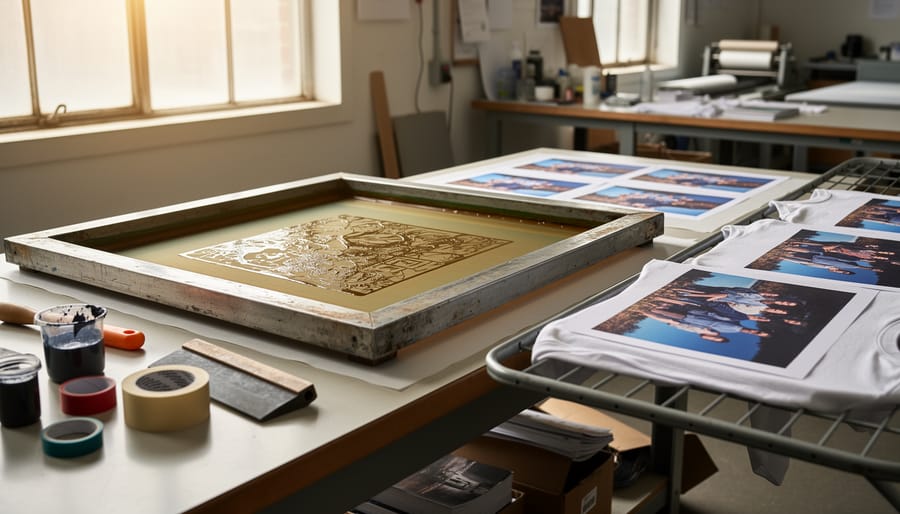
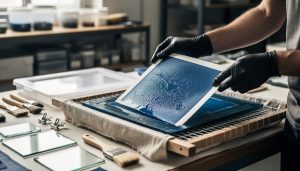
Screen printing with photographic emulsion lets you coat a fine mesh screen with light-sensitive liquid, expose it under a film positive of your photograph, and wash away the unexposed emulsion to create a stencil. You then push ink through the open areas onto paper, fabric, wood panels, or nearly any flat surface. Unlike direct photo prints, photo-emulsion screen printing gives you control over ink opacity, layering multiple colors, and combining photographic imagery with hand-drawn or typographic elements in the same print.
Photographers gravitate toward this technique for edition work because once you’ve burned a screen, you can pull dozens or hundreds of nearly identical prints without relying on a printer or service bureau. It’s also forgiving for mixed-media projects: you can print a photographic portrait on top of a painted background, layer translucent inks to build depth, or experiment with metallic and fluorescent colors that digital processes can’t replicate. The tactile quality of ink sitting on the surface, rather than absorbed into paper, adds dimension and presence to photographic work, making it feel more like a handmade object than a reproduction.
Photogravure and Intaglio Methods
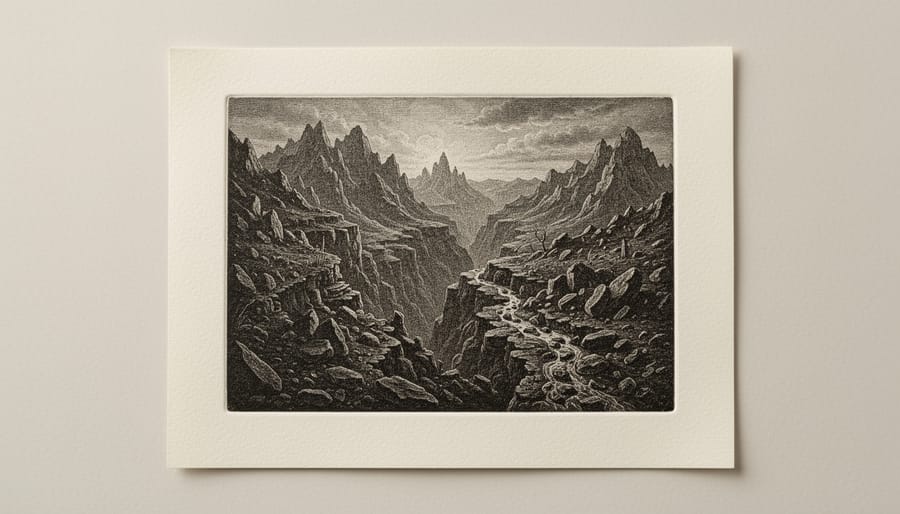
Photogravure transforms your photographs into intaglio prints with tonal depth that rivals the finest museum prints. The process etches your image into a copper plate using light-sensitive gelatin, creating microscopic wells of varying depths that hold ink proportionally to the tones in your original photograph. When you press dampened paper against the inked plate under immense pressure, you get continuous-tone prints with a velvety richness no other medium matches.
The technical complexity is significant, you’re working with acid baths, aquatint grounds, and precise timing, but that’s exactly why fine art photographers gravitate toward it. Each print requires hand-inking and individual printing, making every impression subtly unique despite coming from the same plate. The process rewards patience and craft with prints that have tangible dimensionality; you can feel the slight embossing where paper molded into the plate’s recessed areas.
Photogravure particularly excels at rendering delicate gradations in black-and-white work. Landscape and portrait photographers prize it for how it holds shadow detail while maintaining luminous highlights, creating prints with an archival permanence measured in centuries rather than decades.
Lithography and Photo-Litho
Lithography translates photographic images onto flat limestone slabs or metal plates through a chemical process based on the principle that oil and water repel each other. A photographic positive is exposed onto a light-sensitive coating on the stone or plate, hardening the image areas to accept greasy ink while the non-image areas remain receptive to water. During printing, the plate is dampened, then inked, ink adheres only where the photographic image has been transferred, and paper is pressed against the surface to capture the image.
Photo-litho produces prints with exceptionally smooth tonal gradations and a subtle surface sheen distinct from the texture of etched plates or the matte finish of cyanotypes. Fine-art photographers value lithography for its ability to render delicate midtones and continuous gradations, making it ideal for portraits and landscapes where nuanced tonality matters more than stark contrast. The process also allows for multiple color passes, enabling photographers to layer transparent inks and explore color theory in their print work. Lithography demands precision and access to specialized equipment, heavy stones, lithographic presses, specific inks and chemicals, which typically means working in a dedicated printmaking studio rather than at home.
Who Can (and Should) Explore Photographic Printmaking
Photographic printmaking welcomes anyone willing to get their hands dirty, literally and creatively. You don’t need a fine art degree or decades of darkroom experience to start. If you have photographic images (digital files work perfectly) and curiosity about how ink, emulsion, or chemistry can transform those images into something tangible and unique, you’re already qualified. The barrier to entry is surprisingly low, especially with beginner-friendly techniques like cyanotype that require minimal equipment and no darkroom at all.
This practice particularly resonates with:
- Fine art photographers seeking gallery-quality work with distinctive material presence
- Experimental photographers interested in mixed media and layered storytelling
- Educators teaching alternative processes and photographic history
- Hobbyists wanting tactile, hands-on engagement with their images beyond screen viewing
Your existing photography skills transfer directly. If you already understand composition techniques and how to work with light and shadow in your camera work, you’ll apply those same principles when selecting images for printmaking. The difference is you’re adding another creative layer, the physical making of the print itself.
Equipment access matters more than skill level. Some techniques require studio facilities (photogravure presses aren’t cheap), but others need only a sunny window and basic chemistry you can order online. Community darkrooms, printmaking studios, and university extension programs often offer open-access workshops where you can test techniques before investing in your own setup. Start by auditing what’s available in your area and what techniques genuinely excite you. Your readiness isn’t about technical mastery, it’s about your willingness to embrace trial, error, and the unpredictable beauty that comes from working with physical materials instead of pixels alone.
How to Get Started: The Complete Process
Step 1: Choose Your First Technique
Your first technique should match your budget, workspace, and the aesthetic you’re after. If you want immediate results with minimal investment, cyanotype is hard to beat, you need only a few chemicals, some watercolor paper, and sunlight. The distinctive blue prints appear in minutes, making it satisfying for beginners. Expect to spend around $30-50 to start.
Screen printing with photo emulsion offers more versatility if you want color and the ability to print on fabric or wood. You’ll need a screen, squeegee, emulsion, and inks, initial costs run $100-150, but you can reuse screens indefinitely. It requires a bit more space and a UV light source or bright sun for exposing screens.
Consider what excites you visually. Cyanotype’s ethereal blues suit landscapes and botanicals beautifully. Screen printing gives you bold, graphic possibilities with layered colors. Most photographers try cyanotype first because it’s forgiving, then expand to other techniques once they understand coating, exposing, and developing fundamentals. Don’t overthink it, both paths teach you the core principles you’ll use in any photographic printmaking process.
Step 2: Prepare Your Photographic Image
Transforming your digital photograph into a printable negative is simpler than you might expect. Most photographic printmaking techniques require a negative the exact size of your desired final print, this is called a contact negative because it sits directly on your coated substrate during exposure.
Start by editing your image in Lightroom or Photoshop to optimize contrast and tonality for your chosen process. Cyanotypes need high contrast with deep blacks, while photogravure handles subtle gradations better. Invert the image to negative (in Photoshop: Image > Adjustments > Invert), then save it as a high-resolution TIFF.
For printing your negative, most home inkjet printers on transparency film produce decent results for beginners experimenting with cyanotype or simple contact printing. For professional-quality negatives with precise density curves, essential for techniques like platinum printing or photogravure, specialized service bureaus like Pictorico or Bostick & Sullivan create large-format acetate or true film negatives from your digital files. They cost around $15-40 per negative but deliver the consistency needed for repeatable, archival prints.
Step 3: Gather Materials and Set Up Your Workspace
Starting photographic printmaking doesn’t require a fully equipped studio. For cyanotype, your shopping list is surprisingly short: pre-sensitized paper or the chemical kit (ferric ammonium citrate and potassium ferricyanide), watercolor paper if mixing your own, a foam brush for coating, and a contact frame or piece of glass. Your light source can be direct sunlight or a UV exposure unit, a basic tabletop model runs around $200-300, though natural sunlight costs nothing.
Screen printing adds a few items: screens (start with 10×14 inch), photo emulsion, a scoop coater, squeegees, and textile or acrylic inks. You’ll need a washout booth or access to a utility sink with good water pressure.
Your workspace needs good ventilation (essential when working with chemistry), a flat surface protected with plastic sheeting, running water nearby for rinsing, and storage for light-sensitive materials away from windows. A spare bedroom, basement corner, or even a kitchen table works for cyanotype; screen printing benefits from dedicated space where you can leave screens to dry overnight. Temperature control matters, most chemistry performs best between 65-75°F.
Step 4: Make Test Prints and Refine
Photographic printmaking is fundamentally iterative. Your first print rarely matches your vision, and that’s normal. Exposure times vary with light intensity, coating thickness, and paper absorbency. A test strip, exposing the same image at 30-second intervals, reveals how your chosen technique responds before committing to a full sheet.
Start with shorter exposures than recommended online. A cyanotype that looks perfect when wet will darken considerably as it oxidizes during washing. Screen prints need multiple test pulls to dial in squeegee pressure and ink viscosity; too much pressure forces ink through the mesh unevenly, creating blotchy areas.
San Francisco photographer Maya Chen recalls her first photogravure attempts: “I wasted six copper plates before realizing my acid bath was too warm, etching too aggressively and losing highlight detail.” She now tests with small plate scraps first.
Keep notes on every variable, coating dilution ratios, exposure duration, developer temperature. These records transform random results into repeatable processes. Expect to produce several disappointing prints before achieving consistency. That hands-on problem-solving is where real learning happens.
Your Rights and Responsibilities as a Photographic Printmaker
When you start making photographic prints through printmaking techniques, you own the copyright to your final artworks just as you do with any photograph, assuming the original image is yours. That means you control how the work is reproduced, displayed, and sold. But this creative control comes with responsibilities, particularly around proper edition numbering if you plan to sell your prints. Each print in a limited edition should be numbered (such as “3/25” for the third print in an edition of 25) and signed, establishing a clear record for collectors and galleries. Producing additional prints beyond the stated edition size without disclosure undermines trust and the value of your work, so commit to your edition numbers and honor them.
If you’re adapting someone else’s photograph for a printmaking project, say, a historical image or a collaborator’s work, you need explicit permission or must verify the image is in the public domain. Copyright doesn’t disappear just because you’ve changed the medium from silver gelatin to cyanotype. Similarly, maintain archival standards when you can: use acid-free papers, lightfast inks, and proper fixers to ensure your prints last. Buyers and galleries expect photographic printmakers to follow conservation best practices, especially for work positioned as fine art.
Your health and safety responsibilities extend beyond protecting yourself. If you’re working in a shared studio or teaching others, label all chemical containers clearly, store materials securely, and dispose of exhausted solutions according to local regulations, pouring ferric chloride or fixer down the drain can violate environmental laws. Taking these precautions seriously protects you, your collaborators, and your reputation as a responsible maker.
Where to Learn and Get Help
Finding quality instruction and community support is crucial when starting photographic printmaking. Unlike purely digital photography, these hands-on processes benefit enormously from in-person guidance, access to specialized equipment, and the shared knowledge of experienced practitioners.
Community studios and printmaking cooperatives remain the most accessible entry point for most photographers. These member-based facilities offer open studio time, equipment access, and workshops at a fraction of what establishing your own darkroom or printmaking space would cost. Search for printmaking studios, community darkrooms, or artist cooperatives in your area, many now accommodate photographic processes alongside traditional printmaking. Membership typically runs from $50 to $200 monthly, granting you access to presses, exposure units, chemical mixing stations, and ventilation systems you wouldn’t have at home.
University extension programs and art centers frequently offer weekend or evening workshops specifically in cyanotype, photogravure, or screen printing for photographers. These concentrated courses let you test a technique before committing to ongoing practice. Community colleges often include photographic printmaking in their continuing education catalogs, and some maintain open-access studios for enrolled students.
For structured learning paths, several resources can accelerate your progress:
– Local printmaking cooperatives and shared studio spaces with monthly memberships and equipment access
– Online learning platforms offering courses in alternative processes, photogravure, and screen printing fundamentals
– Instructional books and technical manuals covering chemistry, exposure calculations, and troubleshooting
– Artist residencies focused on printmaking or book arts that accept photographers working in hybrid processes
– Professional organizations like the International Association of Hand Papermakers and Paper Artists, which connect practitioners and share technical knowledge
Finding mentors happens organically once you join a studio community. Experienced printmakers are typically generous with troubleshooting advice, and many community studios facilitate skill-sharing through critique sessions or informal demonstrations. Don’t hesitate to ask questions during open studio hours, the printmaking community values this exchange.
Online forums and social media groups dedicated to alternative photographic processes have grown significantly. Instagram tags like #photogravure or #cyanotype reveal active practitioners, and platforms like YouTube host detailed process videos from working artists. These digital communities complement hands-on learning by letting you see how others solve technical challenges and interpret the same processes differently.
Start locally if possible. The tactile feedback and immediate troubleshooting you get from standing beside someone at a press is irreplaceable, especially in your first months of experimentation.
Frequently Asked Questions About Photographic Printmaking
Do I need film camera experience or a darkroom to start photographic printmaking?
No, most photographic printmaking techniques work perfectly with digital images converted to negatives. You can start with processes like cyanotype or screen printing using nothing more than a contact frame and sunlight or a simple UV light source at home.
How much does it cost to start?
You can begin experimenting with cyanotype for under $50, covering chemistry kits, watercolor paper, and a basic contact frame. More involved techniques like photogravure require specialized equipment and studio access, pushing startup costs into the hundreds or thousands depending on whether you rent facilities or build your own setup.
How is photographic printmaking different from just printing my photos on an inkjet printer?
Photographic printmaking is a hands-on process where you physically coat substrates, expose images using UV light or chemical reactions, and develop prints through direct interaction with materials. Each print becomes a unique object with texture, depth, and material presence that digital prints can’t replicate, the process itself becomes part of the artwork’s meaning and can strengthen visual metaphors through tactile and surface qualities.
What’s the learning curve like?
Expect a few weeks to gain basic competency with simpler techniques like cyanotype, where you’ll nail consistent exposures and coating after a dozen test prints. Complex methods like photogravure take months to years of practice to master the chemistry, timing, and pressure variables, but the iterative learning process is part of the appeal for many photographers.
These questions come up constantly when photographers first encounter printmaking processes, and the answers reveal an encouraging truth: the barrier to entry is lower than most people assume. You don’t need a fully equipped darkroom or years of analog experience to create your first photographic print using alternative processes. What you do need is curiosity, patience for trial and error, and a willingness to get your hands dirty, literally. The initial learning phase involves plenty of test strips, exposure adjustments, and troubleshooting, but that experimental cycle is exactly what draws many photographers to these techniques after years of working digitally. Once you’ve produced your first successful print and felt the weight and texture of a handmade image, the time and material investment makes sense in a way that’s hard to articulate beforehand.
Photographic printmaking isn’t some specialized discipline reserved for fine art MFAs or those with fully equipped darkrooms. It’s an accessible extension of your photographic practice that invites you to slow down, work with your hands, and discover what your images can become when they meet paper, chemistry, and light in new ways.
You don’t need to commit to an expensive studio membership or master every technique. Start small. Mix up a batch of cyanotype chemistry in your kitchen. Coat a sheet of watercolor paper. Place one of your favorite negatives on top and leave it in the sun. That first print, with its deep Prussian blue tones and the slight irregularities where the coating pooled, will teach you something no screen ever could about materiality and presence.
The beauty of photographic printmaking is precisely this tactile connection between you, your process, and the final object. Every print carries the marks of your hands, your decisions about exposure and pressure, the particular paper you chose. These aren’t just reproductions of your photographs. They’re unique artworks that exist in the world as physical things people can hold and experience.
Your images are already worth making. Now give them texture, depth, and a life beyond the digital. Start with one technique this month and see where it takes you.
 By
By