Imagine returning to the exact same spot year after year, camera in hand, capturing the identical frame as glaciers shrink, forests regenerate, or coastlines reshape before your lens. This is photo monitoring—a deceptively simple technique that transforms ordinary photography into a powerful scientific tool for documenting environmental change.
The concept is straightforward: photograph a location from a precise position, then return periodically to capture the same scene using identical framing and camera settings. What emerges is a visual timeline that reveals transformations invisible to casual observation. A single photograph captures a moment, but a series of carefully matched images tells a story of change that numbers and graphs cannot convey alone.
Scientists have used repeat photography for over a century to track everything from retreating glaciers in Alaska to desert vegetation recovery after wildfires. The method gained prominence when researchers began comparing modern landscapes with historical photographs from exploratory expeditions, revealing dramatic shifts in ecosystems that would have otherwise gone unnoticed. Today, both professional researchers and dedicated volunteers contribute to monitoring projects worldwide, creating invaluable archives of environmental data.
The beauty of photo monitoring lies in its accessibility. You don’t need specialized equipment beyond a camera and tripod, nor do you need advanced scientific training to participate meaningfully. The technique demands patience, attention to detail, and commitment to returning to your chosen location, but the technical execution is within reach of any photographer willing to master a few key principles.
Whether you’re interested in contributing to climate change documentation, tracking landscape changes in your local area, or simply exploring a photography technique that merges art with science, photo monitoring offers a uniquely purposeful approach to your craft.
What Is Photo Monitoring and Why It Matters
The Science Behind the Shots
Repeat photography isn’t just about capturing pretty before-and-after images. It’s a legitimate scientific tool that provides researchers with quantifiable visual data they can measure, analyze, and share with the world. When you photograph the same location from precisely the same vantage point over months, years, or even decades, you create a visual dataset that reveals changes invisible in single snapshots.
Think about what scientists can track through this method. Glacier retreat becomes starkly evident when comparing images taken from identical positions over time, allowing researchers to measure exactly how many meters of ice have vanished. Deforestation patterns emerge clearly when forest boundaries shift between photographs. Urban sprawl transforms from abstract statistics into concrete visual evidence as cities expand outward. Coastal erosion reveals its relentless progression as shorelines recede frame by frame.
The power of this technique lies in its accessibility. Unlike complex satellite imagery requiring specialized interpretation, repeat photography speaks a universal language. When someone sees two photographs of the same glacier taken fifty years apart, the dramatic ice loss needs no explanation. This visual clarity makes repeat photography invaluable for documenting environmental change and communicating findings to policymakers and the public.
What makes this data truly scientific is its measurability. Researchers overlay historical and contemporary images, using reference points like rocks or buildings to calculate precise distances and areas. Your carefully composed photographs become quantifiable evidence, transforming artistic vision into scientific documentation that helps shape our understanding of environmental transformation.
From Historical Archives to Modern Documentation
The practice of revisiting and rephotographing the same location over time has surprisingly deep roots. In the late 1800s, photographers began documenting landscapes and urban environments, inadvertently creating the foundation for future comparison. Some of the earliest examples come from geological surveys in the American West, where photographers captured mountain ranges and valleys, never imagining their work would become invaluable baseline references.
One of the most celebrated modern projects is the Glacier National Park repeat photography initiative, which began systematically rephotographing historic images from the early 1900s. These side-by-side comparisons dramatically reveal glacial retreat, transforming abstract climate data into visceral visual evidence. Similar projects have emerged worldwide, from monitoring coastal erosion to tracking urban development.
Digital technology has completely transformed this practice. Where pioneers worked with cumbersome large-format cameras and glass plates, today’s photographers benefit from GPS coordinates, digital image overlays, and metadata that precisely records shooting parameters. These historical landscape photography techniques now merge with modern tools, making photo monitoring accessible to anyone with a camera and commitment to documentation. Cloud storage and online databases enable global collaboration, allowing thousands of contributors to participate in meaningful environmental monitoring projects that were once limited to well-funded research institutions.
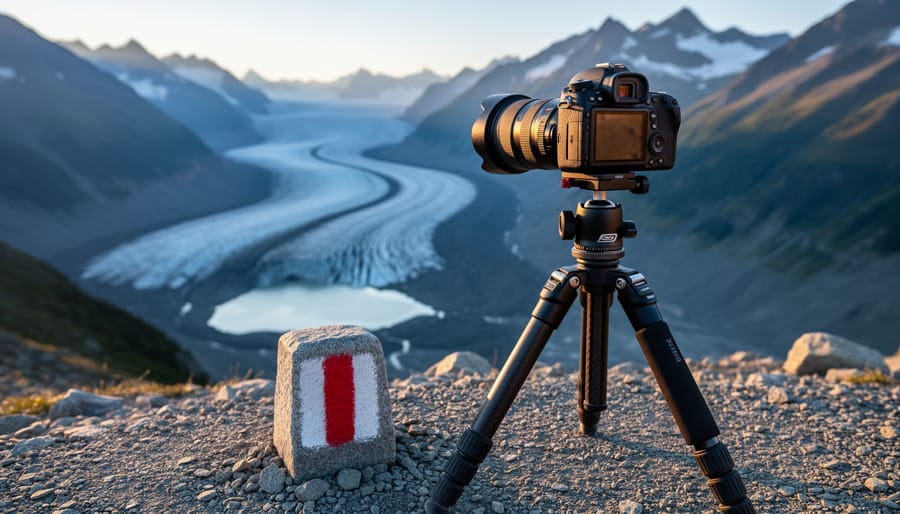
The Technical Challenge: Matching Perspectives Across Time
Location, Location, Location
The success of photo monitoring hinges on one critical factor: returning to the exact spot where the original image was captured. Even a slight shift in position can dramatically alter perspective, making comparison difficult or impossible.
GPS coordinates offer the most straightforward solution for relocating your shooting position. Modern smartphones and cameras with built-in GPS can automatically embed location data in your image files. When planning a return visit, these coordinates guide you back to within a few meters of your original position. However, GPS alone isn’t precise enough for the pixel-level accuracy photo monitoring demands, especially in areas with dense tree cover or between tall buildings where signals weaken.
That’s where reference photos become invaluable. Before leaving your original location, take several additional images that document your surroundings from the camera position. Capture distinctive landmarks, unique trees, rock formations, or even temporary markers you’ve placed. Include close-up shots of the ground directly in front of your tripod. These reference images serve as your visual roadmap when you return months or years later.
On-site triangulation refines your positioning further. Once you’re in the general area using GPS, pull up your original photograph and use prominent landscape features as alignment guides. Line up distant peaks, building corners, or tree arrangements visible in your frame. This technique, combined with your reference photos, helps you dial in that precise vantage point.
For ongoing monitoring projects, consider creating a permanent marker at the site if appropriate and permitted. Some environmental researchers use small, unobtrusive ground markers or even measure distances from fixed features like fence posts or large boulders, recording these measurements for future reference.
Getting the Angle Right
Getting the angle right is arguably the most challenging aspect of photo monitoring, yet it’s absolutely critical for meaningful comparisons. Even a slight variation in camera position can create dramatic differences in perspective that make your before-and-after images difficult to interpret.
Start by documenting your original camera setup meticulously. Measure the exact height of your camera above the ground using a tape measure, and note the compass bearing of your shot. If possible, place a permanent marker at the tripod position, whether that’s a small painted stone, a GPS coordinate recorded to the meter, or even a discreet ground stake in locations where it won’t be disturbed.
Camera tilt deserves special attention. A bubble level attached to your hot shoe helps maintain consistent horizontal alignment, while many modern cameras include electronic levels in their viewfinders. Record the degree of tilt if your tripod head has angle markings, or simply note whether you’re shooting level, slightly upward, or downward.
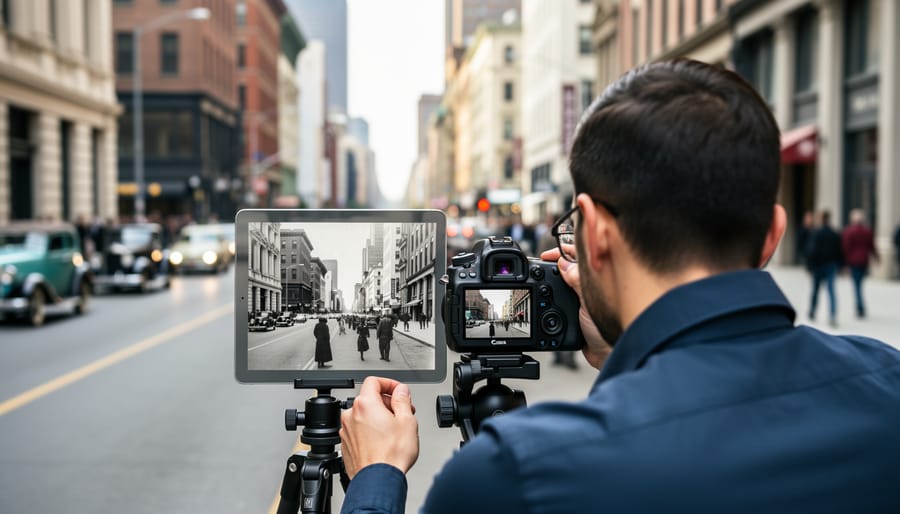
Overlay techniques can be game-changers in the field. Many cameras now offer image overlay features that let you display a previous photo semi-transparently over your live view. Line up key elements like distant peaks, building corners, or tree trunks to match your original framing. Even reviewing the reference image on a phone or tablet while composing helps tremendously.
Pay attention to foreground elements as anchors. That distinctive boulder, fence post, or tree stump becomes your alignment guide. Position these reference points in the same location within your frame, and the background will naturally fall into place.
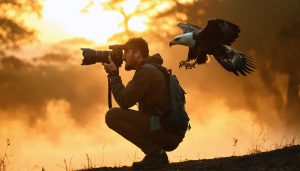
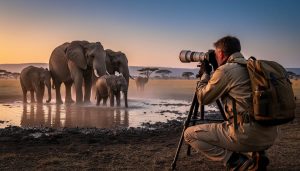
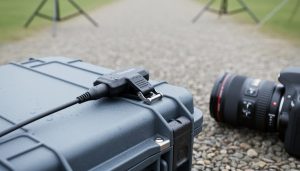
Essential Gear for Repeat Photography Projects
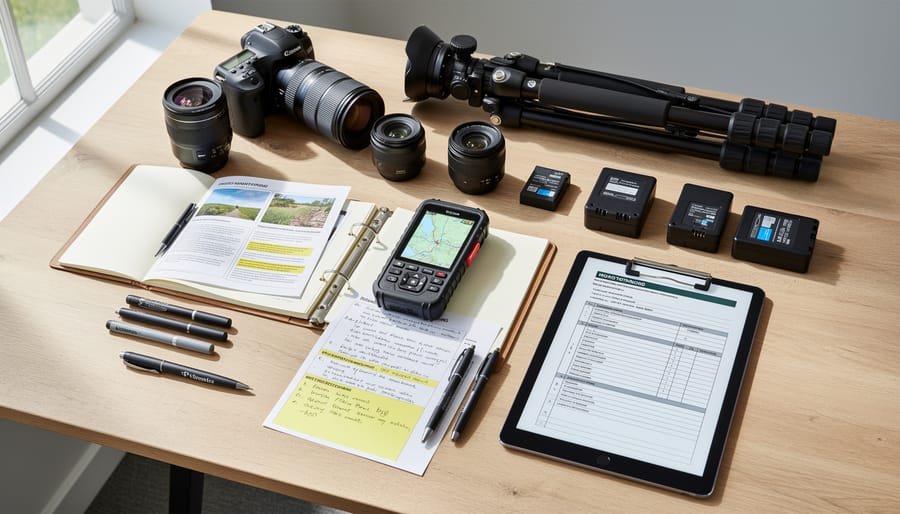
Camera and Lens Considerations
When attempting to recreate a historical photograph, the ideal scenario is using the exact same camera and lens combination as the original. This ensures identical perspective, field of view, and image characteristics. However, in most photo monitoring projects, especially those involving historical images, you won’t know what equipment was used, and even if you did, that gear likely isn’t available anymore.
The good news? Perfect equipment matching isn’t essential for valuable photo monitoring work. What matters most is getting reasonably close to the original focal length and framing. If you’re working with a known focal length, you’ll need to account for sensor size differences. A 50mm lens on a full-frame camera produces a different field of view than the same lens on a crop sensor camera. Many smartphones and modern cameras include focal length information in their metadata, which helps future photographers recreate your work.
When the original equipment is unknown, use visual clues to estimate the focal length. Wide-angle shots show more distortion at the edges and include expansive scenes, while telephoto shots compress perspective and isolate subjects. Start with a moderate focal length like 35-50mm and adjust based on what you see through your viewfinder compared to the reference image.
For practical workarounds, bring multiple lenses if possible, or use a zoom lens to dial in the correct framing. Take several shots at different focal lengths and positions. It’s better to capture too many variations than miss the mark entirely. Document your settings thoroughly so future monitoring efforts can build on your work.
Support Equipment That Makes a Difference
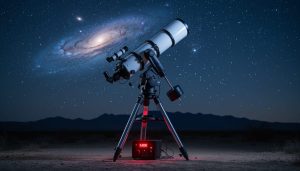
Success in photo monitoring depends heavily on having the right support equipment to ensure precise repositioning. A sturdy tripod is absolutely essential—not just any tripod, but one that allows you to record exact leg extensions and head positions. Consider marking leg sections with tape or taking notes about specific settings for future reference.
GPS devices have become invaluable for returning to exact locations, especially in remote areas where landmarks change seasonally. Modern smartphones offer GPS coordinate apps that can pinpoint locations within meters, though dedicated GPS units often provide better accuracy in challenging terrain. Pair this with a reliable compass to determine shooting direction, particularly important when natural features don’t provide obvious orientation cues.
Laser levels help match horizon lines and camera angles precisely, eliminating the guesswork that leads to misaligned comparisons. These compact tools ensure your camera tilt matches the original photograph exactly.
Digital overlay techniques represent perhaps the most transformative advancement in photo monitoring. Tablet apps and cameras with overlay features let you superimpose reference images directly onto your viewfinder or screen, allowing real-time alignment adjustments. This technology dramatically reduces the trial-and-error process that once made repositioning so challenging. Simply load your historical photograph, position your camera until the overlay matches your current view, and capture your comparison shot with confidence. This approach has made photo monitoring accessible to photographers at all skill levels.
Don’t Forget the Documentation Tools
Your camera captures the visual story, but successful photo monitoring relies equally on the information you document alongside each image. Start by maintaining detailed field notes—record the exact GPS coordinates, compass direction you’re facing, time of day, and any environmental conditions that might affect future replication. Weather tracking matters more than you might think; cloud cover, precipitation, and seasonal variations all influence lighting and visibility. Create a simple metadata system that works for you, whether that’s a dedicated field notebook, smartphone app, or voice recordings. Include landmarks, distance from reference points, and even your lens height from the ground. Think of yourself as building a roadmap for the next photographer who’ll stand in your exact spot—perhaps decades from now. The more thoroughly you document today’s shoot, the more valuable your baseline images become for tracking environmental change over time. Consider photographing a handwritten note card with key details before each monitoring shot, creating a permanent record embedded in your image sequence.
Planning and Executing Your Photo Monitoring Project
Choosing Your Subject and Timeline
Selecting the right subject and timeline is crucial for creating a meaningful photo monitoring project. Start by identifying locations or subjects where you expect visible change over time. Coastal areas, glaciers, urban development sites, and forest edges typically show dramatic transformations, while slower changes like tree growth or erosion patterns reveal their stories more gradually.
When choosing your subject, think about accessibility. You’ll need to return to this exact spot multiple times, so consider whether you can realistically reach it in different seasons and weather conditions. A spectacular mountain vista might seem perfect, but if winter snows make it inaccessible for half the year, you’ll have gaps in your documentation.
Your monitoring interval should match your subject’s pace of change. Urban construction sites might warrant monthly visits, while tracking seasonal shifts in landscape photography calls for quarterly or seasonal intervals. Climate-related changes like glacier retreat typically require annual documentation, though some dedicated photographers return twice yearly to capture both summer and winter conditions.
Set realistic expectations from the start. Meaningful environmental changes often unfold over years or decades, not weeks. If you’re documenting tree growth or ecological recovery, commit to a five or ten-year timeline. For faster changes like tidal erosion or construction projects, six months to two years might tell the complete story. The key is patience and consistency—your most compelling images will emerge from sustained commitment rather than instant gratification.
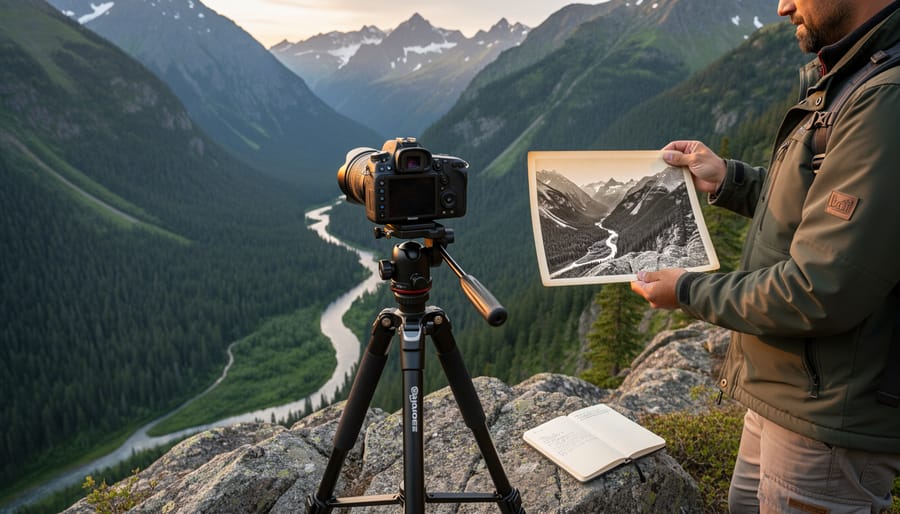
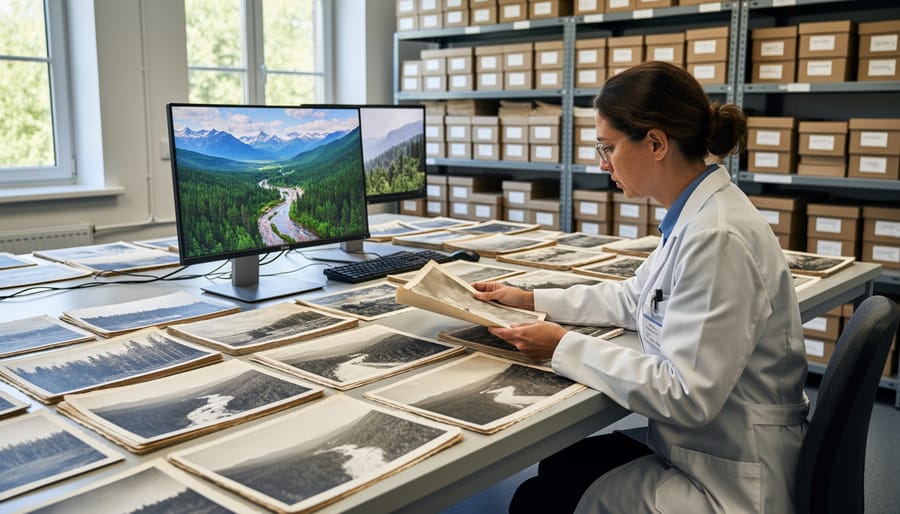
Working with Historical Images
Tracking down historical photographs is like detective work, and the hunt itself can be surprisingly rewarding. Start with local historical societies, university archives, and public libraries—many have digitized collections searchable online. The Library of Congress, National Archives, and regional museums often house extensive photograph collections, while websites like the U.S. Geological Survey’s Repeat Photography Project provide pre-catalogued baseline images specifically for monitoring purposes.
When you find a promising image, examine it carefully for clues. Look for landmarks, distinctive trees, or rock formations that might still exist. Shadow angles can help determine the time of day and season, while lens compression effects reveal approximate focal length. High vantage points or unusual perspectives often indicate accessible locations worth investigating.
Note any metadata available—photographer names, dates, and original captions provide valuable context. If the collection allows downloads, save high-resolution versions for detailed analysis at home.
Always respect copyright, even with old photographs. Images created before 1928 are generally public domain in the United States, but newer works require permission. When publishing your repeat photographs, credit the original photographer and archive source. This ethical practice honors the historical record while building goodwill with institutions that might assist your future projects. Many archives appreciate learning how their collections contribute to ongoing environmental documentation.
Creating a Repeatable Protocol
Success in photo monitoring hinges on creating a protocol that anyone can follow years from now. Think of it as writing instructions for your future self, or better yet, for someone you’ve never met who needs to recreate your exact shot.
Start by documenting everything. Note the precise GPS coordinates, compass bearing, and specific landmarks in your field of view. Take reference photos from multiple angles showing your shooting position. Record the date, exact time, weather conditions, and sun position. Many photographers create a simple field sheet template that captures all these details consistently.
Timing matters enormously. Seasonal changes in vegetation, snow cover, and sun angle can make comparisons misleading. If you photograph a glacier in June, future images should also be taken in June, ideally within the same week. Similarly, consistent lighting conditions produce more reliable comparisons. Morning versus afternoon shadows can completely transform a landscape’s appearance.
Create a detailed written description of your setup: focal length, camera height above ground, and distance to key features. Some monitoring projects place permanent markers or use distinctive natural features as reference points. Consider including a measurement scale or color chart in your initial images.
The goal is simple: someone finding your notes decades later should be able to stand in your exact footsteps and recreate your photograph without guessing.
Real-World Photo Monitoring Projects You Can Learn From
Landscape-Scale Environmental Monitoring
Photo monitoring shines brightest when applied across vast landscapes where changes unfold over decades. Glacier monitoring projects demonstrate this beautifully—photographers returning to the same alpine viewpoints year after year document dramatic ice retreat that would otherwise go unnoticed between scientific surveys. The Glacier National Park repeat photography project, for instance, uses century-old images to create compelling before-and-after comparisons that communicate climate change impacts more powerfully than data tables ever could.
Forest change documentation similarly benefits from consistent photographic records. Projects tracking wildfire recovery, invasive species spread, or reforestation success rely on photographers maintaining precise location records and seasonal timing. The key to success? Detailed metadata and permanent reference markers that future photographers can relocate.
Watershed studies employ photo monitoring to track stream bank erosion, vegetation changes, and water level fluctuations. Like conservation photography, these projects succeed when photographers commit to long-term participation and establish clear protocols for image capture.
The biggest lesson learned across landscape-scale projects is the importance of accessibility—both physical access to remote sites and digital access to archived images. Successful initiatives create robust databases with geographic coordinates, standardized file naming, and clear documentation so future contributors can continue the work seamlessly, building visual records that span generations.
Urban and Community-Scale Projects
You don’t need expensive equipment or scientific credentials to contribute to meaningful environmental documentation right in your neighborhood. Urban photo monitoring projects welcome everyday photographers to document changes in their communities, from tracking seasonal variations in local parks to recording the evolution of streetscapes over time.
Many cities now host citizen science initiatives that rely on repeat photography. Projects like “Block by Block” in Portland and similar programs in cities worldwide ask volunteers to photograph designated locations quarterly or annually. These images create invaluable records of urban tree canopy changes, green infrastructure development, and neighborhood transformations that planners and researchers analyze for patterns.
Start your own micro-monitoring project by selecting locations meaningful to you. A local creekbed, community garden, or historic building makes an excellent subject. Use consistent camera settings and a simple landmark-based method to return to the exact spot. Even smartphone photos work when taken systematically.
Consider documenting seasonal changes in a favorite park, capturing the same vista monthly for a year. Or track construction projects, greening initiatives, or street art evolution. Share your work with local environmental groups, historical societies, or urban planning departments who often welcome this documentation.
The beauty of community-scale monitoring lies in its accessibility. Your regular walks, commutes, or weekend outings become opportunities to contribute data while developing your observational photography skills.
Making Your Work Count: Sharing and Archiving
Proper Archiving and Metadata
Your photos are only valuable if future researchers can find and understand them. Start with a logical folder structure that includes location and date—something like “ProjectName/Location/YYYY-MM-DD” makes files instantly identifiable years later. Use consistent naming conventions for files, incorporating date, location, and frame number.
Embed comprehensive metadata directly into your image files using IPTF or XMP standards. Include GPS coordinates, camera settings, weather conditions, time of day, and detailed notes about what you’re documenting. Many photographers create a companion spreadsheet or text file documenting viewing angles, landmarks used for alignment, and any site-specific details that photos alone can’t convey.
Implement a 3-2-1 backup strategy: three copies of your data, on two different media types, with one copy stored off-site. Cloud storage services like Google Drive or Dropbox work well for the off-site component, while external hard drives handle local backups. Refresh your backup media every few years to prevent data degradation.
Consider your documentation from a future perspective. That tree you used as a reference point might not exist in twenty years, so describe it in context: “large oak tree, third from left when facing north.” Include sketches, smartphone snapshots showing the broader context, and written notes about access routes. You’re creating a time capsule for researchers who’ve never visited your site.
Connecting with the Scientific Community
Your photo monitoring images can make a genuine difference when shared with the right communities. Unlike casual documentary photography, these images become part of scientific records that inform conservation decisions and climate research.
Start by exploring citizen science platforms like iNaturalist, which welcomes time-lapse environmental observations, or the USA National Phenology Network, which tracks seasonal changes in plants and wildlife. These platforms provide clear submission guidelines and connect you directly with researchers actively using this data.
Many universities and environmental organizations maintain specific photo monitoring projects. Contact your local natural history museum, university geography or ecology departments, or environmental nonprofits working in areas you photograph. They often seek long-term visual documentation but lack resources for systematic photography.
Public archives like the Internet Archive accept environmental photo series, ensuring your work remains accessible for future researchers. Regional geological surveys and national park systems frequently welcome contributed observations that document landscape changes.
When reaching out, clearly document your methodology: exact locations using GPS coordinates, consistent shooting positions, dates, times, and any relevant environmental conditions. Include technical details like focal length and camera height. This metadata transforms casual images into scientific tools that researchers can confidently incorporate into their work.
As a photographer, you possess a unique power: the ability to freeze moments in time and create visual records that transcend your own lifetime. Photo monitoring harnesses this power for something remarkably meaningful—documenting our changing planet in a way that scientific instruments alone simply cannot capture. While data loggers record temperatures and satellites track ice coverage, your photographs tell stories that resonate with human understanding, making environmental change tangible and immediate.
The beauty of starting a photo monitoring project today is that you’re creating tomorrow’s historical record. Those baseline images you capture this month become invaluable references for future generations. Consider that some of the most powerful environmental photographs we have today were taken decades ago by photographers who had no idea their work would become essential scientific evidence. Your systematic documentation might reveal patterns invisible to casual observation, contributing real value to environmental research and conservation efforts.
This field welcomes photographers of all levels. You don’t need expensive specialized equipment or advanced credentials—just consistency, attention to detail, and commitment to returning to your chosen location. Whether you select a nearby park experiencing development pressure, a coastline vulnerable to erosion, or a forest recovering from wildfire, your perspective matters.
The most important step is simply beginning. Pick a location that matters to you, one you can realistically revisit. Take that first baseline photograph today. Mark your position, record your settings, and set a reminder to return. Your photographic journey into environmental documentation starts with a single frame—make it count.