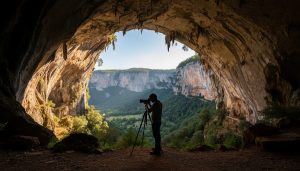
Desert landscapes offer photographers some of the most dramatic lighting and otherworldly compositions available in nature, but these environments demand respect and preparation. The combination of extreme temperatures, abrasive sand, and intense UV radiation can destroy thousands of dollars worth of camera equipment in minutes if you’re unprepared. Yet photographers who master arid environment techniques consistently capture images that stop viewers mid-scroll—those golden-hour dunes with razor-sharp ridgelines, the stark beauty of cracked earth patterns, and star trails arcing over silent mesas.
The challenges are real and immediate. Sand infiltrates every crevice of your gear, scratching lens elements and jamming mechanical components. Temperature swings from 110°F daytime highs to near-freezing nights cause condensation inside camera bodies. Battery life plummets in extreme heat, and LCD screens become nearly impossible to read under harsh midday sun. Physical stamina becomes a limiting factor as dehydration affects your decision-making and creative vision.
But understanding how to protect your equipment and yourself transforms these obstacles into manageable considerations rather than deal-breakers. The key lies in systematic preparation: choosing the right protective gear, timing your shoots strategically, and developing workflows that minimize exposure to damaging elements. Photographers who approach arid environments with knowledge and proper technique discover these locations aren’t just survivable—they’re where some of photography’s most compelling work happens. The stark simplicity forces you to focus on composition, light quality, and form in ways that cluttered landscapes never demand.
What Makes Arid Environments So Hostile to Camera Gear
The Dust Problem Nobody Warns You About
If you’ve shot at the beach, you might think you understand dusty environments. Here’s the reality check: desert dust operates on an entirely different level, and it will find its way into places you didn’t know existed on your camera.
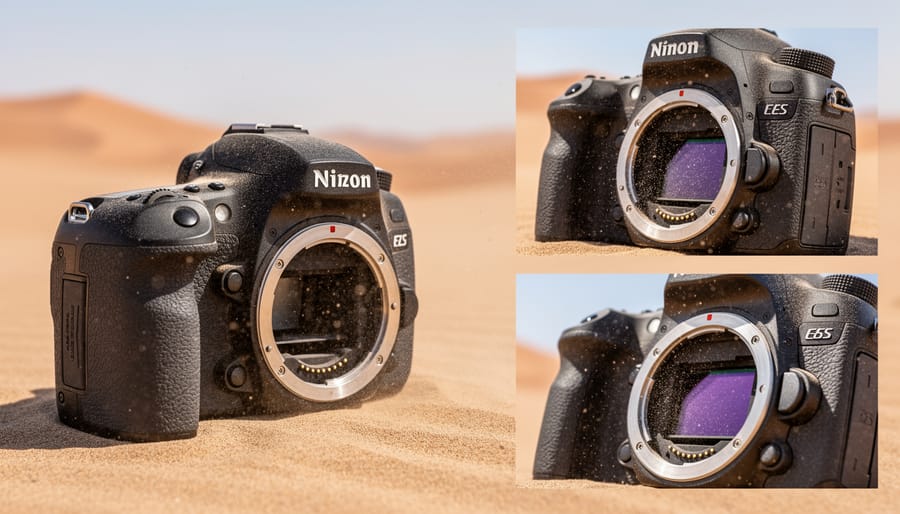
Desert dust particles are significantly finer than beach sand, often measuring just 10-50 microns in diameter. To put that in perspective, human hair is about 70 microns thick. This microscopic size means dust doesn’t just sit on your camera’s exterior. It creeps past weather sealing, infiltrates lens barrels during zooming, and settles on your sensor even when you’re careful about lens changes.
I learned this the hard way during a shoot in Death Valley. Despite my camera’s weather sealing rating and my cautious handling, I ended up with persistent dust spots on my sensor after just two days. The culprit? Those impossibly fine particles were being pulled into the camera body through the normal breathing that occurs as lenses extend and retract with temperature changes.
Standard weather sealing is designed primarily for moisture protection, not particulate defense. The rubber gaskets and seals on most cameras create barriers against water droplets, but dust particles can slip through microscopic gaps. Even professional-grade bodies with extensive sealing will eventually succumb to prolonged desert exposure.
The situation intensifies during windy conditions, which are common in arid environments. Wind doesn’t just blow dust around; it creates static electricity that causes particles to actively cling to your equipment. You’ll notice this when wiping your lens cloth across the camera body creates that characteristic crackling sound and the dust seems magnetically attracted back to the surface you just cleaned.
Temperature Extremes That Warp More Than Just Your Lens
Desert temperature swings aren’t just uncomfortable—they’re gear killers. That 130°F scorching afternoon can plummet to 40°F by midnight, and your camera equipment struggles with every degree of that dramatic shift.
Batteries take the hardest hit. Lithium-ion batteries lose approximately 20% of their capacity at 32°F and can drain in minutes at freezing temperatures. Even more concerning, extreme heat above 110°F can cause permanent capacity loss or, in rare cases, swelling and leakage. The solution? Keep spare batteries in an insulated pouch against your body during cold desert mornings, and never leave them in direct sunlight during midday heat.
LCD screens become sluggish or unresponsive when temperatures drop below 32°F—those familiar black blotches creeping across your display mean the liquid crystals are literally freezing. Conversely, above 120°F, screens can develop permanent dead pixels or complete failure.
Your lens elements expand and contract with temperature changes, potentially throwing off autofocus calibration. Modern lenses account for some thermal expansion, but extreme desert conditions can push beyond those tolerances. You might notice focus breathing issues or inconsistent sharpness when shooting in harsh midday heat.
Memory cards also have operating limits, typically rated between 14°F and 185°F. While the upper threshold seems generous, direct sunlight can heat a camera body well beyond ambient temperature. Cards exposed to extreme heat risk data corruption, making backup practices especially critical in desert environments. Always carry cards in a protective case away from heat sources.
Essential Gear Protection Strategies for Desert Shoots
Weather-Sealed vs. Weather-Resistant: What Actually Works
Here’s the truth about those weather ratings: they’re often more marketing than meaningful protection. Understanding what your gear can actually handle in desert conditions could save you thousands in repair costs.
Weather-sealed cameras feature gaskets and seals at every potential entry point—buttons, dials, card doors, and lens mounts. Weather-resistant gear has some protection, but with gaps that leave it vulnerable to fine dust infiltration. In extreme conditions like desert environments, that distinction matters enormously.
Let me share what actually works based on field experience. The Canon EOS R5 and R6 series have proven themselves remarkably reliable in sandy conditions, with photographers reporting thousands of desert shots without issues. Pair them with Canon’s L-series lenses—particularly the RF 24-70mm f/2.8 or RF 100-500mm—and you’ve got a combination that genuinely resists dust penetration.
Nikon’s Z8 and Z9 bodies also excel here, featuring extensive sealing that stands up to sustained desert use. Their Z-mount lenses with weather sealing, especially the 24-120mm f/4 and 70-200mm f/2.8, have earned solid reputations among landscape photographers working in arid regions.
Sony’s A7R V and A1 bodies offer excellent protection, though some users report the card door seal as a potential weak point. The GM lenses handle dust well, particularly the 24-70mm f/2.8 GM II.
Here’s the practical takeaway: weather-sealed gear gives you breathing room, not invincibility. Even the best-sealed cameras benefit from protective practices like rain covers in dust storms and regular cleaning. Check your camera’s manual for its specific IP rating if listed—anything below IP53 means you’ll need extra precautions in dusty conditions.
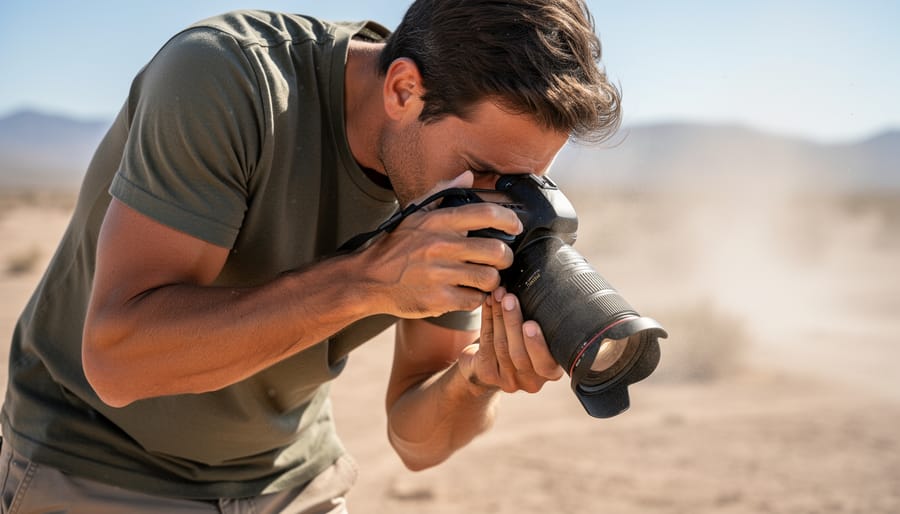
The Right Way to Change Lenses in Dusty Conditions
Changing lenses in dusty conditions feels risky, but with the right technique, you can minimize sensor exposure and keep your gear safe. The key is preparation and speed.
Before you even think about removing a lens, prepare your workspace. Turn your back to the wind and create a barrier with your body. If you’re working with a buddy, have them stand as a windbreak. Keep your camera bag positioned so you can access the new lens quickly without fumbling.
Here’s the technique that works: have your replacement lens ready with the rear cap removed and held securely in your non-dominant hand. Point your camera body downward at roughly a 45-degree angle. This simple positioning uses gravity to your advantage, preventing dust from settling directly onto the sensor. Remove the current lens with a quick twist, immediately attach the new lens, and complete the entire swap in under three seconds. Practice this motion at home until it becomes muscle memory.
Timing matters tremendously. Wait for lulls in the wind rather than fighting against gusts. Early morning and late evening typically offer calmer conditions in desert environments. If you’re planning multiple lens changes, consider whether you really need them or if you can accomplish your creative vision with a single focal length.
If dust does get inside despite your precautions, don’t panic. Keep shooting if possible and address the cleaning later in a controlled environment. Attempting field cleaning often makes things worse. Use a rocket blower only as a last resort, and never touch the sensor yourself in the field.
Protective Accessories Worth Carrying (And Which Ones Waste Space)
Let’s talk about what actually protects your gear in the desert versus what just takes up valuable bag space.
UV filters spark endless debate, but in arid environments, they earn their keep. Not for image quality—modern lenses don’t need UV correction—but as sacrificial elements against windblown sand. I’ve had filters take scratches that would have destroyed front lens elements. They’re cheap insurance. Just keep them clean, because a dusty UV filter degrades your images faster than no filter at all.
Lens hoods are non-negotiable. Beyond the obvious sun-shading benefit, they provide crucial physical protection from debris and bumps. The surprise benefit? They create a small buffer zone that helps keep dust from settling directly on your front element during windy conditions.
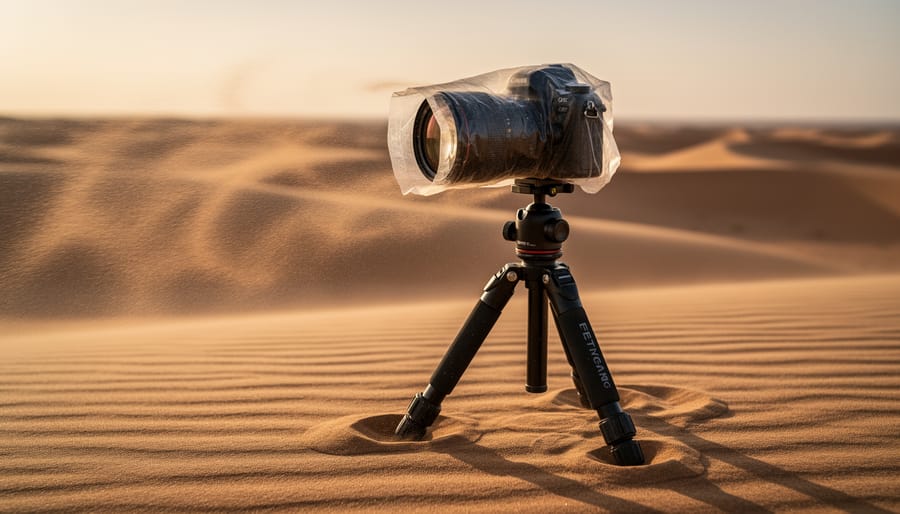
Camera wraps and rain covers might seem excessive for “dry” environments, but they’re genuinely useful. A simple silicone wrap protects your camera body from abrasive dust and provides grip when your hands are sweaty. Those bulky “all-weather” covers marketed for extreme conditions? Skip them. A lightweight microfiber cloth works better for quick wrapping between shots.
Rocket blowers are essential—just not the cheap ones. Invest in a quality blower with enough force to actually dislodge particles. Those tiny keychain versions are worthless against desert dust. I keep mine accessible in an outer pocket because you’ll use it constantly.
What wastes space? Elaborate lens cleaning kits with multiple solutions. Bring a quality blower, microfiber cloths, and lens-safe wipes. Those multi-tool cleaning gadgets with brushes and pens? They collect more dust than they remove. The “armored” camera cases are also overkill—your regular padded bag provides sufficient protection if you’re mindful about sealing it between shooting sessions.
Managing the Light: Exposure Challenges in Bright, Reflective Environments
Why Your Camera’s Meter Lies in the Desert
Your camera’s meter is calibrated for middle gray, assuming the world reflects about 18% of the light that hits it. But desert sand? It reflects anywhere from 30% to 60% of incoming light, depending on its color and composition. This fools your meter into thinking there’s more light than your scene actually needs, resulting in underexposed images where that gorgeous golden sand turns muddy gray.
Here’s the desert exposure reality: you’ll typically need to overexpose by 1 to 2 stops from what your meter suggests. Start with +1 stop of exposure compensation and check your histogram. You’re aiming for data pushed toward the right side without clipping highlights in the sky. Those bright dunes should appear bright in your image, not dingy.
Spot metering becomes your best friend in these conditions, especially when your meter lies about the overall scene. Point your spot meter at a mid-tone element, perhaps a shadowed rock face or your subject’s clothing, and lock your exposure there. This gives you a more accurate starting point than evaluative metering, which averages all that reflective sand into its calculation.
During midday with overhead sun bouncing off sand in every direction, consider bracketing your exposures. Shoot at your metered exposure, then at +1 and +2 stops. Review your results and adjust. Within a few shots, you’ll develop an intuition for how much compensation your specific conditions demand.
Shooting During the Heat: Mirage, Distortion, and When to Stop
If you’ve ever watched a distant rock formation shimmer and dance in the midday heat, you’ve witnessed the challenge of heat mirage firsthand. This atmospheric distortion occurs when light bends through layers of air at different temperatures, creating wavering effects that can absolutely destroy the sharpness of your images, especially when shooting with telephoto lenses.
Heat waves are most intense from late morning through mid-afternoon, typically peaking between 11 AM and 3 PM. During these hours, that gorgeous distant mesa you’re trying to photograph might look perfectly sharp through your viewfinder, but your images will show a telltale softness and wavy distortion that no amount of post-processing can fix. The effect becomes more pronounced the farther your subject is and the longer your focal length.
Here’s the reality: sometimes you simply need to stop shooting and wait. If you’re witnessing severe mirage through your lens, you’re likely wasting battery power and memory card space. Instead, use this time for lunch, location scouting, or rest in whatever shade you can find.
However, you can work with mirage creatively. Close-up and mid-range compositions are less affected, so focus on foreground elements, abstract textures, or intimate landscapes during peak heat. Some photographers intentionally embrace the dreamlike quality mirage creates, using it to add an ethereal atmosphere to their work. If you’re determined to shoot distant subjects, position yourself higher than your subject when possible, as cooler air at elevation reduces distortion. Early morning and late afternoon naturally minimize these effects while providing better light anyway.
Battery Life and Power Management in Extreme Conditions
Here’s something most photographers discover the hard way: that battery that powers your camera for 800 shots at home? It might give you 400 in the desert heat, and even fewer in the freezing desert night. Temperature extremes are like kryptonite for lithium-ion batteries, and arid environments deliver both ends of the spectrum.
During midday heat, when temperatures soar past 110°F, your batteries lose capacity because chemical reactions inside accelerate and efficiency drops. Conversely, when desert temperatures plummet after sunset, those same batteries struggle as the chemical reactions slow down. I’ve watched my battery indicator drop two bars simply by leaving my camera on a tripod during a frigid dawn shoot.
The solution starts with realistic planning. For a full day of desert shooting, pack at least double your normal battery count, maybe triple if you’re shooting in winter when cold mornings transition to hot afternoons. Keep spare batteries close to your body in an interior pocket where your body heat maintains their temperature. This simple trick can preserve 30-40% more capacity.
Consider investing in a portable power bank specifically designed for cameras, not just phones. Look for models rated between 20,000-30,000mAh with DC output options. Some photographers swear by solar chargers, though reliability varies. I’ve found them useful for multi-day expeditions but unreliable as primary charging sources due to dust accumulation on panels.
Create a rotation system: charge batteries overnight in your vehicle or accommodation, carry working batteries in insulated pouches, and keep depleted ones separate. Label everything. When your creative vision depends on capturing that perfect light during magic hour, running out of power isn’t just inconvenient, it’s heartbreaking.
Composition Opportunities Unique to Arid Landscapes
Using Emptiness as Your Subject
In arid landscapes, emptiness itself becomes your most powerful compositional tool. Rather than viewing sparse environments as lacking subjects, reframe your perspective: the vast, open space is the subject. A single weathered rock, a lone plant, or even a set of footprints gains dramatic impact when surrounded by emptiness.
The rule of thirds works beautifully here. Position your isolated subject at an intersection point, allowing the surrounding void to create tension and draw the viewer’s eye. This negative space isn’t wasted frame area; it communicates scale, solitude, and the raw essence of desert environments.
Try using extreme minimalism by placing your subject very small within the frame, perhaps occupying only 5-10% of the composition. This approach emphasizes isolation and can evoke powerful emotional responses. The surrounding emptiness tells as much of the story as the subject itself.
Texture becomes crucial when working with minimal subjects. A rippled sand dune or cracked mud flat provides visual interest across what might otherwise feel like dead space. Look for subtle variations in tone and pattern within these seemingly empty areas.
Consider shooting with a wide aperture to isolate your subject through selective focus, or use a small aperture to keep vast expanses sharp, celebrating every detail of that emptiness. Both approaches honor the minimalist aesthetic that makes desert photography so compelling.
The Golden Hours Are Different Here
The atmosphere in arid environments holds far less moisture and particulate matter than humid regions, creating surprisingly different lighting conditions during golden hour. Without water vapor to scatter light, the transition from day to night happens more rapidly—often 15-20 minutes faster than you’d experience near the coast. This means your shooting window is shorter, but the light quality can be exceptionally clean and directional.
In high desert environments above 4,000 feet, golden hour arrives earlier in the evening and extends later in the morning due to thinner atmosphere. Rocky deserts like those in the American Southwest offer the most dramatic color shifts, with red rocks amplifying warm tones. Sandy deserts produce softer, more uniform light that’s ideal for dune photography.
During winter months, plan to arrive 45 minutes before sunset rather than the standard 30, as temperatures drop quickly and the light show begins earlier. Summer golden hours stretch slightly longer but bring extreme heat—dawn shoots become essential. Always scout your location in advance; that perfect composition you imagined might face the wrong direction when the light finally turns magical.
Post-Processing Considerations for Desert Images
Desert images often need thoughtful post-processing to truly capture what your eyes saw in the field. The harsh midday sun common in arid environments can wreak havoc on your camera’s auto white balance, often rendering scenes too cool or washing out the warm, golden tones that make deserts so captivating. Start by adjusting your white balance toward the warmer end of the spectrum, typically between 5500-6500K, to restore those authentic earthy hues.
Atmospheric haze presents another common challenge. That shimmering heat distortion you witnessed looks romantic in person but often translates to flat, low-contrast images. The dehaze slider in your editing software becomes your best friend here, though use it judiciously. Too much can make images appear artificially crisp and lose their sense of place.
Blown highlights are practically inevitable when shooting bright sand dunes under intense sunlight. Rather than trying to recover completely white areas, focus on preserving detail in the transition zones. Graduated adjustments can help balance sky and land without creating an unnatural look.
Here’s where desert photography gets exciting: those seemingly monotone sand dunes actually contain subtle color variations that deserve emphasis. Boost your vibrance slider modestly to reveal hidden oranges, pinks, and purples without oversaturating. Selective color adjustments can enhance the interplay between cool shadows and warm highlights, adding dimension to what might otherwise appear one-dimensional. Remember, the goal is enhancing reality, not reinventing it.
Arid environments present real challenges, but they shouldn’t intimidate you or keep your camera in the bag. With the right preparation and protective strategies, these landscapes offer some of the most visually stunning and rewarding photography opportunities you’ll ever experience. The key is approaching desert shoots with respect for the environment and a solid plan for protecting your gear.
The beauty of photographing in arid conditions is that once you’ve mastered the basics of sand and dust protection, heat management, and exposure techniques, you’ll gain confidence that translates to other challenging shooting scenarios. Many photographers who regularly work in deserts find themselves better prepared for any adverse conditions they encounter.
Before heading out into arid environments, run through this essential preparation checklist:
– Clean and inspect all gear, checking seals and connections
– Pack extra memory cards and fully charged batteries
– Bring proper lens protection including UV filters and lens hoods
– Include microfiber cloths and a rocket blower for field cleaning
– Prepare your camera bag with dust-resistant coverage
– Pack sufficient water and sun protection for yourself
– Plan shooting times around optimal light conditions
– Research your location and have backup navigation tools
– Inform someone of your shooting location and expected return
With these preparations complete, you’re ready to capture the extraordinary light, textures, and colors that make arid environments truly special.