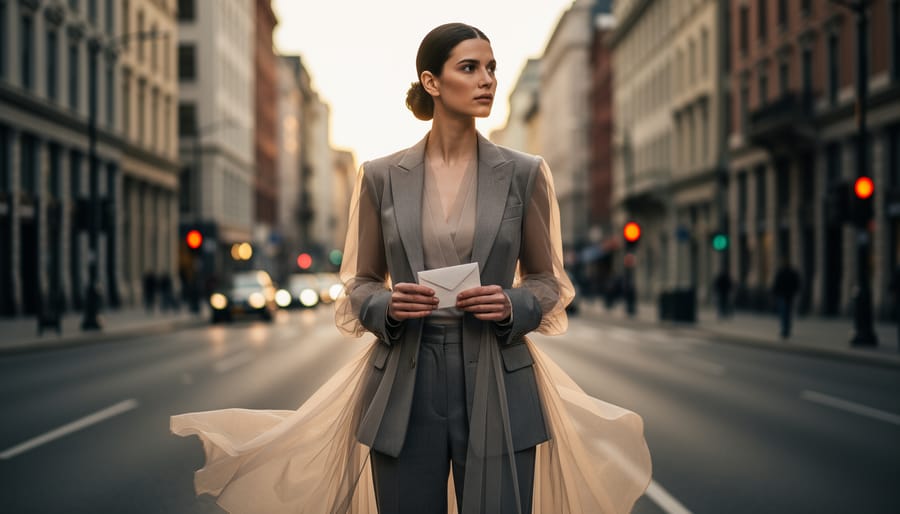
Study the editorial spreads in Vogue, Harper’s Bazaar, and i-D Magazine to understand how editorial fashion photography differs fundamentally from commercial work: these images prioritize artistic vision and storytelling over product sales, allowing photographers creative freedom to push boundaries with unconventional styling, dramatic lighting, and conceptual narratives. Editorial work serves as your visual portfolio and industry calling card, demonstrating your ability to collaborate with creative teams and execute high-concept imagery that magazines use to establish their aesthetic identity.
Master the collaborative nature of editorial production by building relationships with fashion stylists, makeup artists, and art directors who share your creative vision. Unlike commercial shoots where client requirements dominate, editorial projects thrive on collective creativity, with each team member contributing to a unified concept. Start by reaching out to emerging stylists through social media or local fashion schools, proposing test shoots that benefit everyone’s portfolio while you develop the communication skills essential for professional editorial work.
Develop a distinctive visual signature that makes your work immediately recognizable to photo editors scanning hundreds of submissions. Whether you gravitate toward moody, high-contrast black and white imagery, saturated color palettes, or experimental techniques like intentional motion blur or unconventional perspectives, consistency in your aesthetic helps you stand out in a crowded field. Photo editors remember photographers whose style aligns with their publication’s voice, leading to repeat assignments and long-term relationships.
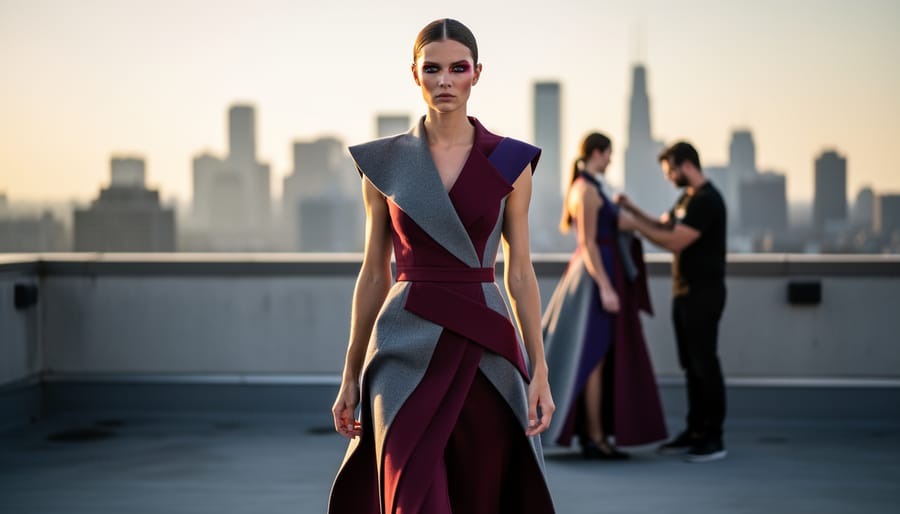
Understand that editorial photography demands technical excellence across changing conditions. You might shoot in a controlled studio one day and navigate harsh midday sun on an urban rooftop the next, requiring fluency with both strobe and natural light while directing models through dynamic poses that convey emotion and movement rather than static catalog stances.
What Makes Editorial Fashion Photography Different
The Storytelling Element
Editorial fashion photography exists to tell stories, not sell products. While commercial fashion work focuses on showcasing clothing details and driving purchases, editorial shoots prioritize emotion, concept, and artistic vision. Think of it as the difference between a product catalog and a short film—both feature the same clothing, but the intent is completely different.
In editorial work, the narrative might explore themes like rebellion, nostalgia, futurism, or social commentary. The clothing becomes a character in a larger visual story rather than the star of the show. Photographers use visual storytelling techniques to create mood through lighting choices, location selection, model direction, and styling decisions that work together cohesively.
Consider some iconic examples: Peter Lindbergh’s raw, black-and-white portraits for Vogue revolutionized fashion photography by stripping away glamour in favor of authenticity. Tim Walker’s whimsical, dreamlike editorials for magazines like Vogue Italia transport viewers into surreal fantasy worlds. Steven Meisel’s narrative-driven spreads often feel like film stills from movies that don’t exist.
Your editorial work should ask questions and evoke feelings. What story does this location tell? How does the lighting reflect the emotional tone? Does the model’s expression and body language support the narrative? When viewers flip through a magazine, editorial spreads should stop them in their tracks, making them curious about the world you’ve created rather than simply admiring a dress.
Creative Freedom vs. Commercial Constraints
Understanding the distinction between editorial and commercial fashion photography helps clarify what makes editorial work so appealing to creative photographers. In editorial shoots, you’re typically creating images to tell a story or convey a mood for magazine features, with the primary goal of inspiring readers rather than directly selling products. This means you’ll often enjoy significantly more creative latitude in concept development, styling choices, and post-processing techniques.
Commercial fashion work, on the other hand, exists to sell specific products or promote brands. The client’s marketing objectives take precedence, which means your creative decisions must align with brand guidelines, product visibility requirements, and advertising goals. While commercial assignments often pay better and offer clearer direction, they come with tighter constraints on experimentation.
In editorial photography, you might collaborate with stylists to create avant-garde looks that push boundaries, even if they’re not commercially viable. The images can be moodier, more conceptual, or deliberately unconventional. Your end goal is creating compelling visual content that engages magazine readers and builds your artistic reputation.
Commercial clients need images that showcase products clearly, appeal to target demographics, and maintain brand consistency. You’ll receive detailed briefs specifying everything from lighting mood to color palettes. The trade-off is straightforward: commercial work provides reliable income and professional stability, while editorial assignments offer portfolio-building opportunities and artistic expression. Many successful fashion photographers balance both, using commercial income to fund their more experimental editorial pursuits.
Essential Gear for Editorial Fashion Photography
Camera Bodies That Deliver
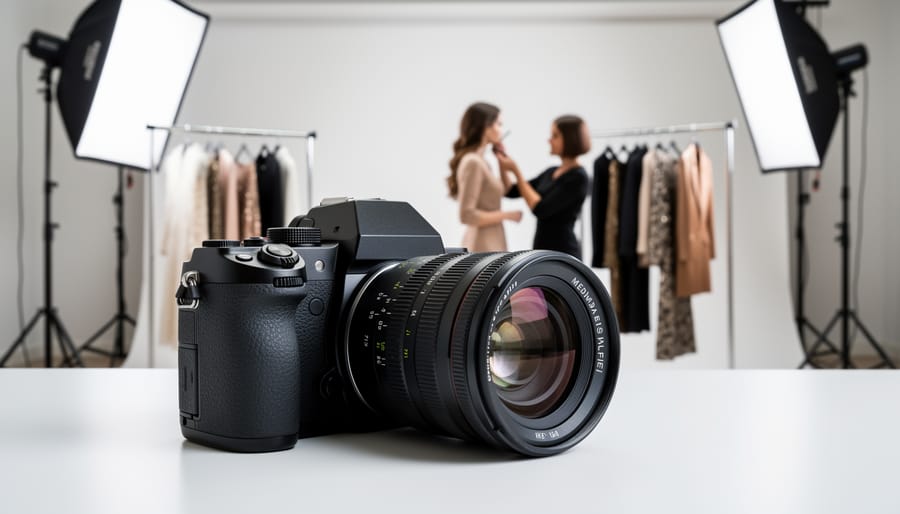
When it comes to editorial fashion photography, your camera body needs to deliver exceptional resolution and color fidelity to satisfy demanding art directors and publications. Let’s look at what’s actually being used in the industry today.
The workhorse cameras you’ll find in most editorial photographers’ bags are full-frame models like the Canon EOS R5, Sony A7R V, and Nikon Z8. These cameras offer 45-61 megapixel sensors that capture the detail and texture magazines demand, along with excellent dynamic range for preserving highlights in harsh studio lighting or outdoor shoots. The Canon R5, for instance, is beloved for its color science straight out of camera, which means less time color correcting in post-production.
For high-end editorial work where every detail matters, medium format cameras have become increasingly accessible. The Fujifilm GFX 100 II delivers 102 megapixels and produces files with a unique dimensionality that clients notice. Photographers like Annie Leibovitz and Patrick Demarchelier have used medium format throughout their careers, though they’ve worked with both Hasselblad and Phase One systems.
What matters most isn’t necessarily the highest megapixel count, but how the camera renders skin tones and handles challenging lighting situations. The Sony A7R V excels in adaptability with its impressive autofocus system, making it ideal for location shoots where conditions change rapidly. Whatever system you choose, ensure it pairs well with professional-grade lenses, as the glass matters just as much as the sensor behind it.
Prime vs. Zoom Lenses for Editorial Work
The choice between prime and zoom lenses can significantly shape your editorial fashion work, and understanding each focal length’s character will help you develop a signature style.
Prime lenses remain the preferred choice for many editorial photographers. A 35mm lens creates environmental context, perfect for lifestyle-oriented editorials where you want to show the model interacting with urban landscapes or architectural spaces. It draws viewers into the scene while maintaining intimacy with your subject. The 50mm, often called the “nifty fifty,” closely mimics human vision and works beautifully for full-length and three-quarter shots. It’s versatile enough for both studio work and on-location shoots, making it an excellent foundation for any kit.
The 85mm is the workhorse of editorial fashion photography. It provides flattering compression, making it ideal for beauty shots and portrait-style editorials. This focal length creates gorgeous background separation while maintaining a comfortable working distance from your model. For more compressed, dramatic imagery, the 135mm delivers stunning bokeh and allows you to isolate details like accessories or capture striking headshots with incredible sharpness.
Zoom lenses, particularly a 24-70mm f/2.8, offer practical advantages when shooting fast-paced editorial work or when you can’t easily change positions. They’re invaluable for location shoots where you need to adapt quickly to changing scenarios.
Start your kit with an 85mm prime for its versatility in editorial work, then add a 50mm for environmental shots. As your style develops and budgets allow, expand with either a 35mm for storytelling editorials or a 135mm for beauty-focused work. Many professionals eventually own both prime and zoom options, choosing based on each specific editorial’s creative requirements.
Lighting Equipment You Actually Need
Here’s the truth about lighting gear for editorial fashion: you don’t need to mortgage your house. Start with what actually matters.
A quality strobe system remains the workhorse of editorial photography. A single strobe with adjustable power output handles most situations, especially when paired with modifiers. Speaking of modifiers, invest in a large softbox (around 36×48 inches) and a beauty dish. These two shape light beautifully for fashion work without breaking the bank. Single light setups can produce stunning editorial results when used creatively.
Continuous LED panels deserve consideration if you shoot video alongside stills or prefer seeing your lighting in real-time. They’re particularly helpful when working with nervous models who find strobes intimidating.
Here’s something many beginners overlook: natural light often outperforms expensive equipment. Window light during golden hour creates that coveted soft, directional quality magazines love. A simple reflector (white foam board works perfectly) bounces light into shadows without additional expense.
The key is understanding light quality over quantity of gear. Master one strobe and natural light before adding complexity. Your portfolio will thank you.
Lighting Techniques for Editorial Fashion
Natural Light Mastery
Natural light remains one of the most versatile tools in editorial fashion photography, offering a range of moods and qualities that can elevate your images from snapshots to magazine-ready shots. The key is understanding how to read, manipulate, and enhance different natural light conditions.
Window light serves as your personal studio softbox, creating beautiful, directional illumination that wraps around your subject. Position your model perpendicular to a large window for dramatic side lighting that emphasizes texture in fabrics and creates depth through shadows. For a softer, more even look, face your subject toward the window and use a white reflector opposite to fill in shadows. The closer you position your model to the window, the softer the light becomes, while moving them further away creates more contrast.
Golden hour, that magical period just after sunrise or before sunset, bathes everything in warm, flattering tones perfect for outdoor editorial work. The low angle of sunlight during these times creates long shadows and adds dimension to your compositions. Position your subject so the light skims across them at an angle rather than shooting directly into the sun, unless you’re intentionally creating a backlit, ethereal effect.
Overcast days are often underestimated but provide beautifully even, diffused lighting that eliminates harsh shadows and allows fabric colors and details to shine. This natural softbox effect works exceptionally well for editorial fashion, particularly when shooting lighter clothing or when you want the focus on styling rather than dramatic lighting.
To modify natural light, keep a 5-in-1 reflector in your kit. Use the white side for subtle fill, silver for brighter reflection, or black to subtract light and deepen shadows for more dramatic results.

Studio Lighting Setups for Editorial Looks
Editorial fashion photography builds on classic portrait lighting techniques, but with a twist. While traditional portrait setups aim for flattering, natural-looking light, editorial work often pushes these patterns to create more dramatic, mood-driven images that tell a story.
Rembrandt lighting remains a go-to for editorial work, creating that signature triangle of light under the eye on the shadowed side of the face. Position your key light about 45 degrees from your subject and slightly elevated. For fashion, try intensifying this pattern by using a smaller light source or pulling the light farther back to deepen shadows and add edge to your images.
Split lighting divides the face directly down the middle, with one half in light and the other in shadow. This dramatic setup works beautifully for editorial pieces requiring intensity or mystery. Place your light at 90 degrees to your subject, level with their face. Fashion photographers often enhance this by using minimal fill light or none at all, letting those shadows stay deep and striking.
Broad lighting illuminates the side of the face turned toward the camera, while short lighting highlights the side turned away. These patterns help shape your subject differently depending on your creative direction. For high-fashion editorial, experiment with extreme angles and harder light sources like beauty dishes or bare bulbs to create definition that complements the clothing and concept. The key is understanding these fundamentals, then breaking the rules intentionally to achieve your editorial vision.
Creating Mood with Light Quality
Light quality transforms the entire mood of your editorial fashion image. Hard light, created by small light sources like bare strobes or direct sunlight, produces sharp shadows and defined edges—perfect for edgy, high-contrast editorials that demand attention. Soft light, diffused through large modifiers like softboxes or scrims, wraps gently around your subject, creating subtle transitions ideal for beauty-focused or romantic narratives.
Color temperature adds another emotional layer. Cooler tones (around 5500K and above) convey sophistication and modernity, while warmer temperatures (3000-4000K) evoke intimacy or vintage aesthetics. When planning your shoot, consider how your lighting choices reinforce the story. A gritty urban editorial might employ dramatic lighting with harsh shadows, while a dreamy spring collection benefits from golden-hour softness. Mix light qualities intentionally—combining hard key light with soft fill can create dimensional, magazine-worthy results that support your creative vision.
Developing Concepts and Mood Boards
Finding Inspiration and Building Concepts
Great editorial concepts rarely appear from thin air. They emerge from curious observation and active engagement with the world around you. Start by immersing yourself in sources beyond fashion itself. Art movements like surrealism or minimalism offer rich visual languages to reinterpret through clothing. Classic films provide narratives, color palettes, and mood boards ready for adaptation. Even architectural photography or street culture can spark unexpected directions.
The key is translating inspiration into a cohesive concept. Let’s say you’re captivated by Wes Anderson’s symmetrical compositions and pastel color schemes. Rather than simply mimicking his style, consider how those elements might frame a story about modern femininity or vintage resort wear. Ask yourself: What emotion am I conveying? What narrative connects these images as a series?
Photographer Tim Walker famously draws from fairy tales and theater, transforming whimsical ideas into elaborate editorial spreads. His work demonstrates how a single inspirational thread can expand into an entire world. Similarly, Steven Meisel’s cultural commentary pieces show how current events and social movements can fuel powerful fashion narratives.
Create mood boards combining tear sheets, color swatches, and reference images. Write brief narratives explaining your concept. This preparation ensures your creative vision translates clearly to your team and results in images that feel intentional rather than random, making your work truly editorial rather than just fashion photography.
Creating Effective Mood Boards
A mood board serves as your creative compass, translating abstract ideas into tangible visual references that everyone on your team can understand. Think of it as a visual conversation starter that ensures your stylist sources the right pieces and your model understands the energy you’re after.
Start with Pinterest or Milanote for digital boards, though physical boards using magazine tearsheets still have their charm for in-person meetings. Collect 15-20 images maximum to avoid overwhelming your team. Include reference photos showing lighting styles, color palettes, poses, and styling details that capture your vision. Don’t just gather beautiful images; each one should serve a specific purpose in communicating an aspect of your concept.
Organize your board into clear sections: overall mood and atmosphere, specific poses or expressions, styling inspiration, color schemes, and location aesthetics. Add notes explaining why certain images resonate with your concept. For example, “Notice the soft window light creating dimension on the fabric” gives clearer direction than simply pinning a backlit photo.
Share your board at least a week before the shoot, allowing time for questions and creative input. The best collaborations happen when team members feel invited to contribute their expertise while understanding your core vision. Remember, a mood board isn’t about dictating every detail but rather establishing a cohesive direction that guides creative decisions throughout your shoot.
Working with Models and Creative Teams
Directing Models for Editorial Poses
Editorial posing requires a fundamentally different approach than commercial fashion photography. While commercial work often demands perfect, polished poses that showcase the product, editorial photography thrives on storytelling and authentic emotion. Think of it as the difference between a catalog and a visual narrative—your model isn’t just wearing clothes, they’re embodying a character or mood.
Start by sharing your creative vision with your model before the shoot begins. Explain the story you’re telling, the emotion you’re capturing, or the character they’re portraying. This context helps models move beyond standard poses and tap into genuine expression. For instance, instead of saying “look serious,” try “imagine you’re waiting for someone who might not show up.”
Encourage movement rather than static poses. Have your model walk, turn, adjust their clothing, or interact with the environment. Capture these transitional moments—they often yield the most natural, dynamic shots. The goal is to photograph life rather than manufacture it.
Give direction that evokes feeling rather than precise positioning. Instead of “turn your chin 15 degrees left,” try “look away like something caught your attention.” This keeps expressions authentic and prevents that stiff, overthought look.
Remember that imperfection can be powerful in editorial work. A hand slightly out of frame, wind-blown hair, or an unconventional angle can add energy and realism that polished commercial poses lack.
Collaborating with Your Creative Team
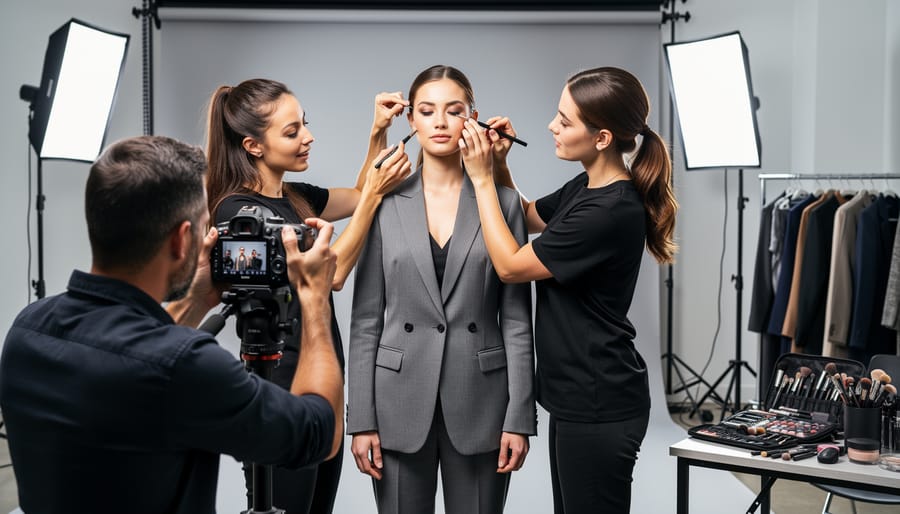
Editorial fashion photography thrives on collaboration. Your creative team—stylists, makeup artists, hair specialists, and assistants—are essential partners in bringing your vision to life, not just hired hands executing orders.
Start by sharing your concept before the shoot. Create a mood board with reference images, color palettes, and examples that communicate the story you want to tell. This visual communication prevents misunderstandings and allows your team to prepare appropriately. A makeup artist needs to know if you’re shooting high-key beauty or moody, editorial drama—each requires different products and techniques.
On set, foster an environment where ideas flow freely. Your stylist might suggest an unexpected garment combination that elevates the entire concept. Stay open to these contributions while maintaining your overall vision. Think of yourself as a director rather than a dictator—guide the creative direction but welcome input from specialists who understand their craft deeply.
Communication during the shoot matters too. Show your team tethered images as you work so everyone sees what’s translating on camera. This real-time feedback loop allows for quick adjustments and keeps everyone aligned. When collaboration feels genuine and respectful, the energy shows in the final images.
Location Scouting and Environmental Storytelling
Choosing Locations That Support Your Story
Your location choice can elevate your editorial story from ordinary to extraordinary. The right setting doesn’t just provide a backdrop—it becomes a character in your narrative, adding layers of meaning and visual interest that strengthen your entire concept.
When selecting locations, consider how the environment supports your theme. A minimalist concrete structure might emphasize cutting-edge fashion through stark contrasts, while a vintage theater could transport viewers to a different era entirely. The architecture, textures, and lighting conditions should align with your mood board and styling choices.
Effective location scouting involves thinking beyond aesthetics. An abandoned warehouse offers industrial grit and dramatic natural light, perfect for edgy streetwear editorials. Conversely, a botanical garden provides organic textures and soft, diffused lighting ideal for romantic or ethereal concepts. Urban rooftops work beautifully for high-fashion pieces where city skylines add sophistication.
Don’t overlook practical considerations either. Scout locations at the same time of day you’ll be shooting to understand natural light patterns. Check for permits, accessibility, and weather contingencies. Sometimes creative backdrop solutions in controlled studio environments offer more flexibility than unpredictable outdoor locations.
Remember that your location should never compete with your subject but rather complement and enhance the fashion story you’re telling.
Technical Considerations for Location Shoots
Location shoots bring editorial visions to life but require careful planning. Start by securing permits well in advance—many public spaces and urban areas require permission for commercial photography, and getting caught without proper documentation can shut down your entire production.
Weather contingencies are non-negotiable. Always have a backup date or indoor alternative, especially for multi-day shoots with talent and crews on the clock. Check forecasts obsessively in the week leading up to your shoot, and pack weatherproof gear bags. Consider portable pop-up tents or reflectors that double as wind shields.
Lighting presents unique challenges outdoors. Natural light changes rapidly, so shoot during golden hour for that coveted soft glow, or bring battery-powered strobes to supplement harsh midday sun. Scout your location beforehand at the same time of day you’ll be shooting to understand how light behaves in that space.
Pack strategically for logistics: extension cords, sandbags for light stands, a wagon or cart for equipment transport, and always bring more batteries than you think you’ll need. Designate a crew member as location manager to handle on-site problem-solving while you focus on creating stunning images.
Post-Processing for Editorial Fashion
Color Grading and Tonal Consistency
Color grading is where your editorial work truly develops its signature identity. Think of it as the visual language that ties your series together, creating that cohesive, magazine-ready look that sets professional editorial work apart from standalone fashion shots.
The most popular tools for this work are Adobe Lightroom and Capture One, both offering powerful color grading capabilities. Lightroom’s HSL (Hue, Saturation, Luminance) sliders let you target specific color ranges, while its Color Grading panel gives you precise control over shadows, midtones, and highlights. Capture One, favored by many high-end fashion photographers, offers even more granular color control through its Color Editor tool, allowing you to isolate and adjust specific hues with surgical precision.
Start by establishing your look on one key image from your series. Consider whether you want cool, desaturated tones for a high-fashion aesthetic, or perhaps warm, rich colors for a more accessible editorial feel. The crucial step is creating a consistent workflow. Save your adjustments as presets or styles that you can apply across the entire series, then fine-tune individual images as needed.
A practical approach is the “hero image” method: perfect your strongest shot first, then use it as your reference point. This ensures visual continuity even when lighting conditions varied during your shoot. Remember, consistency doesn’t mean identical treatment—it means maintaining the same color relationships and tonal characteristics throughout your series.
Retouching Standards for Editorial Work
Editorial retouching requires a delicate balance between polished professionalism and authentic representation. The goal is to enhance without creating an artificial or overly processed look that undermines the storytelling aspect of your work.
Start with the basics: always address technical imperfections like sensor dust spots, stray hairs across the face, and temporary blemishes. These are distractions that don’t add to the narrative. However, permanent features like birthmarks, freckles, or unique facial characteristics should generally remain untouched, as they contribute to the model’s authentic identity.
Skin retouching should maintain natural texture. The current industry standard leans heavily toward preserving skin detail rather than creating airbrushed perfection. Use frequency separation or dodge-and-burn techniques to even out skin tones while keeping pores and natural texture visible. Think refinement, not transformation.
Color correction and exposure adjustments are fair game and often necessary to achieve the editorial vision. You can also remove wardrobe malfunctions, adjust garment fit digitally when minor tweaks improve the overall composition, and clean up distracting background elements.
What to avoid: dramatically altering body shapes, removing natural body features, or creating unrealistic proportions. Many publications now have strict guidelines against excessive body manipulation, reflecting growing industry awareness about representation and authenticity.
Remember, editorial work appears in contexts where credibility matters. Your retouching should be invisible, serving the story rather than becoming the story itself.
Building Your Editorial Portfolio and Getting Published
Creating Test Shoots That Matter
Test shoots are your training ground and portfolio builder rolled into one. TFP (trade-for-print or time-for-portfolio) collaborations allow everyone involved to create editorial-style work without financial pressure, making them ideal for developing your vision and refining your approach.
Start by assembling the right team. Reach out to emerging makeup artists, stylists, and models who are also building their portfolios. Be clear about your concept and what everyone receives in return—typically high-quality edited images for their portfolios. Create a mood board that shows your editorial vision, whether that’s drawing inspiration from specific magazines or developing your own narrative.
Choose locations that add editorial interest. Even a simple studio setup with seamless paper can work, but consider urban environments, architectural spaces, or natural settings that complement your concept. The key is cohesion—every element should support your story.
Plan thoroughly but stay flexible. Create a shot list covering various angles, compositions, and styling variations. Include full-length shots, close-ups, and dynamic poses that show movement and emotion rather than static catalog poses. During the shoot, communicate your vision clearly while remaining open to spontaneous moments. These test shoots demonstrate not just your technical abilities but your capacity to direct a team and execute editorial concepts—exactly what editors and clients need to see.
Submitting Work to Publications
Getting your editorial fashion photography published requires more than exceptional images—it demands strategic thinking and relationship building. Start by researching publications that align with your aesthetic. Spend time studying magazines both online and in print to understand their visual language. Does your moody, atmospheric style fit better with an avant-garde publication, or would your clean, commercial approach suit mainstream fashion magazines?
Before submitting, thoroughly review each publication’s submission guidelines. Some editors prefer curated portfolios of 10-15 images, while others want complete editorial stories. Pay attention to file format specifications, naming conventions, and whether they accept email submissions or require online portals.
When reaching out to editors, personalize your approach. Reference specific stories they’ve published that resonate with your work, demonstrating you’ve done your homework. Keep initial emails brief and professional, with a compelling subject line and a link to your portfolio rather than attachments that clog inboxes.
Building lasting relationships takes patience. Start with smaller, independent publications to gain tearsheets and experience. Engage authentically on social media, comment thoughtfully on published work, and attend industry events when possible. Remember, editors receive countless submissions daily—persistence coupled with genuine professionalism will help you stand out without being pushy.
Editorial fashion photography stands at the intersection where technical mastery meets unbridled creative vision. Throughout this exploration, we’ve seen how this genre demands more than just understanding camera settings or lighting ratios. It requires you to think like a storyteller, art director, and visual poet all at once. The technical skills you develop, from mastering off-camera lighting to perfecting your retouching workflow, serve as the foundation. But what transforms a technically sound image into compelling editorial work is your ability to communicate emotion, concept, and narrative through every element in the frame.
The beauty of editorial fashion photography is that there’s no single correct path to success. Your unique perspective and creative voice are what will set your work apart in this competitive field. Start small by developing mood boards for personal projects. Collaborate with local stylists and models to bring your concepts to life. Study the editorial spreads in magazines you admire, analyzing not just the aesthetic choices but the stories being told.
Remember that every photographer whose work graces the pages of major publications started exactly where you are now, with a camera and a vision. The difference between aspiring and achieving lies in consistent practice, willingness to experiment, and commitment to refining your storytelling abilities. Don’t wait for the perfect opportunity or ideal conditions. Create your own editorial concepts today, test your ideas, learn from each shoot, and keep pushing your creative boundaries. The stories you want to tell through fashion photography are waiting to be captured.