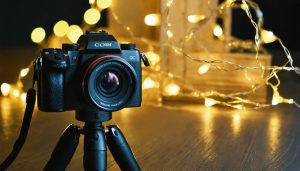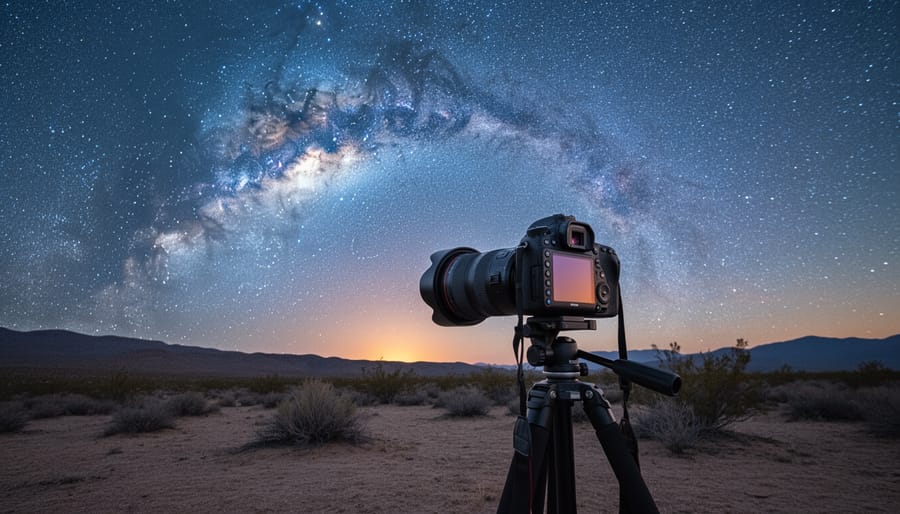
Point your DSLR at the Milky Way tonight—you already own the most important piece of equipment for capturing stunning astrophotography. That camera body sitting in your bag, whether it’s an entry-level Canon Rebel or a professional full-frame model, is perfectly capable of photographing stars, nebulae, and galaxies when paired with the right accessories and settings. The difference between a disappointing black frame and a breathtaking star field isn’t expensive gear—it’s understanding what your DSLR needs to gather light efficiently in near-total darkness.
Mount your camera on a sturdy tripod, attach a fast wide-angle lens with an aperture of f/2.8 or wider, and start with 20-second exposures at ISO 3200. These three specifications form the foundation of every successful DSLR astrophotography setup, regardless of your budget or experience level. But the journey from your first star trail to professional-quality deep-sky images involves strategic equipment additions, precise configuration choices, and mastering night photography techniques that work specifically for celestial subjects.
Most photographers hit immediate roadblocks: stars appear as streaks instead of pinpoints, images come out noisy and unusable, or focusing in complete darkness feels impossible. These challenges stem from fixable setup issues, not camera limitations. Whether you’re planning your first attempt at photographing the Andromeda Galaxy or troubleshooting why your current results disappoint, understanding each component’s role in your astrophotography system transforms frustrating nights into productive sessions under the stars. The learning curve is steep, but each piece of knowledge compounds rapidly once you grasp how exposure time, tracking, and light pollution affect your final images.
Why Your DSLR Is Better Than You Think for Night Sky Photography
If you’re wondering whether your DSLR can handle night sky photography, I have good news: it absolutely can. In fact, that camera sitting in your bag right now is more capable than most people realize.
The secret lies in what DSLRs bring to the table. First, those large APS-C or full-frame sensors excel at gathering light, which is exactly what you need when photographing faint celestial objects. Unlike smartphone sensors that measure just a few millimeters across, your DSLR sensor gives you significantly better light-gathering power and lower noise at high ISO settings.
Interchangeable lenses give you another major advantage. Want to capture the sprawling Milky Way? Mount a wide-angle lens. Ready to photograph the Andromeda Galaxy in detail? Switch to a telephoto. This flexibility simply doesn’t exist with fixed-lens cameras or smartphones, and it costs considerably less than jumping straight into telescope astrophotography.
Manual controls matter tremendously for night sky work. Your DSLR lets you dial in precise shutter speeds, apertures, and ISO settings. You can focus manually to infinity, control exposure length down to the second, and shoot in RAW format to preserve maximum data for post-processing. Try doing that with a smartphone.
Speaking of dedicated astrophotography cameras, yes, they offer cooled sensors and specialized features. But they also cost thousands of dollars and require laptops for operation. Your DSLR works standalone, displays images immediately, and handles daytime photography too.
Real-world proof? Photographers regularly capture stunning Milky Way panoramas with entry-level Canon Rebels and Nikon D3500s. I’ve seen breathtaking images of the Orion Nebula taken with decade-old DSLRs paired with basic telephoto lenses. The camera you already own is genuinely capable of producing gallery-worthy astrophotography. What matters more than having the latest model is understanding how to use what you have.
The Essential DSLR Astrophotography Setup Components
Your Camera Body: What Actually Matters
Good news: you probably don’t need to spend thousands on a new camera body. What matters most for astrophotography is understanding which features actually make a difference under dark skies.
Let’s start with sensor size, which is where most beginners get caught up. Full-frame sensors do offer advantages—they gather more light and typically handle high ISO settings with less noise. But here’s the reality: crop sensor cameras are absolutely capable of producing stunning astro images. I’ve seen breathtaking Milky Way shots from crop sensors that rival anything from full-frame bodies. The choice matters more for your field of view than image quality itself.
What you should focus on is ISO performance. Astrophotography often requires shooting at ISO 1600, 3200, or even higher. Check your camera’s high ISO noise levels—anything from the last decade should handle ISO 3200 reasonably well. Most modern DSLRs, even entry-level models, have improved dramatically in this area.
Long exposure capability is non-negotiable. You need a camera with bulb mode, which allows exposures longer than 30 seconds. Nearly every DSLR includes this feature, so you’re likely already covered. Pair this with mirror lock-up, which reduces vibration when the mirror flips up before the exposure. Even tiny movements during a 3-minute exposure can soften stars, so this seemingly minor feature becomes surprisingly important.
One practical consideration: check if your camera can be controlled remotely, either through a cable release port or WiFi connectivity. You’ll want this for triggering exposures without touching the camera directly.
The bottom line? Your current DSLR probably has everything you need. Before considering an upgrade, master what you already own.
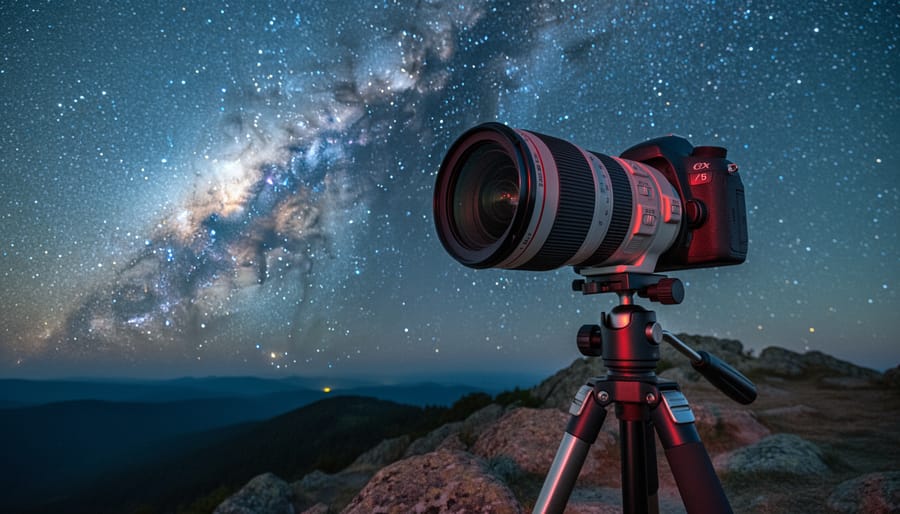
Lenses That Gather Starlight
Your lens choice can make or break your astrophotography results. The night sky doesn’t offer much light to work with, so your glass needs to gather every photon it can.
When choosing between wide-angle and telephoto lenses, consider what you want to capture. Wide-angle lenses (14-35mm) excel at sweeping Milky Way landscapes and meteor showers, letting you include foreground elements for context. Telephoto lenses (85mm and beyond) bring distant nebulae and galaxies closer, though they magnify star trailing and typically require tracking mounts.
The critical specification is aperture. You’ll want lenses with f-stop settings of f/2.8 or wider. Each stop of aperture lets in twice as much light, and at f/1.4 versus f/2.8, you’re collecting four times more photons. This translates directly to cleaner images with less noise or shorter exposure times to minimize star trails.
Watch out for coma, an optical aberration that turns stars into ugly blobs toward frame edges. Premium astrophotography lenses correct this distortion, keeping pinpoint stars across the entire image.
Budget-friendly options include the Rokinon 14mm f/2.8 (around $300), which delivers surprisingly sharp stars despite manual-only operation and some coma at the edges. The Tokina 11-16mm f/2.8 offers zoom flexibility with decent coma control for about $400. For telephoto work, the Rokinon 135mm f/2.0 punches well above its $500 price point.
Premium choices like the Sigma 14mm f/1.8 Art (roughly $1,600) virtually eliminate coma while gathering massive amounts of light. Canon’s RF 15-35mm f/2.8L and Nikon’s 14-24mm f/2.8 (both around $2,000-2,400) offer professional-grade optics with excellent coma correction and the convenience of autofocus for daytime shooting.
The trade-off is straightforward: budget lenses require careful composition to keep subjects away from problematic edges, while premium glass lets you shoot with confidence across the entire frame. Both can capture stunning images—your technique matters more than your price tag.
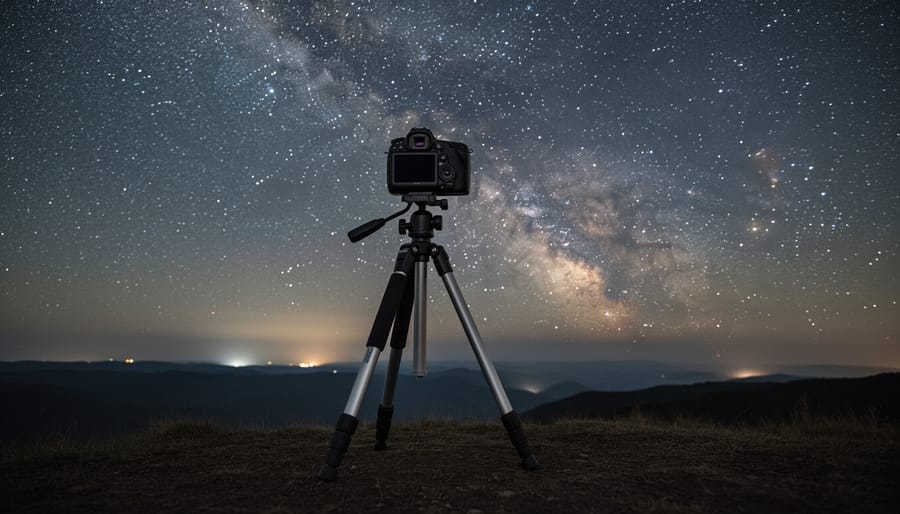
Tripods and Mounts: The Foundation Everything Depends On
Your camera and lens mean nothing if they’re moving during your exposure. Even the slightest vibration can turn pinpoint stars into blurry streaks, which is why your support system matters just as much as your glass.
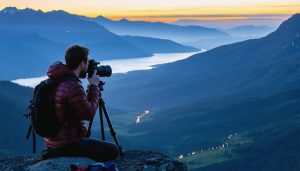
Let’s start with the basics: a sturdy tripod. If you’re shooting wide-angle Milky Way landscapes with exposures under 30 seconds, a quality tripod is all you need. Look for carbon fiber models with a good ball head and a hook for adding weight in windy conditions. Your tripod should feel rock-solid when you gently tap it. Budget around $150-300 for something that won’t let you down. This setup works beautifully for those dramatic Milky Way arch shots at 14-24mm.
But here’s where things get interesting. As you zoom in or extend your exposure time, Earth’s rotation becomes your enemy. That’s where star trackers enter the picture. These motorized devices compensate for the planet’s rotation, allowing exposures of several minutes without star trails. The iOptron SkyGuider Pro or Sky-Watcher Star Adventurer are popular choices in the $300-500 range. They’re perfect for telephoto Milky Way shots at 85-200mm or capturing nebulae with your camera lens. Setup takes about 10 minutes once you’re familiar with polar alignment.
For serious deep-sky imaging of galaxies and nebulae, you’ll eventually want a full equatorial mount. These hefty platforms can handle telescopes and multiple accessories while providing precise tracking and computer control. Think Celestron AVX or Sky-Watcher EQ6-R starting around $800-1500. They’re overkill for casual shooting, but if you’re photographing the Andromeda Galaxy at 400mm with 5-minute exposures, nothing else will do.
The practical advice? Start with a solid tripod, graduate to a star tracker when wide-field shots no longer satisfy you, and consider an equatorial mount only when you’re committed to deep-sky imaging. Each step represents both increased capability and complexity.
Accessories That Make the Difference
While your camera and lens grab the spotlight, the right accessories can transform a frustrating night into a productive imaging session. Let’s break down what you actually need versus what’s just nice to have.
The most essential accessory is an intervalometer or remote shutter release. This simple device lets you trigger exposures without touching the camera, eliminating vibrations that blur stars. Even a $15 wired remote works perfectly fine. The fancier programmable intervalometers around $30-50 let you automate sequences of hundreds of exposures while you stay warm in your car, which becomes invaluable when you’re shooting for hours.
Dew heaters deserve serious consideration, especially in humid climates. There’s nothing worse than hiking to a dark site only to have moisture condense on your lens an hour into your session. A basic USB-powered dew strap costs around $25 and wraps around your lens barrel, keeping the front element just warm enough to prevent condensation. This moves from nice-to-have to essential if you live anywhere with humidity above 60 percent.
For power solutions during those multi-hour sessions, your options depend on your setup complexity. A simple USB power bank can run your camera for extended periods through a dummy battery adapter. If you’re powering dew heaters and other accessories, invest in a portable power station with at least 150Wh capacity.
Red flashlights preserve your night vision while you adjust settings. A headlamp with a red mode costs under $20 and keeps your hands free. Finally, consider a Bahtinov mask, an inexpensive focusing aid that makes achieving pin-sharp star focus nearly foolproof. At around $15-30, it eliminates the guesswork of manual focusing in darkness.
Setting Up Your DSLR for Night Sky Success
Camera Settings That Actually Work
Let’s talk about the camera settings that will actually capture those stunning starscapes you’re after. Forget the automatic modes—astrophotography demands full manual control.
Start by switching to manual mode (M on your mode dial). This gives you complete authority over the exposure triangle, which is essential when your camera’s light meter can’t accurately read a dark sky.
For ISO, you’re walking a tightrope between gathering enough light and managing noise. Most modern DSLRs perform well between ISO 1600 and 3200 for night sky work. If you have a newer sensor (like those in Canon 6D Mark II or Nikon D850), you can comfortably push to ISO 6400. Start at ISO 3200 and adjust based on your test shots. Remember, some noise is acceptable—you can always process it out later, but you can’t rescue an underexposed image.
Aperture should be as wide as your lens allows. If you’ve got an f/2.8 lens, shoot at f/2.8. An f/1.4 prime? Use it wide open or stop down slightly to f/2 for sharper stars. The wider your aperture, the more light you collect in shorter exposures.
Shutter speed requires calculation to avoid star trails. The classic 500 rule divides 500 by your focal length. With a 24mm lens, that’s roughly 20 seconds (500/24 = 20.8). However, the more accurate NPF rule accounts for sensor size and aperture. For a full-frame camera with a 24mm lens at f/2.8, you’re looking at about 25 seconds. Crop sensors need shorter exposures—roughly 13 seconds for the same setup.
Always shoot in RAW format. This preserves maximum data for post-processing adjustments that JPEG simply can’t handle. Set your white balance to 3400-4000K for Milky Way shots, or use Daylight (5500K) and adjust later—since you’re shooting RAW, this is just a preview setting.
For deep-sky objects like nebulae, start with ISO 1600, your widest aperture, and 30-second exposures. For wide Milky Way landscapes, try ISO 3200, f/2.8, and 20 seconds. These are jumping-off points—test and refine based on your specific conditions and light pollution levels.
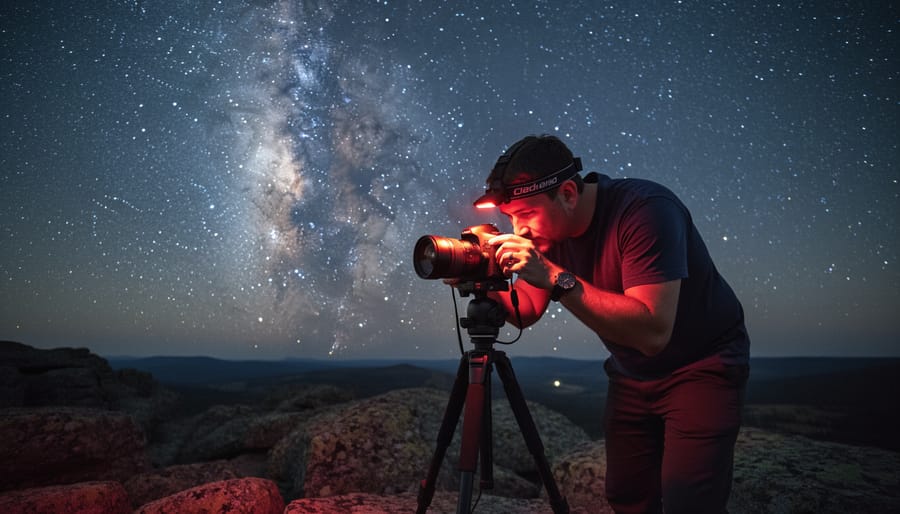
Achieving Pin-Sharp Focus in the Dark
Achieving sharp focus on stars might feel like threading a needle in the dark—literally. Autofocus systems struggle with faint points of light, so you’ll need to embrace manual focusing with some specialized techniques that become second nature with practice.
Start by enabling live view on your camera’s LCD screen. Find the brightest star you can see (Sirius, Vega, or even a bright planet like Jupiter works perfectly), then use your camera’s magnification feature to zoom in 5x or 10x on that star. You’re essentially turning your camera into a giant magnifying glass. Slowly adjust your lens’s focus ring until the star becomes the smallest, tightest point of light possible. This method works reliably about 90% of the time.
Here’s a common misconception: setting your lens to the infinity mark doesn’t guarantee sharp stars. Manufacturing tolerances mean infinity focus varies between lenses, and temperature changes can shift it throughout the night. Always verify focus visually rather than trusting the markings.
For consistently perfect results, consider investing in a Bahtinov mask—a specialized focusing aid that costs around 20 to 40 dollars. This circular filter creates diffraction spikes around stars, and when those spikes align symmetrically, you’ve nailed focus. It removes all guesswork and works brilliantly even with moderately bright stars.
Real-world troubleshooting: If stars look sharp in live view but blurry in your final images, check for lens or mirror vibration. If focus seems to drift between shots, temperature changes might be affecting your lens barrel—refocus every 30 minutes in cold conditions. And if you’re photographing near the horizon, atmospheric distortion can make stars appear softer no matter how perfectly you’ve focused, so aim higher when possible.
Polar Alignment and Tracking Basics
For static tripod shots of star trails or wide Milky Way scenes with exposures under 20-30 seconds, you can skip tracking entirely. But when you want longer exposures to capture dimmer deep-sky objects without star trailing, a star tracker becomes essential.
Polar alignment means pointing your tracker’s axis toward the celestial pole (Polaris in the Northern Hemisphere). Think of it as syncing your tracker with Earth’s rotation. Most entry-level trackers like the Star Adventurer or SkyWatcher Star Tracker include a polar scope—a small telescope built into the mount. You’ll look through it and position Polaris at a specific spot marked inside, using the date and time on a rotating reticle.
The practical method is surprisingly straightforward. Level your tripod, roughly point it north using a compass or smartphone app, then fine-tune using the polar scope. You don’t need laboratory precision for DSLR lenses under 200mm—getting within a degree or two works fine for exposures up to several minutes.
For beginners, I recommend practicing polar alignment during daytime by targeting a distant object, simulating the process. When you’re shooting the Milky Way core at 50mm with two-minute exposures, even rough polar alignment dramatically improves your results compared to untracked shots.
Common Setup Mistakes (And How to Fix Them)
Even experienced photographers hit roadblocks when they first point their DSLR at the stars. Let’s tackle the most common setup mistakes and get you shooting successfully on your very first night out.
Star trails appearing in what should be sharp pinpoints? You’ve likely exceeded the exposure time your focal length allows. The “500 Rule” provides a quick fix: divide 500 by your focal length to find your maximum shutter speed in seconds. For example, shooting with a 24mm lens means keeping exposures under 21 seconds (500÷24=20.8). Modern high-resolution sensors benefit from the stricter “300 Rule” instead. This simple calculation prevents Earth’s rotation from turning stars into streaks.
Soft, unfocused stars frustrate beginners constantly because autofocus doesn’t work in darkness. Switch to manual focus and use your camera’s live view at maximum magnification (usually 10x zoom). Focus on the brightest star you can find, then carefully lock your focus ring with tape. Many photographers mark their infinity focus point with a small piece of glow-in-the-dark tape for future sessions.
Light pollution washes out faint celestial details, but you don’t need pristine dark skies to start. Light pollution filters designed for astrophotography block specific wavelengths from streetlights while letting starlight through. Alternatively, shoot during new moon phases and point your camera away from city glow. These night photography tips work especially well when combined with proper post-processing to enhance contrast.
Dew forming on your lens will ruin an entire session. Cold glass meets humid night air, creating condensation that turns stars into fuzzy blobs. Wrap chemical hand warmers around your lens barrel with rubber bands, or invest in a dedicated dew heater strap. Check your lens every 30 minutes during humid conditions.
Battery drain happens faster in cold conditions. Lithium-ion batteries lose 20-30% capacity below freezing. Keep spare batteries in an inside pocket close to your body warmth, and swap them throughout the night.
Vibration from mirror slap and shutter movement creates subtle blur. Enable mirror lock-up mode and use a 2-second self-timer or remote shutter release. This simple combination eliminates camera shake completely, ensuring tack-sharp results.
From Basic to Advanced: Growing Your Setup
Your astrophotography journey doesn’t require buying everything at once. In fact, starting simple helps you understand what matters most before investing in specialized gear.
Begin with widefield Milky Way photography using just your DSLR, a sturdy tripod, and a fast wide-angle lens. This combination lets you capture stunning landscape astrophotography with exposures of 15-25 seconds before star trailing becomes noticeable. You’ll spend around $100-300 for a decent tripod and can use the kit lens you already own. At this stage, expect impressive results that look great on social media, though fine details in nebulae won’t be visible yet.
The next significant upgrade is a tracking mount, which changes everything. A basic star tracker like the iOptron SkyGuider Pro or Sky-Watcher Star Adventurer ($400-500) allows exposures of several minutes, revealing faint nebulosity and countless stars invisible to stationary setups. This is where deep sky imaging truly begins. You’ll need to learn polar alignment, but the learning curve isn’t steep. Expect to see dramatic improvements in image depth and detail, particularly in targets like the Andromeda Galaxy or Orion Nebula.
For serious deep sky work, consider a full equatorial mount with autoguiding capabilities. Systems like the Sky-Watcher HEQ5 or iOptron CEM26 ($1,000-1,500) handle heavier telescope-camera combinations and enable exposures of five minutes or longer through autoguiding. Add a guide camera and guidescope ($200-400) to automatically correct for tracking errors. At this level, you’re capturing data that rivals images you’ve admired online.
Light pollution filters come next in priority. A clip-in filter for your DSLR ($100-200) reduces urban skyglow, making suburban imaging viable. If you’re shooting from light-polluted areas, prioritize this before expensive mounts.
Budget roughly one year between major upgrades. This gives you time to master each level, understand your actual needs versus wants, and avoid expensive mistakes. Remember, patient imaging with modest equipment consistently outperforms rushed sessions with premium gear you haven’t learned to use properly.
The beauty of DSLR astrophotography is that you probably have everything you need to start tonight. That camera sitting on your shelf is more than capable of capturing stunning images of the Milky Way, star trails, and deep sky objects. You don’t need to invest thousands in specialized equipment to create photographs that will take your breath away.
Start simple. Take your DSLR, a sturdy tripod, and your widest lens out under dark skies tonight. Experiment with the settings we’ve covered, make mistakes, and learn from each shot. The best teacher in astrophotography is practice, not perfection. Every blurry star or overexposed frame teaches you something valuable about your equipment and technique.
Remember that the photographers whose work inspires you started exactly where you are now. They learned by doing, adjusting their approach with each session under the stars. Your journey into night sky photography builds naturally from the fundamentals covered in our beginner’s guide to night photography, adding specialized techniques as you grow more comfortable.
The universe is waiting, and your DSLR is ready to capture it. Check the weather forecast, find a dark location away from city lights, and head outside. Your first successful astrophotograph might be just hours away. Don’t wait for perfect conditions or additional gear. The best time to start is tonight.