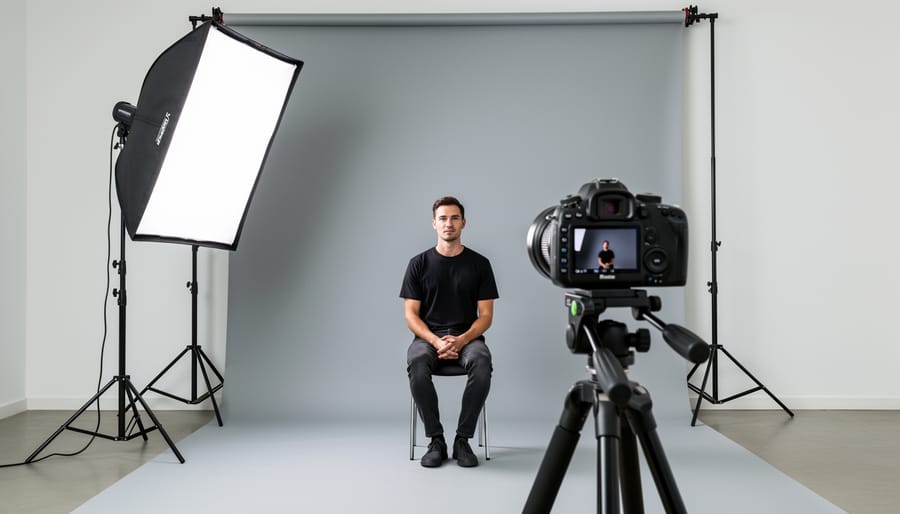
Position your single light source 45 degrees to your subject’s face and slightly above eye level to create the foundational Rembrandt lighting pattern—recognizable by the small triangle of light beneath the shadowed eye. Master feathering by angling your light so the edge of the beam, rather than its center, illuminates your subject, producing softer transitions and more dimensional skin tones. Control the shadow intensity using a reflector on the opposite side of your light source, bouncing fill light back into darker areas to achieve ratios ranging from dramatic 4:1 splits to gentle 2:1 portraits. Experiment with light-to-subject distance following the inverse square law: moving your light twice as close quadruples its intensity while softening shadows, giving you powerful control over mood without additional equipment.
The beauty of single-light portraiture lies in its elegant simplicity. While multi-light setups dominate professional studios, working with one light source strips away complexity and forces you to truly understand how light shapes form, creates depth, and directs viewer attention. This constraint becomes creative liberation—photographers from Rembrandt to Karsh built their reputations on masterful single-source work, proving you don’t need extensive gear to create compelling portraits.
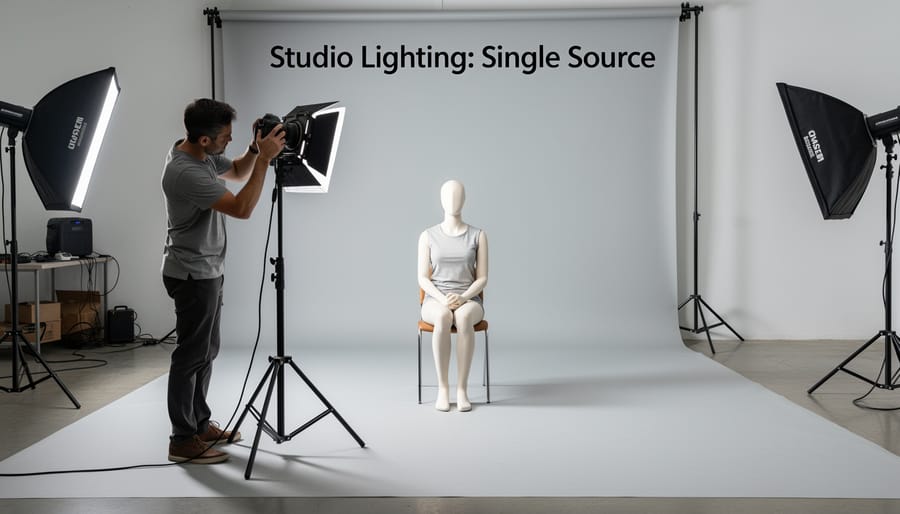
Whether you’re shooting in a home studio, working on location, or pursuing pro studio results on a budget, understanding single-light fundamentals establishes the foundation for all advanced lighting techniques. Each additional light you eventually introduce simply modifies the principles you’ll master here. By learning to see light direction, quality, and falloff through one-light exercises, you develop the visual literacy that separates technically competent photographers from true lighting artists.
The Philosophy Behind Single-Light Portraits
There’s something profoundly liberating about working with just one light. While modern photography often celebrates complexity—multiple strobes, elaborate modifiers, and intricate lighting ratios—the single-light approach strips away the excess and returns us to photography’s essence: the thoughtful manipulation of light and shadow.
The philosophy is simple: limitations breed creativity. When you can’t rely on a fill light to rescue shadow detail or a hair light to add separation, you’re forced to think more deliberately about every decision. Where do you place that single source? How large should it be? What angle creates the most compelling interplay of highlight and shadow? These questions transform technical execution into artistic intention.
History supports this minimalist approach. The great portrait painters of the Renaissance worked with one dominant light source—natural window light—creating depth and dimension through careful positioning and reflection. Similarly, Hollywood’s golden age cinematographers built entire lighting philosophies around the “key light” concept, with everything else serving a supporting role. Photographers like Yousuf Karsh and Irving Penn proved that one well-placed light could reveal character and create timeless imagery more effectively than any complex setup.
Working with a single light also develops your understanding of dramatic lighting in portrait photography. You learn to see how light wraps around faces, where shadows fall naturally, and how distance and size affect the quality of illumination. These fundamentals become second nature, building a foundation that makes multi-light setups intuitive when you eventually need them.
Perhaps most importantly, single-light portraits feel honest. There’s an authenticity to images where the lighting mimics what we experience in real life—one dominant source creating natural-looking contrast. The result isn’t just technically proficient; it’s emotionally resonant. Your subjects look like themselves, just beautifully illuminated, rather than artificially lit. That authenticity connects with viewers in ways that overly complicated lighting rarely achieves.
Understanding Your Single Light Source
Hard Light vs. Soft Light
Understanding the difference between hard and soft light is fundamental to controlling the mood and feel of your portraits. Hard light creates sharp, defined shadows with distinct edges—think of direct sunlight at noon or a bare speedlight. Soft light produces gradual transitions between highlights and shadows, creating a gentle, flattering effect that’s often preferred for beauty and headshot work.
The key factor determining light quality is the apparent size of your light source relative to your subject. A small light source positioned far away creates hard light, while a large light source close to your subject produces soft light. This is why the same speedlight can produce dramatically different results depending on how you modify it.
To achieve hard light with a single source, use your light unmodified or with a narrow modifier like a grid or snoot. Position it several feet from your subject. Hard light excels at creating dramatic, edgy portraits with strong character. It emphasizes texture and definition, making it excellent for athletes, musicians, or any subject where you want to convey strength and intensity.
For soft light, attach a large modifier like a softbox or umbrella and move it as close to your subject as your frame allows. The closer the light, the softer the quality. Soft light minimizes skin texture and creates gentle, flattering shadows—perfect for corporate headshots, family portraits, or beauty photography.
Consider your subject and the story you’re telling when choosing between hard and soft light. Neither is inherently better; they’re simply different tools for different creative visions.
Light Size and Distance
Understanding how light size and distance work together is fundamental to controlling the quality of your portraits. Here’s the key principle: the closer your light source is to your subject, the larger it appears relative to them, creating softer shadows and more gradual transitions between light and dark areas. Move that same light farther away, and it becomes a smaller, harder source that produces more defined shadows with sharper edges.
Think of it this way: the sun is enormous, but because it’s 93 million miles away, it acts as a small, hard light source on a clear day, creating harsh shadows. A softbox that’s only two feet wide becomes a large, soft source when placed just a few feet from your subject’s face.
In practical terms, this means you can modify your light quality without changing equipment. Start with your light three feet from your subject for soft, flattering illumination. Move it back to eight feet, and you’ll notice shadows become more pronounced and dramatic. This distance relationship is especially important when working with modifiers like umbrellas or softboxes. A 24-inch softbox placed two feet away will produce softer light than a 48-inch softbox positioned ten feet back, even though the larger modifier seems like it should be softer.
Direction and Angle
The position of your single light source fundamentally transforms your portrait’s emotional impact and dimensional quality. Moving the light just a few feet can shift your image from dramatic and mysterious to soft and approachable.
Start by thinking of your subject at the center of a clock face. Placing your light directly in front at the 12 o’clock position creates flat, even lighting that minimizes texture and dimension. While this can work for certain beauty applications, it generally lacks visual interest. As you move the light to 45 degrees (around 2 o’clock for right-side lighting), you begin creating the foundational patterns that give faces depth and structure.
Height matters just as much as horizontal position. A light placed at or slightly above eye level produces natural, flattering results. Raise it too high, and you’ll create heavy shadows under the eyes and nose. Lower it below eye level, and you’ll achieve an eerie, horror-movie effect that works great for creative projects but rarely for traditional portraits.
The distance between light and subject also affects mood. Closer placement creates softer shadows with gradual transitions, while moving your light farther away produces harder, more defined shadow edges. Experiment by photographing the same subject with your light at various positions, documenting each setup. This hands-on exploration reveals how subtle adjustments create dramatically different emotional responses.
Essential Single-Light Patterns Every Photographer Should Know
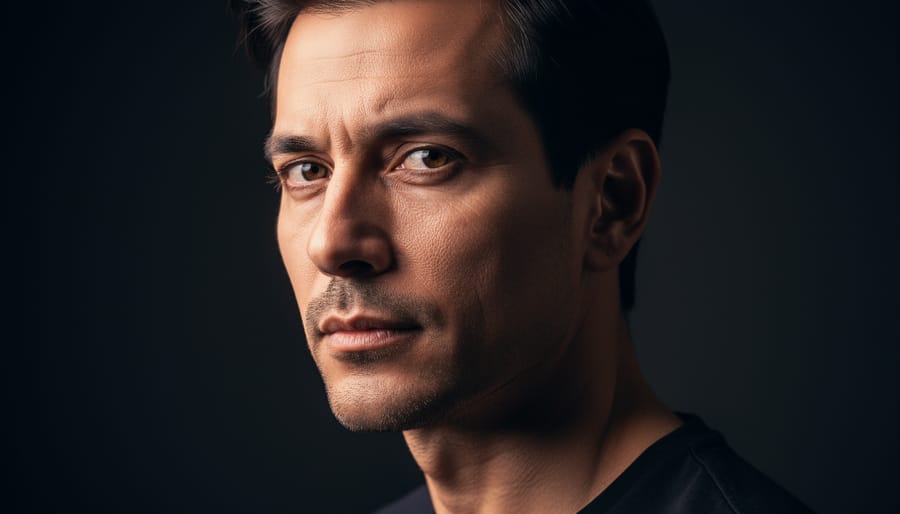
Rembrandt Lighting
Rembrandt lighting creates a distinctive small triangle of light on the shadowed cheek beneath the eye—a signature look named after the Dutch master painter who frequently used this dramatic pattern in his portraits. This technique works beautifully for creating depth and dimension, particularly for subjects with defined facial features.
To set up Rembrandt lighting, position your light source approximately 45 degrees to the side of your subject and slightly above eye level. The key is getting that telltale triangle just right—it should be no wider than the eye and no longer than the nose. Start by having your subject face the light, then gradually turn their face away until you see the triangle appear on the shadow side. If the triangle doesn’t form, adjust your light height or ask your subject to tilt their chin slightly.
This pattern excels at conveying mood and character. It works particularly well for editorial portraits, headshots with a cinematic quality, and subjects with strong, angular features. The inherent drama makes it less suitable for high-key beauty work or children’s portraits where softer lighting typically shines.
Common troubleshooting issues include the triangle disappearing entirely (your light is too far to the side) or the shadow side becoming completely dark (move your subject closer to a reflective wall or add a subtle reflector). Practice recognizing that triangle shape—once you’ve trained your eye, you’ll set it up instinctively.
Loop Lighting
Loop lighting strikes that sweet spot between dramatic and approachable, making it a go-to choice for portrait photographers across virtually every genre. This pattern gets its name from the small loop-shaped shadow that forms just to the side of the nose, pointing down toward the corner of the mouth—subtle yet defining.
To create loop lighting, position your light source about 30-45 degrees to the side of your subject and slightly above eye level. The key word here is “slightly”—raising the light too high transforms loop lighting into Rembrandt lighting. You’re looking for that characteristic nose shadow to angle downward without touching the cheek shadow.
Why does loop lighting enjoy such widespread popularity? It flatters nearly every face shape and bone structure while adding gentle dimension without excessive drama. The technique works beautifully for corporate headshots, family portraits, and even fashion work. Think of it as the versatile middle ground—it adds more interest than flat lighting while remaining more accessible than split or Rembrandt patterns.
A practical tip: watch that loop shadow carefully. It should never extend beyond the width of the nose or reach longer than the nostril. These boundaries keep the look natural and flattering rather than accidentally unflattering.
Split Lighting
Split lighting creates one of the most dramatic and mood-heavy effects in portrait photography by illuminating exactly half the face while leaving the other half in shadow. Position your light source at a 90-degree angle to your subject—directly to the left or right—so the light divides the face down the center. You’ll know you’ve nailed it when you see a clean separation between the lit and shadowed sides.
This technique works beautifully for subjects with strong facial features and adds an air of mystery or intensity to your images. It’s particularly effective for masculine portraits, character studies, and creative projects where you want to convey drama or introspection. Musicians, actors, and artists often favor this look for promotional materials.
Here’s a practical tip: split lighting can be challenging on rounder faces, as it may appear too harsh. In those cases, adjust your light position slightly forward (closer to 70 degrees) to soften the effect while maintaining the dramatic feel. You can also use a reflector on the shadow side to add subtle detail without completely eliminating the split effect. This lighting pattern gives you tremendous creative control—experiment with the depth of shadows to match your artistic vision.
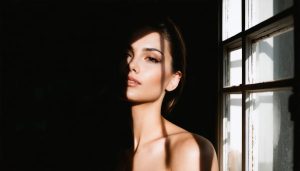
Butterfly (Paramount) Lighting
Butterfly lighting, also called Paramount lighting after the glamorous Hollywood portraits of the 1930s, creates a distinctive butterfly-shaped shadow directly beneath the nose. To achieve this classic look, position your light source directly in front of your subject and slightly above eye level, angled downward at about 25-35 degrees. The subject should be looking straight into the camera, with their face fully illuminated from the front.
This pattern is particularly flattering for subjects with well-defined cheekbones and narrow faces, as it creates symmetrical shadows that emphasize facial structure while minimizing the appearance of wrinkles. Fashion and beauty photographers frequently choose butterfly lighting because it produces that signature catch light in both eyes while sculpting the face with elegant shadows along the sides.
The key to successful butterfly lighting is finding the right height. Too high, and the nose shadow becomes elongated and unflattering; too low, and you lose the distinctive butterfly shape altogether. Watch your subject’s face carefully as you adjust the light, looking for that perfect balance where the shadow sits just below the nose without extending past the upper lip. This setup works beautifully in both studio and natural light situations when you need sophisticated, polished portraits.
Broad and Short Lighting
Here’s where many photographers get tripped up: broad and short lighting aren’t about where you place your light. They’re about how your subject’s face relates to the camera and light together.
Short lighting occurs when the side of the face furthest from the camera receives the main light. The shadowed side faces toward you, creating a slimming, dramatic effect. This technique works beautifully for most portraits because it adds dimension and is particularly flattering for subjects with rounder faces.
Broad lighting is the opposite—the side of the face closest to the camera is illuminated, while the far side falls into shadow. This widens the face visually and creates a softer, more open look. It’s ideal for subjects with narrow faces or when you want a brighter, more approachable mood.
The key insight? Your subject controls whether you’re using short or broad lighting by turning their face toward or away from your single light source. With the same light position, simply asking your subject to rotate their face slightly changes everything.
In practice, short lighting tends to be more versatile and forgiving, which is why it’s the default choice for many portrait photographers. Try both approaches during your session—you’ll quickly develop an eye for which technique enhances your subject’s features and serves your creative vision.
Modifying Your Single Light for Maximum Versatility
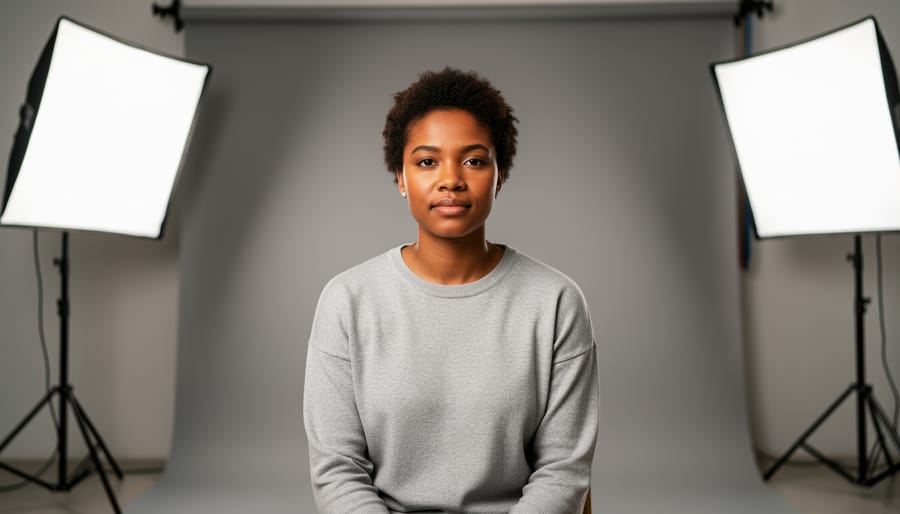
Softboxes and Umbrellas
Softboxes and umbrellas represent your two most accessible light modifiers for single-light portraits, each offering distinct characteristics that serve different creative needs. Understanding when to reach for each will significantly expand your portrait possibilities.
Softboxes create directional, controlled light by bouncing illumination off reflective interior walls before passing through a diffusion panel. This double-diffusion process produces soft, wraparound light with defined falloff characteristics. The contained nature of softboxes means light goes exactly where you point it, making them ideal when you need precise control or want to prevent light spill onto your background. Rectangular softboxes naturally complement human facial structure, while octagonal versions create pleasing round catchlights in your subject’s eyes.
Umbrellas, by contrast, scatter light more broadly. Shoot-through umbrellas diffuse light as it passes through translucent material, creating an extremely soft, forgiving quality perfect for beginners. Reflective umbrellas bounce light back toward your subject with slightly more punch and contrast. The trade-off? Less control. Umbrellas spill light everywhere, which can be advantageous for brighter, airier portraits but problematic in smaller spaces.
Choose softboxes when you need precision, dramatic lighting patterns, or background separation. Opt for umbrellas when you want fast setup, forgiving light quality, or that naturally bright look. Many photographers keep both in their kit, selecting based on the specific portrait they’re creating.
Beauty Dishes and Reflectors
Beauty dishes occupy a sweet spot between softboxes and bare bulbs, creating a distinctive quality that many portrait photographers swear by. These shallow, bowl-shaped modifiers produce light that’s simultaneously soft and crisp—wrapping around your subject’s features while maintaining excellent contrast and texture. The center deflector plate bounces light onto the reflective interior, creating a focused yet diffused beam that’s incredibly flattering for close-up portraits. You’ll notice the signature circular catchlight in your subject’s eyes, plus enhanced definition in cheekbones and jawlines.
Reflectors deserve mention here too, though they technically redirect rather than modify your primary light source. A silver reflector positioned opposite your key light can effectively create a fill light from a single strobe, giving you two-light results with one-light simplicity. White reflectors provide gentler fill, while gold adds warmth to skin tones. In outdoor sessions, a reflector can transform harsh sunlight into beautifully controlled illumination. Many photographers consider a good reflector their second most important modifier after their primary softbox.
Grids, Snoots, and Flags
When you’re working with a single light, controlling exactly where that light falls becomes crucial for creating dimension and drama. This is where modifiers like grids, snoots, and flags prove invaluable—they’re essentially the sculpting tools of portrait photography.
A grid attaches to your softbox or beauty dish and narrows the light spread, creating a graduated falloff that keeps your subject illuminated while the background goes darker. Think of it like adding a spotlight effect without losing the quality of your main modifier. Grids come in different degrees (10, 20, 40 degrees typically), with tighter grids producing more focused beams.
Snoots take this concept further, funneling light into an even narrower beam. They’re perfect for hair lights or when you want a dramatic pool of light on your subject’s face against a completely black background. The effect is theatrical and bold.
Flags, which are simply black panels positioned between your light and areas you want to keep dark, give you surgical precision. Place a flag to block light from hitting your background, and suddenly you’ve created separation without adding another light source. This technique is fundamental in commercial portraiture where clean, controlled lighting defines professional work.
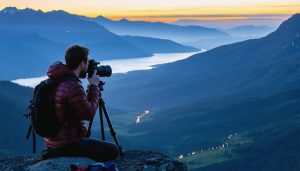
Working with Natural and Ambient Light
Natural and ambient light offers some of the most beautiful, accessible options for one-light portrait photography. The key advantage? It’s free, widely available, and creates naturally flattering results when you understand how to work with it effectively.
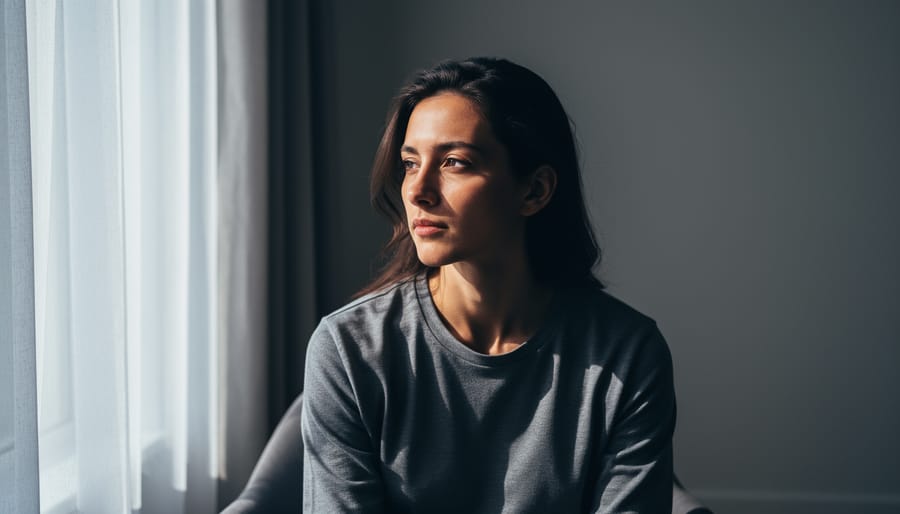
Window light stands as the gold standard for indoor natural light portraits. Position your subject three to six feet from a large window, and you’ll instantly have a soft, directional light source that mimics expensive studio modifiers. North-facing windows provide the most consistent light throughout the day since they receive indirect sunlight, making them ideal for longer shooting sessions. East and west-facing windows offer gorgeous warm light during morning and evening hours respectively, though the intensity changes more dramatically. The size of the window matters too—larger windows create softer light because they function as bigger light sources relative to your subject.
Doorways and open garage doors work similarly to windows but often provide even larger light sources. I’ve captured stunning portraits in open doorways where the subject stands just inside the threshold, with beautiful wraparound light illuminating their features. The contrast between the bright outdoors and darker interior creates natural separation and depth.
Time of day dramatically impacts your results with natural light. The golden hour—roughly the first hour after sunrise and the last hour before sunset—delivers warm, directional light that’s incredibly forgiving. Overcast days act like nature’s giant softbox, providing beautifully even illumination without harsh shadows. Avoid midday sun when shooting outdoors unless you position your subject in open shade, where they’re shielded from direct overhead light but still receiving soft, diffused illumination from the sky.
Consider pairing natural light with DIY photo backdrop ideas to create professional-looking results without studio expenses. A simple white wall or neutral curtain near your light source can transform any room into an effective portrait space.
Camera Settings for Single-Light Success
Getting your camera settings right is crucial when working with a single light source, as you have less margin for error than with multi-light setups. The good news? Once you understand the fundamentals, you’ll find that single-light photography actually simplifies the technical decision-making process.
Start with your aperture, which controls both depth of field and how much light reaches your sensor. For traditional portraits, an aperture between f/2.8 and f/5.6 works beautifully, creating pleasing background separation while keeping your subject’s face sharp. If you’re working in a small space or want more environmental context, f/8 might be your sweet spot. Remember that wider apertures like f/1.8 or f/2 can be stunning but require precise focusing, especially with single-light setups where shadows are more pronounced.
Your ISO should typically stay between 100 and 400 for studio work with strobes or continuous lights. Higher ISOs introduce noise that becomes more visible in the shadow areas created by your single light source. If you’re shooting in natural light situations, don’t be afraid to bump ISO up to 800 or even 1600, but always expose to the right without clipping highlights to minimize grain.
Shutter speed depends on your light source. With strobes, you’re limited by your camera’s sync speed, usually around 1/200th of a second. This is actually beneficial because it helps eliminate ambient light, giving you complete control. For continuous lights or natural light, use shutter speed as your primary tool for controlling ambient exposure. A practical approach: set your aperture for the depth of field you want, then adjust shutter speed to balance your key light with the existing room light, creating natural-looking results without flat, overlit backgrounds.
Common Single-Light Mistakes and How to Avoid Them
Even experienced photographers stumble when working with a single light source. The good news? Most mistakes are easily correctable once you know what to look for.
Harsh, unflattering shadows typically top the list of single-light problems. This happens when your light source is too small relative to your subject or positioned at an extreme angle. I’ve seen countless portraits ruined by a bare speedlight placed directly to the side, creating a dramatic split down the middle of the face that looks more like a horror movie than a professional portrait. The solution is straightforward: modify your light with a softbox or umbrella to increase its apparent size, and position it at a 30-45 degree angle from your subject rather than at 90 degrees. Moving the light closer also helps—remember that light falloff follows the inverse square law, so doubling the distance quarters the intensity and softness.
Flat, dimensionless lighting strikes from the opposite direction. When photographers fear shadows too much, they position their light directly in front of the subject, eliminating all depth and contour. Your subject ends up looking two-dimensional and lifeless. The fix requires embracing shadows as a tool rather than an enemy. Move your light off-axis, allowing shadows to define cheekbones, jawlines, and facial structure. Even a modest 30-degree shift creates dimension while maintaining flattering illumination.
Unintentional underexposure often catches beginners off guard, especially when transitioning from natural light. Single-light setups create stark contrasts between lit and unlit areas, and your camera’s meter can be fooled by large dark zones. Switch to manual mode and meter specifically for your subject’s face, or use spot metering to ensure proper exposure where it matters most.
Poor light placement relative to the subject’s features creates unflattering results even with correct exposure. A light positioned too low casts upward shadows that look unnatural, while excessively high placement creates deep eye sockets. Start with your light at approximately subject eye level, then adjust based on the specific lighting pattern you’re creating and your subject’s facial structure.
Building Your Single-Light Portrait Kit
Building a single-light portrait kit doesn’t require breaking the bank, though your investment level will naturally reflect your goals and where you are in your photography journey.
For beginners working with a limited budget, start with the genuine essentials. A basic speedlight or continuous LED panel (around $50-150) gives you controllable off-camera light. You’ll need a light stand—even an inexpensive one beats holding your light or recruiting an assistant. Add a shoot-through umbrella or basic softbox (under $40), and you’ve got a functional kit. A wireless trigger system completes the setup, allowing you to fire your light remotely. Many photographers have created stunning portraits with exactly this configuration.
Mid-level enthusiasts should consider upgrading to a more powerful strobe (200-400 watt-seconds) and investing in better light modifiers. A quality 43-inch octabox or parabolic umbrella provides beautiful, controllable light quality that immediately elevates your work. At this stage, a sturdy boom arm becomes incredibly valuable for positioning flexibility, especially when shooting solo.
Professional photographers typically invest in reliable, high-output strobes with consistent color temperature and fast recycle times. Premium modifiers like large parabolic reflectors or specialized beauty dishes offer precise control. Battery-powered units provide location flexibility without compromising power.
Regardless of your budget level, prioritize the modifier over the light source itself. A $100 light with a $150 softbox typically outperforms a $300 bare bulb light. Real-world experience proves that understanding light behavior matters far more than equipment cost.
Don’t feel pressured to buy everything immediately. Many successful portrait photographers still use their original speedlight years later, having simply added better modifiers and refinement tools as their skills and client base grew. Start with one quality light and truly master it before expanding.
Mastering single-light portrait photography is more than just learning to work with limitations—it’s about building the essential foundation that will elevate every aspect of your creative lighting in portrait photography. When you truly understand how one light source interacts with your subject, you develop an intuitive sense of direction, quality, and shadow that translates directly to more complex multi-light setups.
The beauty of this approach lies in its simplicity. Rather than getting overwhelmed by multiple lights and conflicting shadows, you learn to see light as a sculptor sees clay—shaping dimension and mood with deliberate, thoughtful choices. Every session with a single light trains your eye to recognize what’s working and what needs adjustment.
As you practice, be intentional. Don’t just place a light and hope for the best. Ask yourself what emotion you want to convey, what features you want to emphasize, and how the shadows will contribute to your story. Experiment with the same setup on different subjects, and notice how small adjustments create dramatically different results.
Remember, some of the most iconic portraits in history were created with nothing more than window light or a single lamp. Your gear doesn’t define your creativity—your vision does. Start simple, practice deliberately, and trust that mastering these fundamentals will unlock creative possibilities you haven’t yet imagined. The journey from good to great begins with understanding one light completely.