By
By 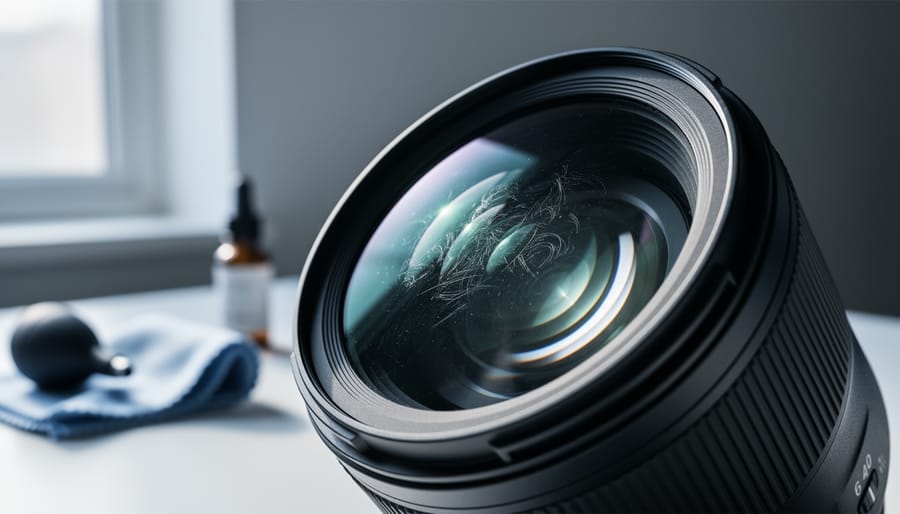
You’ve just cleaned your camera lens, held it up to the light, and there they are—stubborn streaks, mysterious smudges, and swirl marks that weren’t there before. That sinking feeling is all too familiar to photographers who’ve unknowingly made their optical glass worse instead of better.
Lens cleaning marks are the visible residue, streaks, or patterns left behind after attempting to clean your lens elements. They stem from improper cleaning materials, contaminated cloths, incorrect techniques, or using products that leave behind oils and particles. These marks can degrade image quality by creating flare, reducing contrast, and introducing soft spots in your photographs—sometimes subtly, sometimes devastatingly obvious in backlit situations.
The frustration multiplies when you realize that each additional cleaning attempt seems to spread the problem rather than solve it. You’re caught in a cycle: dirty lens, attempted cleaning, more marks, repeat. Understanding what creates these marks is your first step toward breaking free from this pattern.
The good news? With proper lens cleaning techniques and the right materials, you can remove existing marks and prevent new ones from forming. Your expensive glass deserves more than kitchen towels and breathing on it like you’re cleaning reading glasses. This guide will show you exactly how to restore your lens to pristine clarity and keep it there, protecting both your investment and your image quality.
What Are Lens Cleaning Marks and Why Do They Appear?
If you’ve ever cleaned your camera lens only to find it looks worse than before, you’re not alone. Lens cleaning marks are those frustrating residue patterns, streaks, or even micro-scratches that appear after what you thought was a careful cleaning session. These marks can manifest as circular smudges, linear streaks across the glass, or rainbow-like patterns that become especially visible when shooting toward light sources.
So why do these marks appear in the first place? The science behind them is surprisingly straightforward. When you touch your lens with bare fingers, you transfer natural skin oils and proteins onto the glass surface. These organic compounds don’t evaporate cleanly—they leave behind a thin film that redistributes when you try to wipe it away with a dry cloth. Similarly, if you’ve applied too much cleaning solution, the excess liquid doesn’t fully evaporate and instead leaves dried chemical residue in circular or streaky patterns.
Another common culprit is abrasive particles. Imagine you’re out shooting in a dusty environment, and you notice a smudge on your front element. If you immediately wipe it with a cloth without first blowing away loose particles, you’re essentially dragging tiny grains of sand, dirt, or pollen across the delicate lens coating. This creates micro-scratches that scatter light and can permanently degrade image quality.
Understanding this distinction is crucial because it changes your approach to prevention and correction.
The type of cloth you use matters tremendously too. That old cotton t-shirt or paper towel might seem harmless, but their fibers are relatively coarse compared to proper microfiber lens cloths. Using inappropriate materials can leave behind lint, scratch coatings, or simply push oils around rather than removing them. Even a dedicated lens cloth can become problematic once it accumulates dust and oils from previous cleaning sessions, turning it into an abrasive tool itself.
The Most Common Types of Lens Cleaning Marks
Streaks and Smears
Streaks and smears are perhaps the most common cleaning marks photographers encounter, and they’re usually signs that something was left behind rather than removed. These frustrating patterns typically result from oily residue—whether from fingerprints, environmental contaminants, or even the natural oils from your skin transferred during handling. Sometimes the culprit is cleaning solution that wasn’t fully buffed away, leaving a thin film that creates visible streaks across your lens surface.
Here’s what makes streaks particularly maddening: you might not even notice them under normal shooting conditions. The problem reveals itself when you point your camera toward bright light sources. Whether you’re shooting into the sun, capturing stage lighting, or photographing cityscapes at night, those seemingly invisible streaks suddenly become glaringly obvious in your images. The light scatters across the residue patterns, creating unsightly lines or haziness that can ruin an otherwise perfect shot.
Using dirty or previously contaminated microfiber cloths is another common cause. That cloth might look clean, but if it picked up oils or debris from a previous cleaning session, you’re essentially redistributing grime rather than removing it. This is why maintaining clean cleaning tools is just as important as the cleaning technique itself.
Circular Swirl Marks
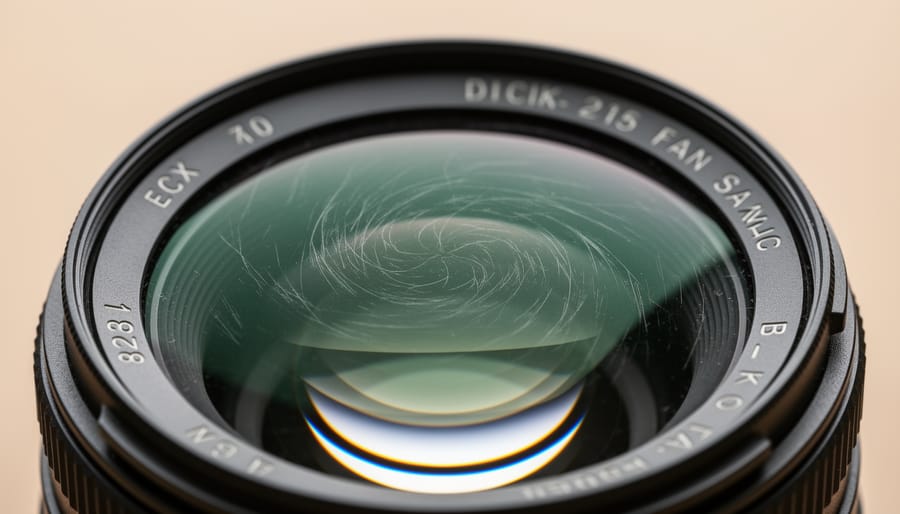
You’ve probably seen them—those swirling, rainbow-like patterns that catch the light just right and remind you of a CD disc from the ’90s. Circular swirl marks are among the most common and frustrating lens cleaning artifacts, typically created when you wipe your lens in repetitive circular motions using dry cloths, old t-shirts, or paper products that contain microscopic abrasive particles.
Here’s why these marks are particularly troublesome for modern lenses: today’s high-quality optics feature multiple delicate coatings—anti-reflective, water-repellent, and scratch-resistant layers stacked mere nanometers thick. When you use improper wiping techniques or rough materials, you’re essentially creating thousands of tiny scratches that follow your hand’s circular pattern. These micro-abrasions scatter light unpredictably, reducing contrast and sharpness in your images, especially when shooting toward bright light sources.
The real-world impact becomes obvious during backlit portraits or landscape photography with the sun in frame—those swirls transform into distracting halos and flares that no amount of post-processing can completely eliminate. Professional photographers understand that once these marks are etched into the coating, they’re essentially permanent, making prevention through proper technique absolutely essential for protecting your valuable glass investment.
Residue Rings and Spots
Ever notice those stubborn circular marks left behind after cleaning your lens? Those are typically residue rings from cleaning solutions that dried before you could buff them away. When cleaning fluid evaporates on glass, it leaves behind whatever minerals, additives, or dissolved particles were in the solution. Think of it like the water spots on your car after a rainstorm—except your lens coatings are far more delicate.
Water spots present a similar challenge. If you’ve used plain water or a damp cloth, tap water minerals create distinctive spotting patterns as they dry. These spots become particularly visible when shooting into bright light sources or at narrow apertures where every tiny imperfection becomes noticeable in your images.
Here’s where things get interesting: lens coatings react differently to various cleaning agents. Modern multi-coated lenses typically handle pH-neutral solutions well, but harsh cleaners containing ammonia or alcohol can actually compromise the coating structure over time. Some coatings are hydrophobic (water-repelling), while others are more porous—meaning the same cleaning solution might work brilliantly on one lens but leave stubborn marks on another. This explains why your vintage glass might clean up differently than your newest lens, even when using identical techniques. Always choose cleaning solutions specifically formulated for optical coatings to avoid these reactive residues.
Why Traditional Cleaning Methods Create More Marks
We’ve all been there. You’re out shooting, notice a smudge on your lens, and instinctively reach for whatever’s handy—your shirt tail, a tissue from your pocket, maybe even the corner of that microfiber cloth you use for your glasses. It seems harmless enough, right? Unfortunately, what feels like quick problem-solving is actually creating a bigger issue than the original smudge.
Let’s talk about what’s really happening when you use a cotton t-shirt or paper towel on your lens. While these materials feel soft to your fingertips, they’re remarkably abrasive at a microscopic level. Paper products contain wood fibers that act like tiny sandpaper particles against your lens coating. Cotton fibers, despite feeling gentle, have irregular surfaces that trap dirt and grit. When you wipe with these materials, you’re essentially dragging microscopic debris across your lens surface, creating hairline scratches that manifest as those frustrating marks you’re trying to eliminate.
The classic “breath and wipe” technique deserves special attention because it’s perhaps the most commonly passed-down advice that actually causes harm. When you breathe on your lens, you’re depositing moisture mixed with saliva particles, oils, and whatever else is in your breath. This creates a slightly acidic mixture that can gradually degrade modern lens coatings. Sure, Grandpa might have cleaned his simple single-coated lenses this way for decades, but today’s multi-coated optics are fundamentally different.
Modern lenses feature multiple delicate nano-coatings designed to reduce flare, improve contrast, and repel water and oil. These coatings are measured in nanometers—incredibly thin layers that provide optical benefits but remain vulnerable to improper cleaning. What worked on a 1960s lens with a single magnesium fluoride coating simply doesn’t translate to contemporary optics with seven or more specialized coating layers.
The reality is that each improper cleaning session doesn’t just fail to solve your problem—it compounds it, leaving you with an accumulation of micro-scratches, degraded coatings, and ironically, more visible marks than when you started.
The Mark-Free Cleaning Method That Actually Works
Essential Tools for Mark-Free Cleaning
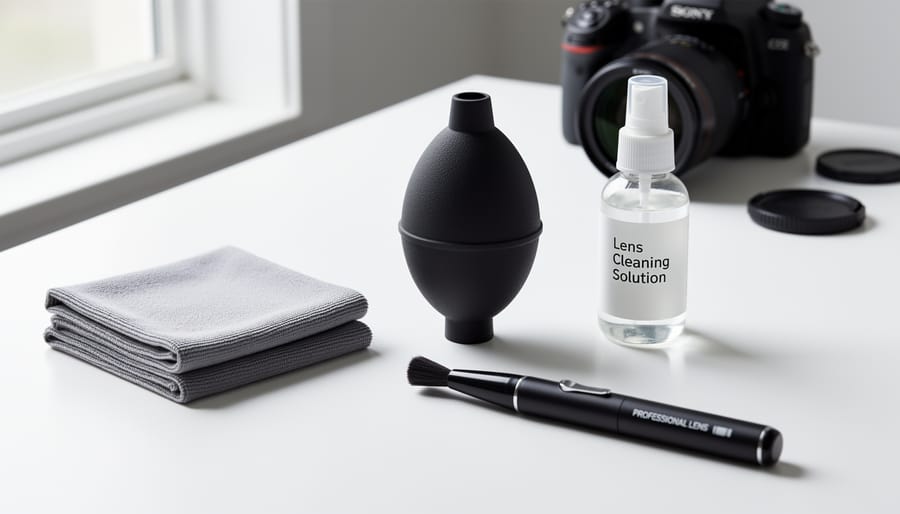
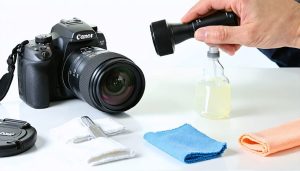
Having the right tools makes all the difference between successfully cleaning your lens and creating more marks. Let’s walk through the essential items every photographer should have in their camera bag.
Start with a rocket blower—this humble tool is your first line of defense. The Giottos Rocket Air Blaster remains the professional standard because its one-way valve prevents it from sucking in dust that could scratch your lens. Always use the blower before touching the glass to remove loose particles that cause those frustrating scratches during cleaning.
Next, invest in proper microfiber cloths specifically designed for optics. Regular microfiber towels from the hardware store won’t cut it. Look for ultra-fine weave cloths like those from Zeiss or Altura Photo. These specialized cloths lift oils and dust without redistributing them across your lens surface. Keep several on hand and wash them regularly in distilled water without fabric softener.
For stubborn marks, lens cleaning solution is necessary. Professionals trust brands like Eclipse or Zeiss Lens Cleaner because they evaporate quickly and leave no residue. Apply solution to your cloth, never directly onto the lens, to prevent seepage into the lens barrel.
Finally, lens pens offer portable convenience for field cleaning. The LensPen features a carbon compound tip that absorbs oils effectively, making it perfect for fingerprints and smudges when you’re shooting on location.
The Correct Wiping Technique
The key to avoiding those frustrating cleaning marks lies in your wiping technique. Instead of cleaning in circular motions—which many of us instinctively do—adopt a spiral-to-edge approach. Start at the center of your lens and gently wipe outward in a continuous spiral motion until you reach the edge. This technique pushes contaminants off the lens surface rather than redistributing them around in circles.
Pressure matters more than you might think. Apply only enough force to maintain contact with the lens surface—imagine you’re wiping a soap bubble without popping it. Too much pressure can grind particles into the coating or create streaks, while too little won’t effectively remove oils and smudges.
Speed is equally important. Move your cleaning cloth steadily and deliberately, not frantically. A rushed cleaning job often leaves behind the very marks you’re trying to eliminate. I learned this the hard way during a wedding shoot when I quickly wiped my lens between shots and ended up with visible streaks in my next series of images.
Know when to stop. Once you’ve completed your spiral motion and the lens looks clear, resist the urge to keep buffing. Over-cleaning can sometimes create static that attracts more dust or leave behind micro-abrasions over time.
When to Use (and Not Use) Cleaning Solution
Here’s the reality: most of the time, your lens doesn’t need cleaning solution at all. A dry microfiber cloth or air blower handles probably 80% of cleaning situations—think dust, fingerprints from careful handling, or light smudges. The friction from a quality microfiber cloth alone lifts oils and debris effectively without introducing moisture.
So when do you actually need solution? Reserve it for stubborn situations: dried water spots, sticky residues, or oily fingerprints that won’t budge with dry methods. If you’ve been shooting in coastal environments and notice salt spray, or if someone touched your front element directly (we’ve all been there at family gatherings), that’s solution territory.
The danger with over-wetting is real and often the culprit behind those frustrating cleaning marks. Apply too much solution, and it seeps into the lens barrel edges where it can’t easily evaporate, leaving mineral deposits as it dries. I’ve seen photographers spray solution directly onto their lens—never do this. Instead, apply one or two drops to your cleaning tissue, not the lens itself. The tissue should be slightly damp, never saturated. If liquid is visibly pooling or running, you’ve used too much and you’re setting yourself up for exactly the streaky marks you’re trying to avoid.
Prevention: Protecting Your Lens From Needing Frequent Cleaning
The best cleaning mark is the one you never have to deal with in the first place. While perfect protection isn’t realistic—you will eventually need to clean your lens—smart prevention strategies can dramatically reduce how often you’re reaching for that microfiber cloth.
Start by using a protective filter on your lenses. Yes, this adds another glass element to your optical path, but quality filters have minimal impact on image quality while taking the brunt of fingerprints, dust, and environmental contaminants. When disaster strikes—and it will—you’re cleaning or replacing an inexpensive filter rather than your expensive front element. I learned this lesson the hard way after sea spray left permanent etching on an unprotected wide-angle lens during a coastal shoot.
Develop mindful handling habits. Always attach your lens cap when the camera isn’t actively in use, even if you’re just walking between shooting locations. Keep your lens pointed downward when changing it to prevent dust from settling on the glass. Avoid touching the front or rear elements entirely—those oils from your fingers are stubborn and almost always leave streaks during cleaning attempts.
Store your gear properly in a camera bag with dividers, never loose where lenses can rub against each other or other equipment. Consider using lens pouches for extra protection. In dusty or humid environments, silica gel packets in your bag help control moisture that can promote fungal growth and attract particulates.
When shooting in challenging conditions like light rain or sand, use a lens hood for additional shielding. The hood creates a protective barrier that keeps environmental elements at bay while improving your images by reducing flare. These simple preventive measures mean less cleaning, fewer cleaning marks, and lenses that maintain optical excellence longer.
Fixing Stubborn Marks You’ve Already Created
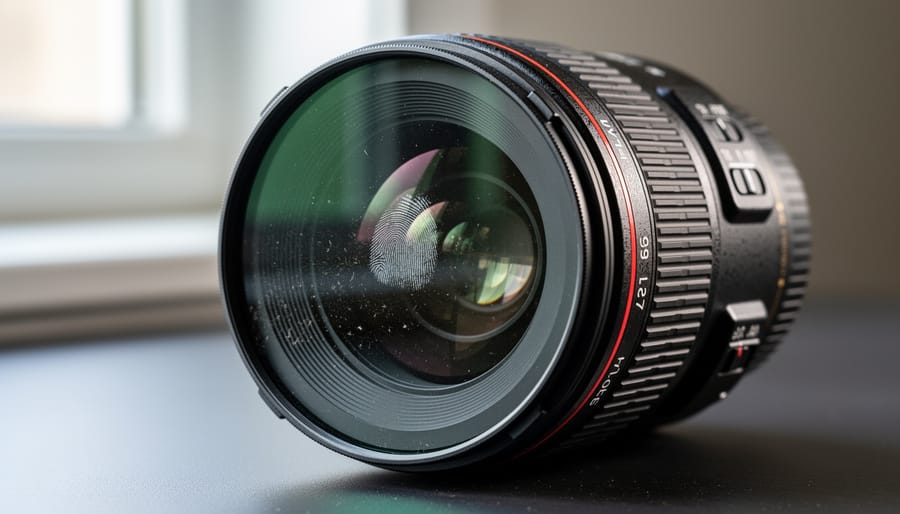
So you’ve already got those frustrating marks on your lens. Don’t panic—many stubborn cleaning marks are actually fixable with the right approach, though it’s important to understand the difference between removable residue and permanent damage.
First, assess what you’re dealing with. Stubborn marks typically fall into three categories: dried cleaning solution residue, oily fingerprint smears that have been “buffed in” by previous cleaning attempts, or actual coating damage. The good news? The first two are usually reversible. Coating damage, which appears as rainbow-like patterns or areas where the lens looks different texturally, is unfortunately permanent and means the anti-reflective coating has been compromised.
For dried residue, try this: breathe gently on the affected area to add moisture, then use a fresh microfiber cloth with distilled water or a proper lens cleaning solution. Work in gentle circular motions from the center outward, using light pressure. If that doesn’t work, lens cleaning fluid specifically designed for coated optics often dissolves stubborn deposits that water alone can’t touch. I’ve seen photographers spend hours with dry cloths trying to remove marks that disappear in seconds with the right solution.
Oily marks require a different strategy. These often need a proper lens cleaning solution with mild solvents to break down the oils. Apply a small amount to your cleaning tissue—never directly to the lens—and work methodically across the surface.
Sometimes, particularly with vintage lenses or stubborn contamination, professional cleaning services are your best option. Professional cleaners have access to specialized solutions and equipment that safely remove deposits without risking your lens coatings. Expect to pay between fifty to one hundred fifty dollars depending on the lens, but that’s a worthwhile investment compared to replacing expensive glass. If your lens shows coating damage or if marks persist after proper cleaning attempts, consulting a professional helps you understand whether the lens remains usable or needs repair.
Here’s the truth: lens cleaning marks are almost entirely preventable when you use proper technique and invest in quality cleaning tools. Yes, it takes a few extra minutes to learn the correct methods, but consider this—your lenses represent a significant financial investment, often costing hundreds or thousands of dollars. Isn’t it worth spending a little time now to protect that glass for years to come?
The good news is that proper lens cleaning isn’t complicated once you understand the basics. Use the right materials, employ gentle circular motions, and never rush the process. Make lens care a regular part of your camera maintenance routine, and those frustrating streaks and smudges will become a distant memory.
And here’s some reassurance: every photographer, even seasoned professionals, has made cleaning mistakes at some point. I’ve certainly been there, standing in the field squinting at mysterious streaks across my lens, wondering what went wrong. The difference is learning from those mistakes and adopting better habits moving forward. Your lenses will thank you for it.



 By
By