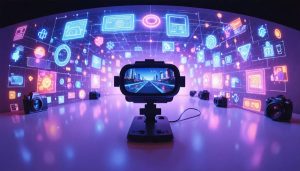
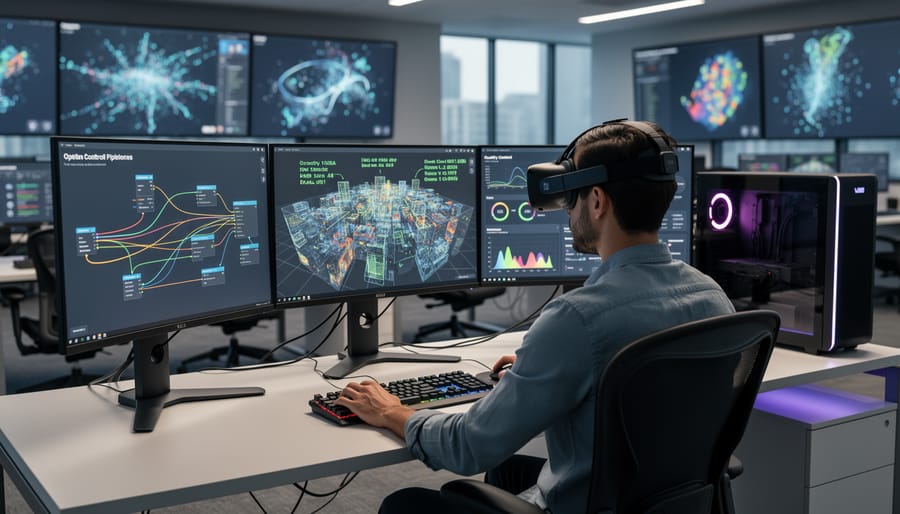
Understand that 4D pipeline refers to the complete workflow for capturing, processing, and delivering immersive VR photography where the fourth dimension represents time or viewer movement through space. When you shoot a 360-degree scene, your camera captures massive amounts of data that must be intelligently compressed and transmitted without destroying the immersive quality that makes VR compelling.
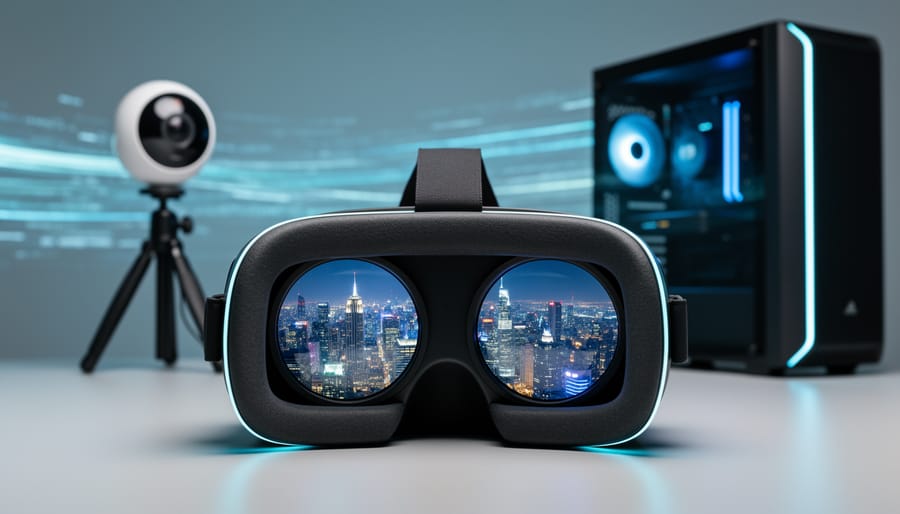
The challenge begins the moment you press the shutter. A single 8K stereoscopic 360 image contains roughly 100MB of raw data, and VR video multiplies this exponentially across every frame. Your viewers expect smooth, crystal-clear experiences, but their headsets have limited bandwidth and processing power. This fundamental tension drives every decision in the 4D pipeline.
Think of the pipeline as three interconnected stages working in harmony. First, capture involves choosing the right camera rig, shooting techniques, and initial file formats that preserve spatial information. Second, processing transforms your raw captures into optimized VR content through stitching, color correction, and spatial audio integration. Third, delivery compresses and packages your work for various platforms while maintaining perceptual quality, ensuring viewers on Quest headsets experience the same impact as those on high-end PC VR systems.
The terminology sounds complex, but the concept mirrors traditional photography workflows you already know. Just as you wouldn’t email a 50MB RAW file to a client viewing on their phone, you cannot serve uncompressed VR content to headsets with limited resources. The 4D pipeline simply adapts familiar principles of asset optimization to the unique demands of immersive media.
Mastering this workflow separates amateur VR content from professional-grade experiences that transport viewers convincingly into your captured worlds.
What Makes VR Photography Different

The Data Problem Nobody Talks About
Here’s something most VR photographers discover the hard way: file sizes spiral out of control frighteningly fast. A single high-quality 360-degree VR photos can easily consume 50-100MB of storage space. Add stereoscopic imaging into the mix, where you’re capturing separate views for each eye, and you’re looking at 150-200MB per image. Shoot a modest 50-image project? That’s potentially 10GB of data.
The bandwidth implications become painfully clear when you try sharing your work. Uploading that 10GB project to a client through standard internet connections could take hours, even with decent upload speeds. If you’re working with 4K or 8K stereoscopic content, a single panorama might take five minutes just to load on your client’s device, assuming they don’t abandon it first.
This creates a genuine dilemma for photographers. You’ve invested in proper VR camera techniques and captured stunning immersive content, but delivering that quality to viewers becomes nearly impossible. Email attachments? Forget it. Cloud sharing services throttle downloads. Even dedicated portfolio platforms struggle with files this massive.
The traditional solution has been aggressive compression, but that defeats the purpose of shooting high-resolution VR in the first place. This bandwidth versus quality tension is exactly why understanding modern pipeline technology matters so much for practical VR photography workflows.
Why Traditional Compression Breaks VR
Standard compression methods like JPEG and H.264 were designed for flat screens viewed at arm’s length. They work by discarding information your eyes typically won’t notice on a monitor or phone. The problem? What works for 2D viewing becomes glaringly problematic when that same image wraps around your entire field of vision in a VR headset.
Think about typical JPEG compression artifacts: those blocky patterns that appear in gradients or the slight blur around sharp edges. On your computer screen, you might barely notice them. But in VR, where the image fills your peripheral vision and moves with your head, these artifacts transform into something far more disturbing. That subtle blockiness becomes a shifting, crawling pattern that your brain interprets as motion sickness triggers.
Video codecs create even more pronounced issues. They achieve compression by storing only the changes between frames rather than complete images. When you turn your head in VR, you’re not watching a predetermined sequence of frames. You’re creating new viewing angles in real-time. The compression artifacts that were designed to hide in predictable motion suddenly become visible as inconsistent, jittering details that contradict what your inner ear says you should be experiencing.
A practical example: imagine photographing a sunset beach scene in 360 degrees. Standard compression might save 90 percent of file size by simplifying the sky’s color gradients. On a flat screen, this looks fine. In VR, those simplified gradients create visible bands of color that seem to hover at different distances, breaking the illusion of depth and causing viewer discomfort within minutes.
Understanding the 4D Pipeline
The Four Dimensions Explained
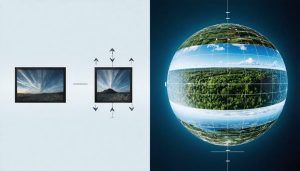
Think of traditional photography as capturing two dimensions: horizontal and vertical. You’re recording width and height on a flat plane, just like a painting on canvas. When you look at that photo, you see the scene flattened into those two axes.
Now, VR photography adds a crucial third dimension: depth. Instead of flattening everything onto one plane, VR captures the spatial information that tells your viewer how far away objects are. It’s like the difference between looking at a picture of a canyon versus standing at its edge and experiencing that vast distance dropping away from you. This depth dimension is what creates the immersive sensation that separates VR content from conventional images.
But here’s where it gets interesting. The fourth dimension in a 4D pipeline is temporal, meaning time. For VR video, this is straightforward: your content changes from one moment to the next, creating motion and narrative flow through time. However, the temporal dimension also applies to sequential VR still images, like those used in virtual tours where viewers move through different viewpoints in a space.
Here’s a practical analogy: imagine you’re documenting a museum. The horizontal and vertical dimensions capture each room’s layout. The depth dimension records how far visitors stand from each exhibit. The temporal dimension links these moments together, whether that’s smooth video of someone walking through the gallery or a series of connected still images that let viewers jump between carefully chosen vantage points.
Understanding these four dimensions is essential because compression algorithms treat each one differently. A 4D pipeline must intelligently process all four to maintain quality while keeping file sizes manageable for streaming and playback.
How the Pipeline Actually Works
Think of the 4D pipeline as a sophisticated relay race for your VR content, where each stage hands off data to the next while maintaining quality and adding efficiency.
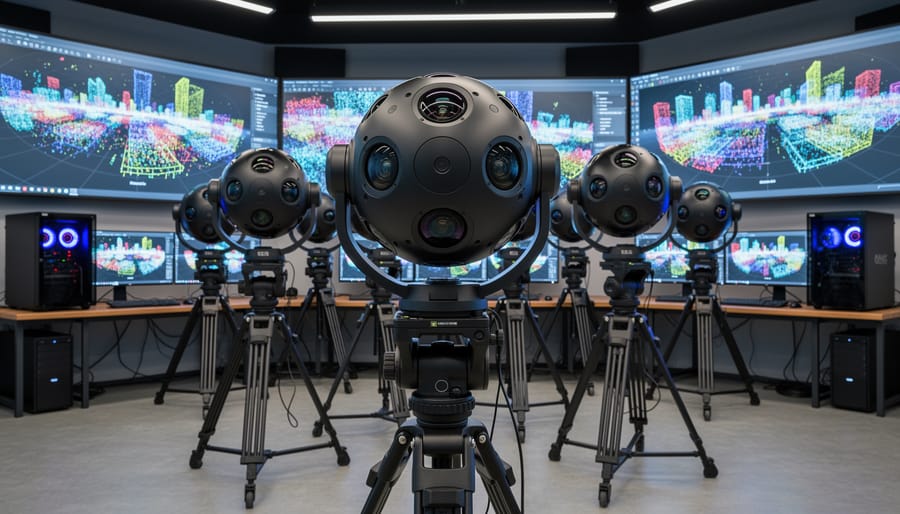
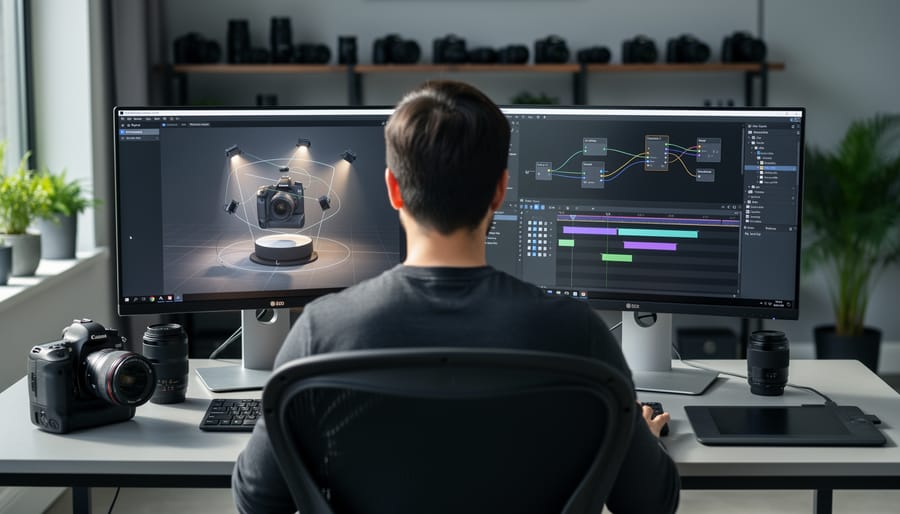
It all starts at capture. When you shoot a VR photograph or video, you’re recording multiple perspectives simultaneously, whether from a multi-camera rig or a specialized 360-degree camera. This raw data is enormous because you’re essentially capturing every viewing angle at once. At this stage, you have the highest quality possible, but file sizes that would choke most delivery systems.
Next comes the stitching and preprocessing phase. Your camera’s software (or third-party tools) combines those multiple perspectives into a seamless spherical image. Here’s where the 4D thinking begins: instead of treating your VR content as a flat, static file, the pipeline starts analyzing it as a dynamic, viewable space. The system identifies which parts of the sphere viewers are most likely to look at first and prioritizes those regions.
The compression stage is where things get clever. Rather than applying uniform compression across your entire 360-degree scene, a 4D pipeline uses spatial and temporal analysis. It examines where viewers typically look (usually straight ahead initially) and preserves maximum quality there while applying stronger compression to peripheral areas. For video, it also tracks motion patterns to predict where attention will shift next.
During delivery, the pipeline doesn’t dump the entire file on your viewer. Instead, it streams adaptively based on their head position and internet speed. As they turn their head left, the system rapidly fetches and decompresses that higher-quality data while deprioritizing what’s now behind them.
Finally, in the headset, the viewer experiences this orchestrated data flow as seamless immersion. The 4D pipeline constantly runs calculations milliseconds ahead of their movements, ensuring the sweet spot of quality always follows their gaze. It’s like having a dedicated assistant who knows where you’ll look before you do.
Compression Techniques That Preserve VR Quality
Spatial Compression vs. Temporal Compression
When you’re working with VR photography, understanding compression strategies can make or break your final output quality. Think of spatial compression as taking a single photograph and making it smaller—like when you save a JPEG at different quality levels. This method analyzes each frame independently, looking for redundant visual information within that single image to compress. It’s the same technology you use every day when sharing photos online.
Temporal compression, however, is where the “4D” aspect really shines. Instead of treating each frame as an isolated entity, temporal compression examines how pixels change from one frame to the next. Imagine filming someone standing still in a VR environment—most of the scene stays identical between frames, so why store all that duplicate data? Temporal compression only records what actually changes, dramatically reducing file sizes while maintaining quality.
For VR photography projects, your choice depends on your content type. If you’re creating static 360-degree panoramas that users can explore at their own pace, spatial compression works perfectly fine. You’re essentially dealing with still images, even if they’re spherical ones.
But when you venture into animated VR experiences or any scenario where the scene evolves over time—even subtle movements like parallax effects as users look around—temporal compression becomes essential. It’s particularly valuable for stereoscopic VR content where you’re managing two video streams simultaneously.
The practical takeaway? Static scenes favor spatial compression for simplicity, while dynamic VR experiences demand temporal compression to keep file sizes manageable without sacrificing the immersive quality your viewers expect.
Depth Map Optimization
Here’s where 4D pipelines really shine: instead of storing complete 3D data for every pixel in your VR image, they work smarter by focusing on depth maps. Think of a depth map as a grayscale image where brightness represents distance from the camera—it’s essentially a compressed blueprint of your scene’s geometry.
This approach dramatically reduces file sizes. A full 3D point cloud might require megabytes of data per frame, but a depth map paired with your original photo typically adds only 10-20% to the file size. For stereoscopic VR photos, this efficiency is game-changing. When you’re shooting a 360-degree panorama at high resolution, those savings multiply quickly.
In practical terms, this means faster uploads to VR platforms, quicker loading times in headsets, and more images stored on your devices. The 4D pipeline reconstructs the necessary 3D information on-the-fly during playback, using the depth map as a guide. Your viewers get the full immersive experience without the storage penalty of traditional volumetric capture methods.
Delivery Methods for VR Content
Adaptive Streaming for VR
Modern VR platforms have gotten remarkably smart about how they deliver content to your headset. Instead of streaming the entire 360-degree scene at full resolution all the time, they use what’s called foveated streaming or viewport-adaptive delivery. Think of it like a spotlight that follows your gaze—the system only sends high-quality image data for the portion you’re actually viewing, while everything in your peripheral vision gets transmitted at much lower quality. Since you can’t see those peripheral areas clearly anyway, you won’t notice the difference.
This approach dramatically reduces bandwidth requirements, sometimes by as much as 80 percent. For you as a VR photographer, this means your content can reach viewers with slower internet connections, and it loads faster for everyone. The catch is that your content needs to be properly prepared for this delivery method.
Here’s how to optimize for adaptive streaming: First, ensure your VR images are encoded in formats that support tiled or segmented delivery, such as equirectangular projections divided into multiple resolution layers. Platforms like Facebook 360 and YouTube VR automatically handle this conversion, but understanding the process helps you make better choices during capture.
Pay extra attention to the initial viewing direction of your scene. This is typically the front-facing area where viewers first look when your content loads. Make sure your most important visual elements appear in this zone, since it will load at full quality first. Additionally, avoid rapid transitions or busy details throughout the entire 360-degree space, as these can cause quality fluctuations when viewers move their heads quickly, creating a less smooth experience.
Progressive Enhancement Loading
Think of the last time you loaded a photo on a slow connection—that blurry preview that gradually sharpens into crisp detail. Progressive enhancement loading brings this same principle to VR photography, but with even more dramatic benefits.
In a 4D pipeline, your VR photos don’t arrive as all-or-nothing downloads. Instead, they load in strategic layers. When someone first opens your VR scene, they’ll immediately see a low-resolution version—maybe just 10-20% of the final file size. This base layer loads in seconds, letting viewers start exploring and orienting themselves right away. While they’re looking around, higher resolution data streams in progressively, sharpening details without interrupting the experience.
This approach transforms user experience, especially on mobile devices or slower connections. Rather than staring at loading screens, viewers engage immediately with your content. The technical implementation varies by platform, but most modern VR delivery systems support multiple resolution tiers encoded during the compression stage.
For photographers, this means understanding that your 8K equirectangular masterpiece will actually be experienced as several versions of itself. The pipeline automatically generates these layers, but knowing they exist helps you optimize for what viewers see first—ensuring your composition works even at lower resolutions before the full glory arrives.
Tools and Software You Can Use Today
Beginner-Friendly Options
If you’re just dipping your toes into VR photography, the good news is that you don’t need to become a technical wizard overnight. Several platforms have emerged that handle the complex 4D pipeline processing behind the scenes, letting you focus on capturing great moments rather than wrestling with encoding settings.
Google’s VR180 Creator is a solid starting point for beginners. This free tool automatically processes your 360-degree or 180-degree content, handling the spatial metadata and compression settings without requiring you to understand the technical intricacies. Simply import your footage, and the software guides you through a straightforward workflow that prepares your content for YouTube VR or other platforms.
For photographers already comfortable with Adobe’s ecosystem, Premiere Pro includes built-in VR editing capabilities with automated 4D pipeline processing. The software recognizes spatial video formats and applies appropriate compression profiles, making it easier to maintain quality without manual intervention. While there’s still a learning curve, the interface feels familiar to anyone who’s edited traditional video.
Insta360 Studio deserves mention for its truly hands-off approach. If you’re shooting with an Insta360 camera, their desktop software essentially automates the entire pipeline. It handles stitching, spatial encoding, and compression optimization in one click. Real-world feedback from hobbyists consistently praises how this tool removes technical barriers, letting them share immersive content within minutes of shooting.
These beginner-friendly options won’t give you the granular control that professionals might want, but they’re perfect for learning the ropes and understanding how 4D pipelines affect your final output quality.
Professional-Grade Solutions
When your VR workflow demands pixel-perfect results and you need complete control over how your content is compressed and delivered, professional-grade tools become essential investments. These platforms typically cost more and have steeper learning curves, but they offer capabilities that consumer tools simply can’t match.
Applications like Mistika VR and GoPro VR Player Pro give you granular control over bitrate settings, compression algorithms, and spatial audio mapping. You can tweak individual parameters for different viewing platforms—optimizing one version for standalone headsets with limited processing power while creating a higher-fidelity version for PCVR systems. The difference is similar to shooting in RAW versus JPEG; you’re capturing and preserving more information to work with downstream.
The real question is when this complexity pays off. If you’re delivering VR content to clients, publishing to multiple platforms simultaneously, or working with particularly challenging scenes (think high-contrast environments or fast-moving subjects), professional tools justify their cost. They’re also invaluable for photographers exploring AI-powered VR optimization, where you need precise control over input files to achieve the best machine-learning results.
For hobbyists or photographers just starting with VR, these tools might be overkill. Start with simpler solutions and upgrade only when you encounter specific limitations. Your time learning the software should translate directly into better results for your particular projects.
Common Mistakes That Kill VR Photo Quality
Even experienced photographers stumble when they first venture into VR content creation, and the mistakes often happen during the 4D pipeline workflow. Let me walk you through the most common pitfalls I’ve seen and how to avoid them.
The biggest culprit is over-compression at the wrong stage. Many photographers apply aggressive compression immediately after stitching their 360-degree images, thinking they’re simply optimizing file size. The problem? Once you compress spatial data before it enters the 4D pipeline, you’ve permanently degraded the quality foundation. The pipeline can’t reconstruct detail that’s already been destroyed. Instead, maintain your master files at maximum quality through the initial processing stages, then apply compression strategically after the 4D encoding process.
Another frequent mistake involves mismatched frame rates in time-based VR content. I’ve reviewed countless projects where photographers captured at 60fps but delivered at 30fps without properly considering how the 4D pipeline handles temporal data. This creates jarring motion artifacts that break immersion. The solution is to decide your target frame rate early and configure your entire pipeline accordingly, ensuring your compression settings align with the temporal resolution.
Color space confusion also wreaks havoc on VR photo quality. Many photographers shoot in one color space, process in another, and deliver in yet another without maintaining proper conversion protocols throughout the 4D pipeline. This results in banding, posterization, and inaccurate colors that look particularly awful in VR headsets. Always work in a consistent color space from capture through delivery, typically sRGB or Rec. 2020 for VR applications.
Finally, there’s the metadata neglect problem. The 4D pipeline relies on embedded metadata to properly process spatial and temporal information. Stripping this data during compression or failing to include proper VR-specific tags means viewers might see your content incorrectly mapped or distorted. Always verify your metadata survives the entire pipeline and includes critical information like projection type, stereo layout, and viewing parameters before final delivery.
Understanding the 4D pipeline is your gateway to creating VR photography that truly immerses viewers. By now, you’ve seen how this framework addresses the complete journey of your content—from the moment of capture through compression, delivery, and final display. The key takeaway? Every decision you make along this pipeline affects your final image quality, and knowing where potential bottlenecks exist empowers you to make informed choices.
Think of the 4D pipeline as your quality control checklist. When you’re capturing that stunning 360-degree landscape, remember that your camera settings are just the beginning. Consider how your chosen compression method will handle those intricate details, whether your delivery platform can maintain the spatial data that makes VR convincing, and how different headsets will ultimately render your work. This holistic view separates amateur VR content from professional results.
Ready to put this knowledge into action? Start by evaluating your current workflow. Identify which stage of your pipeline might be limiting quality—is it excessive compression to meet file size requirements, or perhaps your delivery platform’s specifications? Test different compression settings with sample images and compare the results in your target VR headset. Document what works and what doesn’t, building your own reference guide.
Most importantly, don’t let the technical aspects intimidate you. Every professional VR photographer started exactly where you are now. Begin with one optimization at a time, measure the results, and gradually refine your approach. Your understanding of the 4D pipeline will naturally deepen with each project, transforming technical knowledge into creative advantage.