Consider X10 lighting control as your gateway to affordable studio automation—a decades-old home automation protocol that photographers have repurposed to remotely trigger strobes, continuous lights, and modeling lamps without expensive proprietary systems. Install X10 modules between your standard electrical outlets and lighting equipment to create wireless on/off control through radio frequency signals, allowing you to adjust your lighting setup from across the room using handheld remotes or computer interfaces. Evaluate whether this budget-friendly option suits your workflow by understanding that X10 operates on powerline communication technology, sending signals through your existing electrical wiring rather than requiring dedicated infrastructure.
X10 emerged in the 1970s as the first widely adopted home automation standard, and while modern wireless lighting systems offer more sophisticated features, X10 remains relevant for photographers seeking reliable, inexpensive remote control solutions. The technology’s simplicity means you can start with a basic two-piece setup costing under fifty dollars—a lamp module and controller—then expand gradually as your needs grow.
This guide demystifies X10 for photographers who’ve heard whispers about this veteran technology but aren’t sure whether it deserves space in a contemporary studio. You’ll discover how X10 actually works, whether its limitations outweigh its affordability advantages, and concrete steps for implementing it in real shooting scenarios. Whether you’re outfitting your first home studio on a tight budget or exploring alternatives to expensive smart lighting ecosystems, understanding X10’s capabilities helps you make informed equipment decisions that match your technical requirements and financial constraints.
What Is X10 Lighting Control?
How X10 Communicates Through Power Lines
The beauty of X10 technology lies in its elegant simplicity. Rather than requiring you to run new cables throughout your studio or wrestling with WiFi connectivity issues, X10 uses the electrical wiring already hidden in your walls as a communication highway.
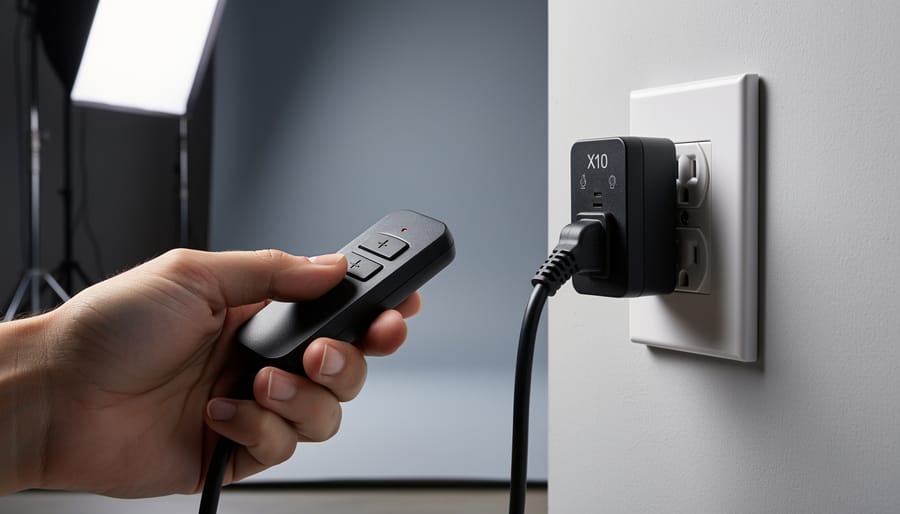
Here’s how it works: X10 devices communicate by sending brief bursts of radio frequency signals—specifically 120 kHz pulses—that piggyback on your standard 60 Hz AC power supply. Think of it like Morse code tapping on top of the steady hum of your electrical current. These signals ride along your existing power lines, carrying commands from transmitters (like wall switches or remote controls) to receivers (the modules controlling your lights).
When you press a button on an X10 controller to turn on your studio key light, it sends a digital signal through the electrical wiring. This signal includes two pieces of information: a house code (letters A through P) and a unit code (numbers 1 through 16), followed by a command like “on,” “off,” or “dim.” Every X10 device you own is set to respond to a specific house code and unit code combination, ensuring your command reaches only the intended light.
The system synchronizes these transmissions with the zero-crossing point of your AC power wave—the brief moment when voltage passes through zero. This timing minimizes interference and ensures reliable communication. It’s essentially a conversation happening thousands of times per second, invisibly traveling through the same wires powering your equipment. No internet connection required, no passwords to remember, just straightforward point-to-point communication through copper.
X10 Components for Photography Studios
Setting up X10 lighting control in your photography studio requires three main hardware categories: controllers, receivers (modules), and the necessary adapters to connect everything to your studio lights.
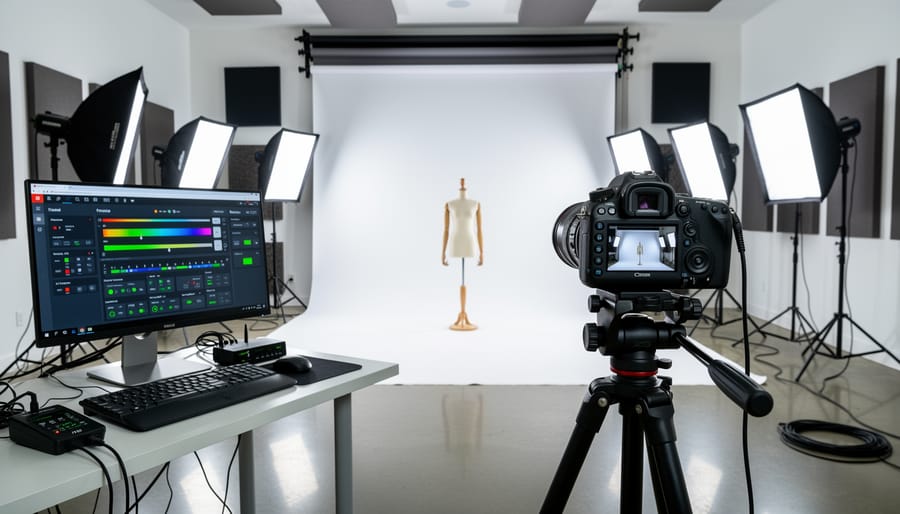
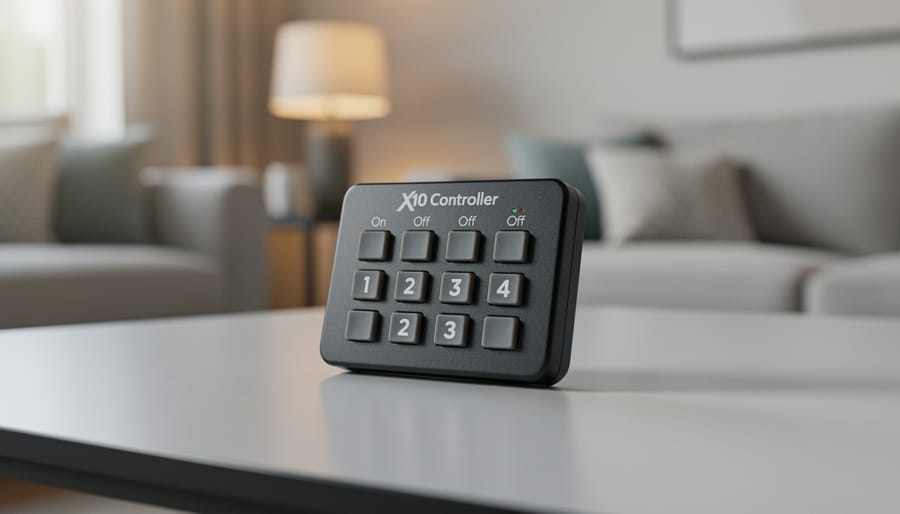
Controllers serve as your command center. The most common options for photographers include tabletop controllers like the Maxi Controller, which features 16 buttons corresponding to different lighting units, and wireless remotes such as the Keychain Remote for hands-free operation during shoots. If you’re tech-savvy, computer interfaces like the CM15A allow you to control your lights through software, creating programmable lighting sequences perfect for product photography where you need consistent, repeatable setups.
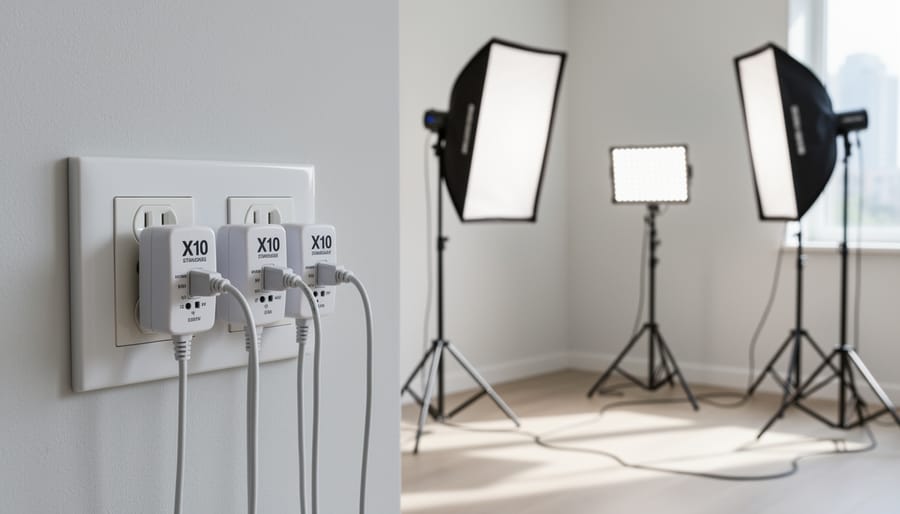
Receivers or modules are what actually connect to your lights. The Appliance Module (AM466 or similar) handles heavy-duty studio strobes and continuous lights, rated typically for 15 amps. These plug into your wall outlet, and your light plugs into the module. For smaller continuous LED panels, the Lamp Module works perfectly fine and costs less. Each module gets assigned a unique house code (A through P) and unit number (1 through 16), allowing you to control up to 256 devices theoretically, though most photographers use far fewer.
Here’s a practical example: imagine a three-point lighting setup. Your key light plugs into a module set to A1, your fill light connects to A2, and your background light to A3. Using a tabletop controller, you can turn each light on or off independently, or create scenes where certain combinations activate together. For instance, pressing one button might trigger your standard portrait setup (A1 and A2), while another activates your dramatic single-light configuration (only A1).
The beauty of this modular approach means you can start small with one controller and a couple of modules, then expand as your needs grow.
The Real-World Advantages of X10 in Photography
Reliability When You Can’t Afford Failures
When you’re shooting a paid event or working with time-sensitive client sessions, lighting failures aren’t just inconvenient—they can be career-threatening. This is where X10’s hardwired approach offers a significant advantage over modern wireless systems.
X10 communicates through your existing electrical wiring using powerline communication. Unlike WiFi or Bluetooth systems that broadcast signals through the air, X10 signals travel directly through your power lines. This fundamental difference means you’re not competing with the dozens of wireless devices that typically crowd modern environments—smartphones, tablets, wireless routers, microwave ovens, and even neighboring networks.
Consider a typical wedding reception scenario. You’ve set up your studio flash system, but so has the venue’s DJ with their wireless sound system, the videographer with their wireless mics, and guests with their dozens of active smartphones. WiFi-based lighting controllers in this environment can experience lag, dropped connections, or complete failure at the worst possible moment. X10, meanwhile, continues operating reliably because it’s entirely immune to this radio frequency congestion.
Professional photographer Maria Chen discovered this firsthand after switching back to X10 for event work: “I lost a crucial shot at a corporate gala when my Bluetooth trigger couldn’t connect through the interference. Never again. X10 might be old-school, but it fires every single time.”
The technology’s simplicity also contributes to its reliability. With fewer complex protocols and no authentication handshakes required, X10 commands execute almost instantaneously once transmitted—no pairing, no dropped connections, just consistent performance when it matters most.
Budget-Friendly Studio Automation
One of X10’s most compelling advantages is its remarkable affordability compared to modern wireless lighting systems. While professional smart home solutions like Lutron or Control4 can cost thousands of dollars, you can build a functional X10 budget-friendly studio automation system for under $200.
A basic X10 starter kit typically includes a controller module and two lamp modules for around $50-$75. Individual lamp modules run between $10-$20 each, while wall switches cost $15-$30. Compare this to modern Z-Wave or Zigbee equivalents at $40-$60 per device, and the savings become significant when outfitting multiple light positions.
For photographers building a home studio on limited funds, X10 offers genuine value. You could automate four studio light positions with dimming control for approximately $150—a fraction of what comparable modern systems demand. The catch is finding compatible modules, as X10 production has decreased. However, the used market and remaining stock from retailers make it viable for those willing to invest time in sourcing components. This cost efficiency makes X10 particularly attractive for hobbyists and emerging professionals who need reliable automation without the premium price tag of contemporary solutions.
No Learning Curve, No App Updates
Here’s one of X10’s most underappreciated advantages: once you’ve plugged everything in, you’re done. There’s no app to download, no firmware updates to install, and no compatibility headaches when your phone’s operating system updates overnight.
For photographers managing a studio lighting setup, this simplicity translates to reliability. Your X10 remote works the same way today as it did twenty years ago—press the button, and the light responds. No password recovery, no checking whether your controller supports the latest iOS version, and no troubleshooting why your lights suddenly stopped talking to your tablet.
This plug-and-play approach particularly appeals to photographers who want automation without becoming IT specialists. You won’t spend shooting time staring at spinning loading icons or resetting network connections. The physical controllers are intuitive enough that assistants can walk in and immediately understand how to operate your lights.
The trade-off, of course, is missing out on smartphone convenience and advanced scheduling features. But if you value dependability over digital bells and whistles, X10’s straightforward operation means less time troubleshooting technology and more time actually photographing.
Where X10 Falls Short in Modern Studios
Speed and Precision Limitations
Let’s be honest: X10 isn’t winning any speed records. This powerline-based protocol operates at a relatively sluggish 60 bits per second, meaning a command to turn on a light can take anywhere from half a second to several seconds to execute. In comparison, modern wireless protocols like Zigbee or Wi-Fi deliver near-instantaneous responses.
Does this matter for your photography? It depends entirely on how you shoot.
If you’re setting up lights before a portrait session, adjusting your setup between takes, or preparing for product photography, the delay is completely negligible. You’re not racing against the clock—you’re thoughtfully crafting your lighting scheme. In these scenarios, waiting an extra second for a backdrop light to illuminate won’t disrupt your workflow.
Where X10 becomes problematic is in dynamic shooting situations. Imagine you’re photographing a live event and need to quickly adjust room lighting between performances. That multi-second lag could mean missing critical moments. Similarly, if you’re experimenting with multiple lighting ratios during a fast-paced shoot, constantly waiting for each adjustment becomes genuinely frustrating.
The precision issue is less pronounced but worth noting: X10 uses a 256-step dimming scale, which is adequate for most photography applications but lacks the granular control some high-end photographers demand for nuanced lighting adjustments.
Limited Remote Range and Control Options
While X10 revolutionized home automation in its heyday, it comes with some practical limitations that photographers should understand before committing to the system.
The most significant constraint is X10’s addressing system, which supports only 256 possible device combinations (16 house codes multiplied by 16 unit codes). For a small home studio, this seems generous, but photographers working in larger commercial spaces or those who want granular control over multiple lighting zones quickly bump against this ceiling. Once you’ve assigned codes to your key lights, fill lights, background lights, and practical room fixtures, expansion becomes a puzzle of reassigning and remembering which code controls what.
Dimming control presents another frustration. X10 modules typically offer just 22 brightness levels, which feels coarse compared to modern lighting systems. When you’re trying to fine-tune ambient light to achieve that perfect mood in a portrait session, you’ll notice the jumps between brightness steps. There’s no smooth, imperceptible fade—just distinct increments that can be jarring during video work or when you need precise control for mixed lighting scenarios.
Perhaps most troublesome is X10’s dependency on your electrical circuit’s quality. Signal degradation happens when your wiring is older, when circuits are overloaded, or when certain appliances create interference. I’ve seen photographers struggle with unreliable control in older buildings where the system works perfectly on Tuesday but fails mysteriously on Wednesday after someone plugs in a new piece of equipment.
The Compatibility Challenge
Here’s the reality: X10 technology is showing its age. While it was groundbreaking in the 1970s, manufacturer support has steadily declined over the past decade. Major brands like Smarthome (formerly Insteon) have discontinued most X10 products, and finding replacement modules or new equipment increasingly means scouring secondhand marketplaces or limited specialty retailers.
This creates practical headaches for photographers building or maintaining X10-controlled studios. If a module fails during a critical shoot, you might not find an immediate replacement at your local electronics store. Compatibility issues also arise when trying to integrate X10 with modern smart home systems or wireless triggers. While adapters and bridges exist, they add complexity and cost that somewhat defeats X10’s original affordability advantage.
For those just entering lighting automation, this declining ecosystem is worth serious consideration. You’re essentially investing in technology that’s being phased out, which could leave you scrambling for parts five years down the line. That said, if you’re comfortable with some DIY troubleshooting and can source equipment now while it’s still available, X10 remains functional and budget-friendly for basic studio automation needs.
Setting Up X10 for Your Photography Studio
Essential Equipment and Where to Find It
While X10 technology is considered legacy equipment, it remains surprisingly accessible for photographers working on a budget. If you’re building X10 into your studio setup as part of your essential lighting equipment, here’s what you’ll need and where to find it.
For controllers, the CM15A ActiveHome Pro USB interface offers reliable computer control and typically costs under fifty dollars on eBay or Amazon. Pair this with lamp modules like the LM465 (for incandescent lights) or the newer LED-compatible LV467 modules. Each module handles up to 300 watts and can be daisy-chained to control multiple lights on the same house code.
Appliance modules work well for triggering strobes or continuous LED panels that draw higher current. Look for the AM486 or heavy-duty HD243 models.
For purchasing equipment, eBay remains the most reliable source for used X10 gear, often in unopened packaging. SmartHome.com still carries limited new stock, though inventory fluctuates. Amazon sellers occasionally offer bundles that provide better value than buying individual components.
One practical recommendation: start with a three-module starter kit before committing to a full studio setup. This allows you to test reliability with your specific lighting equipment and ensures compatibility with your studio’s electrical configuration before significant investment.
Basic Configuration for Studio Lighting
Setting up X10 for your studio doesn’t require an electrician, just some patience and attention to detail. Think of it like assembling modular grip equipment—each piece has a specific job, and once you understand the basics, it’s surprisingly straightforward.
Start by assigning addresses to your modules. Each X10 device needs a unique house code (A through P) and unit number (1 through 16). For a typical photography setup, stick with one house code—let’s say “A”—and number your lights sequentially. Use a small screwdriver to set the dials on each module: your main key light becomes A1, fill light A2, and so on. Write these assignments down; you’ll thank yourself later when troubleshooting.
Next, plug your lamp modules into regular wall outlets, then plug your strobes or continuous lights into the modules themselves. For hardwired installations like overhead softboxes, you’ll need appliance modules installed in junction boxes—this is where you might want professional help, though many photographers tackle it confidently after watching tutorial videos.
Now install your controller. The basic tabletop controller plugs into any outlet and sends signals through your existing electrical wiring. Position it somewhere accessible near your shooting area—think of it as your lighting console.
For initial testing, set everything to manual first. Press the controller’s button for unit A1 and toggle it on. Your key light should respond immediately. Work through each address systematically. If a light doesn’t respond, check that both devices share the same house code and verify the module is getting power. Sometimes older homes with multiple circuit breakers need signal bridge repeaters, but most studios work fine without them.
Troubleshooting Common Issues
X10 systems can be finicky, but most issues have straightforward fixes. The most common problem is signal interference—when your lights don’t respond consistently or turn on unexpectedly. This typically happens when X10 signals clash with noise from computer power supplies, LED bulbs, or battery chargers plugged into the same circuit. Try installing a noise filter on problem devices or plug your X10 modules into a different circuit. Phase coupling can also cause headaches; if your home’s electrical panel has multiple phases, signals may not communicate across them. A phase coupler, available for around twenty dollars, bridges this gap.
Unreliable switching often stems from weak signals traveling through long wire runs. Adding a signal booster near your breaker panel amplifies commands throughout your space. If specific modules fail intermittently, they may simply be worn out—X10 components from the 1990s have done their time. Replacing older modules with newer ones often resolves mysterious behavior. Finally, compact fluorescent and LED bulbs can interfere with dimmer modules since they don’t draw power like traditional incandescents. Stick with incandescent or halogen bulbs for X10-controlled fixtures, or upgrade to dedicated LED-compatible modules designed for modern lighting.
X10 vs. Modern Wireless Lighting Protocols
When X10 Makes More Sense Than WiFi or Bluetooth
Despite being older technology, X10 still holds distinct advantages in specific photography scenarios that modern wireless systems can’t always match.
If you’re setting up a permanent home studio, X10 offers unbeatable reliability. Once installed behind walls and properly configured, these systems can operate for years without the battery changes, firmware updates, or connectivity issues that plague modern smart devices. Professional photographers who’ve had the same X10 setup controlling their studio lights for over a decade will tell you there’s real value in “set it and forget it” technology.
Budget is another compelling factor. A complete X10 lighting control system for a small studio can cost under $100, while comparable WiFi-enabled smart switches often run $40-60 each. For hobbyist photographers working with limited funds, this price difference is significant.
Radio frequency interference can also make X10 the smarter choice. If your studio shares space with WiFi routers, Bluetooth devices, cordless phones, and wireless camera triggers all competing for the 2.4GHz spectrum, X10’s powerline communication operates in an entirely different domain. I’ve worked in warehouses converted to photography spaces where WiFi was nearly unusable, but X10 performed flawlessly.
Finally, there’s simplicity. X10 doesn’t require smartphone apps, cloud accounts, or network configuration. For photographers who want straightforward on-off control without the learning curve of smart home ecosystems, X10 delivers exactly that—nothing more, nothing less.
When to Choose Modern Alternatives Instead
While X10 technology has its place, certain photography scenarios call for more contemporary solutions. If you’re building a multi-room commercial studio where lighting needs to sync precisely with camera shutters, dedicated wireless flash triggers or DMX-controlled continuous lighting systems offer millisecond-accurate timing that X10 simply can’t match. These modern wireless lighting protocols also eliminate the signal interference issues that plague powerline communication.
Consider WiFi-based smart lighting systems if you need granular dimming control or want to integrate lighting with scheduling software for appointment-based photography businesses. Products in the smart home category now offer smartphone control and scene presets that would require extensive X10 programming to replicate.
For location photographers working in varied environments, battery-powered wireless triggers designed specifically for strobes and speedlights provide portability that AC-dependent X10 modules can’t deliver. You’ll also avoid the awkward conversation about plugging mysterious boxes into a client’s electrical outlets.
The reality is straightforward: if your primary need involves precise flash synchronization, mobile setups, or integration with modern digital workflows, investing in purpose-built photography equipment makes more sense than adapting decades-old home automation technology, regardless of cost savings.
So where does that leave X10 lighting control in today’s photography landscape? The honest answer is somewhere between nostalgia and practical utility. X10 isn’t going to win any awards for innovation or appear in glossy advertisements for the latest smart studio setups. But here’s the thing: not every photographer needs the cutting edge.
If you’re shooting in a dedicated home studio, working within a tight budget, or simply need reliable on/off control for continuous lights and modeling lamps, X10 delivers without demanding a premium price tag. It’s particularly appealing when you already have existing equipment or when your workflow doesn’t require the instantaneous response times that flash photography demands. The technology works, it’s proven, and replacement modules are still readily available.
The key is honest self-assessment. Don’t let marketing hype around newer wireless systems convince you that you need features you’ll rarely use. Ask yourself: Do I actually need smartphone control? Will I benefit from dimming capabilities? Is my shooting environment prone to wireless interference that might favor X10’s powerline approach?
If you’re curious about exploring X10, start small. Purchase a basic transceiver module and a couple of lamp modules to test the concept in your space. Experiment with automating your backdrop lighting or controlling modeling lamps. Map out your electrical circuits to understand how signals will travel. This hands-on approach costs relatively little and provides real-world insight into whether X10 suits your specific photography workflow before committing to a full studio automation setup.