Tighten your tripod’s leg locks systematically, working from top to bottom, ensuring each section clicks firmly into place—loose leg segments are the most common culprit behind shaky shots. Check the center column lock next, as even slight play here translates to significant movement at your camera position, particularly when you’re shooting at telephoto focal lengths or during long exposures.
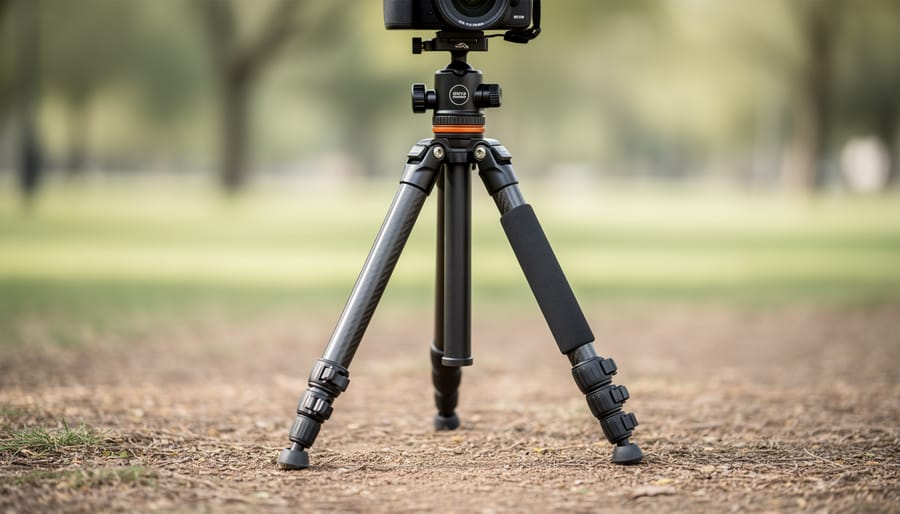
Spread your tripod legs wider to lower the center of gravity and increase the footprint, which dramatically improves stability on uneven terrain. When shooting outdoors, press down gently on the tripod head after setup to ensure the feet are properly seated in the ground rather than perched on loose debris or grass.
Add weight to your tripod by hanging your camera bag from the center column hook if available, creating a pendulum effect that dampens vibration and wind movement. This simple technique can transform a lightweight travel tripod into a surprisingly stable platform.
Inspect your tripod’s feet for worn rubber pads or damaged spikes, as degraded contact points compromise the entire system’s stability just as worn tires affect a vehicle’s handling. Regular inspection should be part of your essential camera maintenance routine.
Replace the quick-release plate if it shows play or wobble in the clamp mechanism—this small component often develops wear that undermines an otherwise solid tripod setup. Understanding these stability principles transforms frustrating moments into reliable shooting experiences, whether you’re capturing landscapes at dawn or shooting product photography in your studio.
Understanding Tripod Stability: The Foundation of Sharp Images
The Three Pillars of Tripod Stability
Think of tripod stability as a three-legged stool—remove any one leg, and everything comes crashing down. The same principle applies to keeping your tripod rock-solid, where three distinct pillars work together to ensure sharp, blur-free images.
The first pillar is proper setup technique. I learned this the hard way during a sunrise shoot at the Grand Canyon when my supposedly stable tripod produced frustratingly blurry images. The culprit? I’d extended the center column to its maximum height while leaving the legs only partially extended. The correct approach reverses this priority: always extend your tripod legs fully before touching the center column. When you need extra height, spread the legs wider at their base rather than cranking up that center post. This creates a lower center of gravity and dramatically reduces vibration. Also, make sure each leg locks firmly—a half-secured leg lock is worse than no tripod at all because it gives you false confidence while your camera slowly tilts during a long exposure.
The second pillar involves equipment condition. A tripod is only as stable as its weakest component. Check your ball head or pan-tilt head regularly for looseness—even a slightly worn quick-release plate can introduce micro-movements that ruin sharpness. I once spent an entire afternoon troubleshooting camera settings before realizing my tripod’s leg locks had accumulated so much sand and grit from beach shoots that they wouldn’t secure properly anymore. Regular cleaning and inspection prevent these frustrating situations.
The third pillar is environmental awareness. Wind is the obvious enemy, but surface matters too. Setting up on soft ground, loose gravel, or even wooden decks can introduce instability. Weight your tripod’s center hook with your camera bag when conditions get breezy, and consider rubber feet versus spiked feet based on your shooting surface.
Daily Stabilization Practices That Actually Work

Leg Extension and Locking Techniques
Getting your tripod legs extended and locked properly is fundamental to achieving a stable shooting platform. I’ve seen countless photographers struggle with wobble simply because they rushed through this crucial setup step.
Start by extending the thickest, topmost leg sections first. This sequence matters because thicker sections provide greater rigidity than the thinner lower sections. Only extend the narrower sections when you need additional height. Think of it like building a pyramid from the bottom up—you want your strongest support closest to the camera.
Now, let’s talk about those leg locks. Modern tripods typically use one of two systems: twist locks or flip locks. Twist locks require you to grip the collar and rotate it counterclockwise to loosen, then clockwise to tighten after extending. The key here is making that final twist firm and deliberate—not overtightened to the point of stripping threads, but snug enough that there’s no give. Flip locks, on the other hand, use levers that snap open and closed. When closing flip locks, you should feel a definite resistance at the end of the motion and hear a satisfying click.
Here’s a real-world tip I learned the hard way during a windy beach shoot: always check each lock twice. After extending all three legs, go around again and give each lock a gentle twist or press to confirm it’s secure. Then physically check for play by gently pushing and pulling each leg section. Any movement means that lock needs readjusting.
Center Column: Your Last Resort, Not Your First Choice
Here’s a counterintuitive truth: that extendable center column on your tripod is actually working against stability. Every inch you raise it creates a lever effect, amplifying any vibration or movement. Think of it like stacking building blocks—the higher you go, the wobblier things become.
The center column essentially turns your stable three-legged platform into a monopod. When extended, it concentrates all the weight on a single vertical axis rather than distributing it across the tripod’s legs. Wind, shutter slap, or even a gentle touch can set everything swaying. For critical shots requiring maximum sharpness, keep that center column retracted.
So when is it acceptable to use? When you’ve exhausted every other option. If you’ve already spread the legs to their maximum angle and you’re still a few inches short, the center column becomes your compromise. Just understand you’re trading some stability for height.
Better alternatives exist. Try repositioning your tripod on higher ground, or if you’re working indoors, stand on a sturdy platform yourself. Some photographers carry a small stepladder for precisely this reason. You can also consider investing in a taller tripod that reaches your desired height without needing the center column extended. Your images will thank you for the extra stability.
Weight Distribution and Ballast Strategies
Adding weight to your tripod’s center hook is one of the most effective stabilization methods, especially in windy conditions. Most tripods include a hook suspended from the center column specifically for this purpose. Using your camera bag as ballast works perfectly—just ensure it hangs freely without touching the ground, which would defeat the purpose.
However, there’s a critical balance to strike. While adding weight lowers the center of gravity and reduces vibration, over-weighting creates dangerous top-heaviness, particularly with lightweight tripods supporting heavy telephoto lenses. A good rule of thumb: don’t exceed the combined weight of your camera and lens. Start with a partially filled bag and add weight gradually until you notice improved stability.
Position matters too. Weight should hang directly below the center column, not swing to one side. Some photographers fill water bottles on location rather than carrying extra weight to shooting sites. Just remember that excessive ballast on an undersized tripod can actually increase instability rather than reduce it, creating a pendulum effect that amplifies movement.
Maintenance Tasks That Prevent Instability Before It Starts
Post-Shoot Cleaning: The 5-Minute Routine
After every shoot, a quick five-minute cleaning routine can prevent the buildup that leads to instability down the road. The key is addressing environmental challenges immediately, before debris has a chance to settle into critical components.
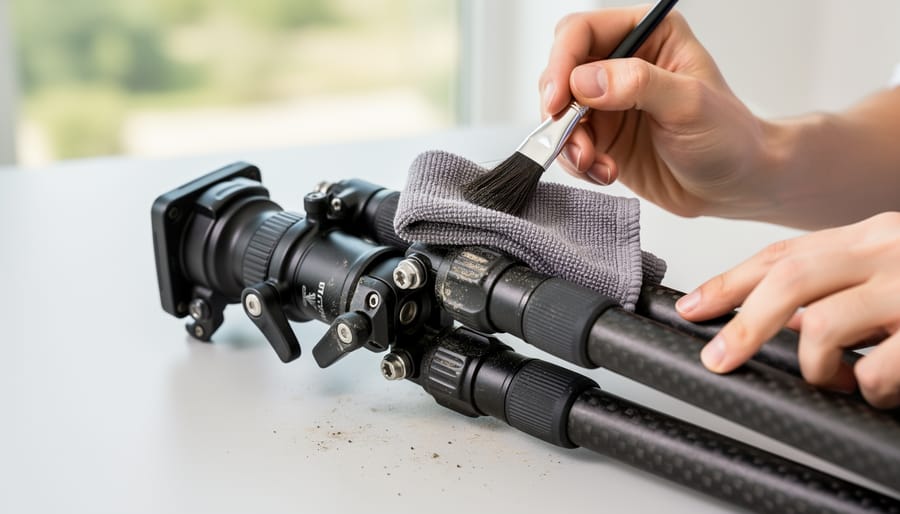
Start by extending your tripod fully and giving it a gentle shake to dislodge loose particles. For beach shoots, salt and sand are your biggest enemies. Use a dry microfiber cleaning cloth to wipe down each leg section, paying special attention to the areas just above and below the locks. Twist each leg lock while wiping to ensure you’re capturing sand trapped in the threading. Once home, rinse legs with fresh water to remove salt residue, but never submerge the locks themselves.
Forest environments introduce moisture and organic debris. Inspect the feet and lower leg sections for mud or leaves, which can work their way into adjustment mechanisms. Wipe everything down while the tripod is still extended, then compress it section by section, checking for resistance that might indicate trapped material.
Urban shoots typically involve less aggressive cleaning, but don’t skip it entirely. Concrete dust and grime accumulate surprisingly fast. A quick wipe-down of all surfaces, especially around the center column and apex, takes just minutes.
The beauty of this routine is consistency. Five minutes after each shoot prevents the hour-long deep cleaning sessions that become necessary when maintenance is neglected, keeping your tripod stable and reliable for years to come.
Monthly Deep Maintenance
Think of monthly deep maintenance as a health checkup for your tripod. Just like you wouldn’t skip regular oil changes for your car, dedicating 20-30 minutes each month to thorough tripod inspection prevents those frustrating stability issues that can ruin a shoot.
Start with the leg locks, which are the most common culprit for wobble. Fully extend each leg section and twist or flip each lock mechanism. Feel for any grinding or resistance. If you notice grit or debris, wipe down the leg tubes with a microfiber cloth dampened with isopropyl alcohol. For twist locks, remove any visible dirt from the threading. Flip locks should move smoothly without sticking. If they’re sluggish, a tiny drop of sewing machine oil on the pivot points works wonders, but wipe away any excess to prevent dirt accumulation.
Next, examine those rubber feet closely. Turn your tripod upside down and look for cracks, flat spots, or missing chunks. Worn feet compromise stability on smooth surfaces like tile or hardwood. Most manufacturers sell replacement feet for under $15, making this an easy fix. While you’re down there, check that the feet screw on securely and haven’t worked themselves loose.
The head mounting plate deserves special attention since it’s under constant stress. Inspect the threaded screw for damage and ensure the plate sits flush against the tripod crown. Any wobble here multiplies dramatically at your camera position.
For lubrication, stick with lightweight machine oil or manufacturer-recommended lubricants. Avoid WD-40, which attracts dust, and heavy greases that can gum up in cold weather. Following proper care and maintenance protocols prevents expensive repairs and ensures your tripod remains rock-solid when you need it most.
Annual Overhaul and Parts Replacement
Even well-maintained tripods eventually show their age. Learning to recognize when parts need replacement can save you from equipment failure during critical shoots. The most common wear points are the rubber feet, which develop cracks or lose their grippy texture over time. If you notice your tripod sliding on smooth surfaces where it once held firm, it’s time for new feet. Lock mechanisms and twist locks often wear out too, especially the internal springs and O-rings that create tension. When you find yourself cranking locks tighter than usual or experiencing gradual leg creep, these components likely need attention.
Thread damage is another telltale sign, particularly where the head attaches to the center column. Cross-threading or overtightening can strip these crucial connection points, creating dangerous instability. Quick-release plates also develop worn grooves that prevent secure camera mounting.
For replacement parts, start with the manufacturer’s website or authorized dealers to ensure proper fit. Many tripod makers sell feet, plates, and bushings individually. Third-party suppliers offer universal solutions, though verify compatibility first. Basic repairs like swapping feet or replacing Allen screws are straightforward DIY projects requiring minimal tools.
However, center column overhauls, ball head servicing, or structural repairs warrant professional attention. Camera repair shops with tripod experience can rebuild internal mechanisms and assess frame integrity. When repair costs approach replacement value, consider upgrading instead.
Diagnosing and Fixing Common Stability Issues
The Wobbly Leg Syndrome
Nothing’s more frustrating than setting up your shot only to watch your camera gently sway in the breeze. Before you blame the wind, let’s diagnose which leg is the troublemaker.
Start by extending your tripod to working height without your camera attached. Apply gentle downward pressure on the head while watching each leg. The wobbly culprit will visibly shift or compress slightly. Once identified, run your hand along that leg section by section, testing each lock mechanism.
Twist-lock legs typically loosen over time. The fix is straightforward: unlock the collar completely, then hand-tighten the tension ring (usually located at the base of each collar). You’re looking for firm resistance without requiring superhuman strength to operate. For flip-lock mechanisms, check the tension screw on the lever’s opposite side. A quarter-turn clockwise often resolves minor wobbling.
In the field without tools, try this temporary fix: wrap a small piece of paper or thin fabric around the leg section before locking it down. This adds just enough thickness to compensate for worn components.
If tightening doesn’t help, the lock mechanism itself may be worn beyond adjustment. Most tripod manufacturers sell replacement parts for popular models. While swapping out a collar requires some mechanical confidence, it’s considerably cheaper than replacing the entire tripod and extends your equipment’s lifespan by years.
Head Movement and Play
A loose head can completely undermine even the sturdiest tripod legs. If you notice your camera drooping or shifting position after you’ve composed your shot, the problem typically originates from the head mechanism itself rather than the legs below.
Start by locating the main locking knob or lever on your ball head or pan-tilt head. For ball heads, this single control should provide enough friction to hold your camera’s weight when partially tightened, with a solid lock when fully engaged. If you’re cranking down with excessive force and still experiencing movement, the friction elements inside have likely worn down. Ball heads contain internal friction pads that deteriorate over time, particularly with heavy use or when exposed to grit and moisture.
Pan-tilt heads offer separate controls for horizontal and vertical movement, making diagnosis easier. Test each axis independently by loosening and tightening the corresponding knob. Excessive play in one direction points to wear in that specific mechanism.
Don’t overlook the quick-release mounting plate, which connects your camera to the head. These plates can work loose during shooting, creating the illusion of head instability. Check that the plate is properly seated in its clamp and the locking mechanism fully engages. Some plates develop burrs or damage that prevent secure mounting.
When tightening knobs no longer eliminates play, internal components need replacement or the entire head requires upgrading to match your current equipment weight.
Vibration and Resonance Problems
Here’s something that might surprise you: a tripod can actually create vibrations rather than eliminate them. When you press the shutter button or the mirror flips up in a DSLR, these movements generate vibrations that travel through your camera into the tripod legs. If these vibrations match the tripod’s natural resonance frequency, they get amplified rather than absorbed, resulting in blurry images despite using a stable support.
You’ll often notice this problem at shutter speeds between 1/15 and 1 second, where exposures are long enough to capture the vibration but too short for it to settle. The telltale sign is unexpected blur in otherwise sharp images, particularly visible in long exposures or when using telephoto lenses.
The solution starts with eliminating direct contact with your camera. Use a remote shutter release or your camera’s self-timer to avoid physically touching the equipment during exposure. For DSLR users, mirror lock-up mode is essential because it separates the mirror movement from the actual exposure by a few seconds, allowing vibrations to dissipate.
Adding weight or dampening materials can help too. Some photographers hang their camera bag from the center column or wrap foam padding around the upper leg sections. These techniques interrupt the vibration cycle and prevent resonance from building up. For particularly stubborn situations, electronic first-curtain shutter or mirrorless cameras eliminate mechanical mirror slap entirely.
Environmental Challenges and Adaptive Techniques
Unstable Surfaces: Sand, Mud, and Snow
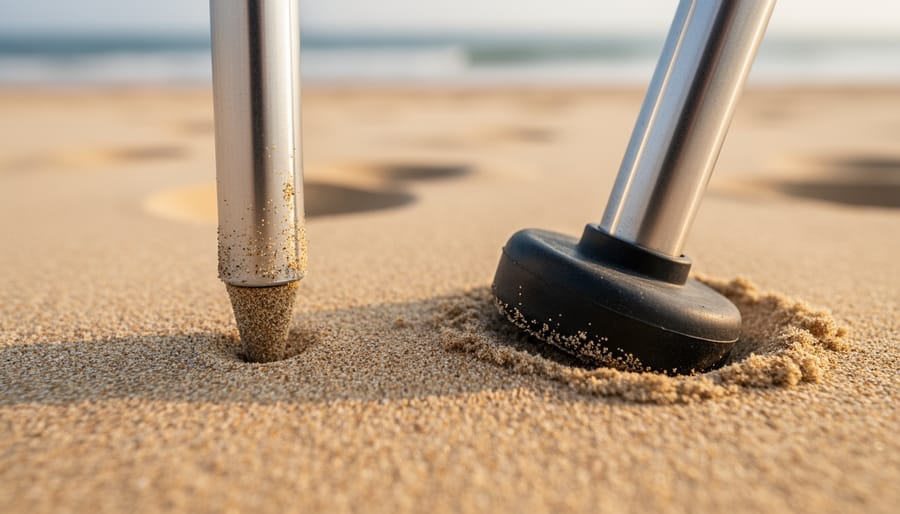
Shooting on challenging terrain requires a different approach to tripod stability. The key decision starts with your feet choice. Spike feet excel on soft surfaces by penetrating deep into sand, mud, or snow to reach firmer ground beneath. Simply twist or push down firmly to anchor them. Rubber feet, while versatile, tend to sink and shift on these surfaces, making them less ideal unless you’re working on ice where spikes might slip.
When dealing with particularly soft ground, prevention is your best strategy. I’ve learned from beach photography sessions that bringing small, flat platforms makes all the difference. Ceramic tiles work beautifully as DIY solutions because they’re inexpensive, readily available at hardware stores, and distribute your tripod’s weight across a larger surface area. Simply place one under each leg before extending your tripod. Alternatively, you can use thin plywood squares cut to about six inches across.
For snow photography, widen your tripod’s stance as much as possible to distribute weight more evenly. If you’re shooting long exposures and notice gradual sinking, check your composition periodically and make adjustments. Some photographers carry snowshoes specifically sized for tripod feet, though the tile method works equally well and costs less than five dollars for a set of three.
Wind and Weather Protection
Wind transforms even the sturdiest tripod into a wobbling nightmare. I’ve watched countless photographers struggle with blurry images on days when they thought their setup was secure enough. The key is understanding that wind doesn’t just blow your camera around—it creates vibrations that travel through every component of your support system.
Your first defense is lowering your tripod’s center of gravity. Extend the thicker bottom leg sections before touching the thinner top ones. This creates a more stable base with less flexibility in the structure. On particularly windy days, spread the legs wider than normal and keep your tripod as low as practical for your composition. Some photographers hang their camera bag from the center column hook, adding weight that helps anchor the setup. Just ensure the bag doesn’t swing like a pendulum, which creates its own problems.
Natural windbreaks are your best friend outdoors. Position yourself behind large rocks, trees, or even your vehicle when possible. I’ve shot stunning landscapes by simply moving fifteen feet to take advantage of a hill’s windbreak, transforming impossible conditions into workable ones.
However, knowing when to call it quits matters just as much. If you’re holding your tripod to keep it stable, conditions are too extreme for sharp long exposures. Wind gusts above 25-30 mph typically mean you’re fighting a losing battle. Protecting equipment during stabilization extends beyond moisture concerns—wind can knock gear over entirely, so consider whether the shot is worth the risk.
Here’s the truth about tripod stability: your equipment is only as reliable as the habits you build around using it. You can own the most expensive carbon fiber tripod on the market, but if you’re setting it up on loose sand without proper footwork, extending the center column to maximum height, and neglecting basic maintenance, you’ll still end up with frustratingly blurry images.
The good news? Most stability issues come down to technique and care, not gear limitations. Start small. Pick one or two techniques from this article and make them non-negotiable parts of your shooting routine. Maybe it’s always checking for debris in your tripod joints before a shoot, or religiously using a remote release instead of touching the camera. Build that habit until it becomes second nature, then add another.
Remember that regular maintenance isn’t glamorous, but it’s the difference between a tripod that serves you reliably for a decade and one that starts failing within two years. A quick wipe-down after beach shoots, periodic tightening of loose components, and annual deep cleaning will keep your equipment performing like new.
Your tripod is a tool, and like any tool, it responds to how you treat it. Sharp images don’t just come from premium gear—they come from photographers who understand their equipment’s capabilities, respect its limitations, and consistently apply sound technique. That discipline, combined with proper maintenance, will deliver the rock-solid stability you’re searching for.