Document every transfer of your digital files from camera to final storage, recording the date, time, person handling the file, and reason for transfer. This paper trail becomes your legal armor when a photograph’s authenticity is questioned in court or during an insurance claim. For example, when photojournalist Marcus Chen captured images of a traffic accident in 2022, his meticulous documentation—from camera card to encrypted backup—helped prosecutors authenticate his photos against claims they’d been manipulated.
Preserve original RAW files untouched in write-protected storage immediately after capture. Think of these as your digital negatives. Any edits, crops, or adjustments should be performed on copies, never the originals. This practice saved wildlife photographer Sarah Mitchell when her images of illegal poaching were challenged in court. She produced the original RAW files with intact EXIF data, proving the time, location, and camera settings matched her testimony exactly.
Use cryptographic hashing tools to create unique digital fingerprints of your files the moment they leave your camera. Tools like MD5 or SHA-256 generate a code that changes if even one pixel is altered. Law enforcement and legal professionals recognize these hashes as proof your image hasn’t been tampered with since capture. When private investigator James Torres photographs accident scenes, he generates hashes within minutes and emails them to his client, establishing an undeniable timestamp.
Maintain a detailed metadata log that extends beyond what your camera automatically records. Include weather conditions, witness names, your exact position, and any relevant environmental factors. This contextual information transforms a simple photograph into credible evidence. During property damage disputes, insurance adjuster Maria Gonzalez’s comprehensive notes have repeatedly validated her photographs when opposing parties claimed her images were taken at different times or locations.
What Chain of Custody Actually Means for Your Digital Photos
Think of chain of custody as a paper trail that follows your digital photo from the moment you press the shutter button until someone views it in court, a news publication, or any official capacity. It’s essentially a detailed record proving that nobody has altered or tampered with your image, and that the photograph presented is exactly what your camera captured.
Here’s a real-world example: imagine you’re photographing a car accident for an insurance claim. Chain of custody means documenting who handled that image file at every step. You took the photo, transferred it to your computer, perhaps sent it to the insurance adjuster, who then forwarded it to their claims department. Each person in that chain needs to be accountable, and ideally, you’d have proof the file wasn’t edited between any of those transfers.
For photographers, this concept becomes critical in several scenarios. Photojournalists covering protests or newsworthy events need to prove their images are authentic representations of what happened. Wildlife photographers documenting endangered species might need their photos to stand up in court for conservation cases. Even wedding photographers could face situations where their images become evidence in disputes.
The chain of custody isn’t just about saying “I didn’t edit this photo.” It requires verifiable proof through metadata preservation, secure file handling, and often cryptographic verification. Your camera embeds information like date, time, camera settings, and sometimes GPS coordinates into each image file. Maintaining that original data intact, using write-protected memory cards, creating verified backups, and documenting every transfer creates that unbroken chain.
Without proper chain of custody procedures, even a completely authentic photograph can be challenged and potentially dismissed as evidence. That’s why understanding and implementing these practices matters, whether you’re shooting for legal documentation, journalism, or any situation where your images might need to prove what really happened.
When Photographers Need to Worry About Evidence Chain
Most photographers won’t need to think about chain of custody for everyday work, but certain situations demand meticulous attention to how you handle your images. Understanding when your photographs might become legal evidence can save you considerable headaches down the road.
Insurance claims represent one of the most common scenarios. When you’re documenting vehicle damage after an accident or photographing a flooded basement for a homeowner’s policy, your images might determine whether a claim gets approved or denied. Insurance adjusters and legal teams will scrutinize not just what the photo shows, but when it was taken and whether it could have been altered. This makes proper documentation practices essential from the moment you press the shutter.
Crime and accident scene photography takes things even further. If you happen to witness an accident or incident and photograph the scene, law enforcement may request your images. Similarly, security professionals and private investigators hired to document suspicious activity must maintain rigorous standards to ensure their photographs hold up in court.
For photojournalism, authenticity is everything. News organizations increasingly face scrutiny over image manipulation, and journalists must prove their photographs accurately represent events as they occurred. Major publications now require detailed metadata preservation and often implement verification systems before publication.
Wedding and event photographers might find themselves in disputes over contract fulfillment. Did you actually shoot the number of images promised? Were certain family members included in the photos? When clients claim breach of contract, your ability to demonstrate what you captured and when becomes crucial evidence.
Real estate and property documentation similarly requires careful handling. Property inspectors, appraisers, and real estate photographers often create images that appear in legal disputes about property conditions, boundary disagreements, or construction defects. Your photos might surface years later in litigation.
Wildlife law enforcement photography involves documenting poaching, habitat destruction, or endangered species encounters. These images can support criminal prosecutions, making chain of custody requirements particularly strict.
Finally, forensic photography encompasses everything from workplace accidents to product liability cases, where specialized photographers document evidence for legal proceedings. This professional niche demands the highest standards of evidence handling from capture through presentation.
The Critical Steps: From Shutter Click to Courtroom
Capture: Camera Settings That Protect Your Evidence
Your camera settings can make the difference between admissible evidence and a questionable image. Think of these technical choices as building the foundation for your photograph’s credibility before you even press the shutter.
First, always shoot in RAW format when evidence integrity matters. While JPEG files are smaller and more convenient, they’re compressed and processed in-camera, which means data is discarded. RAW files preserve every bit of information your sensor captures, creating an unaltered digital negative. If you’re photographing accident scenes, property damage, or anything that might end up in court, that original, unprocessed data proves you haven’t manipulated the image. Some photographers shoot RAW+JPEG to have both options available.
Next, enable your camera’s copyright metadata settings. Most modern cameras let you embed your name and copyright information directly into each file’s EXIF data. This creates an automatic ownership record the moment you capture the image.
GPS tagging is equally valuable for evidentiary purposes. Location data embedded in your files establishes exactly where you took the photograph, which can corroborate witness testimony or prove you were present at a specific scene.
Finally, verify your camera’s date and time settings regularly. Accurate timestamps create a chronological record that helps establish when events occurred. Set your camera to synchronize with GPS time if possible, as this provides an independent verification source. These seemingly small technical details create powerful supporting evidence for your photographs’ authenticity.
Transfer: Moving Files Without Breaking the Chain
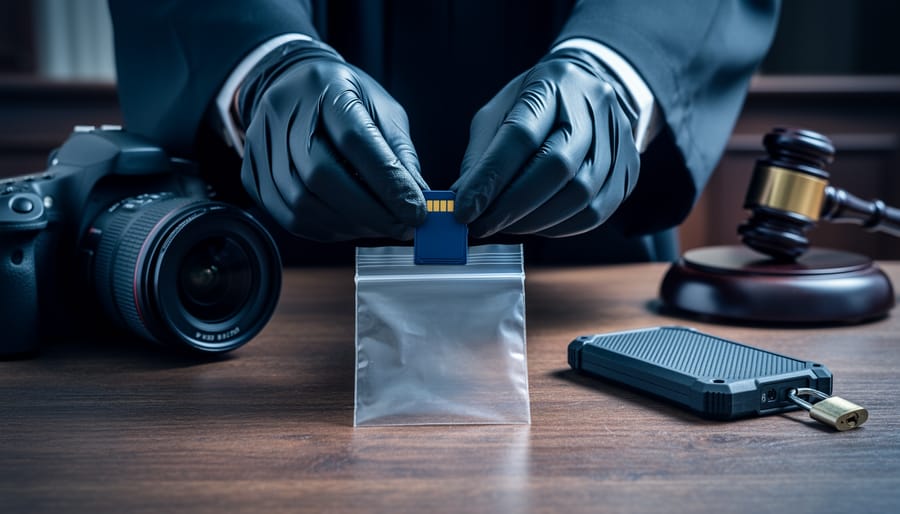
Here’s the golden rule of evidence handling: never, ever work directly from the original memory card. Think of it like a crime scene investigator never handling original evidence without gloves—the same principle applies to your digital files.
When transferring images that might serve as evidence, you need to create what forensic experts call a “forensically sound copy.” This means making an exact duplicate while documenting every step. Start by using a write-blocking device, which connects between your memory card and computer. These devices (available from manufacturers like Tableau or CRU) physically prevent any data from being written back to the original card, ensuring it remains pristine and unaltered.
Here’s your transfer workflow: First, document the card’s make, model, and serial number. Connect it through a write-blocker, then use specialized software to create a bit-by-bit copy—not just dragging and dropping files. Programs like FTK Imager or even free tools like Guymager create exact duplicates while generating hash values.
Hash verification is your proof of authenticity. Think of it as a digital fingerprint—a unique string of characters that represents the exact state of your files. After copying, generate hash values (typically MD5 or SHA-256) for both the original and copy. If they match, you’ve got an identical duplicate. Document these values in your chain of custody log.
Work exclusively from your verified copy for editing, reviewing, or sharing. Keep the original card in secure storage, untouched. If questions ever arise about authenticity, you’ll have that pristine original and documentation proving your copy matches exactly.
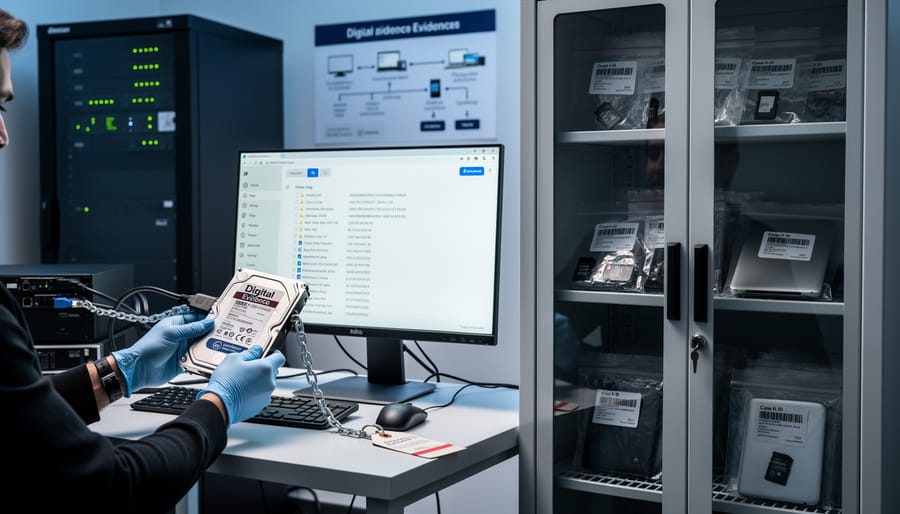
Storage: Protecting Your Digital Originals
Once you’ve captured and verified your images, protecting them becomes your primary responsibility in maintaining the chain of custody. Think of it this way: your original files are the digital equivalent of physical crime scene evidence locked in a police evidence room. They need that same level of protection.
Start with write-once media like CD-Rs, DVD-Rs, or BD-Rs (Blu-ray Disc Recordable). These formats prevent accidental or intentional alteration because once data is written, it cannot be changed. After photographing a wedding that might later involve insurance claims, or documenting an accident scene for legal purposes, immediately transfer your raw files to write-once media and verify the transfer. Label each disc with the date, location, event description, and your signature.
Your storage location matters enormously. Keep original media in a secure, climate-controlled environment away from magnetic fields, direct sunlight, and temperature extremes. A fireproof safe works well for critical evidence. For professional photojournalists covering newsworthy events, consider off-site backup in a bank safety deposit box or professional archival service.
Documentation is your friend here. Create a log noting when files were transferred, what media was used, and where it’s stored. Include hash values from your initial verification. If you’re working on assignment, photograph the sealed storage container with a timestamp.
How long should you keep originals? For commercial work, seven years typically covers most legal scenarios. For photojournalism or forensic photography, consider permanent archival. Always maintain at least three copies: your working files, write-once archival media, and an off-site backup. This 3-2-1 strategy provides redundancy if one copy fails or becomes compromised.
Documentation: The Paper Trail That Saves Cases
Think of documentation as your insurance policy—it’s the difference between “I think I took that photo at 3 PM” and “I have timestamped records proving every detail.” When digital evidence enters legal proceedings, thorough documentation transforms a simple photograph into credible testimony.
Start with a photo log that captures essential information at the moment of shooting. Record the date, time, location (GPS coordinates if possible), camera settings, file name, and a brief description of what you’re photographing. For insurance claims or accident scenes, note environmental conditions like weather, lighting, and any obstacles affecting your work. This might seem tedious during a breaking news event or property inspection, but spending two minutes on documentation can save hours of courtroom confusion later.
Next, maintain custody transfer records whenever your images change hands. Create a simple chain of custody form listing who received the files, when, how they were transferred (USB drive, encrypted email, cloud upload), and why. Both parties should sign or digitally acknowledge the transfer. Think of it like tracking a package—you want proof of every stop along the way.
Witness statements add another layer of credibility. If someone was present during your shoot, document their name and contact information. They can verify you didn’t manipulate the scene or alter images.
Here’s a basic template approach: Create a master spreadsheet with columns for date, time, location, file names, camera serial number, transfer recipient, and notes. Pair this with a standardized custody form you can quickly complete. Store these records separately from your images—if your hard drive fails, your documentation survives.
Remember, judges and juries don’t care about your reputation; they care about verifiable facts your paperwork provides.
Evidentiary Imaging: Technical Requirements That Hold Up in Court
When you’re documenting a car accident scene or capturing images that might end up in court, you can’t just snap a photo and call it evidence. The legal system needs proof that your image hasn’t been altered, manipulated, or tampered with in any way. This is where evidentiary imaging comes into play, and understanding the technical requirements can mean the difference between your photograph being admitted as evidence or thrown out entirely.
Think of it this way: a regular photograph is like a photocopy, while an evidentiary image is more like a notarized document with a complete paper trail. The key difference lies in how the image is captured and preserved.
At the heart of evidentiary imaging is metadata preservation. Every digital photograph contains embedded information like the date, time, camera settings, GPS coordinates, and even the specific camera serial number. This metadata acts as your image’s fingerprint. When creating evidentiary images, you must preserve this data completely and document it thoroughly. Any editing software that strips or modifies metadata can render your image inadmissible.
The gold standard for evidentiary imaging is creating bit-for-bit copies, also called forensic copies or hash-verified duplicates. Unlike regular file copying where you simply drag and drop files from your memory card, forensic imaging creates an exact replica of the entire storage device, sector by sector. This process captures everything, including deleted files and hidden data.
Professional forensic imaging tools like FTK Imager, EnCase, or X-Ways Forensics generate cryptographic hash values like MD5 or SHA-256. These hash values are essentially digital signatures that prove the copy matches the original exactly. If even a single pixel changes, the hash value changes too. Regular file copying through your computer’s operating system doesn’t provide this verification.
Industry standards from organizations like the National Institute of Standards and Technology and the Scientific Working Group on Digital Evidence recommend using write-blockers during imaging. These hardware devices prevent any data from being written back to the original storage media, ensuring you can’t accidentally alter evidence while copying it.
Authentication methods include maintaining detailed logs of who accessed the images, when, and for what purpose. Many photographers now use camera systems with built-in authentication features, like Canon’s Data Verification Kit, which creates encrypted signatures at the moment of capture. This technology essentially time-stamps and cryptographically seals your image, making any later alterations immediately detectable.
Your Rights and Responsibilities as the Photographer
As a photographer, understanding your rights when your images become potential evidence is crucial, and it’s not always straightforward. The distinction between copyright vs. evidence ownership often confuses photographers, but here’s the bottom line: you typically retain copyright to your images, but that doesn’t mean you can refuse to produce them when legally required.
When you receive a subpoena or court order requesting your photographs, compliance is generally mandatory. Think of it like this: you own the creative rights to your work, but courts have the authority to compel you to share evidence relevant to legal proceedings. Ignoring a subpoena can result in contempt of court charges, fines, or even jail time. However, you do have some protections. Many jurisdictions recognize a limited photographer’s privilege, particularly for journalists and documentary photographers, though this varies significantly by location.
You can potentially refuse to hand over images in specific circumstances. If releasing photos would violate a non-disclosure agreement with a client, compromise national security, or put someone at serious risk of harm, you may have grounds to challenge the request through proper legal channels. Additionally, some states and countries offer shield laws protecting journalists from revealing sources or unpublished work. The key is never to simply refuse on your own—always work with an attorney to properly assert any applicable privileges.
Privacy considerations add another layer of complexity. Even when legally compelled to provide images, you should document any privacy agreements made with subjects. Some jurisdictions require photographers to notify subjects when their images are being turned over to authorities, while others prohibit such notification if it could compromise an investigation.
Remember that regulations vary dramatically by jurisdiction. What applies in California differs from Texas, and international work introduces entirely different legal frameworks. When working on sensitive assignments, consult with a lawyer familiar with media law in your specific location to understand your obligations before you’re facing a legal demand.
Common Mistakes That Invalidate Your Evidence
Even experienced photographers make critical mistakes that can render their images legally inadmissible. Understanding these pitfalls is essential for protecting the evidentiary value of your work.
The most common error is editing images before creating archival copies. I’ve seen photographers lose cases because they instinctively opened files in editing software to check focus, inadvertently altering metadata timestamps. In a 2019 insurance fraud case, a photographer’s dashcam images were rejected because the files showed editing software had accessed them before being secured. Always create verified backups on write-protected media before any viewing or processing.
Improper file naming destroys evidence chains faster than you’d think. Renaming files from camera-generated sequences like “DSC_4521.NEF” to “accident_scene_wide.jpg” changes creation dates and metadata. Courts have dismissed photographic evidence when original filenames couldn’t be traced back to specific camera bodies and capture sessions.
Social media sharing is particularly dangerous. One photojournalist documented a workplace safety violation but posted preview images to Instagram before securing the originals. The defense successfully argued the images could have been altered before posting, creating reasonable doubt about the raw files. Never share images publicly until you’ve properly archived and documented the originals.
Inadequate documentation is equally problematic. Simply storing files isn’t enough. You need written records of transfer dates, storage methods, and who accessed files. In a property dispute case, a photographer had pristine original files but couldn’t prove they’d remained untouched because they lacked access logs. The judge excluded the evidence.
The solution is developing habits before you need them. Treat every potentially significant shoot as though it might end up in court, because you never know when casual documentation becomes critical evidence.
Tools and Workflows for Maintaining Evidence Integrity
Maintaining evidence integrity doesn’t require a forensic laboratory budget, though understanding your options across different price points helps you make informed decisions based on your needs.
For professional forensic-grade work, software like AccessData FTK Imager and Arsenal Image Mounter create verifiable copies of storage media while generating hash values that prove nothing has changed. These free tools are surprisingly accessible even for non-specialists. When you’re documenting accident scenes, insurance claims, or anything potentially headed to court, FTK Imager creates a forensically sound image of your memory card that courts recognize.
On the hardware side, write-blocking devices prevent accidental modifications when transferring files. The Tableau T8-R2 is the gold standard, but more affordable options like the CRU WiebeTech Write Blocker serve everyday photographers well. Think of these as read-only adapters that physically prevent your computer from altering anything on your memory card during transfer.
For field documentation, several smartphone apps streamline the process. Timestamp Camera and GPS Map Camera embed visible timestamps and location data directly onto photos you take of your shooting environment. These make creating contemporaneous documentation nearly effortless. Simply photograph your scene, your camera settings display, and any relevant context before and after your main shoot.
Metadata management tools bridge the gap between capture and delivery. Adobe Lightroom preserves EXIF data reliably when used correctly, but avoid the “optimize” features that strip information. PhotoMechanic offers robust metadata handling favored by photojournalists, while ExifTool provides command-line precision for those comfortable with technical workflows.
The procedural workflow matters as much as the tools. Establish a consistent routine: photograph context, transfer files using write-blockers, immediately create backup copies, generate hash values using something like QuickHash, and document everything in a simple spreadsheet or dedicated chain of custody form. This systematic approach, even using free or low-cost tools, demonstrates professionalism and protects your work’s evidentiary value far better than expensive equipment used haphazardly.
Here’s the reality: chain of custody isn’t some obscure legal concept reserved for crime scene investigators and courtroom dramas. As a photographer, there’s a genuine chance you’ll need these skills at some point in your career. Whether you’re documenting a wedding where a dispute arises, capturing street photography that becomes relevant to a legal case, or shooting commercial work where intellectual property questions emerge, your images might become evidence.
The good news? Establishing proper chain of custody doesn’t require a law degree or expensive software. It simply demands intentional habits and a basic understanding of what makes digital evidence credible in legal contexts.
Think of it as insurance for your work. You probably backup your files, maintain your gear, and protect your equipment. Chain of custody is just another layer of professional practice that safeguards both your images and your reputation. The photographer who can confidently demonstrate that their images haven’t been altered or tampered with stands head and shoulders above one who simply shrugs and says “trust me.”
Start small today. Begin documenting your workflow, even informally. Note when you transferred files and to whom. Keep original files separate from edited versions. Enable metadata preservation in your editing software. Create a simple template for logging chain of custody information that you can adapt when needed.
Don’t wait until you’re facing a subpoena or legal question to figure this out. By then, it’s too late. Build these practices into your regular workflow now, and you’ll thank yourself later when those skills become unexpectedly essential.