

Transitions in video production represent a fundamental post-production editing technique that connects separate clips, scenes, or sequences into a cohesive visual narrative. When you’re working on any video project in 2026, from a simple YouTube tutorial to a documentary or commercial spot, you’re using transitions as a specific category of visual effects designed to control pacing, convey time passage, or establish emotional tone between shots.
Think of transitions as the punctuation marks of visual storytelling. Just as a period signals the end of one thought and a comma creates a brief pause, a cut, dissolve, or wipe determines how your audience experiences the shift from one moment to the next. A hard cut might create tension or surprise, while a slow dissolve can suggest the passage of time or a dreamlike quality.
These editing techniques sit at the intersection of technical craft and creative expression. On the technical side, transitions involve frame-by-frame manipulation of video data, whether you’re working with cross-fades that blend opacity values between clips or more complex effects that transform pixels geometrically. The software handles the math, but you make the creative choices that shape viewer experience.
Understanding what transitions are matters because it affects how you approach every editing decision. Are you simply connecting two shots? Or are you using a transition to communicate something specific about story, time, or emotion? Professional editors know that the transition itself carries meaning. An abrupt cut between a character’s face and a landscape doesn’t just change the scene. It creates a relationship between those two images in the viewer’s mind.
The classification of transitions as editing techniques within the broader category of post-production visual effects helps you understand where they fit in your workflow and why mastering them elevates your final product from a collection of clips to polished storytelling.
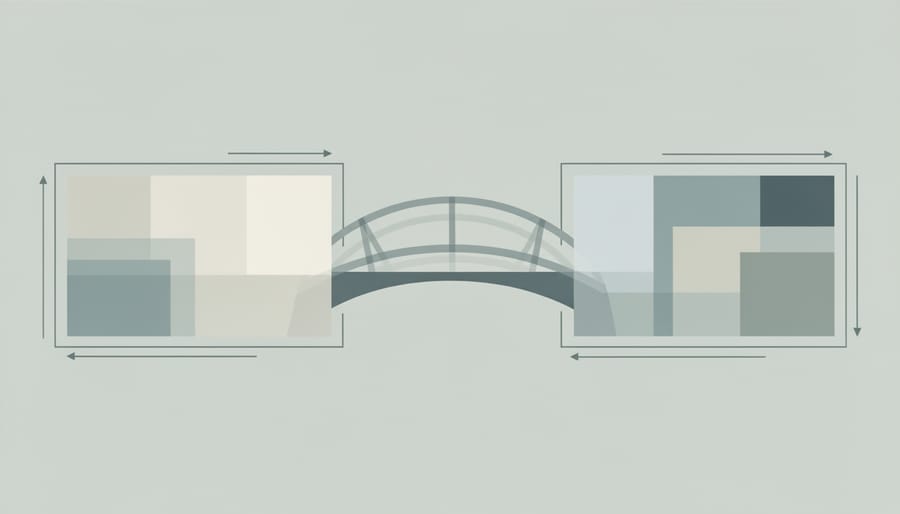
Transitions as Post-Production Editing Techniques
Transitions sit firmly in the post-production phase of video work, where raw footage transforms into a cohesive story. Unlike effects captured in-camera during shooting, transitions are editing techniques applied after filming wraps, during the assembly and refinement stages of your project. They’re the connective tissue that determines how one shot moves to the next, whether you’re cutting between scenes in a documentary or creating seamless sequences in a narrative film.
Think of post-production as three overlapping stages: assembly (organizing your clips), editing (crafting the narrative flow), and finishing (color grading, sound mixing, and final polish). Transitions operate primarily in that middle editing phase, though sophisticated ones may extend into finishing work when they incorporate visual effects or motion graphics. This is where editing transitions bridge shots and establish the rhythm that guides your viewer through the story.
- Post-Production
- The phase after filming where footage is edited, refined, and finalized into the completed video project. All transitions are added during this stage.
- Transition
- An editing technique that controls how one shot ends and the next begins, ranging from simple cuts to complex visual effects that blend multiple frames together.
- Editing Technique
- Methods used in post-production to arrange, time, and connect footage. Transitions are one category within this broader toolkit that also includes pacing, shot selection, and continuity matching.
The functional role of transitions extends beyond mere technical connection points. They carry significant weight in visual storytelling, controlling pacing, establishing relationships between scenes, and guiding emotional response. A quick cut creates energy and immediacy, while a slow dissolve suggests the passage of time or contemplative mood. Transitions can signal shifts in location, perspective, or narrative threads without requiring explanatory dialogue or text.
When you’re working in editing software, transitions become malleable tools. You control their duration (measured in frames or seconds), their style (from invisible cuts to dramatic wipes), and their complexity (basic dissolves versus multi-layered composites). This flexibility makes them different from in-camera techniques, where you’re locked into what you captured during shooting. In post-production, you can test different transition approaches, adjust timing frame by frame, and completely change the emotional tenor of a sequence just by modifying how shots connect.
Understanding transitions as post-production editing techniques helps you plan shoots more effectively. You’ll recognize which moments need extra coverage for smooth connections and which sequences might benefit from creative transition work during editing.
The Technical Foundation: How Transitions Work in Modern Video Editing

In-Camera vs. Post-Production Transitions
In-camera transitions happen while you’re actually filming, you plan the movement, timing, and visual flow before hitting record. A classic example is the whip pan, where you rapidly swing the camera from one subject to another, creating a natural blur that masks the edit point. Another is blocking an actor or object close to the lens to create a momentary blackout, allowing you to cut to a new scene during that darkness. These require careful choreography and sometimes multiple takes to nail the timing.
Post-production transitions get added during editing. You’re working with footage you’ve already captured, applying cuts, fades, dissolves, or wipes in your editing software. This gives you complete control over duration and effect, plus the ability to experiment without reshooting. You can adjust a dissolve from one second to three seconds, or swap a cross-fade for a dip to black without leaving your desk.
When should you use each? Choose in-camera transitions when you want that organic, single-take feel, think continuous action sequences or documentary-style realism. They feel immediate and authentic because they are. Go with post-production transitions when you need flexibility, when you’re working with footage shot at different times or locations, or when you want precise control over timing and visual effects. Most professional projects in 2026 use a blend: in-camera for dynamic movement and energy, post-production for refinement and storytelling control.
The key is intentionality. Decide during pre-production which approach serves your story best, rather than hoping you can fix everything in the edit.
The Role of Frame Rate and Timing
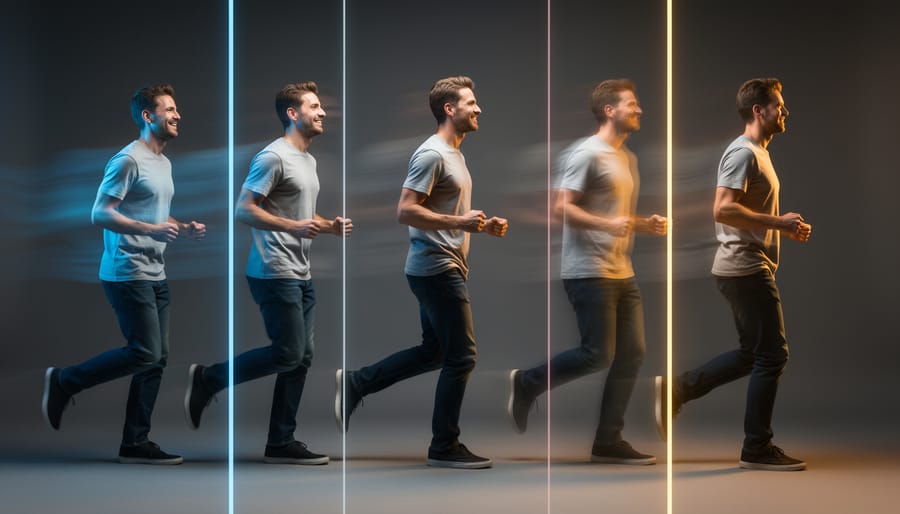
Frame rate choices and timing decisions fundamentally shape how your audience experiences transitions, making them feel smooth and intentional or jarring and amateurish. When you shoot at 24fps, the cinematic standard, each frame occupies roughly 42 milliseconds on screen. A one-second dissolve at this rate blends across 24 individual frames, creating a specific visual cadence that viewers unconsciously associate with professional film production. Bump that to 60fps for smoother motion, and suddenly the same one-second transition spans 60 frames, producing a distinctly different feel, often perceived as more fluid but occasionally less cinematic.
The relationship between video speed and clip duration directly impacts how viewers process transitions cognitively. Research shows that our brains need adequate time to register both the outgoing and incoming images during a transition. Rush a dissolve under half a second, and it reads as confusing flicker rather than intentional storytelling. Stretch it beyond two seconds, and it risks feeling sluggish unless you’re deliberately creating a dream-like effect.
Here’s practical guidance: test your transitions at different durations before committing. A simple cut works instantly at any frame rate. Dissolves typically need 12-30 frames to feel natural, that’s 0.5 to 1.25 seconds at 24fps. Motion-based wipes can be quicker, around 8-15 frames, because the directional movement gives viewers a clear visual path to follow. When working with high frame rates for slow-motion footage, extend transition durations proportionally to match the perceived slower motion, or the transition itself will feel rushed against the slowed action.
Transitions as Visual Effects Elements
The line between simple transitions and visual effects has blurred significantly in modern video production. What once required separate VFX specialists can now be integrated directly into editing workflows, making transitions a genuine example of hybrid techniques that straddle both editing and effects domains.
Modern transitions frequently incorporate motion graphics layers that add dimensional movement beyond simple frame blending. A dissolve between two shots might include particle effects that reveal the second image through animated textures, dust, light rays, or digital glitches. These composite elements transform a basic transition into a visual effects sequence while maintaining the fundamental purpose of connecting two scenes. You’ll see this approach in music videos, commercial work, and increasingly in narrative cinema where stylistic transitions support the story’s visual language.
Compositing techniques drive many contemporary transition effects. Masking and rotoscoping allow specific elements to transition independently from their backgrounds. A subject might remain static while the environment shifts around them, or vice versa. This selective treatment requires keying out portions of the frame, tracking movement across multiple frames, and layering different temporal moments into a single transitional sequence. The technical execution is pure VFX work, but the result serves the editor’s need to move between shots.
CGI elements have become standard tools for creating seamless connections in cinematic videography. Three-dimensional animated objects can bridge spatial gaps between locations or timeframes. A camera might appear to push through a window in one scene and emerge from a car door in another, with the transition space filled by rendered geometry. These aren’t just stylistic flourishes, they solve practical storytelling problems while maintaining visual continuity.
Color grading plays a crucial role in VFX-enhanced transitions. Gradual shifts in color temperature, saturation, or contrast can be timed within a transition to make temporal or spatial jumps feel intentional rather than jarring. This approach combines post-production color work with transition timing to create a unified effect that neither technique could achieve independently.
The accessibility of these tools in 2026 means you don’t need dedicated VFX software for many effects-driven transitions. Node-based compositing systems have been integrated into mainstream editing platforms, letting you build complex layered transitions without leaving your primary editing environment. The technical barrier has dropped considerably, though effective use still requires understanding both compositional principles and the specific story moment you’re bridging.

Common Types of Transitions and Their Applications
The standard and creative transitions you’ll encounter in video production are examples of distinct editing techniques, each serving specific storytelling purposes and triggering different viewer responses. Understanding these tools helps you make intentional choices rather than defaulting to software presets.
The cut remains the most fundamental transition, an instantaneous switch from one shot to another without any visual effect between them. It’s invisible when done well, which is exactly the point. Cuts work for maintaining pace, showing simultaneous action, or simply advancing the story without drawing attention to the edit itself. In dialogue scenes, cuts feel natural because they mirror how we shift attention in real conversations. For action sequences, rapid cuts create urgency and energy. The emotional impact is neutral, letting the content of the shots themselves carry the weight.
Fades manipulate opacity to transition between shots or to black. A fade-out gradually reduces the image to darkness, while a fade-in does the reverse. These transitions signal conclusiveness, the end of a scene, a passage of time, or a shift in emotional tone. You’ll see fade-to-black used between acts in narrative work or to mark significant time jumps. Fades create breathing room, giving viewers a moment to process what they’ve seen before moving forward. The emotional effect tends toward contemplation or finality.
Dissolves, also called cross-fades, blend two shots together by fading out the first while simultaneously fading in the second. This overlap creates a dreamlike, fluid connection between images. Dissolves work beautifully for montages, memory sequences, or showing the passage of time in a compressed way. They soften the transition, suggesting a thematic or emotional relationship between the shots rather than a hard break. A three-second dissolve feels languid and reflective, while a half-second dissolve maintains momentum but with a gentler hand than a cut.
| Transition Type | Best Use Cases | Emotional Impact | Technical Complexity |
|---|---|---|---|
| Cut | Dialogue, action, maintaining pace | Neutral, invisible storytelling | Simple |
| Fade | Scene endings, time passage, act breaks | Conclusive, contemplative | Simple |
| Dissolve | Montages, memories, time compression | Dreamlike, fluid connection | Simple to moderate |
| Wipe | Location changes, energetic pacing | Playful, stylized, dynamic | Moderate |
| Match Cut | Visual parallels, thematic connections | Clever, meaningful juxtaposition | Moderate to complex |
Wipes move a visible boundary across the frame, replacing one shot with another. Think of a line sweeping left to right, revealing the new image as it goes. Classic Star Wars-style wipes have a retro charm, but modern variations include clock wipes, radial wipes, and custom shapes. Wipes announce themselves, they’re not subtle. Use them when you want energy, when changing locations quickly, or when the style of your project allows for visible technique. They feel dynamic and sometimes playful, though they can appear dated if overused in contemporary work.
Match cuts create visual or thematic connections by cutting between shots with similar compositions, movements, or subjects. A character looking up in one shot followed by the sky in the next creates spatial continuity. An object in one era matched to the same object in another creates temporal resonance. These transitions reward attentive viewers and add layers of meaning beyond simple progression. They require careful planning during shooting but deliver powerful storytelling moments.
Creative transitions in 2026 often blend multiple techniques. A whip pan transition uses rapid camera movement to blur the frame, disguising the cut between shots. Seamless transitions use matched action, lighting, or digital compositing to hide edits entirely, creating the illusion of a single continuous take. Light leaks, lens flares, and motion graphics can all serve as transitional elements in stylized work.
The key is matching transition choice to intent. A wedding film might use dissolves for romance, while a sports highlight reel relies on fast cuts for excitement. Documentary work typically favors invisible cuts to maintain realism, reserving fades for chapter breaks. Your transition is either helping the story or calling attention to itself, make sure whichever happens is by design.
Shooting with Transitions in Mind
Planning your shots with post-production transitions in mind saves countless hours in the editing suite and creates more polished final work. The key is thinking beyond individual frames to how shots will flow together before you press record.
Start with camera movement continuity. When you’re planning a sequence that will need a transition, pay attention to the direction and speed of any dynamic camera movement. If you’re ending one shot with a left-to-right pan, consider whether your next shot should continue that directional energy or deliberately contrast it. Matching movement creates seamless transitions, while opposing movement can create intentional tension. For dissolves and crossfades, shoot at similar focal lengths and frame rates to avoid jarring visual jumps.
Lighting consistency matters more than most videographers realize. When two shots need to blend, dramatic differences in exposure, color temperature, or shadow direction make transitions feel disjointed. If you’re shooting b-roll throughout a day, note the sun’s position and quality of light for each clip. Indoor shoots offer more control, maintain the same lighting setup for sequences you know will cut together, and use Log profiles to maximize your color grading flexibility later.
Color matching begins in-camera, not just in post. Shoot with consistent white balance settings across shots that will transition together. Auto white balance might seem convenient, but it creates color shifts that complicate even simple cuts. Custom white balance or fixed Kelvin settings give you predictable results. When you know you’ll be applying color grading secrets in post, shoot flat or log color profiles to preserve maximum information for blending shots during transitions.
Compositional continuity ties everything together. If you’re planning a match cut, shoot both angles with similar framing, same subject position in frame, comparable headroom, and matching eyeline direction. For wipe transitions, leave clean visual space at frame edges where the wipe will enter. Even simple cuts benefit from the 30-degree rule: change your camera angle by at least 30 degrees between shots to avoid jarring jump cuts.
The best approach is shooting more coverage than you think you need. Capture a few extra seconds at the head and tail of every clip, giving yourself breathing room to time transitions precisely in post.
Software and Tools for Creating Cinematic Transitions
The software you choose for creating transitions in video production is an example of what determines both your creative possibilities and workflow efficiency. In 2026, the landscape spans from accessible entry points to sophisticated professional suites.
DaVinci Resolve remains the standout choice for serious videographers, offering robust transition tools alongside industry-standard color correction features like Scinetone grading. The free version includes nearly everything most creators need, while DaVinci Resolve Studio ($295 one-time purchase) unlocks advanced features like noise reduction and HDR grading. Its Fusion page handles complex motion graphics and VFX-driven transitions without requiring separate software.
Adobe Premiere Pro ($22.99 monthly) integrates seamlessly with After Effects for transitions requiring heavy VFX work. The combination gives you preset transitions for quick edits and unlimited creative control for custom work. Its Dynamic Link feature lets you jump between applications without rendering intermediates, saving substantial time on complex projects.
For photographers transitioning into video, Final Cut Pro ($299.99 one-time) offers an intuitive interface optimized for Apple hardware. Its magnetic timeline and built-in transition library make basic edits fast, while Motion provides VFX capabilities without After Effects’ learning curve. The performance on M-series Macs handles 4K and 6K footage smoothly.
Budget-conscious creators should consider CapCut (free with premium features at $7.99 monthly). While limited compared to professional tools, it handles standard transitions competently and runs on modest hardware. HitFilm Express (free) sits between CapCut and the professional tier, offering genuine VFX compositing tools that beginners can grow into.
Your choice should match your current skill level and budget, but plan for growth. Starting with DaVinci Resolve’s free version gives you professional-grade tools without upfront investment, letting you develop skills before deciding whether paid upgrades make sense for your specific work.
Common Mistakes When Using Transitions
Even experienced videographers stumble over transitions, turning polished footage into jarring viewing experiences. The most pervasive mistake is overuse, cramming every possible wipe, dissolve, and animated effect into a single project. When every shot transition demands attention, none of them serve the story. A straight cut remains invisible and effective; if you’re adding transitions simply because the software offers them, you’re already on the wrong path.
Timing errors create equally damaging results. Transitions that linger too long kill pacing and test viewer patience, while rushed transitions feel frantic and incomplete. The standard dissolve works well at one to two seconds for most narrative content, but many beginners stretch them to three or four seconds, creating awkward dead space. Match your transition duration to the emotional beat, contemplative moments can sustain longer fades, while action sequences demand quicker cuts.
Mismatched visual elements destroy the seamless flow transitions should create. When you dissolve between shots with drastically different color grades, exposure levels, or white balance, the transition highlights the discontinuity rather than hiding it. Color correct and match your footage before applying transitions, not after. Similarly, audio continuity matters just as much as visual continuity, abrupt sound design changes mid-transition pull viewers out of the experience.
The final pitfall is choosing transitions that clash with your content’s genre and tone. Star wipes might work for retro or comedic pieces, but they sabotage serious documentary work. Every transition carries inherent meaning and expectation, understand what your choices communicate before committing to them.
Transitions in video production are examples of post-production editing techniques that serve as the connective tissue of visual storytelling. They’re not merely technical flourishes or afterthoughts, they’re deliberate choices that shape how your audience experiences the narrative flow, emotional rhythm, and visual coherence of your work.
Understanding what transitions represent in the broader context of filmmaking gives you control over one of the most powerful tools in cinematic videography. When integrated thoughtfully with visual effects, transitions transform from simple cuts between clips into sophisticated storytelling devices that guide viewer attention, establish temporal relationships, and reinforce thematic elements.
The key to mastering transitions lies in viewing them as both technical craft and creative expression. Every dissolve, wipe, or cut you choose should serve the story you’re telling. Ask yourself why you’re using a particular transition, not just how to execute it. Technical proficiency matters, but purposeful application matters more.
As you continue developing your videography skills in 2026, experiment with different transition types and techniques. Try combining in-camera movements with post-production effects. Test how frame rates and timing alter emotional impact. Push creative boundaries while staying grounded in narrative intent.
Remember that the most effective transitions often go unnoticed because they feel inevitable, they’re exactly what the story needed at that precise moment. That’s the standard worth pursuing: transitions that enhance rather than distract, that reveal your mastery through their seamless integration into the larger visual experience.


