By
By 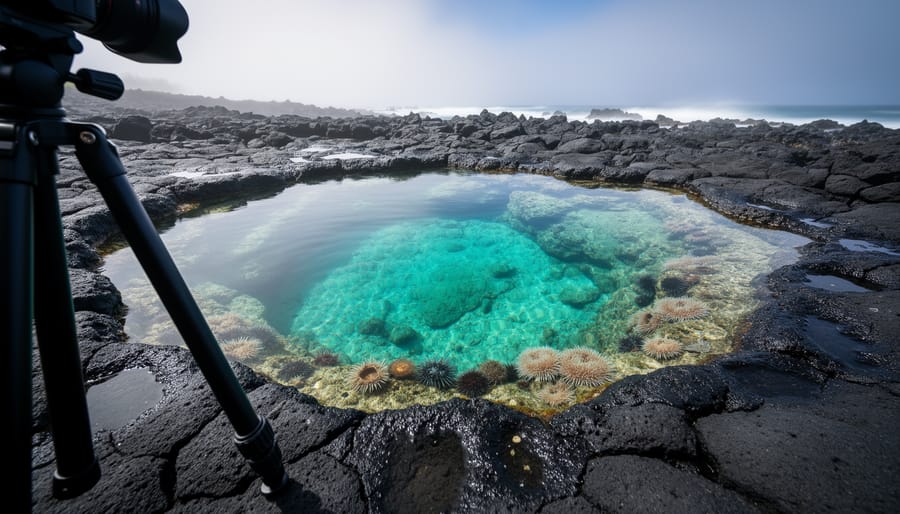
Kapalua’s tide pools offer photographers a rare combination of crystal-clear water, dramatic volcanic rock formations, and vibrant marine life, but capturing them successfully depends entirely on timing your visit with the low tide cycle. Unlike many Hawaiian coastal sites that remain photogenic throughout the day, these pools transform completely as the tide recedes, revealing intricate ecosystems and reflection opportunities that disappear under higher water levels.
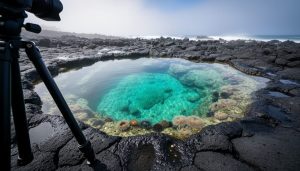
The photographic appeal lies in the contrast between Kapalua’s black lava rock and the turquoise water that fills each depression. During optimal conditions, you’ll find yourself working with natural infinity pools that mirror the sky, tideline textures that create leading lines through your frame, and enough biological diversity to fill an entire portfolio. The challenge is that these conditions exist for roughly two hours on either side of low tide, making this a destination that rewards careful planning over spontaneous visits.
What sets Kapalua apart from other Maui tide pool locations is the accessibility combined with relatively light foot traffic compared to more publicized spots. You can set up a tripod on stable volcanic shelves, work at multiple heights from ground level to elevated vantage points, and move between pools without scrambling over treacherous terrain. The pools range from shallow depressions just inches deep to larger formations that hold several feet of water even at low tide, giving you compositional variety within a compact shooting area.
This guide walks you through the specific pool formations worth your attention, the exact timing windows you need to hit, and the gear configurations that handle the unique challenges of shooting in saltwater spray with constantly changing light conditions.
Why Kapalua Tide Pools Are Worth Visiting for Photographers
Kapalua’s tide pools deliver a rare combination that serious photographers appreciate: technical challenge wrapped in natural spectacle. These aren’t just puddles on a beach. They’re crystal-clear windows into a micro-ecosystem, carved into black volcanic rock that’s been shaped by centuries of Pacific swells. The water clarity here rivals aquarium conditions, letting you shoot through two or three feet of seawater to capture subjects in sharp detail.
The diversity of subjects within a single location sets Kapalua apart. During one four-hour session, you can work macro shots of yellow tang darting between coral fingers, switch to a wide-angle for dramatic seascape compositions with pools as foreground interest, then pivot to wildlife photography as hermit crabs navigate lava formations at sunset. This versatility means you’re not locked into one shooting style or focal length. I’ve watched photographers arrive with a macro mindset and leave with their best landscape work in months.
Marine life concentrations vary by pool, but the reliable residents create consistent opportunities:
- Sea urchins clustered in crevices, their spines creating radial patterns ideal for abstract compositions
- Mirror-smooth pool surfaces reflecting clouds and rock formations during calm conditions
- Weathered lava textures with embedded coral fragments and algae patterns
- Golden hour scenarios where low-angle light rakes across water and stone
- Wave spray and splash-back interactions along the exposed edges
The light behavior here demands technical skill and rewards it generously. Midday sun penetrates shallow pools to illuminate the bottom, but creates harsh reflections on the surface. Polarizing filters become essential tools, not optional accessories. You’ll rotate that filter ring constantly, balancing reflection control against the need to see submerged subjects. Early morning and late afternoon offer softer, warmer light that wraps around rock formations and creates dimension in otherwise flat compositions.
Real-world example: shooting anemones at pool level during the last hour before sunset. The backlit tentacles glow amber and orange, but you’re working at awkward angles on wet rock, managing a tripod on uneven surfaces while timing shots between wave surges. That’s the Kapalua experience. It’s physically demanding, technically complex, and absolutely worth the effort when you review files that night. The challenge level suits photographers who’ve moved beyond automatic modes and want to solve problems rather than just document scenes.
Top Tide Pool Areas to Photograph at Kapalua
1. Hawea Point Pools
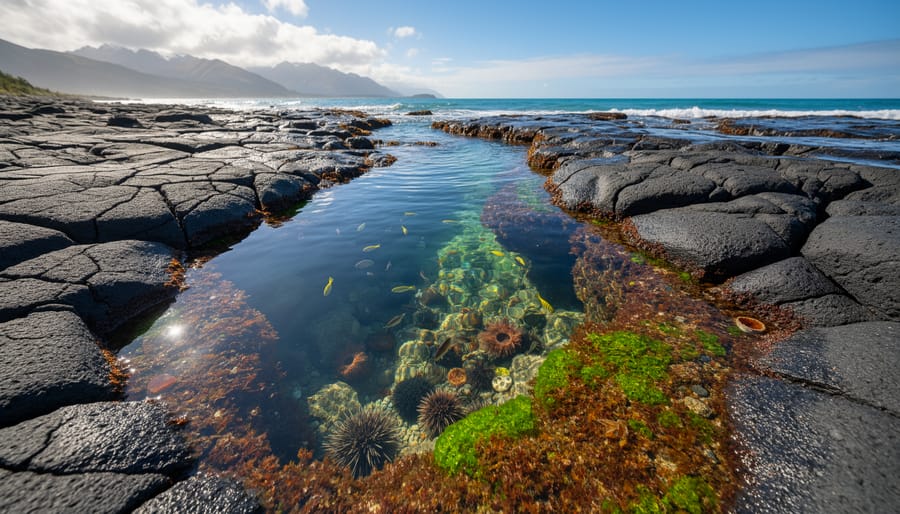
Hawea Point sits on Kapalua’s northern edge, where a dark volcanic shelf holds the region’s most substantial tide pools. At low tide, these pools stretch 3-4 feet deep in places, with widths of 8-10 feet creating natural aquariums filled with bright yellow tangs, striped convict tangs, and green sea urchins clustered against black rock walls. The depth here gives fish room to move naturally, yielding more dynamic wildlife shots than the shallow scatter pools elsewhere.
The standout feature for composition is the jagged lava formations radiating from the shoreline toward deeper water. These ridges create strong diagonal leading lines that pull the eye from foreground pools straight through to the horizon. Position yourself low, 6-12 inches above the water surface with a 16-24mm lens, and you can layer a colorful pool in the foreground, the textured rock lines in the middle, and the blue Pacific beyond. Reflections work beautifully in the calmer pools, shoot midmorning when the sun angle is high enough to illuminate the pool bottom but not so harsh that it blows out the water surface.
For settings, start with f/11 to keep both the near pool edge and distant horizon sharp. The bright tropical light typically allows ISO 100-200, with shutter speeds around 1/250 keeping fish reasonably sharp while managing any surface ripple. A polarizing filter is essential, rotate it to cut surface glare and reveal the vibrant colors two feet down. Watch your histogram closely; the contrast between dark rock and bright water fools meters into underexposing the pools.
2. Kapalua Bay South Edge Pools
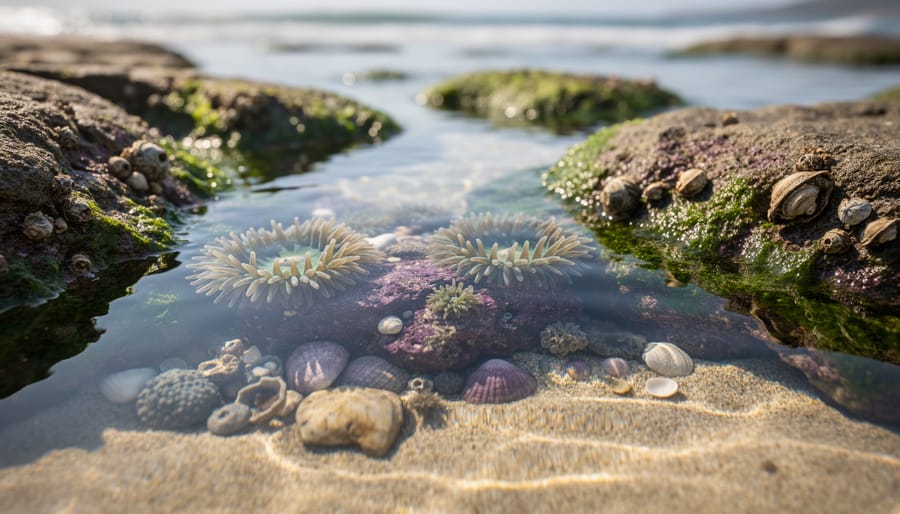
The south edge pools along Kapalua Bay offer ideal conditions for photographers wanting to capture intimate marine life portraits without fighting rough surf or challenging access. These shallow depressions rarely exceed knee depth, creating natural aquariums where sunlight penetrates clearly to the bottom. The protected curve of the bay shields this area from prevailing swells, giving you stable shooting conditions even when other coastal spots face chop.
You’ll find dense concentrations of green and purple anemones anchored to the volcanic substrate, their tentacles swaying gently in the current, perfect subjects for macro work. Small tropical fish, particularly yellow tangs and wrasses, move slowly through these confined spaces, allowing close approach with patience. The shallow water means you can shoot from above without submerging your lens, reducing gear risk while maintaining excellent visibility through the surface.
A 100mm macro lens hits the sweet spot here, offering working distance to avoid casting shadows while delivering the magnification needed for anemone detail and fish portraits. Shoot at f/8 to f/11 for adequate depth of field, these subjects have dimension, and you’ll want the entire creature sharp. Watch your shutter speed stays above 1/250 to freeze the subtle movement of tentacles and fins.
Position yourself to use the sun as backlight, illuminating the translucent edges of anemone tentacles for a natural glow. The calm water surface here acts as a diffuser rather than a mirror, softening harsh midday light that would be problematic in more exposed locations.
3. Oneloa Bay Volcanic Shelf
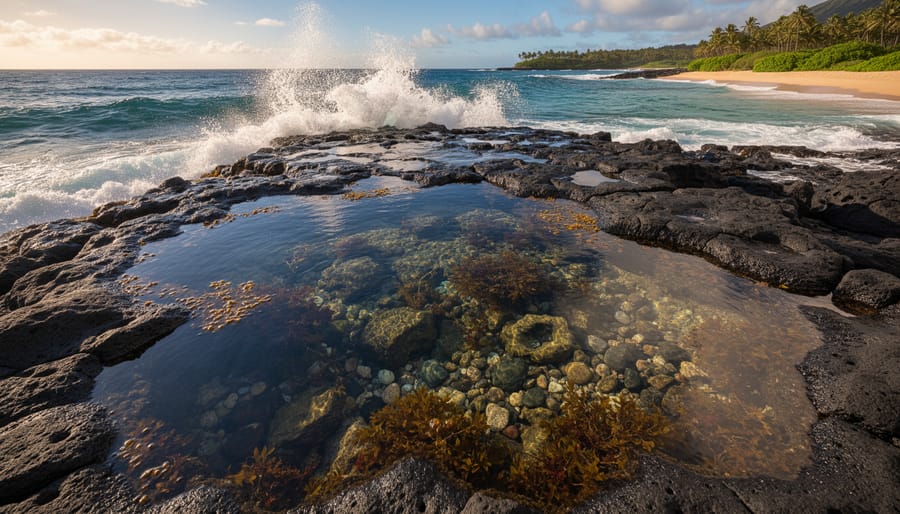
Oneloa Bay’s volcanic shelf presents Kapalua’s most dramatic tide pool environment, where black lava formations create striking contrast against turquoise water. The pools here are carved directly into dark basalt shelves that extend from the shoreline, offering powerful foreground elements for seascape compositions. During low tide, these shallow depressions hold crystal-clear water that reflects sky and clouds, while the surrounding volcanic rock provides rich texture and leading lines toward the ocean horizon.
This location demands more from photographers than the sheltered areas. The shelf faces open ocean, meaning wave action can be unpredictable and forceful. You’ll need to read wave sets carefully, watch for at least ten minutes before committing to a shooting position, noting the interval between larger swells. Position yourself where you can retreat quickly if needed, and always maintain awareness of the water behind you. The wet lava becomes extremely slippery, so move deliberately and test each foothold.
The photographic payoff justifies the extra caution. The dramatic geology creates natural frames and patterns that work beautifully with wide-angle lenses in the 16-24mm range. Try positioning low to emphasize the pools as foreground interest, using f/11 to f/16 for front-to-back sharpness. Early morning light rakes across the volcanic texture, enhancing depth and dimension. For dynamic compositions, time your shots between wave surges when the shelf is wet and reflective but momentarily calm. This spot rewards patience and experience, if you’re comfortable working around active surf and timing exposures between sets, you’ll capture some of Kapalua’s most striking tide pool images.
4. Namalu Bay Scattered Pools
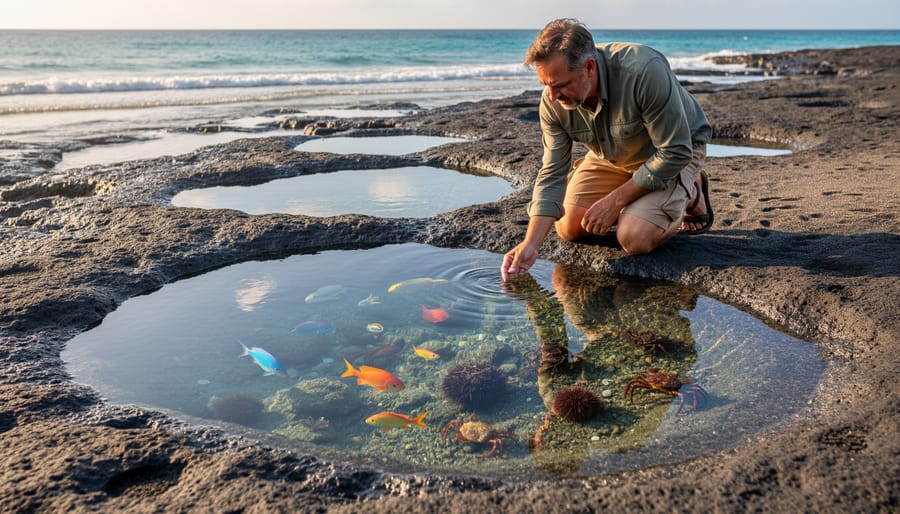
Namalu Bay’s scattered pools sit tucked away from the main tourist paths, making them a quiet refuge for photographers willing to put in a bit of extra effort. You’ll find this area less crowded than Hawea Point or Kapalua Bay, which means marine life behaves more naturally, crabs move without retreating, fish linger in the shallows, and you can work at your own pace without other visitors wandering through your frame.
The pool variety here stands out. Some are barely ankle-deep, perfect for shooting hermit crabs and small fish with a macro lens positioned just inches above the surface. Others run two or three feet deep with darker basalt walls, creating moody compositions where tropical fish dart through shafts of sunlight. This mix lets you capture intimate macro shots, then shift to wider environmental portraits showing pools in context with the surrounding lava shelf, all within a hundred-foot radius.
Getting there requires a ten-minute walk over uneven volcanic rock from the nearest parking area. The terrain isn’t technical, but it’s rough enough that you’ll want to pack smart. Use a dedicated camera backpack with padded compartments rather than a shoulder bag that shifts with every step. Keep your tripod collapsed and secured to the pack until you reach your shooting location. Wear closed-toe shoes with aggressive tread, the combination of wet rock and algae creates treacherous footing, and one slip with thousands of dollars of gear on your back teaches that lesson the hard way.
Bring only the lenses you’ll genuinely use. A macro and a wide-angle cover most opportunities here without the weight penalty of your full kit.
Understanding Tide Timing for Your Photography Visit
Getting your timing right makes the difference between photographing shallow puddles and capturing vibrant underwater worlds teeming with life. Low tide transforms Kapalua’s volcanic coastline, revealing tide pools that sit hidden and submerged just hours earlier.
The critical window spans roughly two to three hours centered on low tide. During this period, water recedes to expose pool floors, concentrate marine life in smaller pockets, and reveal the full range of compositions, from shallow foreground pools to deeper background formations. The receding water also clarifies visibility, allowing you to shoot through to colorful sea urchins, anemones, and darting fish without the distortion of deeper water columns.
Before you pack your camera bag, check tide predictions using NOAA charts or reliable tide apps. The nearest forecast stations sit at Kihei (roughly 8 km away) and Pukoo Harbor on Molokai (about 11 km distant), so local variations can occur. Plan to arrive 30-45 minutes before predicted low tide, this gives you time to scout locations, set up compositions, and start shooting as pools reach their most photogenic state. The best low tide photography happens when you’re already in position with your tripod planted and settings dialed in.
High tide offers entirely different opportunities. Pools disappear under incoming swells, but you gain dramatic wave action, spray photography, and the chance to capture water rushing over black lava formations. The contrast between states is stark, what was a calm pool at 4 PM might be a churning whitewater showcase by 6 PM. If you have the luxury of multiple visits, shoot both tidal extremes to build a comprehensive portfolio of Kapalua’s coastal character.
Essential Camera Gear and Settings for Tide Pool Photography
Your camera bag makes or breaks a tide pool shoot. The wet, reflective environment demands specific tools and settings that differ from typical landscape or wildlife work.
Start with lenses that cover two distinct scenarios. A wide-angle zoom (16-35mm or 14-24mm) captures the sweeping seascape compositions where pools serve as foreground elements against Kapalua’s dramatic coastline. Switch to a macro lens (90-105mm or 100mm) when you’re photographing hermit crabs navigating urchin spines or anemones contracting in shallow water. Prime macro glass delivers sharper detail than zoom alternatives, and the working distance keeps you from shadowing your tiny subjects.
A circular polarizing filter proves essential. Rotate it to cut surface glare, revealing the pool floor and marine life that would otherwise disappear in reflections. The effect varies throughout the day, you’ll see maximum polarization at 90 degrees to the sun, typically mid-morning or mid-afternoon at Kapalua. This same filter also deepens the blue sky behind your compositions and adds saturation to the wet volcanic rock.
Weather sealing matters here. Salt spray drifts unpredictably, and cameras without proper sealing risk corrosion in their electronics and focusing mechanisms. Bring a sturdy tripod for two purposes: stabilizing long exposures that blur wave motion into mist, and keeping your camera steady during macro work where any vibration ruins sharpness.
| Photography Type | Recommended Gear | Suggested Settings | Key Technique |
|---|---|---|---|
| Landscape/Seascape | 16-35mm, polarizer, tripod | f/11-f/16, 1/60-2s, ISO 100-200 | Use pools as foreground interest with leading lines toward horizon |
| Wave Action | 24-70mm, fast shutter | f/5.6-f/8, 1/500-1/1000, ISO 400-800 | Anticipate wave patterns and shoot bursts to capture peak spray |
| Macro Marine Life | 90-105mm macro, diffuser | f/8-f/13, 1/250+, ISO 400-640 | Shoot at subject’s level, focus on eyes or defining features |
| Silky Water Effects | Wide-angle, ND filter, tripod | f/16, 0.5-4s, ISO 100 | Time exposures between wave sets to capture movement while retaining pool definition |
Your settings shift based on what you’re capturing. Freezing wave action requires shutter speeds of 1/500 second or faster, bump ISO to 640 if needed to maintain that speed while keeping your aperture around f/8 for adequate depth. When you want silky, ethereal water flowing around the pools, slow down to 0.5-4 seconds. You’ll likely need a neutral density filter to achieve these speeds in Maui’s bright tropical light without blowing highlights.
Macro work demands f/8 to f/16 for enough depth of field to render your subject sharp from front to back. A sea urchin photographed at f/2.8 might show only a few spines in focus, compelling in some contexts, frustrating in others. Shutter speed stays at 1/250 or faster to counteract both your hand movement and the subject’s (hermit crabs don’t hold still). ISO flexibility helps here; don’t hesitate to use ISO 640 or 800 when pools sit in shadows cast by surrounding rock formations.
Maui’s intense sunlight creates challenges between 11 a.m. and 2 p.m., when harsh overhead light flattens texture and blows out highlights on wet surfaces. Morning and late afternoon provide better contrast and warmer color that enhances the pools’ natural tones. Check our tide timing tips before finalizing your shoot schedule.
Pack a microfiber lens cloth in a sealed plastic bag. You’ll wipe salt spray from your front element every few minutes in exposed areas, and that cloth stays usable only if kept dry between cleanings. Some photographers bring a clear UV filter as a sacrificial element, it’s cheaper to replace than your lens’s front element if saltwater etches the glass. For bodies without extensive weather sealing, a simple rain cover provides peace of mind when shooting near active surf zones.
Practical Information for Visiting Kapalua Tide Pools
Kapalua’s tide pools sit along the northwest coast of Maui, accessible from several points near the resort area. You’ll find the main access points off Lower Honoapiilani Road, where small parking areas serve popular spots like Hawea Point and Namalu Bay. These lots fill quickly between 9am and noon, so aim to arrive before 8am or after 2pm to secure a space. Some photographers park along the roadside where legal, but watch for no-parking signs and avoid blocking residential driveways.
The access paths cross volcanic rock formations rather than sandy beaches. This terrain demands closed-toe shoes with good grip, flip-flops or smooth-soled sneakers will leave you sliding on algae-covered surfaces. The walk from parking to prime tide pool areas typically takes 5-10 minutes over uneven lava rock, so pack your essential travel gear in a comfortable backpack rather than a shoulder bag. There’s no entry fee for these natural areas, though you’re visiting what locals consider both a resource and a responsibility.
Summer months (May through September) bring calmer ocean conditions and clearer water for photography, while winter swells from November through March can make tide pools dangerous or inaccessible. Plan for 3-4 hours on site to properly scout compositions, wait for optimal light, and work through different pool areas without rushing.
Before you head out, pack these essentials:
- Two liters of water per person (no water fountains available)
- Reef-safe sunscreen and a wide-brimmed hat
- Sturdy water-resistant hiking shoes with grip
- Rain cover or plastic bags to protect camera gear from spray
- Snacks and any needed supplies
You won’t find restrooms, changing facilities, or food vendors at the tide pool areas themselves. The nearest facilities sit back at Kapalua Resort, roughly a 10-minute drive from most access points.
Local Tips and Safety Advice for Tide Pool Photography
Getting good shots at Kapalua’s tide pools requires more than technical skill, local knowledge and safety awareness make the difference between a productive session and a dangerous situation. Here’s what experienced photographers who regularly shoot this coastline want you to know.
Arrive at least an hour before predicted low tide. Morning sessions offer the clearest light before afternoon clouds roll in from the west, typically starting around 1 PM. You’ll also beat the tourist crowds that arrive mid-morning. Scout your compositions during the first low tide cycle of your trip, noting pool locations and interesting formations. Then shoot during the second cycle with confidence, spending less time searching and more time capturing.
Never turn your back on the ocean. Rogue waves strike without warning, and photographers absorbed in their viewfinders are particularly vulnerable. Watch the wave sets for several minutes before committing to a shooting position, and stay alert between compositions. If you feel spray or see water surging toward you, move immediately to higher ground.
The algae-covered rocks become treacherously slippery when wet. Wear shoes with aggressive tread, reef shoes or hiking boots work better than standard sneakers. Test each foothold before committing your weight, especially when carrying camera gear. Move deliberately rather than rushing between spots.
Set a timer on your phone to alert you 30 minutes before the tide turns. Photographers focused on macro work often lose track of time, and incoming water can cut off access routes quickly. Rising tide also increases wave energy, making previously safe positions hazardous.
Protect your gear from salt spray with waterproofing accessories like rain covers or even gallon-sized plastic bags in a pinch. Keep a microfiber cloth accessible for wiping lens elements between shots. Salt residue destroys equipment if left to dry.
Respect the ecosystem by observing without touching. Human skin oils harm anemones and other delicate creatures. Don’t move rocks or shells to improve compositions, you’re disrupting the habitat that attracted you here. Leave everything as you found it. The pools you photograph today should remain pristine for the next photographer tomorrow.
Frequently Asked Questions About Photographing Kapalua Tide Pools
What Photographers Most Often Ask About Kapalua’s Tide Pools
The tide pools draw photographers with varied experience levels, each facing similar questions about timing, gear protection, and shooting logistics that aren’t always covered in general guides.
When is the absolute best time for photography?
The hour immediately following low tide offers the most productive shooting window, when pools are fully revealed but marine life hasn’t retreated yet. Morning low tides provide better light quality than afternoon cycles, with softer shadows and more saturated colors before midday haze develops.
Do I need a waterproof camera?
A weather-sealed body handles the humid conditions and occasional spray, but full waterproofing isn’t necessary if you stay alert to wave patterns and use lens cloths frequently. Rain covers or plastic bags provide adequate protection for non-sealed gear during brief spray encounters.
What if I miss low tide?
High tide offers different opportunities for wave action and splash photography, though you won’t access the pools themselves. Consider scouting backup photo spots along the coast for alternative compositions when tide timing doesn’t align with your schedule.
How do I handle lens fog in humid conditions?
Let gear acclimate gradually by leaving it in your closed camera bag for 15-20 minutes after arriving from air-conditioned spaces. Microfiber cloths and silica gel packets in your bag help manage condensation, though morning shoots typically face less fogging than late afternoon sessions.
Commercial photography and drone use fall under Hawaii state park regulations where applicable, though many tide pool areas sit on unregulated coastline. Check with local authorities if you’re shooting for paid clients or planning aerial work, as rules vary by specific location and can change seasonally. Respect posted signage and be aware that some resort-adjacent areas may have their own restrictions, particularly during peak visitor hours when foot traffic makes tripod work challenging.
Kapalua’s tide pools stand out as one of Maui’s most rewarding tide-dependent photography destinations. The volcanic pools deliver a rare combination of technical challenge and raw natural beauty, macro opportunities with vibrant marine life, dramatic seascape compositions, and the ever-changing interplay of light on water. Timing your visit around low tide isn’t just helpful, it’s essential. Those 2-3 hour windows reveal the pools at their best, concentrating subjects and exposing compositions that disappear entirely when the ocean reclaims its territory.
This location demands respect on two fronts. Safety protocols aren’t suggestions, slippery rocks and rogue waves catch even experienced photographers off guard. Similarly, the fragile ecosystem you’re documenting depends on visitors leaving no trace and resisting the urge to manipulate scenes or disturb marine life for a shot.
Before you head out, check current tide charts for your chosen area, pack weather-sealed gear and sturdy footwear, and carve out enough time to scout and experiment. Tide-dependent coastal locations like these push your technical skills and compositional thinking in ways controlled environments never can. The images you’ll bring back, and the problem-solving experience you’ll gain, make every careful step across those lava rocks worthwhile.


 By
By