By
By 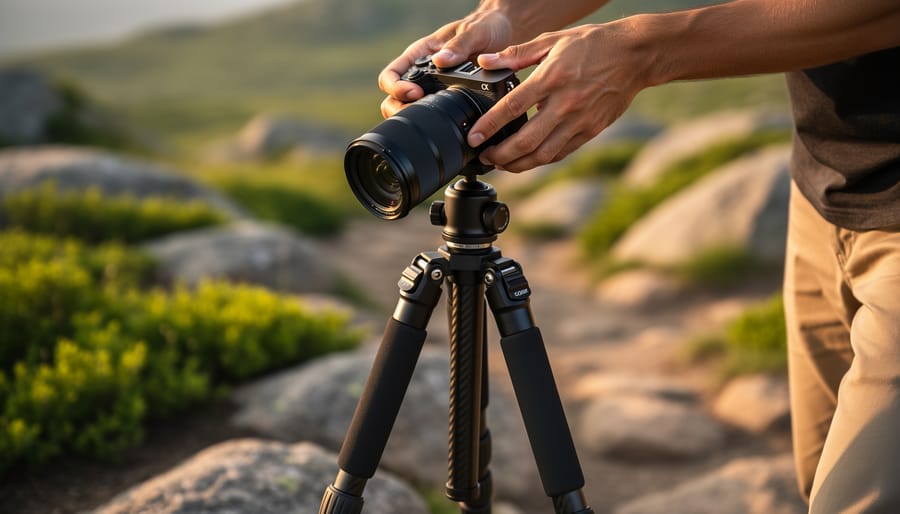
Lifting a tripod with a mounted camera requires a single, counterintuitive principle: always grip the tripod’s center column or apex, never the legs. This technique, which takes just seconds to execute correctly, protects thousands of dollars in gear from catastrophic drops while preventing the awkward, back-straining contortions that come from trying to balance an unwieldy three-legged apparatus. The physics are simple. When you lift from the apex, the tripod’s weight distributes evenly, the legs naturally fold upward or hang balanced, and your camera stays stable atop a controlled center of gravity. Grab a leg instead, and you’re fighting an unstable lever that can swing your camera into door frames, car trunks, or worse.
Too many photographers learn this the hard way. Picture the classic scenario: you’re wrapping up a golden-hour landscape shoot, eager to move to the next location, and you instinctively grab the nearest tripod leg to hoist your rig. The opposite leg swings out, clips a rock, and suddenly your $3,000 camera and lens are plummeting toward the ground. That split-second mistake is entirely preventable, and mastering the proper lift is as fundamental to camera maintenance tips as cleaning your sensor or protecting your lens elements. Whether you’re working with a compact travel tripod or a heavy-duty studio model supporting a professional cinema camera, the same principle applies.
Why Proper Tripod Lifting Matters
Improper tripod lifting does more than create an inconvenient moment, it can cost you hundreds of dollars in gear repairs and leave you nursing a strained back for weeks. When you grab a loaded tripod by its extended legs instead of the apex, the leg lock mechanisms twist under uneven pressure, weakening the friction rings and eventually leading to sections that won’t hold position. I’ve seen photographers pick up a tripod by the ball head, only to have the quick-release plate shift mid-lift and send a $2,000 lens crashing to the ground, because that head wasn’t designed to bear the entire rig’s weight at an angle.
Dragging a tripod across concrete or tile, something I see beginners do constantly at events, scratches the rubber feet down to the metal spikes, ruins the finish on leg tubes, and introduces grit into the twist locks that grinds away at the threads with every future adjustment. The center column can twist out of alignment when you yank the tripod sideways during a rushed move, and that misalignment prevents smooth vertical adjustments until you pay for professional servicing. Proper lifting technique isn’t fussy perfectionism; it’s the same smart maintenance thinking that makes you clean lenses and protect your gear in weather, preventing easily avoidable damage that cuts your equipment’s lifespan in half and keeps your body pain-free during long shoots.
What You’ll Need and When to Lift
Before you attempt any tripod lift, you need to evaluate your setup and confirm it’s safe to move as a single unit. The prerequisites aren’t about gathering equipment, you’ve already got the tripod and camera in position, but about making informed decisions that prevent damage and injury.
Start by assessing the total weight. A mirrorless camera with a lightweight lens might add 2-3 pounds to your tripod, making the combination easy to manage. A DSLR with a telephoto lens, battery grip, and attached flash can push that to 10 pounds or more. Video rigs with monitors, recorders, and counterweights easily exceed 15 pounds. You need to know your limit before you commit to the lift. If you feel any hesitation about the weight, that’s your signal to break down the setup instead.
Your tripod’s design dictates where you’ll grip and how the weight distributes. Most tripods feature an apex ring, the triangular junction where the three legs meet, which serves as the primary load-bearing structure. Some designs incorporate a protruding center column that extends below the apex, while others keep the column entirely above. Carbon fiber tripods concentrate more weight in the head and payload because the legs are lighter than aluminum counterparts, shifting the center of gravity higher. Video tripods with mid-level spreaders or ground spreaders change the geometry entirely, often requiring a different approach.
Before you touch the tripod, complete this inspection:
- Verify all leg section locks are fully tightened and engaged
- Check that the camera is secure to the head with no wobble or play
- Confirm your total payload weight is something you can safely lift and control
- Scan the ground surface for stability, debris, or obstacles in your path
- Identify your grip point, apex ring, center column base, or spreader hub
If any lock feels loose, if cables are wrapped around the legs, or if you’re working on soft ground where a leg might sink during the lift, address those issues first. The moment to discover a problem isn’t when the tripod is already in the air.
Safety Precautions Before You Lift
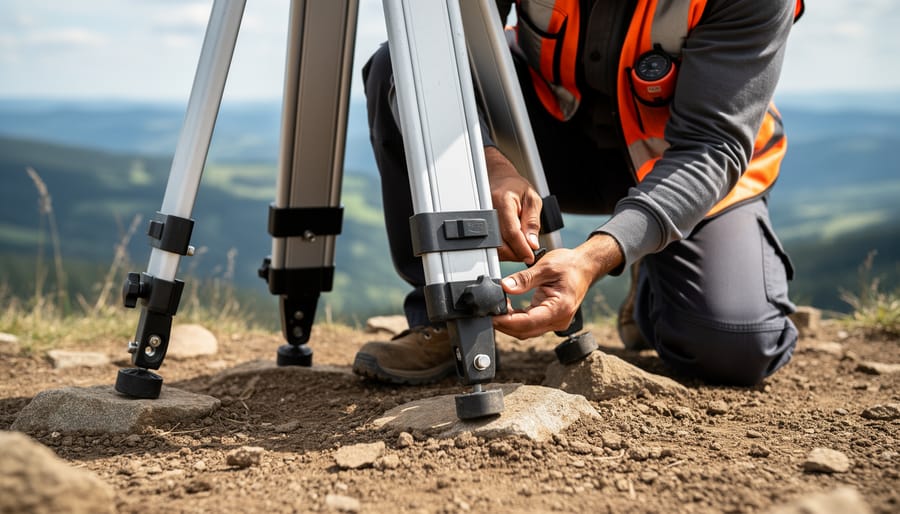
Before you attempt any tripod lift, take thirty seconds to run through a pre-flight checklist that prevents both gear damage and personal injury. Start at the ground: verify that every leg section lock is fully engaged by giving each segment a firm twist and checking for any play or movement. Then work your way up to inspect the camera mounting plate and quick-release clamp, ensuring they are tight and properly seated with no visible gaps. Look for cables connected to your camera, whether for remote releases, external monitors, or power supplies, and trace their path to confirm nothing will snag or pull taut during the lift.
Survey your immediate environment before you grip the tripod. Scan the floor or ground for obstacles like gear bags, light stands, rocks, or uneven surfaces that could trip you mid-carry. Check overhead clearances if you are indoors or near tree branches. Assess wind conditions outdoors, particularly with telephoto lenses or large modifiers attached that act like sails and can catch gusts unexpectedly. In crowded spaces like event venues or busy streets, identify clear paths and watch for people who might bump into you while you are mid-lift.
Pay attention to your own physical state as well. If you are fatigued from a long shoot, if your hands are cold and less dexterous, or if you are carrying other equipment that limits your grip, those are signals to take extra care or choose disassembly over a loaded lift.
The Tripod Lifting Technique: Step by Step
Positioning and Grip
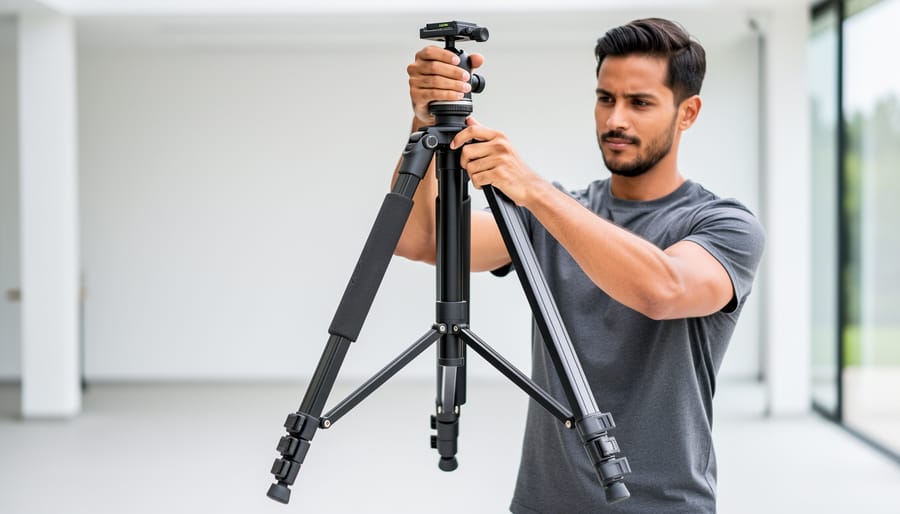
Before you reach for the tripod, position yourself directly in front of it with your feet shoulder-width apart. This stable base gives you the foundation for a controlled lift. Never grab the extended leg sections, they’re designed to telescope, not bear lifting force, and you’ll stress the locks or twist the legs out of alignment.
Instead, locate the apex (the point where all three legs meet at the top). For most photo tripods, wrap one hand around the apex ring or the base of the center column just above where the legs attach. Your grip should be firm but not strangling, you’re controlling the tripod, not wrestling it. For tripods with a protruding center column, you can grip the column itself about six inches below the head, though the apex generally offers better balance.
If you’re dealing with a heavy video tripod or a rig with the center column fully extended, use both hands: one at the apex and one supporting the center column mid-height. This distributes the weight and prevents the column from flexing or rotating during the lift.
Before you begin the lifting motion, engage your core muscles, tighten your abdomen as if bracing for impact. This stabilizes your spine and protects your lower back throughout the movement.
The Lift Sequence
Once you’ve established your grip and stance, initiate the lift by bending your knees while keeping your back straight. Think of this as a squat motion rather than a bend. Your torso should remain upright, core engaged, with the tripod positioned as close to your body as possible, not extended out in front of you.
Drive upward through your heels and legs, letting your quads and glutes do the work. Your arms are simply holding the tripod; they shouldn’t be pulling it up. As you rise, keep the tripod vertical to prevent the camera from swinging or the head from rotating. A tilting tripod during ascent puts unnecessary torque on leg joints and increases injury risk if the load shifts unexpectedly.
Control the speed of your lift. Jerking or rushing creates momentum that can loosen leg locks or cause you to lose balance. A smooth, deliberate ascent takes about two to three seconds for most setups.
For heavier rigs, anything over 15 pounds total, use both hands on the apex or center column with palms facing each other, creating a stable cradle. This distributes weight evenly and gives you better control. Lighter travel tripods under 10 pounds can often be lifted with one hand on the apex, but maintain the same leg-driven lifting motion regardless. If you feel strain in your lower back at any point, you’re not using your legs enough. Stop, reset your posture, and try again with deeper knee bend.
Moving and Setting Down
Once you’ve completed the lift, your next challenge is transporting the tripod without compromising your balance or your gear’s safety. Keep the tripod vertical at all times, tilting it shifts the center of gravity and strains your grip. Hold it close to your body rather than extended outward; this reduces fatigue and keeps the load stable.
Watch the camera head constantly. Many heads can rotate freely even when locked if you jostle them during movement, which means your camera might swing into a wall or doorframe before you notice. If your head has a pan lock, engage it before you start moving.
Take small, deliberate steps. Shuffling beats striding when you’re carrying a loaded tripod, especially across uneven ground or crowded spaces. Before stepping over cables, roots, or curbs, pause and plan your foot placement, rushing causes trips, and a fall with gear in hand rarely ends well.
When navigating doorways or tight corners, lead with your shoulder and pivot your whole body rather than swinging the tripod through the gap. This prevents the legs from catching on door frames or clipping bystanders.
Setting down requires the same control you used to lift. Lower with your legs, not your back, keeping the tripod vertical until the feet touch the surface. Don’t release your grip immediately, apply slight downward pressure while spreading the legs to their stable position. On sloped or soft ground, press each foot firmly and confirm they’re not sliding before you let go. A quick visual check ensures the head hasn’t rotated and the camera faces where you intended.
Technique Variations for Different Scenarios
The core tripod lifting technique remains consistent across most situations, but certain scenarios demand specific adaptations to maintain safety and protect your equipment. Understanding these variations ensures you can handle your tripod confidently regardless of the shooting environment.
Heavy Video Rigs with Accessories
When your tripod supports a cinema camera, monitor, follow focus, and other accessories, the weight distribution changes dramatically. Always use both hands at the apex or center column grip, and consider the extended weight beyond the tripod’s footprint. Before lifting, remove any quick-release accessories like monitors or microphones if they’re not essential for the move. Engage your core more deliberately and take smaller steps, heavy rigs shift your center of gravity and require extra control during transit.
Uneven Terrain and Outdoor Challenges
Rocky ground, sand, or muddy surfaces demand modified footwork. Plant your feet more deliberately before the lift, ensuring stable footing. Keep the tripod closer to your body than usual to counteract unpredictable ground conditions. If one leg is extended significantly further than others due to slope compensation, adjust your grip slightly toward the longer leg side to account for the imbalanced weight. Never rush a lift on uneven ground, a twisted ankle costs more than a few extra seconds.
Here are key adjustments for common challenging environments:
- Stairs and inclines: Face uphill, lift to waist height only, and take one step at a time with deliberate foot placement
- Confined spaces: Tilt the tripod slightly (maintaining vertical camera orientation) to reduce clearance requirements, keeping legs drawn closer together
- Crowded areas: Announce your movement, keep the setup vertical and tight to your body, and maintain constant awareness of head swing
- Windy conditions: Lower your stance further and consider partial disassembly if gusts exceed moderate levels
Lightweight Travel Tripods
Ironically, ultralight carbon fiber tripods under four pounds can be trickier to lift safely because photographers often treat them carelessly. The same principles apply, grip the apex, lift with your legs, but you can execute the movement more quickly. Still, check those leg locks; lightweight tripods often use twist locks that can loosen during shooting. The reduced weight doesn’t eliminate the risk of dropping your camera if you grab an unlocked leg.
For extremely compact tabletop tripods, a single-hand lift from the center column is acceptable, but verify the camera is secure first. These setups weigh so little that the primary risk shifts from personal injury to accidentally knocking the camera loose during the lift.
Verifying a Successful Lift and Next Steps
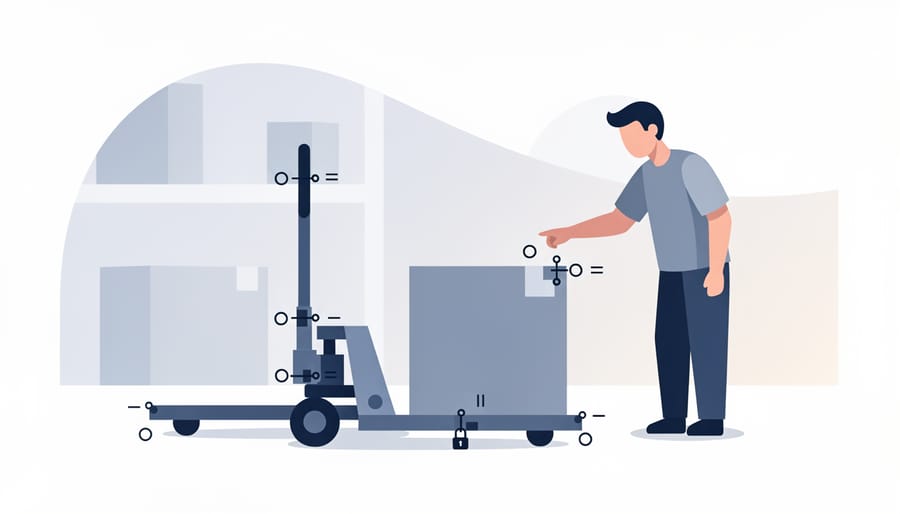
Once you’ve set the tripod down using the proper technique, a quick inspection confirms everything remained secure during the lift. Start by visually scanning the leg angles, they should match their pre-lift positions without any shifted sections or partially-extended segments. Run your hand along each leg lock to verify they’re still tight; a loose lock means the tripod wasn’t fully secured before you lifted it or the movement stressed a worn mechanism. Check the camera or head alignment by looking through the viewfinder or at the monitor, if the framing has changed or the head feels rotated, something shifted during transport.
Test stability by gently pressing down on the camera from above. The tripod shouldn’t wobble, creak, or settle lower. If you notice any of these signs, disassemble the setup and inspect for bent hardware, stripped threads, or damaged leg sections, issues that might require a camera repair service for expensive heads or mounts. Wipe down the apex and legs after setting down to remove dust or debris picked up during the move, treating this as part of your regular maintenance routine alongside tasks like using a lens cleaning system for your optics. Making these verification steps habitual prevents small problems from becoming expensive failures mid-shoot.
Common Mistakes and How to Avoid Them
The most common tripod lifting error is grabbing the legs instead of the apex or center column. When you grip extended leg sections, you create uneven stress on the joints and risk loosening or damaging the leg locks. Always reach for the center column or apex ring, even if it feels slightly less convenient, this distributes the weight through the tripod’s strongest structural points.
Twisting your torso while lifting ranks close behind. Photographers often spot their next shooting position mid-lift and rotate their upper body while the tripod is still rising, which strains your lower back and can shift the camera on the head. Keep your movements deliberate: lift first, then pivot your entire body with your feet if you need to turn.
Rushing the lift causes a cascade of problems. You skip the stability check, forget about that cable running from your camera to an external recorder, or fail to notice the ballast bag hooked to the center column. The fix is simple but requires discipline: pause for two seconds before every lift to scan your setup and your surroundings.
Can I lift by the legs if they’re fully retracted?
Even with retracted legs, gripping the apex or center column remains safer because it keeps the weight centered and prevents accidental lock releases. Reserve leg-gripping only for emergency situations on extremely uneven ground.
What if my tripod doesn’t have an accessible apex?
Some designs bury the apex inside a housing, in these cases, grip the top of the center column as close to where it enters the leg assembly as possible. For tripods with no center column, grip the mounting platform base instead.
How do I break the habit of grabbing legs?
Place a small piece of bright tape on your tripod’s apex or center column as a visual reminder for the first few weeks. Most photographers internalize the correct grip point after 15-20 conscious repetitions.
Ignoring weight limits creates risk you won’t notice until something fails. Your technique might feel solid with a mirrorless camera and small lens, but adding a telephoto, flash bracket, and monitor can push you past safe single-person lifting capacity. Weigh your maximum setup once and know your threshold, if it exceeds 30 pounds for most photographers or 20 pounds if you have any back concerns, get help or break the rig down before moving it.
Mastering the tripod lifting technique isn’t just about moving your gear from point A to point B, it’s a fundamental skill that protects both your equipment investment and your physical wellbeing. Every time you lift correctly, you’re extending the lifespan of your tripod’s leg locks, preserving the integrity of your center column, and safeguarding your camera from unnecessary stress. More importantly, you’re preventing the kind of back strain and muscle injuries that can sideline you from shooting altogether.
The good news? This technique becomes automatic with practice. After a few deliberate repetitions, you’ll find yourself naturally gripping the apex, bending at the knees, and maintaining that vertical orientation without conscious thought. Make it a habit now, and you’ll avoid the expensive repairs and physical discomfort that come from years of improper handling.
Remember that proper lifting is just one component of comprehensive tripod maintenance. Regular inspection of locks and joints, periodic cleaning of leg sections, and proper storage all work together to keep your stabilization gear performing reliably for years. Treat your tripod with the same care you give your lenses, and it’ll support countless successful shoots ahead.



 By
By