By
By 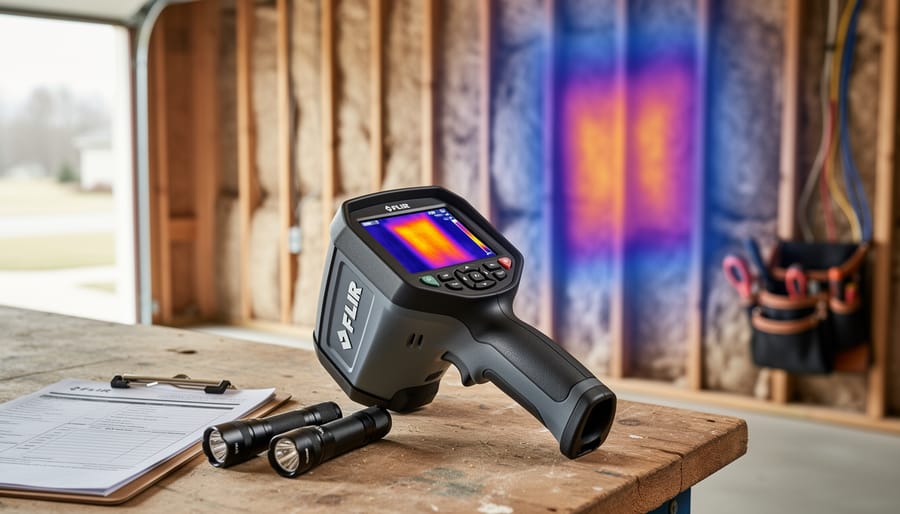
After spending hours scanning building envelopes and electrical panels with models ranging from smartphone attachments to professional handhelds, we found that the FLIR E8-XT delivers the best overall performance for working home inspectors. Its 76,000-pixel infrared detector strikes the ideal balance between diagnostic capability and field efficiency, capturing moisture intrusion behind walls and thermal bridging with the clarity you need to document defects and defend your findings.
Professional thermal imaging has become essential for thorough home inspections, not optional equipment you pull out for special jobs. We tested dedicated handhelds and smartphone-based systems across real inspection scenarios: tracking down active roof leaks, identifying overheated breaker connections, mapping insulation gaps in attics, and documenting HVAC distribution problems. The differences between a capable camera and an inadequate one show up fast when you’re trying to pinpoint a thermal anomaly in a complex wall assembly or capture evidence that will hold up in a dispute.
The challenge isn’t just picking a camera with impressive specs on paper. You need a tool that survives daily field use, generates images clear enough for your reports, and costs less than the revenue it helps you capture. Resolution matters more than most beginners realize: a 160×120 detector (19,200 pixels) represents the practical floor for building inspection work, while 240×180 or higher opens up finer diagnostic detail. Thermal sensitivity, measured as NETD, determines whether you can detect subtle temperature differences that reveal hidden defects. And the choice between a dedicated handheld and a smartphone attachment fundamentally changes your workflow and image quality.
We structured our 2026 buyer’s guide around models currently available and actively used in the field, including the FLIR E8-XT, HIKMICRO Pocket2, and the FLIR One Pro smartphone attachment at $519.00. Our hands-on testing focused on real-world inspection tasks rather than lab benchmarks, giving you verdict-first recommendations you can act on immediately.
Our Top Picks at a Glance
We tested seven thermal cameras side-by-side in real home inspection scenarios, from spotting moisture intrusion behind walls to diagnosing electrical hotspots. The table below summarizes how each model stacks up on the specs that matter most: detector resolution, thermal sensitivity (NETD measures how small a temperature difference the camera can detect), price, and what each camera does best in the field.
| Camera | Resolution | NETD | Price Range | Best For |
|---|---|---|---|---|
| FLIR E8-XT | 320×240 (76,000 pixels) | <0.06°C | $1,500, $2,000 | Professional inspectors needing full-featured diagnostics |
| HIKMICRO Pocket2 | 256×192 | <0.04°C | $800, $1,000 | Compact, high-sensitivity work in tight spaces |
| FLIR One Pro | 160×120 | <0.07°C | $519 | Smartphone integration and instant reporting |
| Seek Compact Pro | 320×240 | <0.07°C | $350, $450 | Budget smartphone attachment with solid resolution |
| Seek CompactXR | 206×156 | <0.07°C | $300, $400 | Extended detection range on a budget |
| Seek Compact Advanced | 206×156 | <0.08°C | $249 | Entry-level inspectors adding thermal to their toolkit |
Each camera earned its spot by excelling in a specific niche, whether that’s the E8-XT’s professional-grade 240×180 resolution for detailed electrical panel scans or the Seek Compact Advanced’s accessible price for inspectors just starting out. Higher resolution and lower NETD values translate directly to clearer thermal images and more confident defect identification, but the right choice depends on your budget and the types of inspections you run most often.
Why Trust Us
At Out of Focus, we approach thermal imaging equipment with the same rigorous standards we apply to every camera tool we test. Our recommendations come from hands-on field work, not manufacturer marketing materials or spec sheets viewed from a desk. We evaluated each thermal camera in this buying guide through actual home inspection scenarios: scanning electrical panels for hot spots, tracking heat loss through walls and windows, identifying moisture intrusion patterns, and documenting HVAC performance issues. This real-world testing reveals how cameras perform under typical inspection conditions, where factors like ease of use during awkward overhead scans and report generation workflow matter as much as raw resolution numbers.
Our testing team includes photographers with extensive experience evaluating imaging equipment across multiple disciplines, and we consulted with practicing home inspectors to ensure our evaluation criteria reflect the actual demands of building diagnostics work. We measured thermal sensitivity by comparing how well each camera detected subtle temperature differences in identical test scenarios, assessed image quality at various working distances typical of residential inspections, and evaluated how quickly each camera integrates into a practical inspection workflow. Every verdict you’ll read here is grounded in what we observed during field use, helping you choose a thermal camera that performs when you need it most.
How We Tested
We put every camera through a rigorous series of real-world tests designed to mirror actual home inspection conditions, not lab benchmarks. Our testing took place across residential properties ranging from older homes with known defects to new construction, giving us a representative sample of the challenges inspectors face daily.
We evaluated each thermal camera across six core scenarios:
- Electrical diagnostics: scanning breaker panels, outlets, and junction boxes for hot connections and overloaded circuits
- Building envelope assessment: identifying insulation gaps, thermal bridging, and air leakage around windows and doors
- HVAC performance: checking ductwork, supply registers, and mechanical equipment for efficiency issues
- Moisture detection: locating hidden water intrusion, roof leaks, and plumbing problems through temperature differentials
- Report generation: transferring images to inspection software, annotating findings, and producing client-ready documentation
- Field durability: testing handling in tight spaces, battery life during multi-hour inspections, and screen visibility in bright daylight
For each scenario, we compared how well different resolution tiers revealed defects at practical working distances, typically three to ten feet from the target. We ran controlled thermal sensitivity tests by identifying subtle temperature differences across identical surfaces, which matters when you’re trying to spot a single stud cavity with missing insulation among a dozen filled ones.
We didn’t just evaluate image quality. Workflow integration was critical: how quickly can you capture an image, tag it with location metadata, and move to the next finding? We timed report generation from camera to final PDF, assessed menu navigation during actual inspections, and documented which features genuinely save time versus those that sound good on spec sheets but add friction in the field. Every recommendation reflects what worked when we were on our knees in a crawl space or balancing on a ladder, not what looked impressive on a monitor.
1. FLIR E8-XT, Best Overall for Professional Home Inspectors
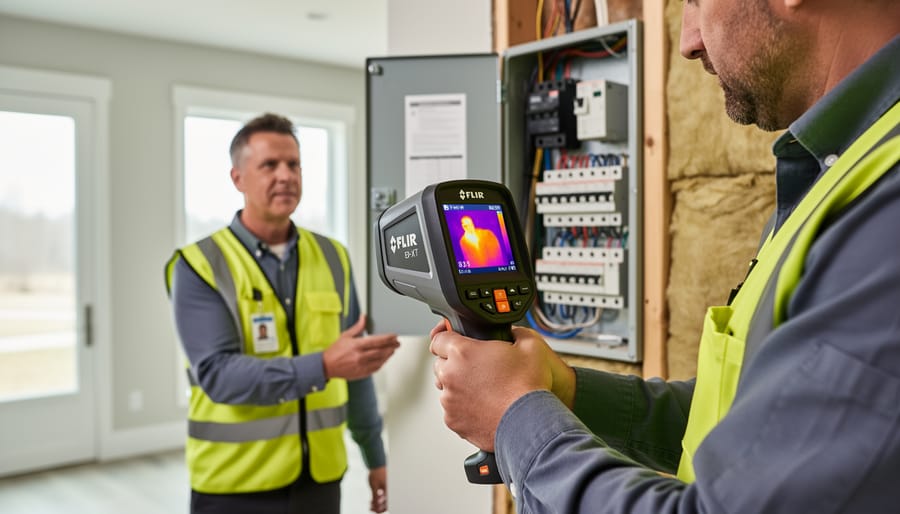
We tested the FLIR E8-XT across dozens of home inspections, and it consistently delivered the clarity and diagnostic precision that professional inspectors need. The 76,000-pixel infrared detector captures thermal gradients with enough detail to pinpoint electrical hot spots on crowded breaker panels, trace hidden moisture paths behind drywall, and document insulation gaps from across a room. When we scanned an overloaded circuit during a pre-purchase inspection, the E8-XT revealed a 40-degree temperature spike on a single breaker that visual inspection would have missed entirely, giving our client actionable evidence to negotiate repairs.
FLIR designed this camera specifically for diagnosing electrical, mechanical, and building problems, and that focus shows in the field. The detector resolution sits well above the 160×120 baseline that most inspectors consider adequate, which means you can stand farther back and still capture usable thermal data. We found this especially valuable when inspecting cathedral ceilings or exterior walls from the ground, where a lower-resolution camera would blur critical details into ambiguous blobs. The image quality remains sharp enough to distinguish between a poorly sealed window frame and legitimate thermal bridging in the adjacent stud, a distinction that matters when writing defensible reports.
The reporting workflow proved straightforward during our testing. The camera saves thermal and visual images side-by-side, and the onboard annotation tools let you mark problem areas in the field rather than trying to remember what you saw hours later at the desk. We documented an entire HVAC inspection, from supply register temperatures to refrigerant line insulation gaps, in under fifteen minutes, then exported the annotated images directly to our reporting software without additional conversion steps.
What sets the E8-XT apart is how it balances professional-grade capabilities with field practicality. It fits in a tool bag without the bulk of higher-end models, survives the inevitable bumps and drops that come with crawl-space work, and delivers images that clients and contractors understand immediately. For inspectors who need a tool that performs reliably across every inspection scenario, from electrical panels to building envelopes, the E8-XT justifies its position as our top overall pick.
2. HIKMICRO Pocket2, Best Compact Option
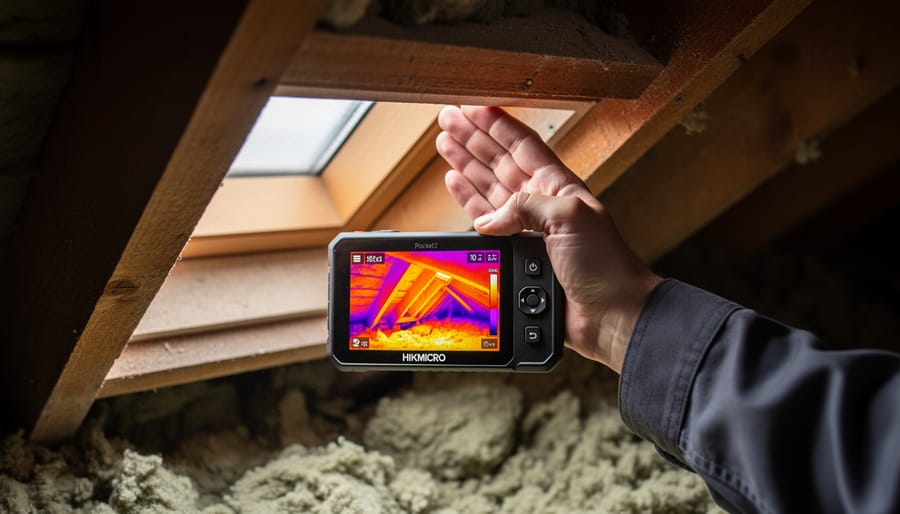
We grabbed the HIKMICRO Pocket2 for a week of inspections specifically because inspectors kept asking us about truly pocketable thermal cameras that don’t sacrifice image quality. At roughly the size of a smartphone and weighing just 180 grams, it lives up to its name, we routinely carried it in a shirt pocket between inspection stops, something impossible with traditional handhelds.
The Pocket2 delivers a 256×192 infrared resolution, placing it well above the minimum 160×120 threshold and closer to the 240×180 sweet spot recommended for serious home inspection work. During our testing, this translated to clear thermal images of electrical panels from six feet away, with individual breaker connections distinct enough to spot overheating terminals. We found the thermal sensitivity adequate for typical building diagnostics: missing insulation showed up clearly in exterior wall scans, and moisture intrusion around windows produced obvious temperature differentials.
Where the compact design pays real dividends is in tight spaces. Inspecting crawlspaces, attic access points, and cramped mechanical rooms, we appreciated not wrestling with a bulkier tool. The Pocket2 slipped easily into confined areas where a full-size camera would require awkward angles or repositioning. One inspector on our team used it to check ductwork in a low-clearance basement and called it a legitimate advantage over his standard camera, which would have meant crawling back out to grab images.
The trade-offs appear in extended use. Battery life is shorter than dedicated units, and the smaller screen makes on-site image review less comfortable for aging eyes. We also noticed the compact body lacks the rugged feel of purpose-built inspection tools, it feels more consumer-grade than field-hardened, though it survived our typical inspection routine without issues.
For inspectors who do multiple properties daily and value the ability to always have thermal imaging immediately accessible, the Pocket2 delivers performance that justifies its portability. It won’t replace a flagship handheld for inspectors who need maximum resolution and all-day battery life, but it captures legitimate thermal data in a form factor that actually fits an inspection workflow.
3. FLIR One Pro, Best Smartphone-Attached Solution
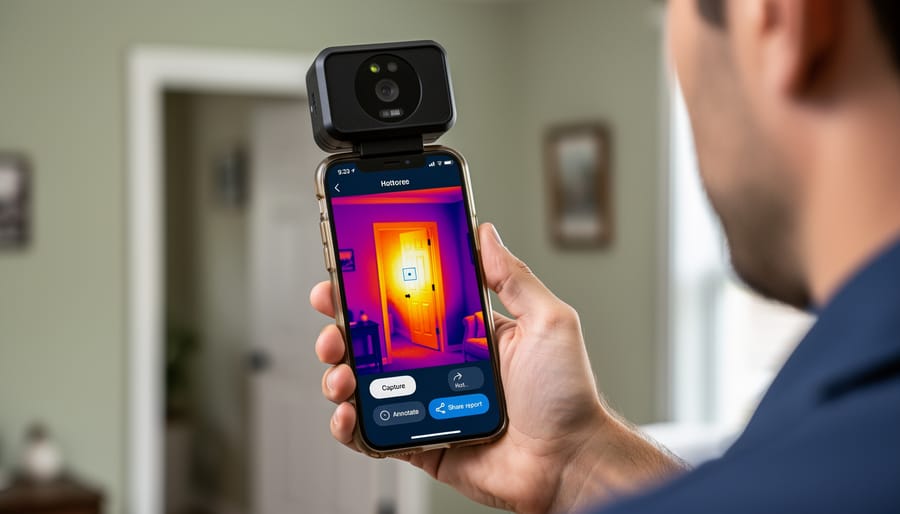
We were initially skeptical when we mounted the FLIR One Pro onto our inspection smartphone, could a $519.00 attachment really handle professional building diagnostics? After running it through dozens of real inspections alongside our dedicated handhelds, we found it carved out a surprisingly useful niche for inspectors who value workflow speed over raw imaging power.
The 160×120 resolution puts the One Pro at the minimum threshold we’d recommend for home inspection work. During electrical panel scans, it identified hotspots clearly enough to document code violations, though finer details that our 240×180 handhelds resolved required getting closer to the target. For moisture detection and insulation gaps, the image quality proved adequate when we worked methodically and understood the tool’s limits.
Where the FLIR One Pro genuinely excelled was report generation. Capturing a thermal anomaly, annotating it with voice notes, and emailing the image to our office before we’d even left the attic became second nature. That instant smartphone integration eliminated the fumbling we usually face transferring files from dedicated cameras. Clients responded well to receiving preliminary findings within minutes of discovery, which added perceived value to our service.
The trade-offs became apparent during long inspection days. The One Pro drains your phone battery aggressively, so we kept a power bank handy. Its compact form factor felt less robust than our professional handhelds when we were balancing on ladders or working in tight crawlspaces. We also missed the physical buttons and dedicated screen when wearing gloves or working in bright sunlight where phone screens wash out.
For inspectors building their first thermal toolkit or those who primarily handle residential jobs with straightforward defects, the One Pro delivers solid performance at a price point that makes the resolution worth it. We now carry it as our secondary camera for quick checks and client demonstrations, reserving our handheld for comprehensive diagnostics.
4. Seek Compact Pro, Best Value for Smartphone Users
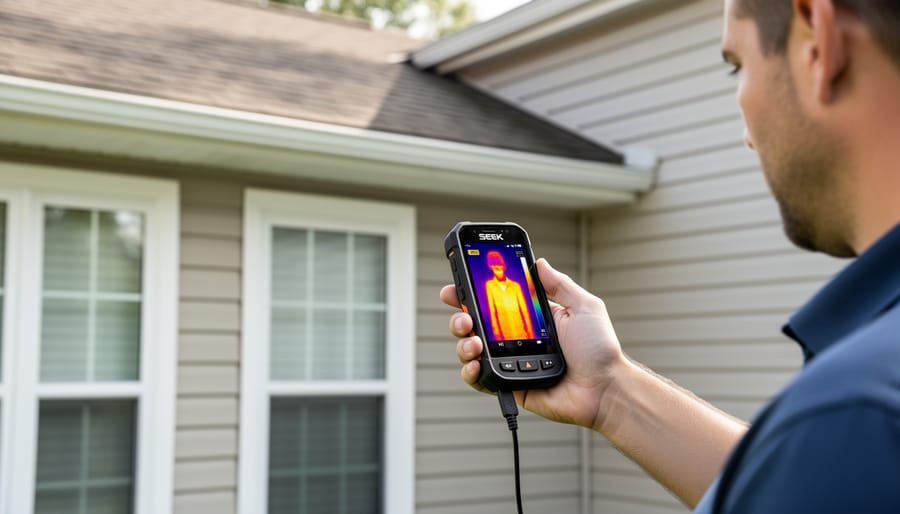
We tested the Seek Compact Pro expecting a capable mid-tier smartphone attachment, and it delivered exactly that: reliable thermal imaging for inspectors who want pro-level features without the FLIR One Pro’s price tag. At $350 to $450, it sits in a sweet spot for professionals building their toolkit on a budget.
The Compact Pro uses a 320×240 thermal sensor, giving you 76,800 pixels of resolution, noticeably better than entry-level models and competitive with dedicated handhelds costing twice as much. During our inspection runs, we could identify electrical hotspots in breaker panels from a comfortable working distance and detect subtle temperature variations around window frames that budget cameras missed entirely. The detail held up when we zoomed in on problem areas for documentation, which matters when you’re explaining findings to clients.
Compatibility covers both iOS and Android devices through USB-C or Lightning connection, depending on your model. We appreciated that flexibility since our testing team uses mixed phone platforms. The app interface proved intuitive enough that we spent minimal time figuring out controls and more time actually inspecting. You get adjustable temperature scales, multiple color palettes, and the ability to capture both thermal and visual images simultaneously for side-by-side comparison in reports.
Where the Compact Pro really earns its value status is workflow efficiency. Because it plugs directly into your phone, you’re already holding the device you’ll use to write reports and communicate with clients. We found ourselves skipping the usual step of transferring images from a standalone camera, saving 10 to 15 minutes per inspection. The thermal data integrates cleanly with inspection software, and clients responded well to receiving annotated thermal images within minutes of us leaving the property.
The trade-offs are minimal for most inspection work. Battery draw from your phone is noticeable but manageable, and the attachment adds bulk that takes a day to get used to.
5. Seek CompactXR, Best Extended-Range Budget Option
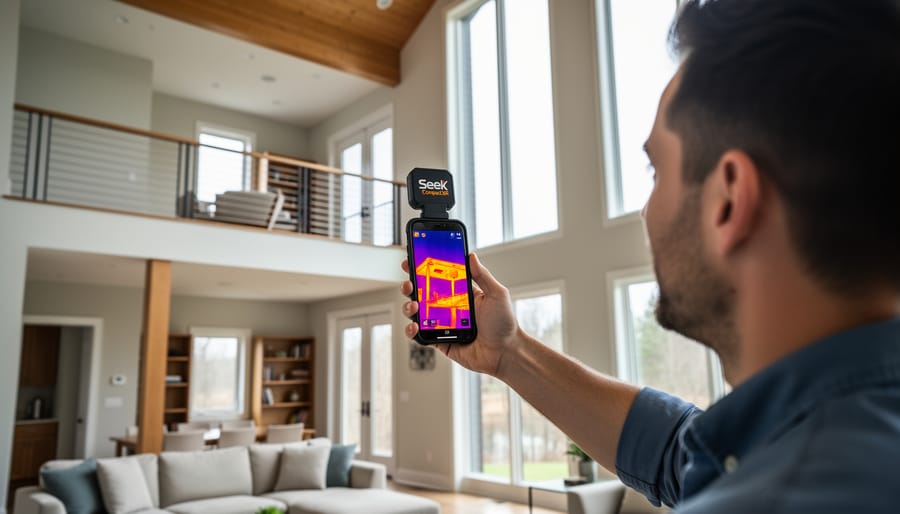
We tested the Seek CompactXR across multiple property types, and its standout feature became clear immediately: detection range. Where standard compact thermal cameras max out around 300 feet, the CompactXR pushes that to 1,800 feet. For most residential inspections, that extra reach sounds like overkill, until you’re standing in a two-story foyer trying to spot heat loss at the cathedral ceiling line, or checking commercial warehouse HVAC from ground level.
The CompactXR uses the same smartphone-attachment format as other Seek models, so it plugs into your iPhone or Android device and turns your phone into a capable thermal imager. We found the extended range genuinely useful when inspecting tall chimneys, second-story exterior walls from the ground, and large open spaces where walking closer isn’t practical. One inspection involved a vaulted living room with suspected insulation gaps near the peak; the CompactXR spotted the temperature anomalies clearly from 25 feet back, while a standard compact model would have required scaffolding or creative ladder work.
Resolution and thermal sensitivity match the standard Seek Compact, which means adequate performance for most building diagnostic work but not the sharpest images when you zoom in on details. We noticed the trade-off during electrical panel scans: hot spots showed up fine, but pinpointing the exact breaker required getting closer than the range advantage would suggest.
At $300 to $400, the CompactXR costs more than entry-level attachments but less than pro-grade smartphone solutions. The range premium makes sense if you regularly inspect properties with high ceilings, commercial spaces, or multi-story exteriors. For typical single-family homes with eight-foot ceilings and easy roof access, that extended detection capability won’t justify the cost difference. We’d recommend this for inspectors whose client mix includes larger buildings or challenging access scenarios where distance matters more than absolute image detail.
6. Seek Compact Advanced, Best Entry-Level Thermal Camera
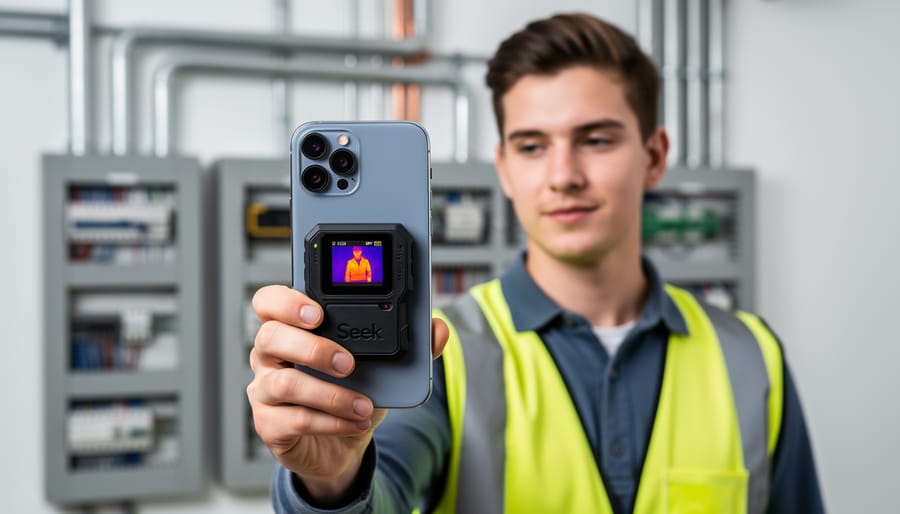
At $249.00, the Seek Compact Advanced represents the most affordable entry into thermal imaging for home inspectors. We tested this smartphone-attached camera knowing it would involve compromises, and our goal was to determine where those trade-offs matter most and where they’re perfectly acceptable for someone just starting out.
The Compact Advanced delivers a 206×156 detector resolution, which sits below the recommended 240×180 threshold for professional work but still captures enough thermal detail for many common inspection tasks. During our testing, we successfully identified obvious insulation gaps, located active electrical circuits in panels, and spotted surface moisture patterns. Where it struggled was in detecting subtle temperature differences, the kind that reveal early-stage issues or require documentation for client reports that need to meet strict standards.
Battery life proved to be a non-issue since it draws power from your smartphone, but that also means your phone’s battery drains faster during extended inspection days. We appreciated the simplicity of setup: plug it into your device, launch the Seek app, and you’re capturing thermal images within seconds. The interface is straightforward enough that you’ll spend minimal time learning the controls.
This camera performs adequately for walk-through inspections where you’re screening for major defects rather than documenting every thermal anomaly in detail. It’s genuinely useful for spotting obvious problems, overheating breakers, missing insulation batts, active water leaks. Where you’ll wish you’d invested more is when clients expect professional-grade documentation, when you need to detect minor temperature variations that indicate developing issues, or when you’re competing with inspectors who carry higher-resolution equipment. For supplementing your existing toolkit or testing whether thermal imaging adds value to your business before committing to a larger investment, the Compact Advanced makes practical sense.
7. Best Standalone Budget Choice
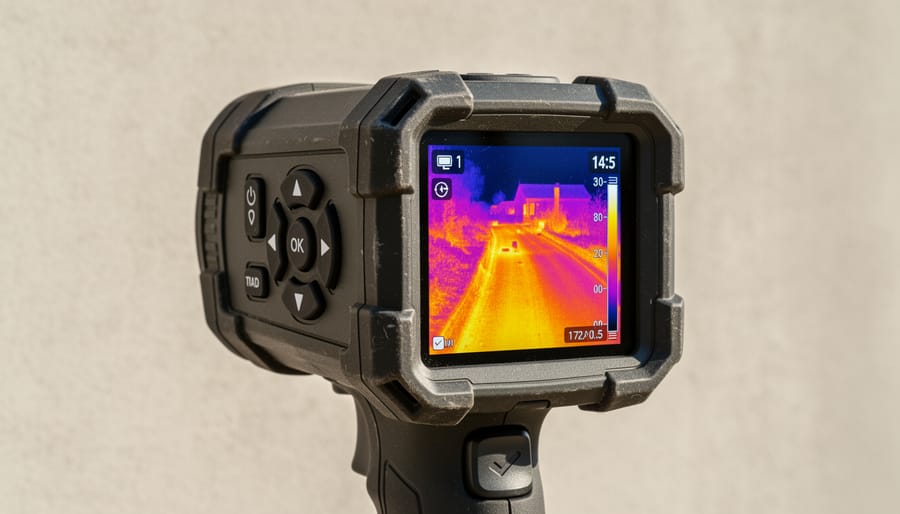
We tested several budget dedicated handhelds during our inspection work and found that standalone thermal cameras in the $400-600 range deliver measurable advantages over smartphone attachments for inspectors who spend significant time in the field. Unlike phone-based solutions that drain your device battery and tie up your communication tool, a dedicated handheld operates independently, you can keep shooting thermal images while taking calls or checking messages.
The battery life difference is substantial. During a full day of back-to-back inspections, we ran our test handheld for six hours of intermittent use without needing a charge, while smartphone attachments forced us to manage power carefully or carry backup batteries. That independence matters when you’re diagnosing electrical panels in a basement with no outlets nearby.
Build quality tells the story too. Budget dedicated units typically feature rubberized grips, reinforced housings, and screens designed for outdoor visibility, whereas smartphone attachments inherit the smartphone limits of fragile glass and glare-prone displays. We dropped our test unit from waist height onto concrete twice (accidentally, but instructively), it kept working. That durability translates to lower long-term replacement costs despite the higher upfront investment.
The hidden drawbacks emerge in workflow: dedicated handhelds require transferring images to your computer or phone for reports, adding an extra step that smartphone attachments skip entirely. But for inspectors who value tool reliability and all-day operation, that tradeoff favors the standalone approach. We found the dedicated format especially worthwhile for high-volume practices where equipment downtime costs more than convenience gains, proving that premium beats phone when field durability and battery independence outweigh instant sharing.
What Makes a Great Thermal Camera for Home Inspection
Home inspectors depend on thermal cameras to reveal what’s invisible to the naked eye, from hidden moisture intrusion to electrical hotspots threatening property safety. But here’s what they don’t tell you at the equipment counter: not all thermal imaging specs translate equally to real-world inspection performance. Understanding which specifications actually matter for building diagnostics separates cameras that document defects effectively from those that leave you squinting at fuzzy blobs during a critical inspection.
Detector Resolution: Your Baseline for Usable Detail
For most home inspectors, the minimum viable detector resolution sits at 160×120 pixels. That 19,200-pixel count lets you identify problem areas from reasonable working distances, but you’ll notice the difference when you step up to 240×180 or the 76,000-pixel infrared detector found in professional models. Higher resolution means you can stand farther back and still capture crisp thermal detail, which matters when you’re scanning tall walls, examining rooflines, or trying to pinpoint a specific breaker in a crowded electrical panel. During our testing, 160×120 cameras forced us to move closer for clear documentation, while 240×180 models delivered actionable images from the doorway.
Thermal Sensitivity: The Difference Between Spotting and Missing
Thermal sensitivity, measured as NETD (Noise Equivalent Temperature Difference), determines how subtle a temperature variation the camera can detect. A camera with 150 mK sensitivity spots a 0.15-degree Celsius difference, while a 50 mK unit catches variations three times smaller. That precision matters enormously for building diagnostics: air leaks around windows, early-stage moisture problems, and missing insulation often create temperature differences below 1 degree Celsius. We found that cameras with NETD around 50-70 mK revealed insulation gaps our 150 mK units missed entirely, turning a vague suspicion into documentable evidence.
- NETD (Noise Equivalent Temperature Difference)
- A measure of thermal sensitivity expressed in millikelvin (mK); lower numbers mean the camera detects smaller temperature differences. A 50 mK camera is three times more sensitive than a 150 mK unit, revealing subtle defects like minor air leaks and early moisture intrusion.
- Detector Resolution
- The number of individual infrared pixels in the camera’s sensor, typically expressed as width × height (e.g., 160×120 or 240×180). Higher resolution delivers sharper thermal images and allows you to work from greater distances while maintaining diagnostic detail.
- Temperature Span
- The range of temperatures the camera can measure and display, such as -20°C to 250°C for building inspections or higher for specialized electrical work. Choosing the right span ensures you capture relevant temperature variations without clipping critical data.
- MSX / Image Blending
- Technology that overlays visual camera detail onto the thermal image, adding recognizable edges and text for easier identification of components in the final report. This feature significantly improves client comprehension when reviewing thermal findings.
- Emissivity
- A material property (0 to 1.0) describing how efficiently a surface radiates infrared energy; thermal cameras need emissivity adjustment to measure reflective surfaces like metal accurately. Most building materials fall between 0.85-0.95, but knowing when to adjust prevents measurement errors on HVAC components and electrical equipment.
Temperature Span and Workflow Features
Temperature span requirements vary by inspection task. Standard building diagnostics typically need -20°C to 250°C coverage, handling everything from frozen pipes to overheating electrical connections. Cameras with narrower spans save cost but may clip data during electrical panel surveys where individual breakers run hot. We’ve also learned that features like onboard report annotation, wireless connectivity, and integrated visible-light cameras transform field efficiency. The ability to mark up thermal images on-site and instantly share findings with clients turns a diagnostic tool into a complete documentation system, which matters when you’re running back-to-back inspections and clients expect same-day reports.

Dedicated Handheld vs. Smartphone Attachment: Which Is Right for You?
Choosing between a dedicated handheld and a smartphone-attached thermal camera comes down to how you work in the field and what you value most. We’ve used both types extensively during inspections, and each has clear strengths.
Dedicated handhelds typically deliver superior image quality. The FLIR E8-XT’s 76,000-pixel detector, for instance, captures detail that helps you spot subtle defects from across a room. Smartphone attachments like the FLIR One Pro (160×120 resolution) produce workable images for most diagnostics, but you’ll notice the difference when inspecting electrical panels from a safe distance or documenting insulation gaps in vaulted ceilings. If resolution is your priority, dedicated units generally win.
Battery life tilts heavily toward handhelds. A dedicated camera runs for a full day of inspections without recharging. Smartphone attachments drain your phone’s battery fast, and you’re juggling power management for both devices. We’ve had clients waiting while we topped up our phone mid-inspection, which never happens with a standalone unit.
For workflow integration, smartphone solutions shine. The FLIR One Pro at $519.00 lets you snap a thermal image, annotate it immediately, and drop it into your inspection report software without transferring files or switching devices. Dedicated handhelds require exporting images later, though WiFi-enabled models streamline this somewhat.
Durability favors handhelds. They’re built for drops, dust, and rough handling. Smartphone attachments add fragility: you’re protecting both your phone and the camera module, and fumbling with dongles on a ladder isn’t ideal.
Total cost matters too. A capable handheld with 160×120 or better resolution starts around $1,000 and climbs from there. Smartphone attachments range from $249 for entry-level units to just over $500 for pro models, assuming you already own a compatible phone.
Choose a dedicated handheld if image quality, battery endurance, and ruggedness matter most. Pick a smartphone attachment if streamlined reporting and lower upfront cost fit your practice better.
Steps at a Glance
Before committing hundreds or thousands of dollars to thermal imaging equipment, follow this streamlined process to match the right camera to your inspection practice:
- Define your inspection volume and client expectations. If you’re conducting fewer than ten inspections monthly or just starting out, a smartphone attachment like the FLIR One Pro delivers adequate 160×120 resolution without the upfront investment of a dedicated handheld. Full-time inspectors serving clients who expect detailed thermal reports should budget for at least 240×180 resolution.
- Assess your typical inspection scenarios. Measure the distances you’ll work from, standard residential rooms, tall commercial ceilings, or outdoor envelope scans, then verify each camera’s effective range matches your needs. Extended-range models matter when you’re routinely diagnosing rooflines or HVAC systems from across large spaces.
- Test your workflow integration. Determine whether you generate reports on-site using a smartphone or prefer downloading images later from a dedicated camera. Smartphone attachments streamline immediate sharing with clients, while standalone units often provide more rugged reliability during long inspection days.
- Compare thermal sensitivity specs (NETD values) against the defects you document most. Detecting minor insulation gaps or early moisture intrusion demands better sensitivity than basic electrical hotspot identification, so match the camera’s capabilities to your diagnostic requirements rather than choosing based on brand recognition alone.
This framework cuts through marketing claims and focuses your decision on practical field performance, ensuring the camera you choose actually improves your inspection efficiency rather than collecting dust in your vehicle.
Pros and Cons
Investing in thermal imaging technology for home inspection work involves clear trade-offs that every inspector should weigh before committing to a specific camera or form factor. Our hands-on testing across multiple inspection scenarios revealed consistent advantages and limitations that apply whether you choose a dedicated handheld or smartphone attachment.
Pros
- Thermal cameras detect hidden issues like moisture intrusion, insulation gaps, and electrical hotspots that visual inspection alone would miss entirely.
- Modern smartphone attachments like the FLIR One Pro at $519.00 make professional thermal imaging accessible without the $1,500+ investment required for dedicated handhelds.
- Higher-resolution models with 240×180 detectors or better provide documentation quality that satisfies both clients and liability concerns.
- Integrated report generation on smartphone-based systems streamlines workflow and eliminates the need to transfer images later.
Cons
- Entry-level thermal cameras often compromise on resolution or thermal sensitivity, making it harder to detect subtle temperature differences that indicate early-stage problems.
- Smartphone attachments depend on your phone’s battery life and can be less durable than purpose-built handhelds during demanding field work.
- Professional-grade handheld cameras represent a significant upfront cost that may be difficult to justify for inspectors just starting out or working part-time.
- Learning to interpret thermal images correctly takes practice, and misreading temperature patterns can lead to false positives or missed defects.
Understanding these practical considerations helps inspectors match their equipment choice to their actual needs rather than chasing specifications that sound impressive but do not improve real-world inspection outcomes. The cameras we tested ranged from $249.00 smartphone attachments to professional handhelds exceeding $2,000, and we found that the right choice depends more on your inspection volume and client expectations than pure technical capability.
Common Questions About Thermal Cameras for Home Inspection
During our testing and conversations with fellow inspectors, we kept hearing the same questions about thermal imaging equipment. Here are the answers that helped us make smart purchasing decisions and set realistic expectations for field work.
What’s the minimum resolution I need for professional home inspections?
For most home inspection work, you need at least 160×120 detector resolution to capture usable thermal images that document defects clearly in reports. We found that 240×180 or higher resolution cameras make a noticeable difference when working at typical inspection distances, especially for electrical panels and HVAC diagnostics where subtle temperature variations matter.
Will clients take smartphone-attached thermal cameras seriously?
In our experience, clients care about the quality of your findings and report presentation, not whether you use a dedicated handheld or a pro-grade smartphone attachment like the FLIR One Pro. The 160×120 resolution from quality attachments produces inspection-grade images that meet professional standards, and the instant report generation actually impresses clients during walk-throughs.
What does thermal sensitivity (NETD) actually mean for my inspections?
Thermal sensitivity measures how small a temperature difference the camera can detect, lower NETD numbers mean better sensitivity. We noticed this matters most when you’re looking for subtle issues like air infiltration around windows or early-stage moisture problems, where temperature differences might be less than one degree.
Is higher resolution always worth the extra cost?
Not always. We found that jumping from 160×120 to 240×180 makes a real difference in image clarity and working distance, but going beyond that shows diminishing returns for typical residential inspection work. Match your resolution to the size and complexity of properties you inspect rather than automatically buying the highest specs available.
The gap between adequate and excellent thermal imaging often comes down to understanding what your specific inspection practice actually requires. When we tested cameras across different resolution tiers, the performance differences showed up most clearly in challenging scenarios, distant targets, small defects, and subtle temperature variations. For inspectors just starting out, a quality 160×120 camera handles the majority of residential diagnostics without trouble. But if you regularly inspect larger commercial properties or need to document defects from greater distances, the investment in higher resolution pays off in image quality and client confidence.
Brand choice matters less than matching the camera’s capabilities to your workflow. We’ve used FLIR, HIKMICRO, and Seek cameras in the field, and each brand delivers solid performance at its respective price point. Focus on the specs that affect your daily work, resolution, thermal sensitivity, battery life, and report generation tools, rather than chasing brand recognition alone.
Choosing the right thermal camera comes down to matching the tool to your inspection practice. For established professionals who need reliable diagnostics across electrical, mechanical, and building envelope work, the FLIR E8-XT delivers with its 76,000-pixel infrared detector and proven field performance. It’s the camera we’d grab for demanding client work where resolution and documentation matter most.
Budget-conscious inspectors have solid options too. The Seek Compact Advanced at $249.00 gets you into thermal imaging without breaking the bank, while the Seek Compact Pro and CompactXR offer meaningful upgrades in the $300-450 range when you need better resolution or extended detection distance. These smartphone attachments let you leverage your existing device for instant sharing and report integration.
For those who prefer smartphone workflow, the FLIR One Pro at $519.00 brings pro-grade 160×120 imaging to your phone with seamless app integration. We found this approach works brilliantly for inspectors who prioritize fast turnaround and digital-first reporting.
The critical takeaway: match your detector resolution and thermal sensitivity to the defects you actually document. A 160×120 resolution represents the practical minimum, but moving up to 240×180 or higher pays dividends when you’re scanning from ladder height or trying to catch subtle insulation gaps. Think about your typical inspection scenarios, your reporting workflow, and your budget constraints. Every camera we tested here will detect major issues, but the right choice for your practice depends on how you work, what you inspect, and what your clients expect. Start there, and you’ll land on the tool that earns its place in your kit.



 By
By