By
By 
Shooting panoramic film with a Lomography camera requires nothing more than loading 35mm film, framing your scene across the camera’s ultra-wide field of view (typically 170 degrees), and advancing the frame after each shot. The entire process takes about the same time as shooting with any analog camera, though you’ll need to think differently about composition since you’re capturing roughly three times the horizontal view of a standard frame.
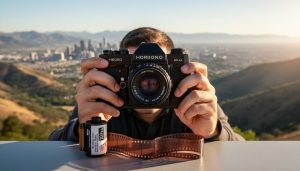
Lomography’s panoramic cameras, like the Horizon Perfekt and Sprocket Rocket, offer an accessible entry point into wide-format analog photography without the bulk and expense of traditional panoramic systems. These compact cameras use standard 35mm film but expose it across an extended frame width, giving you sweeping landscapes, dramatic architectural shots, and immersive street scenes that simply aren’t possible with conventional focal lengths.
The appeal goes beyond the wide view itself. Film-based panoramic photography creates images with a distinctive character: the natural grain structure, color rendition specific to your film choice, and the subtle optical quirks of these cameras combine to produce results that digital stitching rarely matches. You’re not assembling multiple frames in post-production. You’re capturing a single, continuous exposure that preserves the spatial relationships and light transitions across the entire scene.
This guide walks through the complete shooting process, from selecting the right film stock and understanding your camera’s specific characteristics to executing the shot and identifying common problems before you waste an entire roll. Whether you’re new to Lomography’s panoramic lineup or looking to refine your technique, you’ll find practical steps that translate directly to better results on film.
Understanding Lomography Panoramic Cameras
Lomography panoramic cameras occupy a distinctive niche in the world of wide-format photography. Unlike high-end digital panoramic systems or precision mechanical sweep cameras that can cost thousands, these quirky film cameras deliver panoramic results at a fraction of the price, with a healthy dose of analog charm thrown in.
The defining feature is how they capture an extra-wide frame on standard film stock. Most Lomography panoramic cameras use 35mm film but expose a dramatically wider frame than a typical 3:2 ratio camera. The Sprocket Rocket, for example, exposes the entire width of the film including the sprocket holes, creating images roughly 72mm wide on a 24mm tall frame, nearly a 3:1 aspect ratio. The Horizon Perfekt uses a swing-lens mechanism that rotates during exposure, capturing a true 120-degree field of view on a standard 35mm frame.
Other popular models include the Belair X 6-12, which shoots medium format 6×12cm frames for higher resolution panoramas, and the older but beloved Horizon series cameras with their rotating lenses. Each has its own quirks: the Sprocket Rocket is plastic-bodied and lightweight, the Horizon Perfekt is more robust with variable shutter speeds, and the Belair offers interchangeable lenses.
What truly sets these cameras apart is their analog unpredictability. There’s no instant preview, no digital correction, and often limited control over exposure. Light leaks, vignetting, and soft edges aren’t defects to these cameras, they’re features. The results carry a dreamy, imperfect quality that’s become synonymous with the Lomography aesthetic. You’re not just shooting panoramas; you’re embracing the unexpected character of film photography in its widest, most experimental form.
What You’ll Need to Get Started
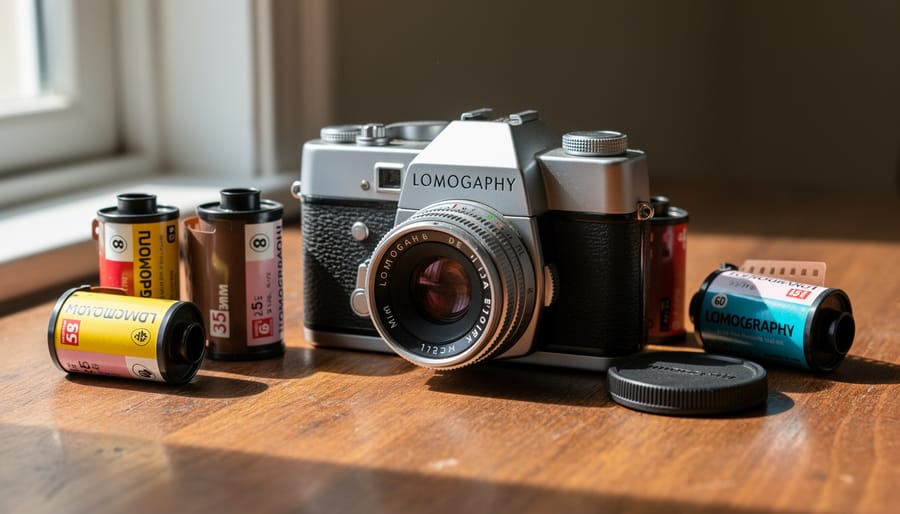
Before you load your first roll of film, gather everything you need for a successful panoramic shoot. Having the right gear on hand eliminates frustrating interruptions once you’re ready to capture those ultra-wide frames.
Here’s your essential checklist:
- Your Lomography panoramic camera (Horizon Perfekt, Sprocket Rocket, or similar model)
- Film stock: 35mm or 120 medium format, depending on your camera model
- Fresh batteries if your camera requires them (check your manual)
- Lens cleaning cloth and blower brush
- External light meter or smartphone metering app (optional but helpful)
- Small notebook for recording settings and conditions
The camera itself is obviously non-negotiable, but your film choice matters more than you might think. For bright outdoor conditions, start with ISO 100 or 200 film like Kodak Ektar or Fuji Provia. These slower films deliver sharp detail and vibrant colors when light is abundant. In overcast weather or urban environments with mixed lighting, ISO 400 films such as Kodak Portra 400 or Ilford HP5 Plus offer versatility. Reserve ISO 800 or higher for dim interiors or twilight shooting, though grain becomes more pronounced.
Many Lomography panoramic cameras feature built-in light meters, but they can be temperamental or absent altogether on older models. A dedicated light meter or a smartphone app like Lightme or Lux gives you backup readings and helps you learn exposure fundamentals. You’ll thank yourself for bringing lens cleaning supplies, dust and fingerprints show up ruthlessly across that expansive panoramic frame.
Keep a small notebook in your bag. Jotting down which film you loaded, the lighting conditions you shot in, and your chosen settings creates a reference guide for when you get your scans back weeks later. Since you can’t review shots instantly like with digital, these notes become your learning tool for refining your technique on future rolls.
Important Considerations Before You Shoot
Before you load that first roll of film, a few critical realities about analog panoramic photography will save you frustration and wasted money. Unlike digital cameras, your Lomography panoramic camera won’t let you review shots on the spot, every frame is a commitment, and you won’t see results until after development. This delayed gratification is part of the charm, but it means mistakes compound quickly if you’re not methodical about technique.
Handle your camera carefully to prevent light leaks, which appear as unwanted streaks or fogging on your images. Check that the camera back seals properly, never open it mid-roll, and load film in subdued light rather than harsh sun. If you’re traveling, request hand inspection of film at airport security, X-ray machines can fog unprocessed film, especially after multiple passes through different checkpoints.
Set realistic expectations about the lo-fi aesthetic these cameras deliver. Vignetting (darkened corners), slight softness, and unpredictable colour shifts aren’t flaws to fix, they’re signatures of the format. Some photographers apply landscape composition principles rigorously and still embrace happy accidents; others lean into the imperfections as creative fuel. Either approach works, but don’t expect clinical sharpness or perfect exposures every time.
For tricky lighting, like applying night photography tips with film, meter carefully and bracket your exposures if possible. The analog nature means you’re working without a safety net, which makes preparation and thoughtful shooting essential rather than optional.
How to Shoot with Your Lomography Panoramic Camera
Loading Your Film
Loading film correctly is half the battle with any panoramic camera. Start by finding a shaded spot or turning away from direct light, even brief exposure can fog your frames. Open the camera back and locate the film chamber on the left side. Pull up the rewind knob to create space, then slide your 35mm canister in with the film leader pointing toward the take-up spool on the right.
Thread the leader into the take-up spool’s slot, ensuring the film’s sprocket holes engage with the camera’s teeth on both sides. This is critical: if the holes don’t catch properly, the film won’t advance and you’ll shoot an entire roll without capturing anything. Give the advance knob a gentle turn while watching the rewind knob, it should rotate counterclockwise as film moves through the camera. If it doesn’t budge, rethread.
Close the back firmly until it clicks. Fire two blank frames to move past the fogged leader section, then set your frame counter to zero if your model has one. Many Lomography cameras lack reliable counters, so some shooters mark their film canister or keep mental notes. If you’re experimenting with black and white film tips proper loading becomes even more important since development costs add up quickly when entire rolls are wasted on loading errors.
Setting Your Exposure
Most Lomography panoramic cameras offer limited exposure control, so understanding what you can adjust matters more than memorizing complex meter readings. The Horizon Perfekt, for instance, provides aperture priority with automatic shutter speeds, while the Sprocket Rocket locks you into fixed settings, usually f/10.8 at 1/100s.
If your camera has a built-in meter, it typically displays readiness through a simple LED system. Point at your scene, and a green or steady light confirms adequate exposure. Red or blinking warnings mean you’re pushing the limits, add light or switch to faster film. These meters are basic by digital standards but surprisingly reliable in moderate light.
Without a meter, use your smartphone. Free apps like Light Meter (iOS) or Lux Light Meter (Android) work well. Set your camera’s fixed aperture, then check what shutter speed the app suggests. If it recommends 1/125s but your camera shoots at 1/100s, you’re close enough, film has latitude.
Bright sun? Stick with ISO 100 or 200 film at f/11 and 1/125s as a baseline. Overcast conditions call for ISO 400, opening to f/8 if possible. Golden hour needs ISO 400 or 800, and you’ll want f/5.6 or wider. The “Sunny 16” rule holds true: on bright days, set aperture to f/16 and shutter speed to match your film speed (ISO 100 film gets 1/100s).
Film forgives slight overexposure better than underexposure. When in doubt, favor one stop brighter.
Composing Your Panoramic Frame
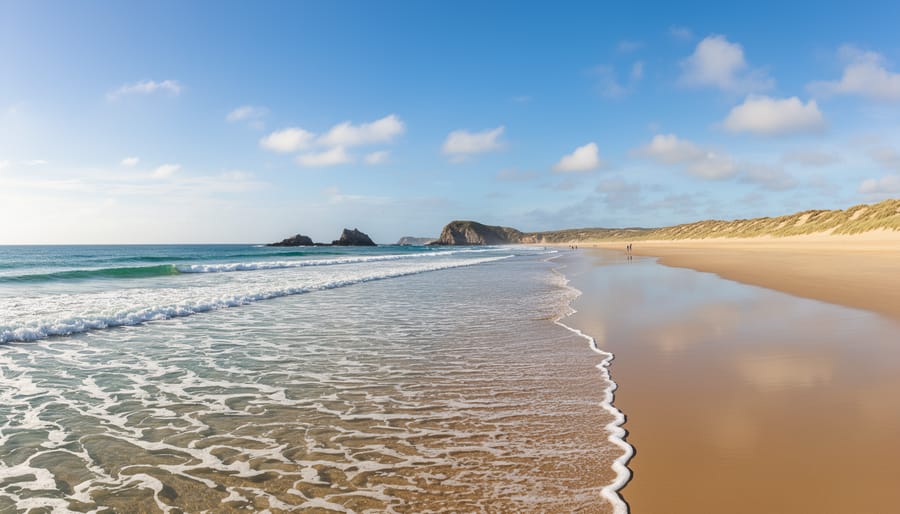
Composing in panoramic format demands a different visual approach than standard photography. That ultra-wide frame, often 2:1 or even 3:1 on Lomography cameras, won’t forgive centered subjects or cluttered scenes the way a square format might.
Start by thinking horizontally. Leading lines become your best compositional tool: a fence receding into the distance, a coastline, a row of buildings, or even shadows cast across pavement. These elements pull the viewer’s eye across the entire frame rather than letting it dead-end in the middle. Position these lines so they flow from one edge toward the other, creating visual momentum through the extended space.
Foreground elements matter enormously in panoramic shots. A branch entering from the left, rocks in the immediate foreground, or architectural details at the edges help anchor the composition and provide depth. Without something close to the camera, your panorama risks feeling flat despite its width.
Here’s the catch with many Lomography panoramic cameras: what you see through the viewfinder isn’t exactly what the film captures. The Horizon Perfekt’s viewfinder, for instance, shows roughly 80% of the actual frame. Always assume you’re getting more on the edges than you think. Leave breathing room around your main subject, and avoid placing critical elements right at the perceived frame edge, they’ll likely get cropped tighter than intended or include unwanted intrusions you didn’t spot.
Practice visualizing that extra-wide rectangle overlaid on your scene, not the viewfinder’s limited preview.
Taking the Shot
With your composition set and exposure dialed in, it’s time to make the exposure. Hold the camera firmly with both hands, keeping your elbows tucked against your body for stability. If you’re using a camera with a swing-lens mechanism like the Horizon Perfekt, be aware that the lens physically rotates during exposure, any movement on your part during this 0.5-second sweep will create blur or distortion. Press the shutter button smoothly rather than jabbing it, and continue holding steady for a full second after you hear the shutter complete its cycle.
The Sprocket Rocket and other fixed-lens models are more forgiving since they capture the frame instantaneously. Still, use a gentle shutter press and avoid breathing heavily during exposure. If you’re shooting in low light at slower shutter speeds, consider bracing the camera against a wall or setting it on a stable surface.
After the shot, advance the film using the wind lever or knob until it stops naturally. Don’t force it, the mechanism knows when the next frame is ready. On cameras without automatic wind-stops, watch for the frame counter or the tension in the advance to signal you’ve gone far enough.
Finishing and Unloading Your Roll
When your camera’s frame counter reaches “0” or you feel significant resistance when advancing the film, you’ve reached the end of your roll, forcing the advance mechanism can tear the film or damage your camera’s internals. Many Lomography panoramic cameras don’t have automatic rewind, so you’ll need to manually wind the film back into its canister before opening the camera.
Here’s how to safely finish and unload your roll:
- Press the rewind release button, typically located on the camera’s base. This disengages the film advance mechanism so the film can move backward.
- Gently turn the rewind crank or knob in the direction indicated by the arrow (usually clockwise) with steady, even pressure. You’ll feel tension as the film winds back into the canister.
- Continue rewinding until you feel the tension suddenly release, this indicates the film leader has pulled free from the take-up spool and is now fully inside the canister.
- Open the camera back only after confirming the rewind release and checking you’ve wound completely. Any remaining film outside the canister will be ruined by light exposure.
- Remove the film canister and immediately store it in its plastic container or a light-tight bag, labeling it with the film type and any exposure notes.
Never open the camera back mid-roll unless you’re in complete darkness, and always rewind carefully, rushing this step risks scratching your negatives against the film gate. The entire roll you’ve just shot is precious cargo heading to the lab, so treat it gently from this moment until it’s safely developed.
Developing Your Film and Evaluating Results
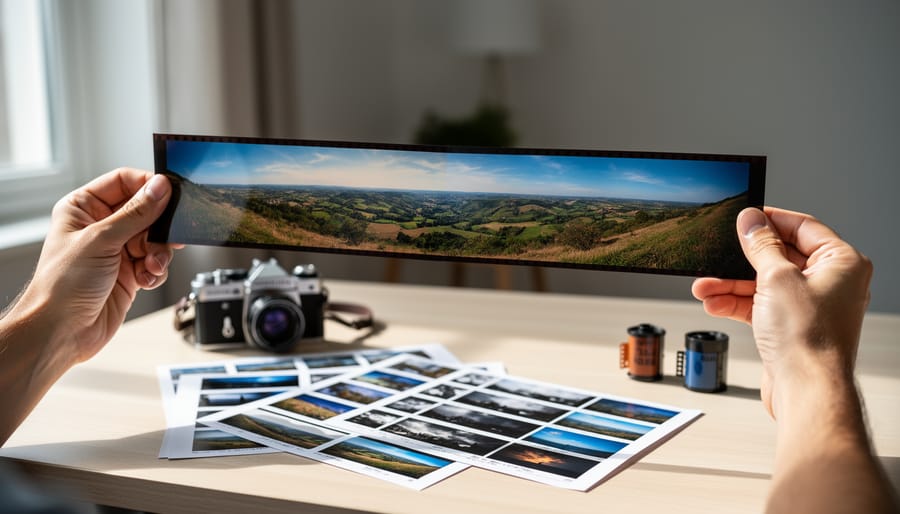
After you’ve shot your roll, the next step is getting your film processed. Most photographers send panoramic 35mm film to a professional lab, which typically costs between $12 and $20 for developing and scanning in 2026. Labs experienced with wide-format negatives will scan your extra-wide frames properly, preserving the full panoramic aspect ratio. If you’re comfortable with home development, you can process your own film using standard C-41 or black-and-white chemistry, then scan the negatives yourself. Home development gives you more control and costs less per roll long-term, but requires initial investment in equipment and chemicals.
When you receive your scans or prints, examine them systematically. Look first at exposure: are highlights blown out or shadows too dark? Check sharpness across the frame, particularly at the edges where panoramic lenses sometimes struggle. Evaluate your composition, does the extended format enhance the scene, or is there dead space you could have avoided? Notice any vignetting in the corners, light leaks (thin orange or white streaks), or uneven density from swing-lens cameras where the rotation wasn’t smooth.
Distinguish between technical errors and creative character. A slightly soft edge might be a lens limitation you can work with, while consistent underexposure means you need to adjust your metering approach. Compare successful frames to weaker ones. What worked? Better light, tighter composition, steadier camera hold?
Keep notes on what settings and conditions produced your favorite images. Over three or four rolls, patterns emerge. You’ll discover your camera’s quirks, maybe it underexposes by half a stop, or the left edge always vignettes heavily. This knowledge transforms guesswork into intentional technique, letting you shoot with confidence and push your panoramic work further.
Common Challenges and How to Overcome Them
Shooting with Lomography panoramic cameras brings a unique set of challenges that even experienced film photographers encounter. Understanding these common issues and how to address them turns frustrating mistakes into learning opportunities and, sometimes, happy accidents.
Exposure problems top the list of difficulties. Many Lomography panoramic cameras have basic or no built-in metering, making it easy to underexpose or overexpose your frames. If your images consistently come back too dark, you’re likely underexposing. The solution is to either use a handheld light meter or smartphone metering app before each shot, or learn the Sunny 16 rule for quick outdoor estimates. Overexposed, washed-out images usually mean you’re shooting wide open in bright conditions. Try faster shutter speeds or choose a slower film stock for sunny days. Keep notes on your first few rolls, recording your settings alongside scene descriptions, so you can identify patterns when you see the developed results.
Vignetting, those dark corners that frame your panoramic image, appears frequently with wide-angle cameras. Some vignetting is inherent to the lens design and becomes part of the Lomography aesthetic. Embrace it rather than fight it. If it’s excessive, check that you’re not using filters or lens hoods that block the edges of the frame. Heavy vignetting can actually enhance certain compositions, drawing the eye toward the center of your panorama.
Light leaks show up as unexpected orange or red streaks across your negatives. These occur when light enters the camera body where it shouldn’t. Check the light seals around the film door, replace them with adhesive foam weather stripping if they’re deteriorated, and always load and unload film in shade. Avoid opening the back mid-roll, even if you think the film is safely wound. Some photographers intentionally create controlled light leaks for artistic effect, but start by minimizing them until you understand the technique.
Why are my panoramas unevenly exposed across the frame?
Swing-lens cameras like the Horizon Perfekt sweep across the scene during exposure, so rapidly changing light conditions or camera movement during the shot creates uneven exposure. Keep the camera steady and avoid scenes with extreme contrast from one edge to the other.
How do I prevent vignetting on my panoramic shots?
Some vignetting is normal with Lomography panoramic cameras and part of their character. To minimize it, avoid stacking filters, ensure lens hoods don’t obstruct the frame edges, and embrace it as a stylistic element rather than a flaw.
What if my horizons are always tilted in panoramic photos?
Tilted horizons result from not holding the camera level during exposure. Use the horizon line in your viewfinder as a reference, practice holding the camera steady against your face, and consider a small bubble level that mounts on the hot shoe for critical shots.
Uneven panoramas plague swing-lens camera users. The rotating lens mechanism means any camera movement during the exposure creates distortion or uneven density across the frame. Plant your feet firmly, press the camera against your face, and breathe steadily during the shot. Avoid handheld shooting in windy conditions. The swing also means subjects crossing the frame during exposure can appear stretched or duplicated, which you can use creatively once you understand the timing.
Horizon line alignment challenges nearly everyone starting out. A tilted horizon in a panoramic frame is more noticeable than in standard formats because of the extended width. Train yourself to reference the horizon line visible in the viewfinder, though remember that many Lomography viewfinders don’t show the exact captured area. Practice holding the camera level becomes second nature after a few rolls. A small bubble level accessory helps for landscapes where a straight horizon matters most.
The beauty of Lomography panoramic photography lies partly in these imperfections. Light leaks can add drama, vignetting creates mood, and unexpected exposures often surpass technically perfect shots. Once you’ve mastered the basics to avoid unwanted problems, you can intentionally push boundaries and turn “flaws” into signature style. Try double exposures, experiment with macro close-up ideas on cameras that focus close, or shoot through the swing to create motion blur. The unpredictability keeps every roll exciting.
Shooting with a Lomography panoramic camera offers something rare in 2026’s digital landscape: the thrill of uncertainty mixed with genuine creative discovery. You’ve loaded film, composed through unique viewfinders, and trusted your instincts on exposure without the safety net of instant review. That leap of faith is precisely what makes these cameras so rewarding.
Your first rolls might surprise you with light leaks, unexpected vignetting, or compositions that don’t quite work. Embrace these moments. Lomography panoramic cameras thrive on happy accidents and lo-fi aesthetics that digital perfection can’t replicate. Each imperfection tells part of your image’s story, and many photographers deliberately chase these quirks as signature elements of their work.
The beauty of these cameras lies in their accessibility. While high-end panoramic equipment demands significant investment and technical mastery, Lomography models invite playful exploration. You can experiment with double exposures, push film processing, or shoot through unusual conditions without worrying about damaging expensive gear. This freedom breeds creativity.
Give yourself time. Your tenth roll will look dramatically different from your first as you internalize each camera’s personality and quirks. Study what works, repeat successful techniques, and push boundaries on shots where failure costs only a frame of film.
These compact analog wonders hold their own alongside any panoramic photography equipment, offering a distinct vision that’s entirely your own. Keep shooting, stay curious, and trust the process.




 By
By