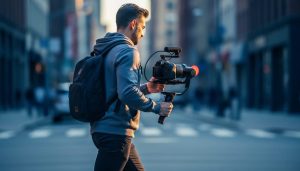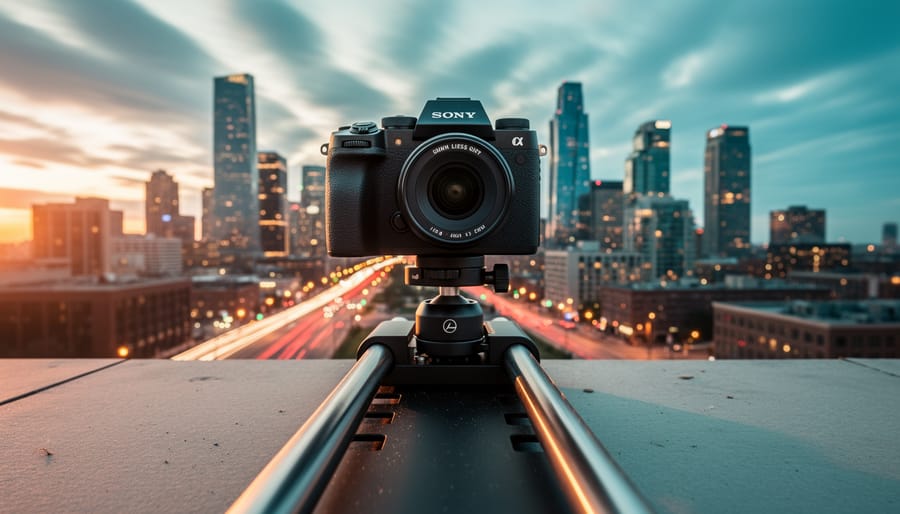
Mount your camera on a motorized slider or gimbal to create the fluid, cinematic movement that transforms ordinary time-lapses into professional-grade sequences. The difference between a static time-lapse and a moving one lies in that subtle dollying motion—a slow push toward your subject or a gentle pan across a cityscape—that adds dimensionality and visual interest your audience craves.
Moving time-lapses combine two complex techniques: capturing sequential frames over extended periods while simultaneously repositioning your camera between each shot. This marriage of time compression and physical movement creates what filmmakers call the “hyperlapse effect,” where clouds race overhead as your perspective glides through space, or where a blooming flower unfolds while the frame orbits around it.
The technical challenge is maintaining smooth, consistent motion across hundreds or thousands of frames. A slider moving just two inches between shots creates dramatic movement when those 300 frames compress five hours into ten seconds. Your precision matters here—jerky movements or inconsistent intervals destroy the illusion entirely.
You have several approaches depending on your budget and ambition. Motorized sliders offer computer-controlled precision for linear movements. Three-axis gimbals enable complex orbital shots. Motion control systems synchronize pan, tilt, and slide movements for elaborate multi-axis sequences. Even DIY solutions using manual repositioning can work for handheld hyperlapses, though they demand meticulous attention to overlapping composition.
The reward for mastering this technique is footage that transcends what either photography or videography achieves alone. Moving time-lapses compress time while expanding space, creating perspectives impossible for the human eye to witness. Whether you’re documenting construction projects, capturing celestial movements, or creating compelling narrative sequences, adding motion elevates your time-lapse work from interesting to unforgettable.
What Makes a Moving Time-Lapse Different
Traditional time-lapse photography has captivated audiences for decades by condensing hours into seconds, revealing the graceful arc of stars or clouds racing across the sky. But there’s one limitation: the camera stays locked in place. Moving time-lapse, also known as motion time-lapse or hyperlapse, shatters this constraint by adding a game-changing element—dynamic camera movement.
At its core, a moving time-lapse combines the interval shooting technique you already know with deliberate camera repositioning between each frame. Instead of your camera remaining stationary on a tripod, it travels along a path—whether that’s a few inches on a slider, several feet on a dolly track, or even miles through city streets. When these individually captured frames play back at normal speed, you get the compressed time effect of traditional time-lapse plus smooth, cinematic camera motion.
Think of it this way: a static time-lapse of a construction site shows buildings rising from the ground, but a moving time-lapse circles around that same site while the structures grow skyward. The added dimension transforms a simple documentation into a narrative journey.
The technical challenge lies in maintaining consistency. Each incremental camera movement must be precise and proportional to your interval timing. Move too much between frames, and your footage becomes jarring. Move too little, and the motion feels barely noticeable. This precision is what separates professional-looking moving time-lapses from amateur attempts.
Real-world examples make this difference clear. A hyperlapse racing through Tokyo’s neon-lit streets at night doesn’t just show the passage of time—it pulls viewers through the experience. A dolly-based time-lapse slowly revealing a mountain sunrise creates emotional impact impossible with a locked-off shot.
The beauty of moving time-lapse is that it works at any scale. You might spend an afternoon creating a 30-second slider shot of your garden, or invest weeks producing an epic hyperlapse journey. Both approaches share the same fundamental principle: intentional movement meeting interval photography.
Essential Gear for Creating Moving Time-Lapses
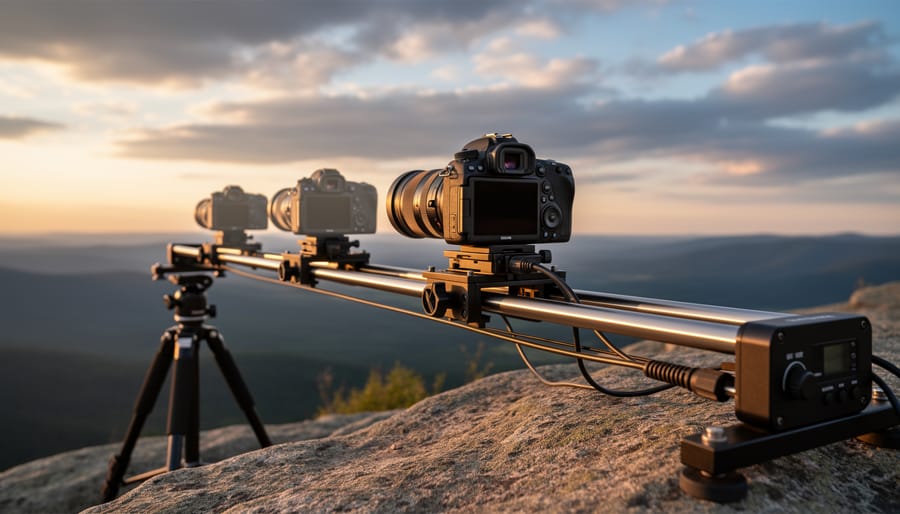
Motorized Sliders and Motion Control Systems
Choosing the right motorized slider can feel overwhelming with options ranging from $200 budget models to $5,000+ professional systems. The good news? You don’t always need the most expensive gear to create stunning moving time-lapses.
Start by considering travel length. A 24-inch slider works beautifully for most compositions, providing enough movement to add visual interest without dominating your frame. Longer 48-inch sliders create more dramatic motion but become cumbersome to transport and set up in the field. I’ve seen photographers produce incredible results with compact 16-inch sliders by shooting closer to their subjects or using wider lenses.
Payload capacity matters more than many realize. Your slider needs to support not just your camera body, but also your heaviest lens, ball head, and potentially an intervalometer. Always choose a slider rated for at least 50% more weight than your actual setup. Budget models typically max out around 8-10 pounds, while professional options handle 20+ pounds comfortably.
Programming features separate basic sliders from advanced motion control systems. Entry-level models offer simple point-to-point movement, which honestly works perfectly for most moving time-lapses. Mid-range options around $800-1,500 add features like keyframe programming, where you can create multiple waypoints with different speeds and easing curves. Professional systems include app control, multi-axis movement combining pan and tilt, and the ability to save and repeat complex motion sequences.
For most enthusiasts, a reliable mid-range slider with basic programming capabilities delivers the best value, letting you focus on composition and timing rather than wrestling with overcomplicated menus.
Pan-Tilt Heads and Multi-Axis Motion
Adding controlled camera movement across multiple axes transforms your time-lapse from simple motion to truly cinematic sequences. Pan-tilt heads introduce rotation on two axes—horizontal panning and vertical tilting—creating dynamic perspectives that guide your viewer’s eye through the frame.
A 2-axis motorized head handles pan and tilt movements, perfect for most landscape and cityscape scenarios. Imagine capturing sunset over a mountain range while slowly panning left to right and tilting down to reveal a valley below. These systems typically cost between $300-$800 and offer excellent value for photographers ready to move beyond basic slider shots.
3-axis systems add a third rotational axis, enabling more complex camera orientation changes during your sequence. This extra degree of freedom becomes invaluable when you’re combining slider movement with camera rotation, or when shooting architectural subjects where you need precise control over perspective shifts. Expect to invest $1,200-$3,000 for professional-grade 3-axis heads.
The creative payoff comes when coordinating multiple movements simultaneously—a slider pushing forward while the camera pans and tilts creates that signature “reveal” effect you’ve seen in high-end documentaries. For most shooters, start with a 2-axis head. The extra complexity of 3-axis systems pays off primarily for commercial work or when you’re regularly shooting complex architectural or product time-lapses where that additional control justifies the investment.
The Manual Approach: Creating Motion Without Motors
You don’t need expensive motorized gear to create compelling moving time lapses. Some of the most memorable motion time-lapse sequences come from photographers using budget-friendly manual techniques that rely on consistency and patience rather than automation.
A simple manual slider is your entry point into motion time-lapse photography. The technique is straightforward: shoot your interval sequence, manually advance the slider a precise distance between frames, and repeat. The key is maintaining consistency in your movements. Mark your slider with tape at regular intervals, or count clicks if your slider has detents. This approach works beautifully for shorter sequences where you need subtle motion, like a 3-second clip requiring only 72 frames at 24fps.
Hyperlapses take this concept further by using your feet as the dolly. Walk a predetermined path, marking positions with tape or chalk, and shoot a frame at each spot. This technique shines in urban environments where you’re capturing architectural subjects or busy streets. The slight imperfections in movement actually add character, creating an energetic feel that polished motorized moves sometimes lack.
DIY dolly setups using PVC pipe, skateboard wheels, or even a wheelchair can produce surprisingly smooth results for linear movements. Professional filmmaker Philip Bloom famously created stunning dolly shots using a wheelchair on smooth surfaces before investing in professional stabilization equipment.
Manual approaches excel when you’re shooting in remote locations where carrying heavy motorized gear isn’t practical, or when you’re experimenting with a concept before committing to more expensive solutions.
Planning Your Moving Time-Lapse Shot
Calculating Movement Speed and Interval Settings
Getting the math right for a moving time lapse doesn’t require a degree in physics, but a few simple calculations will save you from frustrating results. Let’s break down the essential formulas and how to apply them in real shooting situations.
The fundamental relationship to understand is this: your total camera movement distance divided by the number of frames you’ll capture equals the distance your camera moves between each shot. For example, if you want your camera to travel 6 feet during a 4-hour sunset and you’re shooting at 2-second intervals, you’ll capture roughly 7,200 frames. That means your camera needs to move approximately 0.01 inches between each frame—barely perceptible to the eye, but dramatic when played back at 24 or 30 frames per second.
Here’s a practical formula: Movement per interval = Total distance / (Shoot duration / Interval time). Let’s say you’re capturing a construction scene over 8 hours, moving your slider 3 feet, with 10-second intervals. That’s 3 feet divided by 2,880 frames, giving you about 0.012 inches per shot.
For interval timing, consider your subject’s pace. Fast-moving clouds look great at 3-5 second intervals, while slowly changing shadows during golden hour work better at 8-15 seconds. A busy city street might need 1-2 second intervals to maintain smooth motion of pedestrians and traffic.
A useful rule of thumb: slower movement over longer distances creates more cinematic results than quick, short moves. Start conservative—you can always speed up footage in post-production, but you can’t add motion smoothness that wasn’t captured. Most experienced time lapse shooters aim for barely noticeable movement between frames, trusting the accumulation of thousands of tiny movements to create that mesmerizing glide through space.
Composing for Motion: Start and End Points Matter
When you add motion to a time-lapse, you’re essentially creating two compositions: where you begin and where you end. Both need to be visually strong on their own, because your viewer will pause on these moments. Think of them as bookends to your story—if either feels weak or poorly framed, the entire sequence suffers.
Start by scouting both your starting and ending positions before setting up your gear. Walk the path your camera will travel and evaluate what your frame looks like at each extreme. Are there distracting elements that enter the composition partway through? Does the motion reveal something interesting, or does it just slide sideways without purpose? The best moving time-lapses create compelling compositions at both ends while the motion between them adds narrative flow.
Consider what the movement reveals or conceals. A classic example: starting with a tight shot of a city building, then pulling back over several hours to reveal the entire skyline at sunset. The motion serves the story by expanding context. Conversely, pushing in from a wide landscape to isolate a single tree can create intimacy and focus.
The motion path itself matters just as much as the endpoints. Lateral slides work beautifully for cityscapes and architecture, emphasizing scale and geometry. Dolly-in or dolly-out movements add drama and direct attention. Orbital moves around a subject create dimensionality but require careful planning to avoid awkward mid-points where your subject is poorly positioned in frame.
Test your motion path in real-time before committing to the time-lapse. Take a few quick snapshots at intervals along the planned route. This simple check prevents hours of capture time wasted on a movement that looked better in your imagination than in reality.
Shooting Techniques That Separate Good from Great
Mastering the Manual Hyperlapse Technique
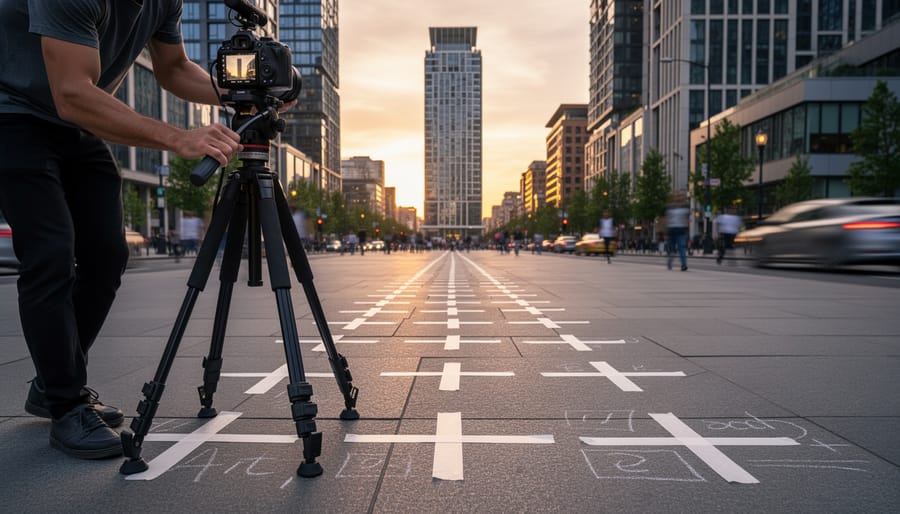
The manual hyperlapse technique requires patience and precision, but the results are worth every careful step. Think of it as creating a photographic breadcrumb trail that your camera will follow through time and space.
Start by choosing your path and mentally dividing it into equal intervals. Urban environments work beautifully here—sidewalk tiles, floor patterns, or even counting paces all serve as natural measurement tools. For a smooth result, aim for movements between 2-6 feet per frame. Smaller increments create subtle, dreamy motion, while larger steps produce more dramatic perspective shifts.
Here’s your core workflow: Position your camera on a tripod at your starting point and identify a prominent reference object in your frame, like a building corner or streetlight. Take your shot, then move to your next position. Before shooting again, align that same reference point to the identical spot in your viewfinder or LCD screen. This consistency is your secret weapon against jarring jumps in the final sequence.
For landscape hyperlapses where tripods become cumbersome, experienced shooters often switch to handheld shooting with a wide-angle lens. The wider focal length forgives small alignment errors that would be obvious with telephoto glass. Enable your camera’s grid overlay and use horizon lines or vertical elements as alignment guides.
Pro tip: Shoot in manual mode with locked exposure settings. Changing light conditions might tempt you to adjust, but flickering between frames will ruin your sequence. Embrace slight under or overexposure for consistency—you can rescue details in post-production far easier than fixing exposure flicker.
Avoiding Common Motion Time-Lapse Mistakes
Even the most meticulously planned motion time-lapse can fall victim to a few common pitfalls. Understanding these issues beforehand will save you hours of frustration in post-production.
Flickering remains the most notorious problem, typically caused by aperture blades shifting slightly between frames. This creates brightness variations that become distractingly obvious in playback. The solution is straightforward: shoot in full manual mode, including manual focus. Many photographers forget to lock down the aperture, allowing the camera to make micro-adjustments. On some cameras, depressing the depth-of-field preview button and taping it down physically locks the aperture blades in place, eliminating this issue entirely.
Jerky motion destroys the illusion of smoothness you’re working to create. This often happens when your slider or motorized head moves too quickly for your interval settings. A helpful rule of thumb: your subject should move no more than one-third of the frame width across your entire sequence. For a three-hour shoot capturing sunset with camera movement, calculate backwards from your desired final clip length to determine the proper motor speed.
Focus drift catches many shooters off-guard, especially during long shoots where temperature changes affect lens elements. Always disable autofocus and live view features when possible, as these drain battery and can trigger unwanted adjustments. If shooting landscapes, focus at the hyperfocal distance and verify sharpness on your first few test frames before committing to the full sequence.
Battery failure mid-sequence ruins otherwise perfect shots. Always start with fully charged batteries, and for shoots exceeding two hours, use an AC adapter or battery grip with backup cells.
Post-Production: Bringing Your Moving Time-Lapse to Life
Stabilization and Motion Smoothing Software
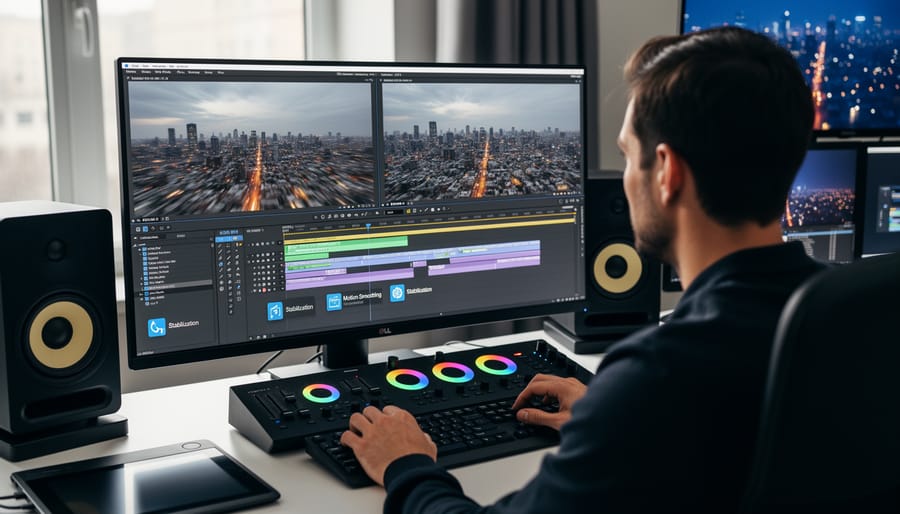
Even with perfect shooting technique, moving time lapses often need a bit of digital polish to truly shine. Camera bumps, vibrations from wind, and mechanical inconsistencies in sliders can all create unwanted jitter that distracts from your cinematic vision. That’s where stabilization and motion smoothing software becomes essential.
Adobe After Effects remains the industry standard for professional time lapse work. Its Warp Stabilizer effect analyzes your footage and removes unwanted camera shake while preserving intentional movement. Start by creating a composition from your image sequence, then apply Warp Stabilizer from the Effects panel. For time lapses, the Smooth Motion method typically works best, with smoothness values between 10-20%. Higher values create more fluid motion but may introduce warping at the edges, so preview carefully and adjust crop if needed.
For a more specialized workflow, LRTimelapse pairs beautifully with Adobe Lightroom. This combination excels at deflickering and smooth exposure transitions, which is particularly valuable when dealing with day-to-night scenarios. Import your raw files into Lightroom, use LRTimelapse’s Holy Grail Wizard to analyze and smooth exposure changes, then export your sequence. The software also includes keyframe-based editing that lets you gradually adjust color grading throughout your sequence.
Premiere Pro offers a simpler alternative through its built-in stabilization. Import your image sequence, apply the Warp Stabilizer effect, and adjust the smoothness slider. While less powerful than After Effects, it’s faster for straightforward projects.
A practical workflow tip: always work with proxy files when possible. Time lapse sequences can contain thousands of high-resolution images that bog down rendering. Create lower-resolution proxies for editing, then swap back to full resolution for final export. This simple step can save hours of frustration.
Color Grading for Cinematic Impact
Color grading transforms good moving time-lapses into memorable cinematic experiences. Think of it as the final polish that ties your entire sequence together, ensuring that the viewer’s eye flows smoothly from frame to frame without jarring color shifts or inconsistent tones.
Start with color correction before grading. This means balancing your white balance, exposure, and contrast across all frames. Since moving time-lapses often span different lighting conditions, you’ll need to create keyframes that gradually transition between color temperatures. For example, if you’re capturing a sunset to nighttime sequence, your color temperature should smoothly shift from warm golden tones to cooler blues rather than jumping abruptly.
Once your footage is balanced, apply color grading techniques to establish mood. A teal-and-orange look works beautifully for urban landscapes, while desaturated earth tones can enhance natural settings. The key is subtlety—overly aggressive grading will make individual frames look disconnected.
Use LUTs (Look-Up Tables) as starting points rather than final solutions. Apply them uniformly across your sequence, then fine-tune individual sections to maintain continuity. Pay special attention to skin tones if people appear in your footage, and watch for clipping in highlights or shadows that might occur when applying the same grade to frames shot in vastly different lighting.
Finally, render a test version and watch it full-screen. What looks good on individual frames might flicker or feel inconsistent in motion, so always evaluate your grading work as a complete sequence.
Creative Applications and When to Use Moving Time-Lapse
Moving time-lapse opens up a world of creative possibilities that static time-lapse simply can’t match. The dynamic camera movement adds production value and emotional impact, transforming simple sequences into cinematic experiences. Let’s explore where this technique truly shines.
In landscape photography, moving time-lapse excels at revealing scale and perspective. Imagine capturing sunrise over a mountain range while your slider slowly pushes forward, drawing viewers into the scene as golden light spills across the peaks. That subtle forward motion creates depth and invites emotional connection. Desert landscapes benefit tremendously from lateral movements that emphasize the vastness of sand dunes or salt flats, while coastal scenes become more dramatic when your camera arcs along a clifftop, revealing both crashing waves and the expansive horizon.
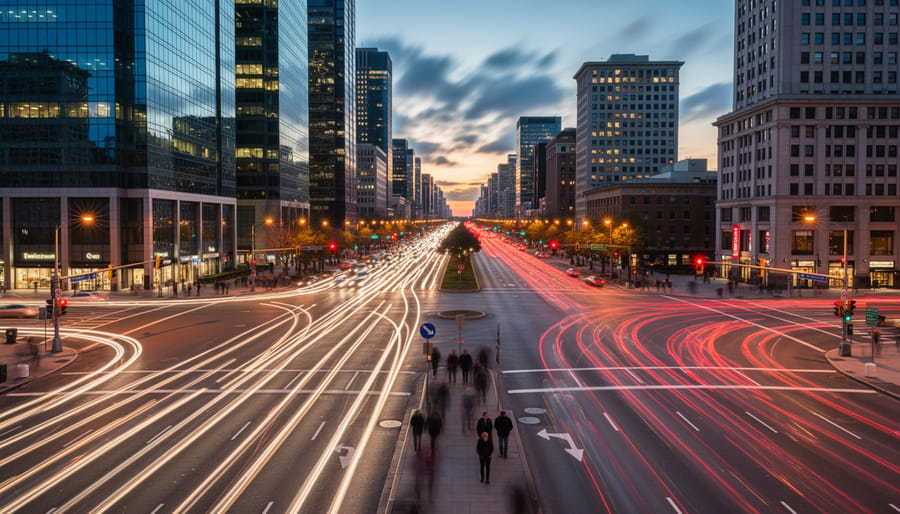
Urban environments practically demand motion. A slow pan across a city skyline as day transitions to night, with windows gradually illuminating and traffic trails intensifying, tells a story that a static shot cannot. Try positioning your camera on a rooftop with a motorized pan-tilt head to capture the choreography of rush hour traffic flowing through intersections. Construction sites offer another compelling subject—months of building progress condensed into seconds, with your camera slowly orbiting the structure to show transformation from multiple angles.
Astrophotography enthusiasts have embraced moving time-lapse for creating those mesmerizing star trail sequences. A gentle rotation following the Milky Way’s arc across the sky, or a slow reveal from foreground landscape elements up to the celestial show above, adds dimensionality to what could otherwise feel flat. The movement helps viewers appreciate the Earth’s rotation in a visceral way.
Event coverage benefits substantially from this technique too. Wedding videographers use moving time-lapse to compress venue setup, showing flower arrangements appearing and decorations transforming an empty space into a celebration venue. Corporate events can showcase conference preparation, booth construction, or the ebb and flow of attendee traffic throughout a trade show floor.
The key is choosing motion that enhances your story rather than distracts from it. Subtle, purposeful movements typically work best—think inches per hour rather than feet. When the subject itself provides drama, let your camera movement complement rather than compete.
Adding movement to your time-lapse photography genuinely transforms your work from impressive to unforgettable. That subtle camera drift across a cityscape or the slow reveal of a sunrise doesn’t just document time passing—it invites viewers into an experience, creating depth and dimension that static time-lapses simply can’t match.
The beauty of moving time-lapse is that you don’t need to master everything at once. Start with a basic slider and a familiar location. Experiment with a simple 3-foot dolly move during a sunset sequence. The results might surprise you, and more importantly, they’ll teach you lessons that no tutorial ever could. Each attempt reveals something new about timing, composition, and the relationship between movement speed and interval settings.
Remember that even seasoned professionals started with shaky first attempts and miscalculated movements. The difference between hobbyists and masters isn’t talent—it’s persistence and willingness to learn from each project. Your first moving time-lapse might have issues with flickering or jerky motion, but those challenges become your greatest teachers.
So here’s your challenge: plan your first moving time-lapse this week. Choose a simple subject, set up your gear, and commit to seeing it through from capture to final edit. Start small, keep it manageable, and focus on completing the project rather than achieving perfection. The transformative power of motion in time-lapse awaits—all you need to do is press record and let your camera glide.