 By
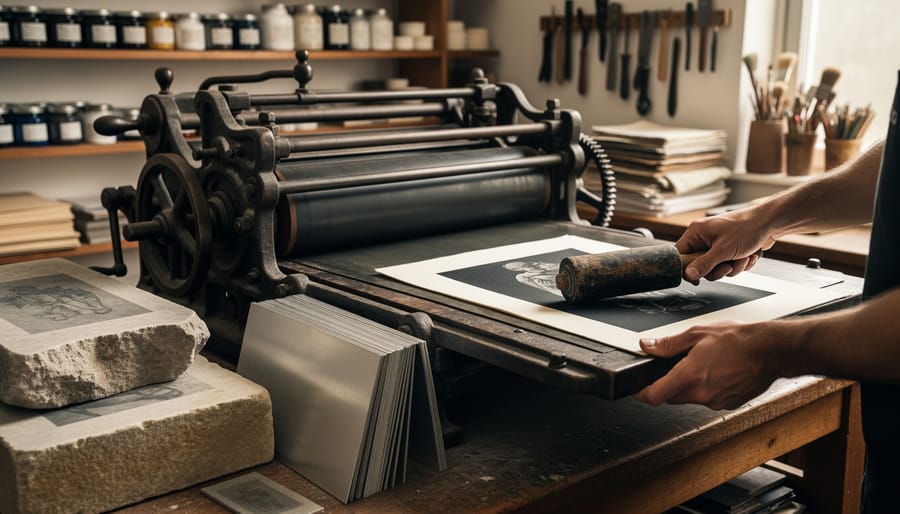
A lithography studio is a specialized printmaking facility equipped with large flatbed presses, prepared limestone blocks or aluminum plates, and the chemistry needed to transfer photographic or hand-drawn images onto paper through a grease-and-water process that dates back to 1796 but remains remarkably relevant for contemporary image-makers.
If you’ve mastered digital printing and darkroom techniques but find yourself craving something more tactile, lithography offers a bridge between photography and fine art printmaking. The process translates your photographs into prints with a distinctive surface quality and tonal range that neither inkjet nor silver gelatin can replicate. Unlike purely mechanical reproduction, each lithographic print involves hands-on collaboration with the stone or plate, making every pull slightly unique even when working from the same image.
Most photographers encounter lithography studios through university art departments, community printmaking cooperatives, or dedicated fine art workshops. The barrier to entry feels higher than walking into a darkroom, partly because lithography requires specialized equipment you can’t easily replicate at home. A single limestone block capable of holding a detailed photographic image weighs 150 pounds or more, and the presses themselves are substantial pieces of 19th-century engineering that cost thousands of dollars even when used.
But accessibility has improved. Many studios now offer open-access hours, introductory workshops, and technical assistance specifically for photographers unfamiliar with traditional printmaking protocols. The learning curve is real, you’ll need to understand concepts like chemical sensitivity, ink viscosity, and registration that don’t appear in photographic printmaking guides focused on darkroom work. Yet photographers who commit to the process often find that lithography changes how they see and edit their images, forcing deliberate choices about tone and composition that digital workflows can obscure.
What a Lithography Studio Offers Photographers
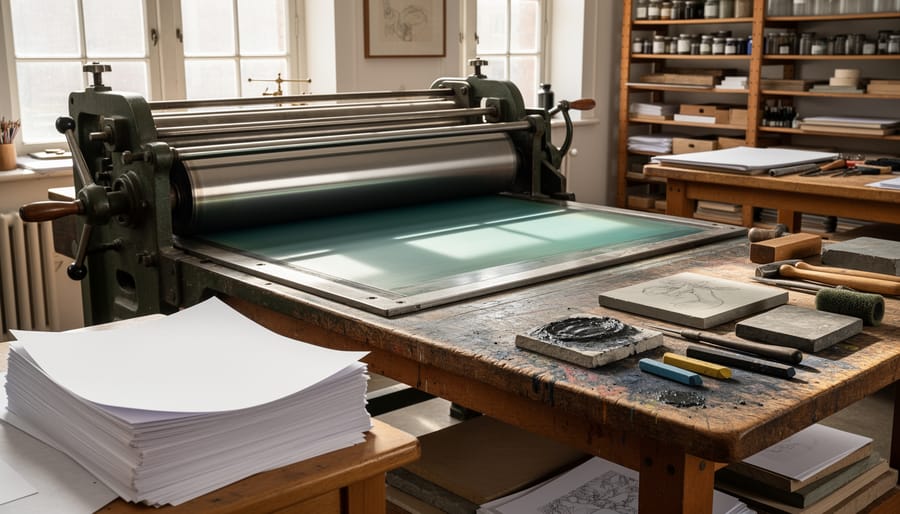
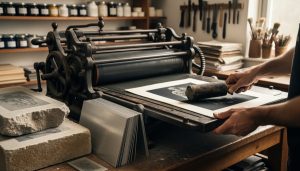
A lithography studio provides photographers with specialized equipment and expertise that transform digital or film-based images into tactile, handcrafted prints with distinctive material qualities impossible to achieve through inkjet or darkroom processes. At its core, these studios house lithographic presses, heavy, precision-engineered machines that apply thousands of pounds of pressure to transfer ink from stone or metal plates onto paper. You’ll find large limestone slabs, aluminum or zinc plates, specialized lithographic inks, an array of rollers and brayers, and chemistry for treating printing surfaces. This isn’t equipment most photographers can house in a home studio, which is precisely why dedicated lithography workshops exist.
The workspace itself matters. Lithography studios typically provide large worktables for preparing plates, dedicated areas for chemical processing with proper ventilation, paper storage that maintains humidity control, and often a separate space for drying finished prints. Many studios employ master printers or printmaking technicians who understand both the traditional craft and how to help photographers translate photographic imagery into lithographic form. This technical support proves invaluable when you’re working with a process that relies on chemical interactions between grease-based materials and water.
What draws photographers to these studios goes beyond mere access to equipment. Lithographic prints possess a physical depth and tonal richness that stems from the way greasy ink sits on paper fibers rather than being sprayed or chemically deposited. The surface has subtle variations, slight imperfections, and a tactile quality you can see and feel. Each print becomes a physical object with material presence, not just a reproduction of an image.
For photographers exploring fine art editions, artist books, or experimental work that bridges photography and printmaking, lithography studios offer a different relationship with the image. You’re not clicking “print” and walking away. Instead, you’re dampening a stone, rolling ink by hand, cranking the press, and building an edition one pull at a time. That hands-on involvement introduces welcome unpredictability and a sense of craft that connects contemporary photographic practice to centuries of printmaking tradition.
How Lithography Works: From Photograph to Print
Preparing Your Photographic Image
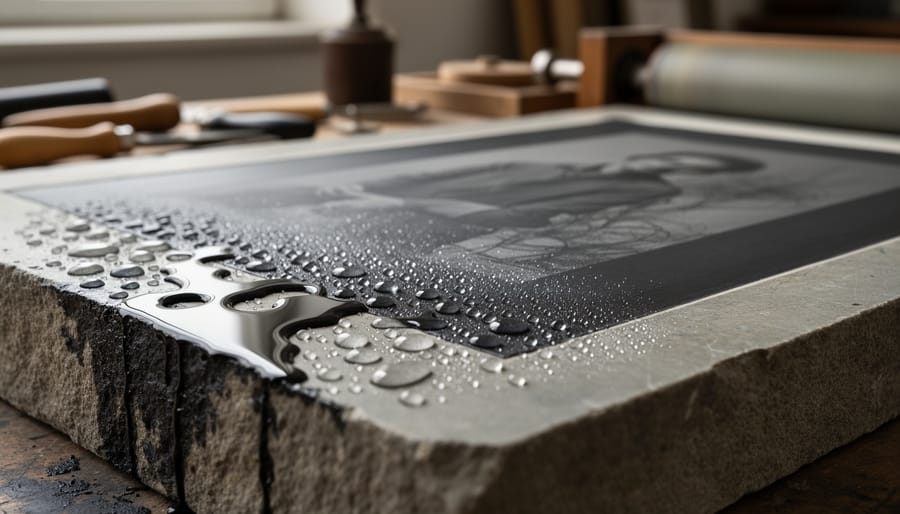
The first step in translating your photograph for lithography is converting it to a high-contrast black-and-white image that reads well in the medium. Unlike inkjet printing, which handles subtle tonal gradations easily, lithography relies on the density of greasy marks to hold ink. You’ll need to adjust your image’s tonal range, often pushing midtones and ensuring your highlights are clean and shadows have enough detail to register on the stone or plate.
Work with your digital file at high resolution, 300 dpi minimum at final print size. Most studio technicians prefer TIFF files, though some workflows accept PDF. Discuss sizing early: lithographic stones and plates come in standard dimensions, and your image needs to fit within the working area with margins for registration marks and handling. A typical stone might measure 20×16 inches, but the printable area is smaller.
If you’re working from film negatives, bring high-quality scans or plan to create a digital positive for transfer. Some studios can work directly from transparencies for photo-lithography processes, but this requires specialized equipment and expertise.
Expect collaboration with studio technicians during this prep phase. They’ll advise on tonal adjustments specific to their press and materials, help you test small proofs, and guide decisions about image orientation and cropping. Many photographers find this dialogue invaluable, the technician’s printmaking knowledge combined with your photographic vision produces stronger results than working alone. Don’t hesitate to ask questions about how your specific image will translate; every photograph presents unique challenges in lithography.
Working the Stone or Plate
Once your photographic image is prepared, the real magic happens on the stone or plate itself. This is where lithography reveals its connection to historic photo processes through chemistry and craft.
You’ll work with either a heavy limestone block or a grained aluminum plate, both prepared with a specific surface texture. The image transfer typically involves drawing or coating with a greasy lithographic crayon, tusche, or photo-sensitive emulsion. For photographic work, many studios use a photo-litho method where your prepared image is exposed onto a light-sensitive coating on the plate.
After the image is on the surface, you’ll treat it with a gum arabic and acid solution. This etches the non-image areas slightly, making them more receptive to water. The image areas, protected by grease, remain ink-receptive. You’ll then wash out the original drawing material and replace it with printing ink.
The fundamental principle is simple: grease attracts ink, water repels it. When you dampen the plate and roll ink across it, the ink adheres only where your image sits. This chemical dance between oil and water creates the lithographic print’s characteristic soft, velvety tones.
Pulling the Print
The moment of pulling the print is where chemistry meets pressure. You ink the dampened stone or plate with a soft roller, coating only the greasy image areas while the wet non-image zones repel the oil-based ink. Place your dampened paper onto the inked surface, cover it with tympan sheets, and roll the bed through the press scraper bar. The pressure transfers ink to paper in a single pass.
For multi-color lithographs, you repeat this process for each color layer, registering the paper precisely using corner marks or pins. Building an edition means pulling identical prints one at a time, re-inking and dampening between each pull. Experienced printers develop a rhythm, but expect your first prints to vary slightly as you calibrate ink density, dampness, and pressure. That variability is part of lithography’s material character.
Types of Lithographic Processes for Photographic Work
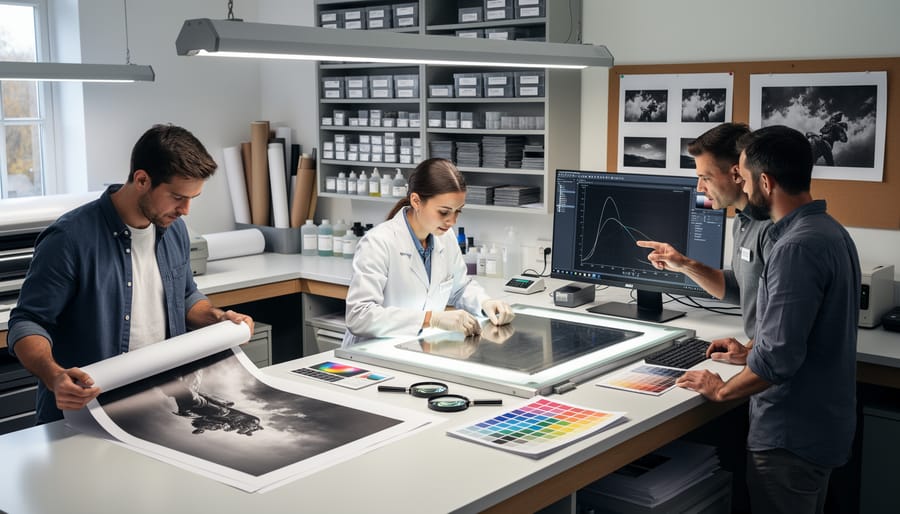
Not every lithography method translates photographic images equally well, and contemporary studios typically offer several distinct processes tailored to different source materials and aesthetic goals. Understanding which variant best suits your photographic work, whether you’re translating high-resolution digital files or hand-manipulated negatives, helps you collaborate more effectively with studio technicians and choose the right approach for your vision.
- Traditional Stone Lithography
- The original lithographic method using polished limestone slabs as the printing matrix, prized for its tonal subtlety and capacity to hold fine photographic detail through chemical surface preparation. Best suited for photographers willing to work slowly and iteratively, producing deeply atmospheric prints with a distinctive texture.
- Photo-Lithography
- A specialized technique that uses light-sensitive coatings on stone or plate to transfer photographic images directly from film positives or digital negatives, enabling precise tonal reproduction. Ideal for photographers working with continuous-tone imagery who want direct translation of their photographic aesthetic without hand-drawing.
- Aluminum Plate Lithography
- A modern, more accessible alternative using thin grained aluminum plates instead of heavy stones, offering consistent surface quality and compatibility with both hand-drawn and photo-transfer techniques. Practical for photographers seeking quicker turnaround and easier registration across multi-color editions.
- Polyester Plate (Pronto Plate) Lithography
- An entry-level lithographic process using disposable plastic-backed plates that can be drawn on directly or exposed photographically, requiring only modest pressure for printing. Accessible for photographers new to printmaking or working in studios with limited press capacity.
Photo-lithography stands out as the most direct route for photographers accustomed to working with negatives or high-resolution digital files. The process involves coating the stone or plate with a light-sensitive emulsion, exposing it through a film positive (either analog or digitally printed onto transparency film), then developing to create a grease-receptive image that behaves exactly like a hand-drawn lithograph during printing. This method preserves the full tonal range of your photograph, from deep shadows to delicate highlights, with a fidelity that rivals traditional darkroom printing, though the lithographic ink and paper introduce their own textural character.
Stone lithography, while labor-intensive, offers unmatched tonal depth and a hand-crafted quality that many photographers find complements their imagery better than purely mechanical reproduction. The limestone’s natural grain adds subtle texture, and the grease-based drawing materials allow for gestural intervention, you can work into your transferred photograph with tusche washes or crayon marks, combining photographic precision with expressive mark-making in ways that feel similar to applying creative lens filters during capture, but with far more material control after the fact.
Aluminum plate lithography has become the workhorse of contemporary studios because it dramatically reduces physical labor and setup time. Plates are lighter, easier to grain consistently, and work well with both direct drawing and photo-exposure techniques, making them practical for photographers producing larger editions or experimenting with color separations across multiple plates. The trade-off is a slightly different surface quality: aluminum prints often feel crisper and more mechanical than stone, though skilled printers can coax remarkable subtlety from grained aluminum.
Hybrid digital-to-litho workflows have opened lithography to photographers without darkroom access or film-output capacity. Many studios now accept high-resolution TIFFs, print them onto laser transparency film at precise dot densities, then expose those transparencies onto photo-sensitized plates or stones. This path lets you prepare and manipulate your image entirely in Photoshop, adjusting contrast curves, converting to bitmap for specific dot structures, even layering multiple exposures, before the image ever touches the printing matrix, bridging the gap between digital precision and analog materiality.
Equipment and Materials You’ll Encounter
Walking into a lithography studio for the first time can feel like entering a blend of chemistry lab and machine shop. The equipment is substantial, purpose-built, and unlike anything in a traditional darkroom or digital printing space. Understanding what you’ll encounter helps demystify the process and prepares you for the hands-on, collaborative nature of lithographic printmaking.
The centerpiece of any lithography studio is the press itself. Most studios house flatbed lithographic presses, heavy iron machines with a sliding bed that passes under a scraper bar, applying even pressure as the stone travels beneath. These presses weigh hundreds to thousands of pounds and require manual operation, though the mechanics are straightforward once demonstrated. Some studios also maintain proofing presses, which are lighter, more portable machines suitable for aluminum plates rather than heavy stones. Proofing presses allow for quicker test prints and are common in educational settings where multiple artists work simultaneously.
The studio’s core materials and tools include:
- Lithographic presses (flatbed for stones, proofing for plates)
- Bavarian limestone blocks in various sizes, ground flat and ready for imaging
- Aluminum or zinc plates as lighter alternatives to stone
- Lithographic crayons and tusche (greasy drawing materials)
- Gum arabic solution for desensitizing non-image areas
- Nitric acid or phosphoric acid for etching
- Oil-based lithographic inks in various colors
- Leather or rubber brayers (rollers) for inking the stone evenly
Beyond these essentials, you’ll find sponges, cheesecloth, scrapers, levigators for grinding stones, drying racks for finished prints, and ventilation systems for chemical fumes. Studios typically stock archival printmaking paper in various weights and textures, though you can often bring your own.
The workspace itself matters as much as the equipment. Expect sturdy work tables, deep sinks with gooseneck faucets, designated areas for chemical mixing, good lighting, and plenty of floor space for maneuvering stones on wheeled carts. Everything is designed for methodical, repetitive work where precision and cleanliness directly affect print quality. It’s a tactile, physical environment that rewards patience and attention to craft.
How Photographers Use Lithography Studios Today
Contemporary photographers turn to lithography studios for reasons that go far beyond nostalgia. The process offers a materiality and aesthetic quality that digital printing simply can’t replicate, making it particularly valuable for artists seeking to differentiate their work in an increasingly screen-dominated world.
Fine art editions remain the most common application. Photographers work with master printers to create limited-run lithographs that carry the hand-crafted credibility collectors value. The slightly variable nature of each pull, subtle differences in ink density, paper absorption, and registration, means every print in an edition has unique character while maintaining overall consistency. This appeals to galleries and buyers who appreciate the evidence of human touch in the making process.
Artist books have emerged as a natural home for lithographic photography. The compatibility between lithographic prints and fine paper stocks, combined with the ability to print text and image together on the same press run, makes the medium ideal for photobooks conceived as physical objects rather than mere image containers. Some photographers design entire narratives around the material qualities of lithography, using the grain of the stone or deliberate registration shifts as part of the storytelling.
Exhibition prints from lithography studios carry a different presence than inkjet or C-prints. The ink sits on the paper surface rather than soaking in, creating a subtle relief you can feel under your fingers. This tactile dimension adds another layer to how viewers experience the work, particularly in gallery settings where prints are viewed up close.
The most exciting contemporary applications involve hybrid approaches. Photographers are increasingly working as collaborative artists with printmakers, bringing photographic imagery to the stone but then drawing, painting, or scratching directly onto the plate between proofs. This creates images that exist somewhere between photography and traditional printmaking, using the photographic element as a foundation for manual intervention. Others exploit lithography’s ability to layer multiple plates, building complex visual metaphors through sequential printing that would be difficult to achieve through darkroom combination printing or digital compositing.
The key shift is photographers treating lithography not as a reproduction method but as a creative medium in itself, with its own grammar and possibilities.
Finding and Working with a Lithography Studio
Finding a lithography studio starts with identifying the type of access you need. University printmaking departments often welcome non-students through community courses or open studio memberships, typically offering equipment access at lower rates in exchange for shared space and time slots. Community art centers run similar programs with drop-in studio hours or structured workshops that teach the fundamentals while providing supervised press time. Professional print shops cater to artists commissioning editions, where you work directly with a master printer who handles the technical execution, ideal if you want expert results without learning every step yourself.
Costs vary widely based on access model. Open studio memberships run $50-200 monthly, granting you press access during designated hours plus materials at cost. Workshop courses range from $300-800 for multi-week sessions that include instruction, materials, and studio time. Commission-based printing starts around $500-2000 per edition depending on print size, edition number, and complexity, with the printer managing all technical aspects while you direct aesthetic decisions.
Before approaching a studio, prepare your photographic work thoughtfully. Convert digital files to high-contrast black and white images at 300 DPI minimum, sized to your intended print dimensions. Many studios prefer TIFF files for maximum tonal information. If working from film negatives, bring oversized scans that allow for cropping and adjustment during the plate-making process.
Contact studios directly to discuss their intake process, some require portfolio review, others schedule orientation sessions explaining equipment protocols and safety procedures. Ask specific questions about their photo-lithography capabilities, as not all facilities specialize in translating continuous-tone photographic imagery. Studios with photo-litho expertise typically use polymer plates or photosensitive stone ground, making the photographic translation more straightforward than traditional hand-drawing methods.
Most importantly, approach collaboration with realistic timelines. Creating a small lithographic edition takes weeks, not days, between plate preparation, proofing, adjustments, and final printing runs.
Common Questions About Lithography for Photographers
Before you commit to working with a lithography studio, you probably have practical questions about how your existing photography workflow translates to this tactile process. Here are answers to the most common concerns photographers raise when exploring lithography for the first time.
Can I use my digital photographs for lithography?
Yes, digital files work perfectly well. Most studios accept high-resolution digital images and use photo-emulsion techniques or laser printing to transfer your photograph onto the stone or plate, where you’ll then complete the lithographic process.
Do I need prior printmaking experience?
No prior experience is required for most lithography workshops or studio access programs. Studios typically offer introductory courses that teach you the fundamentals, and many provide technical assistance even during open studio time.
How long does the lithographic process take?
Plan on several sessions across multiple days. Preparing and processing the stone or plate takes hours, and you’ll need return visits for proofing and printing your edition once everything is properly registered and inked.
What does a lithographic edition typically cost?
Costs vary widely based on studio access model and materials. Open studio memberships might run $200-500 monthly, while commissioning a professional printer for a small edition could cost $1,000-3,000 depending on size, complexity, and number of prints.
Regarding file formats, studios generally prefer TIFF files at 300 dpi or higher, sized to your intended print dimensions. Grayscale images translate most directly, though color work is possible with multiple plates. The tonal range in your photograph matters more than the file type, since lithography excels at mid-tones and subtle gradations but can struggle with deep blacks or pure whites.
The learning curve is real but manageable. You’ll grasp the basic principles quickly, but developing consistent technique for inking, dampening, and registration takes practice. Expect your first few prints to be learning experiences rather than portfolio pieces. Most photographers find they hit their stride by the third or fourth image, once muscle memory kicks in and they understand how their particular press and materials behave. The hands-on, experimental nature is part of the appeal, so embrace the process as much as the final print.
Lithography studios open up a dimension of photographic practice that screens and inkjet prints can’t replicate. The weight of handmade paper, the pressure of the press, the slight variations between prints in an edition, these physical qualities ground your images in a way that feels fundamentally different from clicking “print” on a digital file.
For photographers accustomed to complete control over every pixel, lithography asks you to collaborate with materials, chemistry, and a process refined over two centuries. That loss of total control isn’t a limitation. It’s an invitation to discover what happens when your images meet stone, ink, and pressure. The results carry a presence that collectors and galleries recognize immediately.
In 2026, as photography continues its digital evolution, lithography studios represent something increasingly valuable: a space where making is slow, deliberate, and rooted in craft. You don’t need to abandon your digital workflow. Think of lithography as an expansion of your practice, a way to explore what your images become when they exist as physical objects rather than light on a screen.
If you’ve been curious about alternative processes, a lithography studio is waiting. Start with a workshop, bring a few strong images, and see what the stones have to say.



 By