By
By 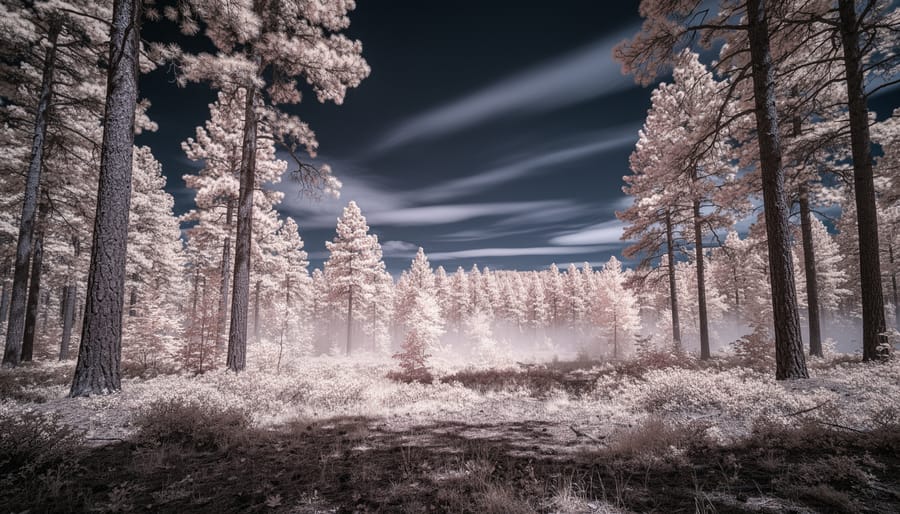
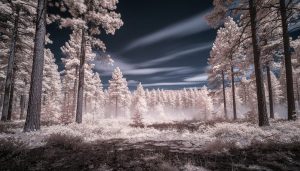
Infrared landscape photography transforms familiar scenes into otherworldly images by capturing light invisible to the human eye. To shoot infrared landscapes, you need either a camera converted to infrared or a standard camera with an infrared filter, followed by careful white balance adjustment in the field and post-processing to reveal the signature look: white foliage, darkened skies, and luminous clouds. The process takes about 15-20 minutes per scene once you’re set up, though converting a camera (if you choose that route) requires sending it to a specialist for modification.
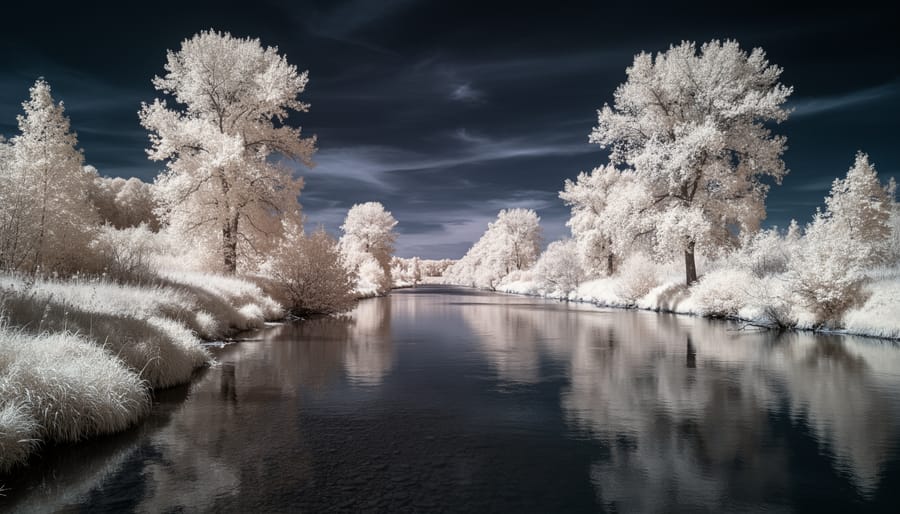
The appeal is immediate. Trees and grass reflect infrared light strongly, rendering as brilliant white against deep, nearly black skies. Water and clouds often glow with an ethereal quality that’s impossible to achieve through conventional photography. You’ve likely seen these haunting images online and wondered how to create them yourself.
The good news: the technique is more accessible than it appears. You don’t need exotic equipment beyond the infrared capability itself, and you can start with a filter-based approach for under $100 before committing to a converted camera body. The challenge lies not in the complexity of the gear but in understanding how infrared light behaves differently from visible light. Autofocus doesn’t work reliably. Standard exposure settings fail. What looks unremarkable to your eyes may produce stunning infrared results, while visually dramatic scenes can fall flat.
This guide walks you through the complete process, from choosing between conversion and filters to nailing exposure in the field to post-processing your first successful infrared landscape.
What You’ll Need for Infrared Landscape Photography
Camera Conversion vs. Filter-Based Shooting
You have two realistic paths into infrared landscape photography, and your choice depends on how committed you are to this specialized discipline.
Camera conversion means sending a DSLR or mirrorless body to a professional service that removes the manufacturer’s hot mirror filter and replaces it with an infrared-pass filter (typically 590nm, 665nm, 720nm, or 850nm). This permanently transforms the camera into an infrared-only tool. You’ll shoot at normal shutter speeds, 1/125s or faster in daylight, and can handhold in most conditions. Autofocus works (though you may need micro-adjustments), live view shows an accurate preview, and you can swap lenses freely. The downside? Conversion costs $300, $500, and you’ve now dedicated an entire camera body to infrared. You can’t shoot normal color photos with it anymore. Many photographers convert an older backup body rather than their primary camera.
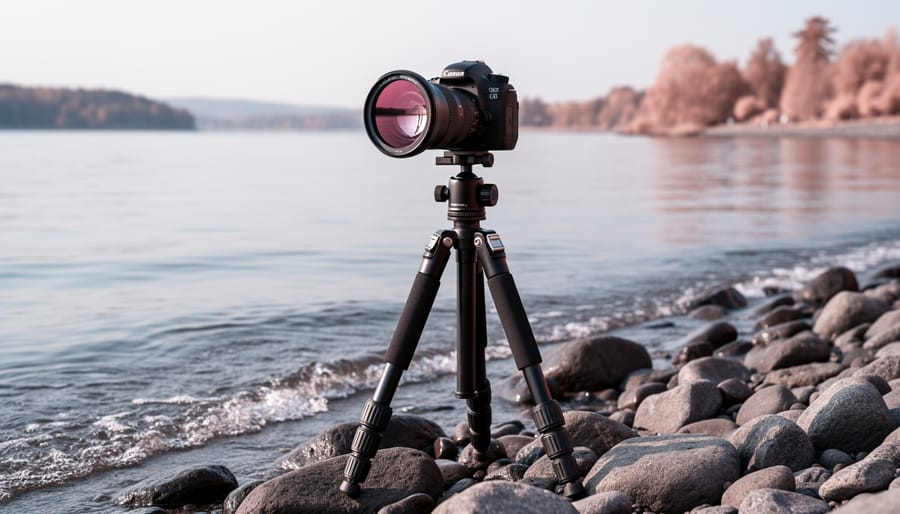
Filter-based shooting uses a screw-on infrared filter (like a 720nm or 850nm) on your existing camera. The filter blocks visible light, so you’re forced into 30-second to 2-minute exposures even in bright sun, which means a tripod for every shot. Autofocus becomes unreliable because the viewfinder goes nearly black once the filter’s attached. You’ll compose and focus first, then carefully thread on the filter without bumping anything. The advantage? Your camera remains versatile, unscrew the filter and you’re back to normal photography. Filters run $50, $150 depending on size and quality, making this the budget-friendly entry point. It works with any lens, including a telephoto lens for compressed perspectives.
Most beginners start with a filter to test whether infrared photography holds their interest before committing to conversion.
Important Considerations Before You Start
Before you head into the field, there are several practical limitations and safety concerns that can make or break your infrared photography experience. Understanding these upfront will save you from costly mistakes and frustrating results.
First and most critical: never point a converted infrared camera directly at the sun without proper solar filters. Concentrated infrared radiation can permanently damage your sensor, just as pointing any camera at the sun can cause harm. While standard cameras have protective hot mirrors that block some infrared light, converted cameras have had this protection removed. Even a few seconds of direct sun exposure during composition can cause irreparable sensor burn. The sun can damage sensors remarkably quickly, creating dead pixels or burnt spots that ruin future images.
Expect dramatically longer exposure times if you’re using the filter-based approach. Where a normal landscape might need 1/125th of a second, the same scene with an infrared filter will require 30 seconds or longer. This makes tripods absolutely mandatory and means any subject movement, swaying trees, drifting clouds, flowing water, will blur across your frame. You can’t handhold these shots.
Autofocus won’t work with infrared filters attached because the camera can’t see through the dense, dark glass. You’ll need to compose and focus first, then attach the filter without bumping the focus ring. Some cameras also exhibit “hot spot” issues in infrared, circular bright areas in the center of images caused by internal reflections. Research your specific camera model beforehand to know if it’s prone to this problem.
Weather matters more than you’d expect. Infrared photography thrives on sunny days with scattered clouds. The contrast between bright foliage and dark skies becomes most dramatic under direct sunlight, while clouds add visual interest to otherwise flat blue skies. Overcast days produce dull, low-contrast infrared images that lack the surreal quality you’re after.
Step-by-Step Process for Shooting Infrared Landscapes
Step 1: Scout and Choose Your Scene
Not all landscapes work equally well for infrared capture. You’ll see the most dramatic results in scenes packed with healthy vegetation, think parks, forests, meadows, or tree-lined riversides. The reason is the Wood Effect: chlorophyll in living plants reflects infrared light intensely, causing foliage to glow brilliant white against darker skies. Bare rock, sand, or winter scenes without greenery produce far subtler results.
Water adds another compelling element. Lakes, rivers, and streams photograph beautifully in infrared because they absorb infrared wavelengths, rendering as deep blacks that create striking contrast with white trees along the banks. Clouds also stand out dramatically against darkened blue skies, so partly cloudy days actually work better than clear ones.
Look for locations where you can combine these elements. A pond surrounded by willows, a meadow with scattered oaks under cumulus clouds, or a creek winding through woodland all make excellent subjects. Standard landscape composition rules still apply, but you’re now working with an inverted tonal palette where grass becomes snow-white and skies turn nearly black.
Step 2: Set Up Your Camera and Tripod
Once you’ve selected your scene, lock your camera firmly onto the tripod and extend the legs to a stable height. For infrared work, stability matters even more than usual because you’ll be working with extended shutter speeds that amplify any movement.
Switch your camera to manual focus mode immediately. Autofocus won’t work reliably through infrared filters, and even converted cameras struggle with autofocus in infrared wavelengths because the focus plane shifts slightly. You’ll focus before the filter goes on, so setting manual mode now prevents the camera from hunting later.
Change your shooting format to RAW if you haven’t already. Infrared images need substantial post-processing, white balance adjustments, channel swapping, and contrast work, and RAW files give you the latitude to make those changes without destroying image quality. JPEGs simply don’t have enough data.
Disable image stabilization in both the camera body and lens. When the camera is mounted on a tripod, stabilization systems can actually introduce micro-vibrations as they attempt to correct for movement that isn’t happening. This causes unwanted softness during long exposures.
If you’re using the filter-based method, keep the infrared filter off for now. You’ll attach it after focusing in the next step.
Step 3: Compose and Focus Before Filtering
This is your last opportunity to see clearly through the viewfinder, so take your time composing the shot. Frame your scene as you would for any landscape photograph, paying attention to foreground elements, horizon placement, and the rule of thirds. Once you’re satisfied with the composition, switch to manual focus and carefully focus on your primary subject. Use your camera’s focus peaking or magnified live view if available, precision matters because you won’t be able to refocus after the filter goes on.
If your lens uses focus-by-wire (common on mirrorless cameras and some modern zooms), the focus ring has no hard stops and can easily shift. Mark your focus position by placing a small piece of tape on both the lens barrel and the focus ring, creating a reference line. This lets you verify the focus hasn’t drifted when handling the camera. For lenses with mechanical focus, the resistance usually holds position, but double-check before proceeding to the next step.
Step 4: Attach Your Infrared Filter (If Applicable)
Once your composition is locked and focus is set, it’s time to attach your infrared filter, but this step requires a steady hand. Carefully screw the filter onto your lens threading, using minimal pressure and keeping the camera as still as possible. Even slight movements can shift your focus plane or knock your tripod position.
Work slowly and rotate the filter smoothly until it seats completely. If your filter binds or catches, back it off and start again rather than forcing it. Some photographers find it helpful to stabilize the lens barrel with one hand while threading with the other.
After attachment, resist the urge to check your viewfinder. With most infrared filters, you’ll see nothing but darkness, this is normal. If you’re using a converted camera, switch to live view if your model supports it, which often provides a usable preview even with the filter attached.
Step 5: Meter and Set Your Exposure
Your camera’s meter wasn’t designed for infrared light, so it’ll give you a ballpark figure at best, but that’s still your starting point. Set your ISO to 200 or 400 to keep noise manageable, choose an aperture between f/8 and f/11 for sharpness across the frame, and let the shutter speed land wherever your meter suggests for a correct exposure. With an infrared filter blocking most visible light, you’re looking at exposures ranging from 30 seconds to several minutes, depending on conditions.
Take a test shot at your meter’s recommended settings, then check your histogram. Here’s where infrared gets tricky: the histogram will look different than what you’re used to. Infrared captures more reflected light from foliage and less from skies, creating unusual distribution patterns. Don’t panic if it looks wrong, clipping on the right edge in foliage areas is common and often recoverable.
Bracket your exposures immediately. Shoot one frame at the metered setting, then capture additional frames at +1 and +2 stops over, and -1 stop under. This insurance policy saves reshoot trips when you’re learning how your specific camera and filter combination handles infrared light. Your bracketed set gives you options during post-processing, when you’ll truly see what worked.
Step 6: Capture the Image
With your composition set and exposure dialed in, you’re ready to take the shot. Press the shutter button on your remote release, or activate your camera’s self-timer if you don’t have a cable release. The two-second delay mode works well for most situations, giving the camera enough time to settle after any vibration from touching it.
During the exposure, resist the temptation to check your camera or adjust the tripod. Even the slightest movement will ruin a long exposure. If you’re shooting on a windy day, shield your tripod with your body or wait for lulls between gusts.
Watch the sky while you wait. Clouds moving through the frame can create dramatic effects in infrared, those white, glowing formations against deep black skies. If a particularly interesting cloud formation is approaching, wait for it to enter your composition before triggering the shutter.
Take at least three to five exposures at different settings: your metered exposure, one stop over, and one stop under. Infrared histograms behave differently than visible light, and what looks correct in-camera might need adjustment. This bracketing approach gives you options during post-processing and serves as insurance against the unpredictable nature of infrared metering.
Reviewing Your Results and Next Steps
After you press the shutter, don’t pack up yet. Your first review happens right there in the field, and it’s crucial for determining whether you got the shot or need to try again before the light changes.
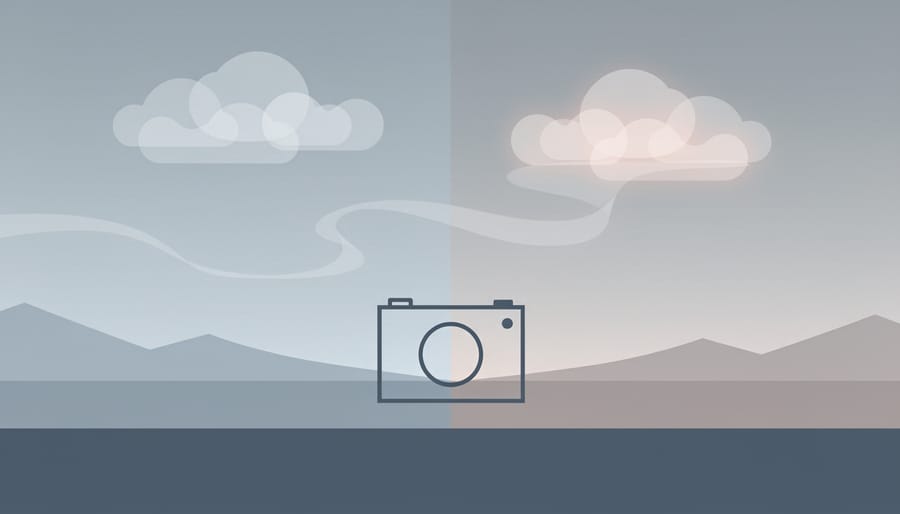
Pull up the image on your LCD screen and look for that telltale pinkish-red or magenta cast in the RAW preview. This isn’t a mistake, it’s exactly what you want to see. If your image looks normal or only slightly off-color, your infrared filter may not have blocked enough visible light, or your exposure settings need adjustment. That surreal magenta tone confirms you’ve captured infrared wavelengths.
Next, check your histogram. Infrared histograms behave differently than visible-light ones. You’ll often see data weighted toward the right side because infrared-reflective elements like foliage can blow out more easily than you’d expect. A slight spike on the right isn’t necessarily bad, but watch for clipped highlights in your sky or clouds. If your histogram is bunched on the left side, you’re underexposed, bump up your ISO or lengthen the shutter speed for your next attempt.
Zoom in to 100% and scan for three common problems. Underexposure makes everything muddy and kills that ethereal glow. Hot spots, bright, blown-out patches where infrared light concentrated, often appear on shiny leaves or water surfaces. Motion blur from wind-blown foliage during long exposures can ruin sharpness, even though some movement in clouds adds drama.
If you spot any of these issues and conditions haven’t changed, reshoot immediately. Adjust exposure for brightness problems, wait for calmer wind if foliage is blurring, or try a faster ISO to reduce exposure time. These field-tested techniques save you frustration later when you can’t return to the location.
Once you’ve confirmed a good capture, understand that you’re only halfway done. Infrared files require post-processing to achieve that signature look with white foliage and dark skies. You’ll need to set a custom white balance and perform a channel swap in editing software, swapping the red and blue channels to transform that magenta preview into the classic infrared aesthetic. This isn’t optional, it’s the final step that completes the infrared process and brings your vision to life.
Common Questions About Infrared Landscape Photography
What time of day works best for infrared landscape photography?
Midday actually produces excellent results because strong overhead sunlight maximizes the infrared reflection from foliage, creating that dramatic white-foliage effect. While golden hour works beautifully for traditional landscape photography, infrared captures benefit from bright, direct sunlight that would normally create harsh shadows in conventional images.
Can any digital camera shoot infrared?
Most digital cameras can capture infrared to varying degrees, but manufacturers install infrared-blocking filters (hot mirrors) in front of the sensor to improve color accuracy in normal photography. These filters block 90-99% of infrared light, which is why unconverted cameras require extremely long exposures with infrared filters, while converted cameras have this blocking filter removed or replaced.
Does infrared photography work in winter or when there’s no foliage?
Yes, though the effect differs significantly from summer scenes. Bare trees appear dark and skeletal against bright skies, snow reflects infrared differently than visible light creating interesting tonal contrasts, and evergreen conifers still provide some of that characteristic glow. Winter infrared landscapes have a stark, minimalist quality that can be equally compelling.
Should I shoot RAW or JPEG for infrared?
Always shoot RAW format. Infrared images require substantial post-processing including custom white balance adjustments and often channel swapping to achieve the classic look, and RAW files preserve the maximum tonal information and flexibility you’ll need for these edits.
Many photographers wonder about equipment longevity. Professionally converted cameras typically last just as long as unconverted bodies since the conversion process simply replaces one filter with another rather than removing protective elements entirely. The sensor itself experiences no additional wear from capturing infrared light.
Filter thread size matters if you’re going the screw-on filter route. Common infrared filters come in standard sizes (52mm, 58mm, 67mm, 77mm), but you’ll need to match your lens diameter or use step-up rings. Investing in a larger filter size with step-up rings gives you flexibility across multiple lenses. These same landscape secrets about composition and light still apply to infrared work, though you’ll interpret scenes differently once you understand how infrared renders different elements.
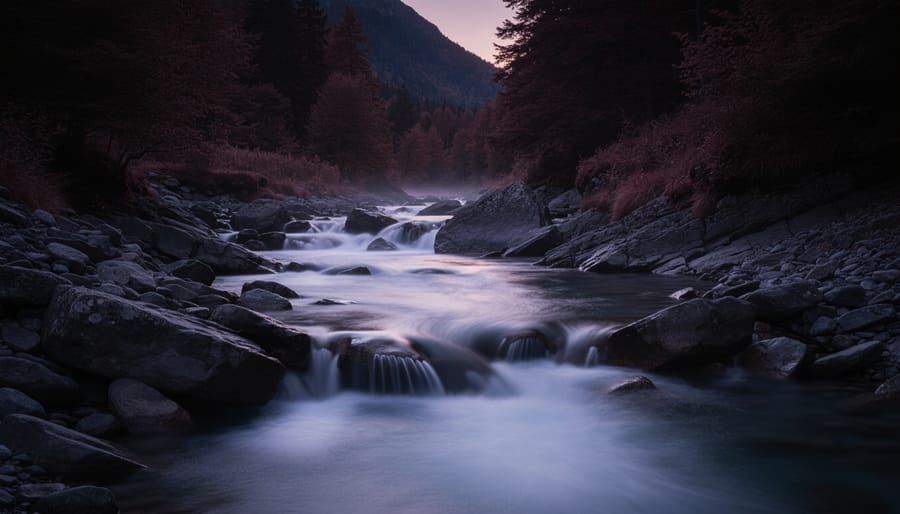
Infrared landscape photography rewrites the visual rules of the natural world, turning familiar scenes into otherworldly visions that no amount of conventional shooting can replicate. Your first successful infrared capture, watching ordinary green foliage transform into luminous white against a charcoal sky, creates an addictive creative shift that keeps photographers coming back.
Start simple. Pick one nearby location you know well and shoot it multiple times with different exposure settings. You’ll quickly learn how your specific camera and filter combination responds to varying light conditions. The technical challenges become intuitive with repetition.
The infrared photography community online offers endless inspiration and troubleshooting help. Study other photographers’ work to understand what’s possible, then develop your own vision. Each landscape you shoot will teach you something new about how infrared light behaves, and that knowledge compounds with every session.

 By
By