By
By 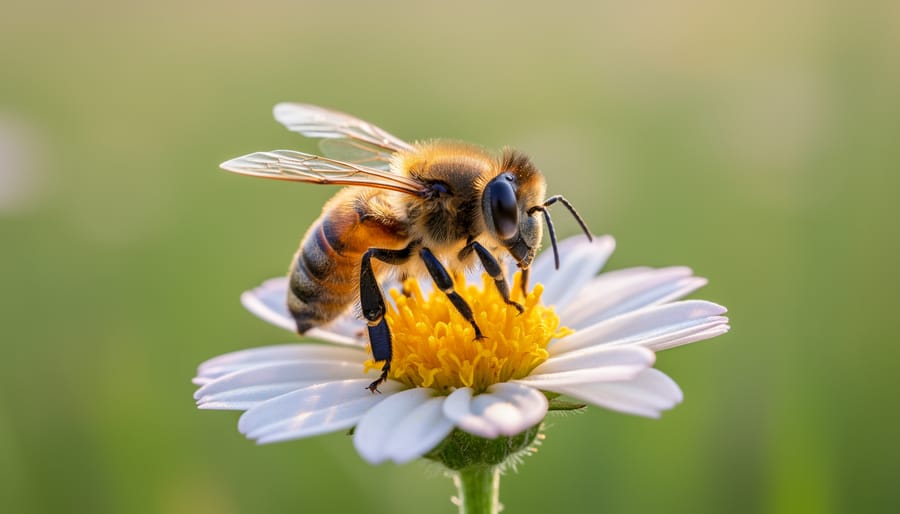
Choosing the right aperture in macro photography means balancing two competing demands: you need a small aperture (f/11 to f/16) to gain enough depth of field for your subject to stay sharp, but not so small that diffraction softens your image. This balancing act is what separates compelling close-up work from frustrating, blurry attempts.
When you’re shooting at 1:1 magnification or higher, depth of field collapses to millimeters. At f/2.8, you might have only a sliver of sharpness across an insect’s eye. Stop down to f/16, and you gain enough depth to capture the entire face, but push past f/22 and diffraction starts eroding the detail you worked so hard to achieve. The challenge is finding that sweet spot for each situation.
Most macro photographers land between f/8 and f/16 for handheld work, adjusting based on subject depth, working distance, and available light. Flat subjects like stamps or coins can live at f/8. Three-dimensional subjects such as flowers or beetles demand f/11 to f/16. Beyond that, you’re trading sharpness for depth unless you turn to focus stacking, a technique that combines multiple exposures at different focus points.
Understanding aperture in macro photography mastery transforms your results from hit-or-miss to intentional. The physics are unforgiving, but once you learn to read your scene and pick the appropriate f-stop, you’ll capture the tiny details that make macro work so rewarding.
Understanding Aperture in Macro Photography
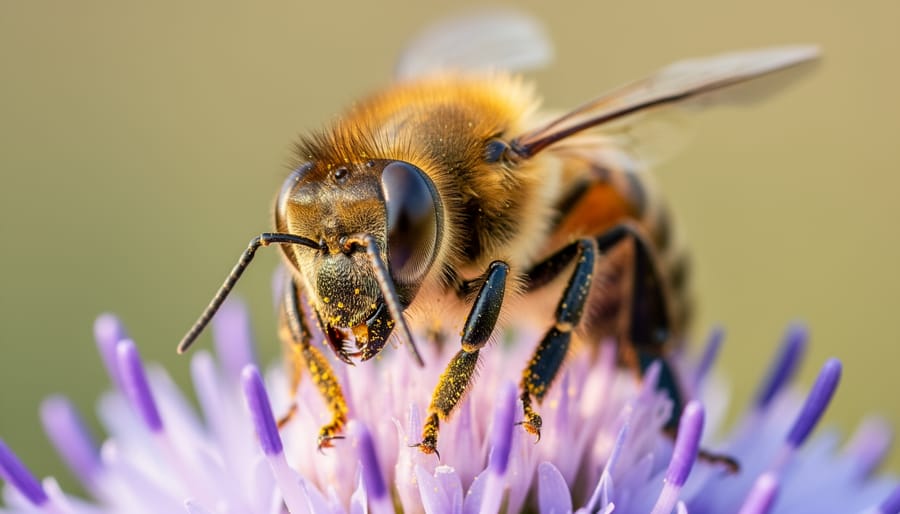
Aperture controls how much light enters your camera and determines the depth of field definition the zone of acceptable sharpness in your image. In everyday photography, you might shoot a portrait at f/2.8 and get pleasingly blurred backgrounds while keeping your subject’s face sharp from forehead to chin. But move into macro territory, and those same rules collapse. At 1:1 magnification (life-size reproduction on the sensor), depth of field shrinks to mere millimeters, even at f/16. This compression happens because DOF is inversely related to magnification: the closer you focus, the thinner your slice of sharpness becomes.
Consider photographing a dragonfly perched on a twig. At f/4, you might capture razor-sharp eyes but lose the thorax and wings to blur. Stop down to f/11, and you’ll bring the entire head and front body into focus, though you’ve now lengthened your shutter speed and risked motion blur from a breeze or the insect’s twitch. That’s the core tradeoff: wider apertures give you faster shutter speeds and creamy backgrounds but sacrifice coverage; narrower apertures expand your DOF but demand more light, slower shutter speeds, or higher ISO.
Magnification amplifies this challenge. Photographing a cluster of wildflowers at 0.5x magnification gives you more breathing room, f/8 might render three blooms acceptably sharp. Push to 2x magnification on a single stamen, and f/16 barely covers the anther and filament. The subject’s depth relative to the sensor matters too. A flat butterfly wing parallel to your sensor plane stays sharp across the frame at f/5.6. Tilt that same wing at an angle, and you’ll need f/11 or focus stacking to hold front-to-back sharpness. Understanding this physics lets you predict what each aperture will deliver before you press the shutter.
Essential Equipment for Controlling Aperture in Macro Work
Choosing the right aperture in macro photography is impossible without the right gear to support your creative and technical decisions. While you can certainly shoot macro with a zoom lens and close-up accessories, purpose-built macro equipment gives you far more control over your aperture workflow and final results.
The foundation of your macro aperture toolkit includes:
- Dedicated macro lens (f/2.8 typical maximum aperture), provides the sharpest results across all f-stops and lets you shoot at wider apertures than adapted alternatives
- Extension tubes, reduce light transmission, often forcing you to compensate with wider apertures or slower shutter speeds
- Close-up filters, create optical aberrations that worsen at wide apertures, pushing you toward f/8 or smaller for acceptable sharpness
- Sturdy tripod, eliminates camera shake when using f/11, f/16 and the slower shutter speeds these narrow apertures demand
- Cable release or remote trigger, prevents vibration during exposure, critical when a tripod already keeps you stable at narrow apertures
Each piece of this kit directly influences which apertures you can use effectively. A true macro lens offers consistent performance from f/2.8 to f/16, giving you the full range of creative and technical options. Extension tubes cost you roughly one to two stops of light depending on their length, which means that f/11 shot suddenly requires the exposure time you’d normally use at f/8. Close-up filters introduce chromatic aberration and softness at the frame edges, particularly wide open, so you’ll need to stop down more than you would with a native macro lens.
The tripod and remote trigger combination becomes non-negotiable once you venture past f/8. At 1:1 magnification and f/11, even a gentle breeze or your finger pressing the shutter can blur the shot.
Critical Warnings: When Aperture Settings Can Ruin Your Shot
Getting your aperture wrong in macro photography doesn’t just mean a less-than-perfect shot, it can completely destroy an otherwise excellent image. Understanding the failure modes and knowing when to stop before you waste time on doomed settings will save you hours of frustration in the field and at the computer.
The most insidious aperture trap in macro work is diffraction. When you stop down past f/11 or f/16 to gain more depth of field, physics works against you: light waves bend around the small aperture blades, creating interference patterns that blur fine details across the entire frame. You’ll gain depth of field but lose edge sharpness, and the tradeoff becomes increasingly unfavorable beyond f/16.
The visible signs are subtle at first: fine textures like insect hairs or flower stamens look mushy rather than crisp, and edges lack bite even when perfectly focused. If you review your shots at 100 percent magnification and everything looks slightly soft despite nailing focus, you’ve likely pushed too far into diffraction territory.
At the opposite extreme, shooting wide open at f/2.8 or f/4 in macro creates a depth of field measured in millimeters. Miss your focus point by a fraction and your subject’s eye is sharp while its antennae blur into nothing. Worse, any subject movement, a breeze rocking a flower, an insect shifting weight, will carry parts of your subject out of the razor-thin focus plane between exposures. You’ll see this as inconsistent sharpness across a burst of shots, with critical details sharp in one frame and gone in the next.
The safest approach is to start at f/8 for most macro subjects, then adjust based on what you see in your test shots. If the entire subject isn’t sharp, stop down one stop at a time until it is, but watch for diffraction softening. If f/8 gives you more depth than you need and shutter speed is becoming a problem, open up to f/5.6. Let the subject and conditions dictate your aperture, not arbitrary rules, and always verify sharpness before moving on to the next shot.
Step-by-Step: Setting Your Aperture for Different Macro Subjects
Flat Subjects and Textures (f/2.8, f/5.6)
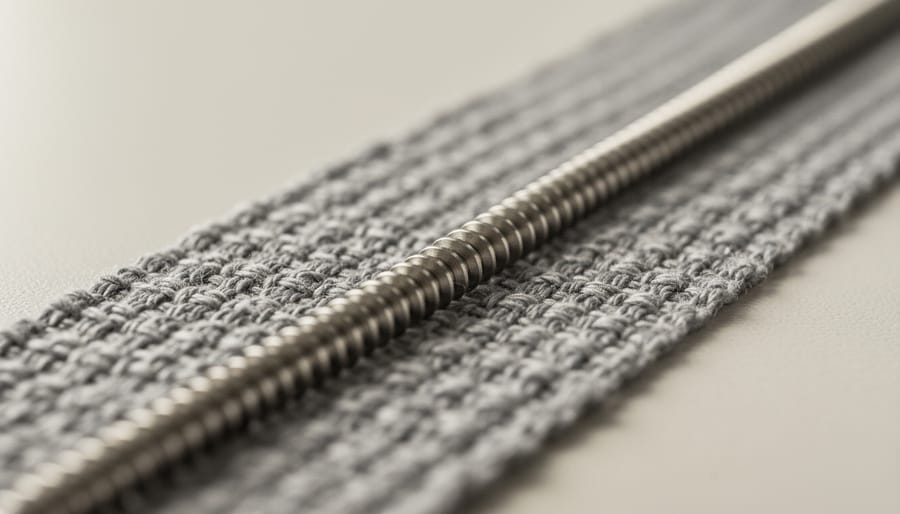
When your subject lies completely flat and parallel to your camera’s sensor, think stamps, coins, watch faces, or woven fabric, you can open up to f/2.8 through f/5.6 without sacrificing sharpness across the frame. Since there’s no significant depth to cover, you don’t need f/11’s extended DOF, which means you gain three key advantages.
First, wider apertures let in more light, allowing faster shutter speeds that freeze any residual camera shake or subject movement. Second, you’ll shoot at your lens’s sweet spot (typically f/4 to f/5.6 for most macro glass), where optical quality peaks and diffraction hasn’t yet softened details. Third, you maximize light transmission, which matters when working indoors or with subtle textures that need every photon to reveal their character.
Position your camera directly above the subject using a tripod with a reversible center column or an overhead arm. Check your composition through live view at maximum magnification to confirm the entire surface sits on the same focal plane, then shoot. You’ll capture crisp edge-to-edge detail without the needless sharpness sacrifice that f/16 would impose.
Three-Dimensional Insects and Flowers (f/8, f/11)
For living subjects like bees on lavender or a butterfly perched on a daisy, f/8 to f/11 delivers the best compromise between edge-to-edge sharpness and enough depth to capture the insect’s body or the flower’s critical features. At 1:1 magnification, f/8 gives you roughly 2-3mm of sharp focus front to back, just enough to render a bee’s head, thorax, and the nearest parts of its wings in crisp detail without pushing into diffraction territory.
Position your focus plane strategically: for a side-on butterfly, align the sensor parallel to the wing surface and place your focus point on the eye. For a bee facing the camera, focus on the nearest eye and let f/11 carry sharpness back through the antennae and into the body. If the subject moves, a faster shutter speed to freeze motion matters more than squeezing out one extra stop of DOF, f/8 with sharp focus beats f/16 with motion blur.
Shoot in aperture priority mode, monitor your shutter speed, and increase ISO before stopping down past f/11. This range handles 80% of outdoor macro scenarios where you need both detail and forgiveness.
Product Shots and Group Subjects (f/11, f/16)
When photographing multiple products in one frame or subjects with significant depth, like a cluster of berries, stacked jewelry, or a group of small components, you’ll need f/11 to f/16 to keep everything acceptably sharp. These apertures push the DOF envelope for macro work, giving you front-to-back coverage that wider settings can’t deliver.
You’re walking a tightrope here. Diffraction starts degrading sharpness noticeably past f/11 on most sensors, yet f/8 often won’t cover the depth you need. The solution is accepting slightly softer overall sharpness in exchange for complete subject coverage, or committing to focus stacking multiple shots at f/8 instead.
Watch your shutter speed at these narrow apertures. You’ll need more light, either bright ambient conditions, flash, or a rock-solid tripod setup with longer exposures. For product work, controlled lighting and a tripod are non-negotiable anyway.
If you’re consistently hitting f/16 and still lacking DOF, that’s your cue to learn focus stacking rather than stopping down further. Three shots at f/11 stacked together will outperform a single frame at f/22 every time.
Creative Bokeh and Isolation Effects (f/2.8, f/4)
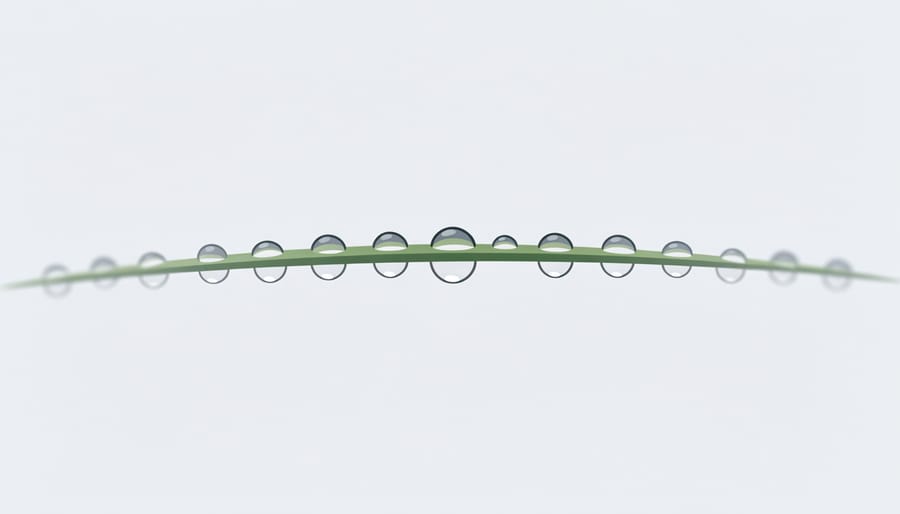
Wide apertures in macro work transform backgrounds into creamy washes of color that make your subject pop. At f/2.8 or f/4, depth of field shrinks to millimeters, turning distracting foliage into soft bokeh and isolating a single dewdrop or petal edge against an ethereal blur.
This approach works brilliantly when you want mood over documentation. Photograph a butterfly’s eye while the wing patterns dissolve into pastel streaks. Capture a single stamens tip sharp while the rest of the flower fades to abstraction. The narrow focus slice becomes a compositional tool, guiding the viewer’s eye exactly where you want it.
Position matters more at wide apertures. Shift your angle a few degrees and the focal plane slides off your subject entirely. Use live view magnification to confirm your critical point is tack sharp, then let everything else melt away. The paper-thin DOF that frustrates technical shooters becomes your creative advantage here.
Fine-Tuning: How to Verify Your Aperture Choice Is Working
Your best verification happens while you’re shooting, not later at your desk staring at a soft image. Macro work doesn’t leave much room for “fix it in post” when a millimeter of focus error can wreck an entire session.
Start with your camera’s built-in tools. Magnified live view is your first line of defense, zoom in to 10× magnification on your subject before you take the shot. Check that the plane you intended to keep sharp actually appears crisp on screen. If you’re shooting at f/11 and the flower’s center looks soft, you’ve likely hit diffraction. Open up to f/8 and check again. Focus peaking overlays colored highlights on sharp edges, making it instantly obvious whether your aperture is giving you enough DOF to cover what matters. If the peaking only covers half your insect’s face, you need to stop down or reposition.
The histogram won’t tell you about sharpness, but it’ll catch exposure shifts. Smaller apertures demand longer shutter speeds or higher ISO, which can introduce motion blur or noise that undermines your careful aperture choice. A blown highlight on a petal means your settings are fighting each other.
Chimp deliberately after every few frames. Review at 100% magnification, not the tiny back-screen preview. Look for:
- Critical focus on your intended focal point, the eye, stamen, or key detail
- DOF coverage across the subject’s depth without empty blur where you need sharpness
- Edge-to-edge sharpness within the depth of field plane
- No visible diffraction softening turning textures to mush
If any of those checks fail, adjust immediately. Move to f/8 if f/16 looks muddy. Stop down to f/11 if f/5.6 left the back half blurred. You’re testing and refining with every shot, not hoping you got it right when you’re miles from the field.
Advanced Techniques: When Standard Aperture Rules Don’t Apply
Once you’re comfortable balancing aperture against DOF and sharpness, you’ll run into scenes where no single setting delivers the results you want. That’s when advanced techniques step in to bypass the usual compromises.
Focus stacking solves the depth-of-field problem entirely. Shoot the same composition at the same aperture, say, f/8 for optimal sharpness, but shift the focus point slightly between frames. Capture a series covering your subject front to back, then merge the shots in software like Photoshop or Helicon Focus. The result combines the sharpness of a moderate aperture with the coverage of f/22, no diffraction penalty. It takes patience and a sturdy tripod, but for subjects like jewelry or intricate flowers, nothing else compares.
Aperture bracketing gives you insurance when you’re uncertain which f-stop will work best. Fire three or five shots at different apertures, f/5.6, f/8, f/11, for example, and review them later. You’ll often discover that the middle choice nailed it, but having the alternatives lets you salvage a shot when field conditions weren’t ideal.
Lighting changes everything about your aperture decisions. Off-camera flash lets you stop down to f/16 without slowing your shutter speed, freezing motion while extending DOF. Ring lights and diffusers soften shadows at wide apertures, making f/4 viable for subjects that would otherwise need f/11 for even illumination. Understanding how flash sync, power output, and modifiers interact with aperture opens creative possibilities the basic rules never address.
These methods demand practice and perfect focus techniques but they’re how professionals consistently deliver impossible-looking macro images. Start with one technique, master it, then layer in the others as your skills grow.
Common Questions About Macro Photography Aperture
You’ve learned the technical theory and step-by-step process for aperture selection, but real-world macro photography always throws up situations the textbook doesn’t cover. These questions come up repeatedly in macro photography forums and workshops, so let’s address the practical concerns that trip up most shooters.
What’s the best aperture for someone just starting macro photography?
Begin at f/8 for most subjects. It gives you enough depth of field to see what you’re capturing while avoiding the worst diffraction effects, and it forces you to learn precise focusing without the false security of f/16’s extended DOF.
Can I use aperture priority or auto modes for macro work?
Aperture priority works well once you understand which f-stop your subject needs, but full auto modes typically choose inappropriately wide apertures that leave critical parts of your subject blurred. Manual mode gives you the control macro photography demands.
How do I choose aperture when photographing insects that won’t sit still?
Accept the shallow DOF of f/5.6 or f/8 and prioritize shutter speed to freeze motion. Position yourself so the insect’s body is parallel to your sensor plane, maximizing the useful DOF across critical features like eyes and antennae.
Why are my macro shots soft even at f/11?
Either you’ve hit diffraction limits (try f/8 instead), your focus point missed the critical area by millimeters, or camera shake blurred the image. Check your tripod stability and use live view magnification to verify exact focus placement.
Does my lens’s maximum aperture matter if I’m shooting at f/8 anyway?
Yes, because wider maximum apertures give you a brighter viewfinder for manual focusing and better autofocus performance in dim conditions. An f/2.8 macro lens makes the focusing process easier even when you stop down for the shot.
Should I always use my lens’s sharpest aperture for macro work?
Not necessarily. Most lenses peak around f/5.6 to f/8, but you’ll often need f/11 or narrower for adequate depth of field despite the slight sharpness loss. The tradeoff favors DOF coverage over absolute peak sharpness in three-dimensional subjects.
The aperture challenges in macro photography feel overwhelming at first because the margin for error is so much tighter than regular photography. That f/8 sweet spot won’t work for every subject, and you’ll spend time experimenting to find what your specific lens and shooting style demand. Pay attention to what fails and why, adjust one variable at a time, and you’ll develop an intuition for aperture selection that becomes second nature. The technical limits are real, but they’re also predictable once you’ve worked through enough scenarios to recognize the patterns.
Choosing the right aperture for macro photography isn’t about memorizing a magic number, it’s a process you refine with each subject and scenario. Start with the guidelines we’ve covered, then adjust based on what you see through the viewfinder and in your results. Don’t be afraid to bracket your aperture settings while you’re learning which f-stops work best for your typical subjects.
Remember, aperture works alongside shutter speed, ISO, lighting, and focusing technique. A perfect f/8 won’t save an image if your focus point is slightly off or your subject moves mid-exposure. Treat aperture as one dial in a coordinated system, and you’ll develop an intuitive feel for when to stop down for depth versus open up for light or isolation.
The macro photographers who consistently nail their shots aren’t the ones who stick rigidly to rules, they’re the ones who understand the tradeoffs well enough to break those rules intentionally.

 By
By