By
By 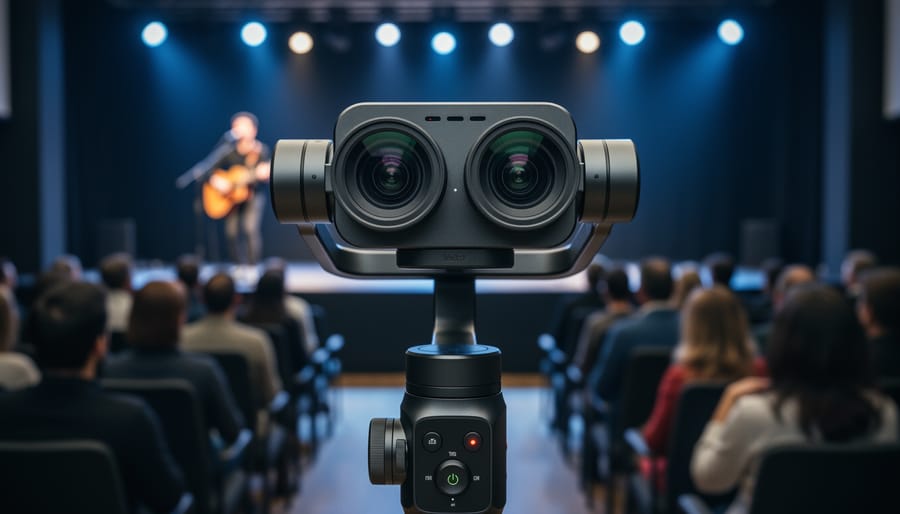
Shooting in 180-degree VR means capturing half a sphere of immersive footage, focusing the viewer’s attention forward while delivering the depth and presence of virtual reality. Unlike full 360-degree content that surrounds viewers in every direction, 180-degree VR concentrates on what’s directly in front of them, making it ideal for cinematic storytelling, interviews, live events, and any scenario where you want to guide the viewer’s gaze rather than encourage them to look everywhere at once.
The practical appeal is straightforward: smaller file sizes, simpler stitching workflows, and fewer concerns about hiding your crew or equipment behind the camera. A 180-degree VR camera typically features two or more lenses positioned on one side of the device, creating stereoscopic 3D footage that mimics how human eyes perceive depth. This stereoscopic effect is what separates true VR content from flat panoramic video, giving viewers that tangible sense of being present in the scene.
If you’ve experimented with 360 techniques you already understand the fundamentals of immersive capture. Think of 180-degree VR as a more focused cousin, trading omnidirectional freedom for compositional control and production efficiency. A concert filmmaker, for instance, can frame the stage and audience without worrying about what’s happening behind the camera rig. A travel vlogger can walk through a market, keeping viewers oriented toward the action ahead rather than spinning around to empty space.
The learning curve is manageable. You’ll need to understand interpupillary distance (the spacing between lenses that creates realistic 3D), proper camera positioning to avoid motion sickness, and how to maintain the ideal viewing zone where your subject matter lives. Most importantly, you’ll discover that shooting in 180 degrees requires thinking like a traditional filmmaker again, composing shots with intention while still delivering that immersive VR magic that makes viewers feel like they’re actually there.
What You’ll Need to Get Started
Camera Selection Considerations
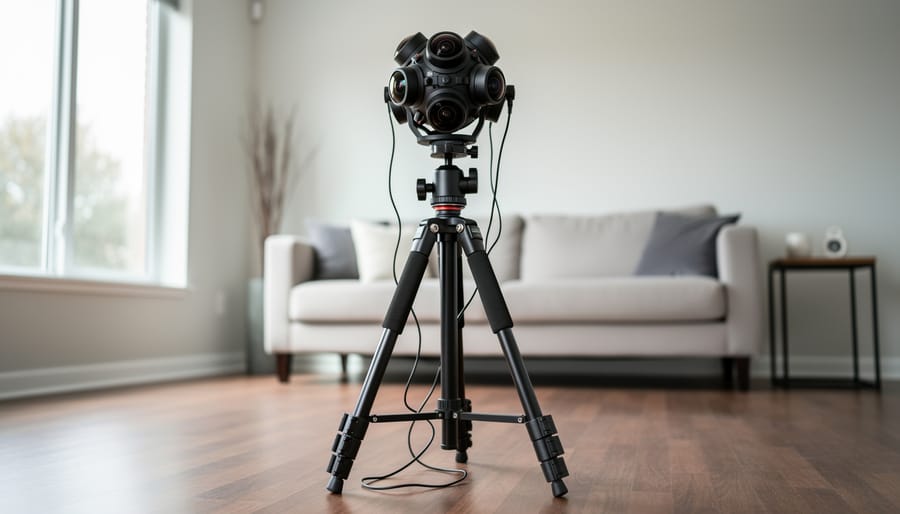
When selecting a 180-degree VR camera in 2026, prioritize three core specifications: resolution, lens optics, and stereoscopic accuracy.
Resolution determines the sharpness of your final VR experience. Look for cameras shooting at least 5.7K per eye, anything lower produces noticeable pixelation when viewed in a headset. While 4K 360 cameras have become standard in full-sphere capture, 180-degree models concentrate their resolution across half the viewing area, so you can achieve higher effective detail with comparable sensor specifications.
Lens quality matters more in VR than traditional video. Poor lenses introduce distortion at the frame edges, creating viewer discomfort. Check reviews specifically mentioning edge sharpness and chromatic aberration control.
Stereoscopic capability creates the depth perception that makes VR convincing. The camera’s interpupillary distance (IPD), the spacing between its two lenses, should closely match human eye spacing, typically 63-65mm. Cameras with adjustable or wider IPD settings offer more flexibility for different viewing distances.
Budget between $300 for entry-level consumer models and $3,000+ for professional options with raw recording and advanced stabilization. Your first camera doesn’t need every feature, but these three specifications directly impact whether viewers feel immersed or uncomfortable.
Software and Editing Tools
The software ecosystem for 180-degree VR has matured significantly, making post-production far more accessible than it was even two years ago. Most modern 180-degree cameras bundle proprietary stitching software that automatically merges your dual-lens footage, manufacturers like Insta360, Canon, and Vuze offer dedicated apps that handle the heavy lifting. These work well for straightforward projects and often include one-click stitching.
For serious editing work, you’ll need a platform that understands VR spatial properties. Adobe Premiere Pro remains the industry standard with native VR editing modes and immersive preview features. DaVinci Resolve offers robust color grading capabilities specifically for 360/180 content and costs nothing for the free version. Final Cut Pro users can add 360VR Toolbox plugins for similar functionality.
Dedicated VR editors like Skybox Studio (an After Effects plugin) excel at advanced tasks like stabilization, nadir patching, and adding graphics that respect the VR space. For spatial audio integration, Facebook 360 Spatial Workstation or the free Resonance Audio plugin lets you position sound sources within your 180-degree scene, which dramatically enhances immersion during playback.
Important Considerations Before You Shoot
Before you press record, a few essential preparations will save you from frustrating reshoots and unusable footage. VR content is unforgiving of mistakes that standard video might let you get away with, and 180-degree capture brings its own specific challenges.
Start with your camera’s physical limitations. VR cameras generate significant heat during extended recordings, especially when shooting at high resolutions. Most consumer 180-degree cameras will overheat after 15 to 25 minutes of continuous recording in warm environments. Check your camera’s thermal warnings before each shoot, keep spare batteries cool and out of direct sunlight, and plan your scenes in shorter takes rather than marathon sessions. If you’re shooting outdoors in summer, consider early morning or late afternoon to avoid both harsh light and thermal shutdowns.
Data management deserves serious attention from day one. High-resolution stereoscopic footage fills memory cards at alarming speeds, a single 10-minute 5.7K scene can consume 15 to 20 GB. Always format cards in-camera before shooting, bring at least twice the storage capacity you think you’ll need, and immediately back up footage to two separate drives after each session. One corrupted card can wipe out an entire day’s work, and VR shoots are expensive to recreate.
Scene planning for the 180-degree field of view requires spatial thinking you might not use in flat video. Position your camera at approximate eye level for the intended viewer experience, typically 150 to 165 cm for standing scenes or 110 to 120 cm for seated perspectives. Getting this wrong breaks immersion immediately. Remember that your 180-degree capture has a back, anything behind the camera doesn’t exist in the final output. Stage your action within the front hemisphere and resist the urge to let subjects move behind the camera plane, which creates jarring discontinuities. Walk your shooting location and mentally map where the viewer will “be” and what they’ll naturally want to look at within that forward-facing bubble.
Step-by-Step: Capturing Your First 180-Degree VR Scene
Setting Up Your Camera Position
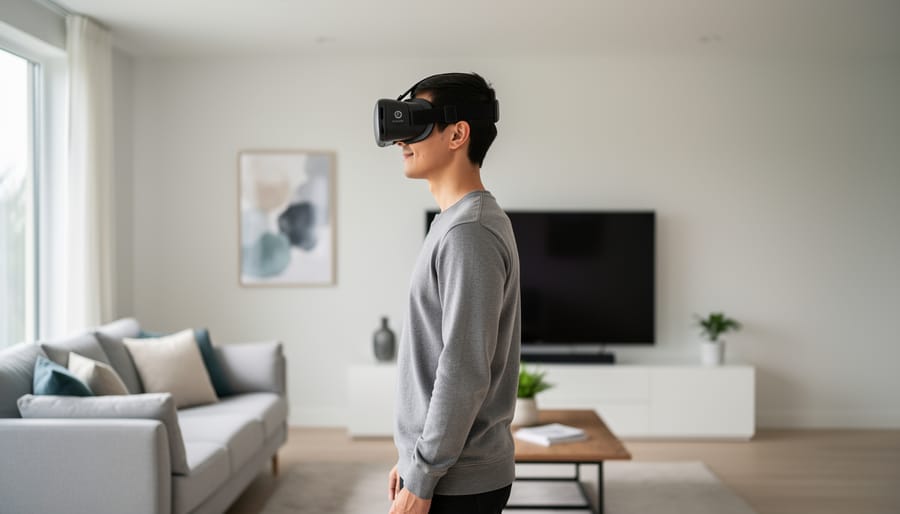
Position your camera at a consistent eye level throughout your shoot, typically 5 to 5.5 feet from the ground for standing scenes, or 3.5 to 4 feet for seated experiences. This height matches where your viewer’s eyes will be in VR, creating a natural perspective that prevents the uncomfortable “floating” or “crouching” sensation that happens when the camera height doesn’t match the viewing position.
Orient the camera so its forward-facing lenses point toward your primary action or subject. Unlike 360-degree cameras that capture everything equally, your 180-degree camera has a clear front and back. The front 180 degrees is your active viewing area, so compose your scene within this hemisphere. Leave at least two feet of space between the camera and any objects directly in front, closer placement can cause uncomfortable cross-eyed effects in the stereoscopic view.
Mark your camera’s position and the 180-degree capture zone on the floor with tape before you start shooting. This spatial awareness helps you keep crew members, equipment, and yourself out of frame. Good VR composition places your most important elements within the central 120 degrees, where viewers naturally look first, while using the outer edges for context and atmosphere rather than critical details.
Configuring Camera Settings
Start with resolution because it determines your final image quality and directly affects file size. Most modern 180-degree VR cameras shoot in 4K or higher per eye, which creates a comfortable viewing experience without visible pixelation when you’re inside the headset. Choose the highest resolution your camera offers unless you’re severely limited by storage or your computer can’t handle the editing demands. Frame rate matters more than you might expect, 30fps is the minimum for VR to avoid motion sickness, but 60fps delivers noticeably smoother motion and reduces viewer discomfort during any camera movement or action in the scene.
The stereoscopic distance, also called interpupillary distance or IPD, controls how far apart the two lenses capture the scene. This single setting determines whether your VR footage looks natural or causes eye strain. The standard human IPD averages 63mm, and most cameras default to this range, but check your camera’s documentation because some allow adjustment between 60-70mm. If your camera offers IPD control, stick with the default unless you’re deliberately creating miniature or giant-scale effects. Viewers will set your IPD correctly on their headset, but if your capture IPD differs wildly from human norms, the footage won’t feel right no matter how they adjust.
Lock your exposure mode to manual. Auto-exposure hunts for the correct brightness as you record, creating distracting flicker that’s amplified in VR. Set exposure manually by testing your brightest and darkest scene elements, then choose a middle value that holds detail in both. White balance follows the same rule, manual only, matched to your lighting conditions, because color shifts mid-recording break immersion instantly.
Recording and Monitoring
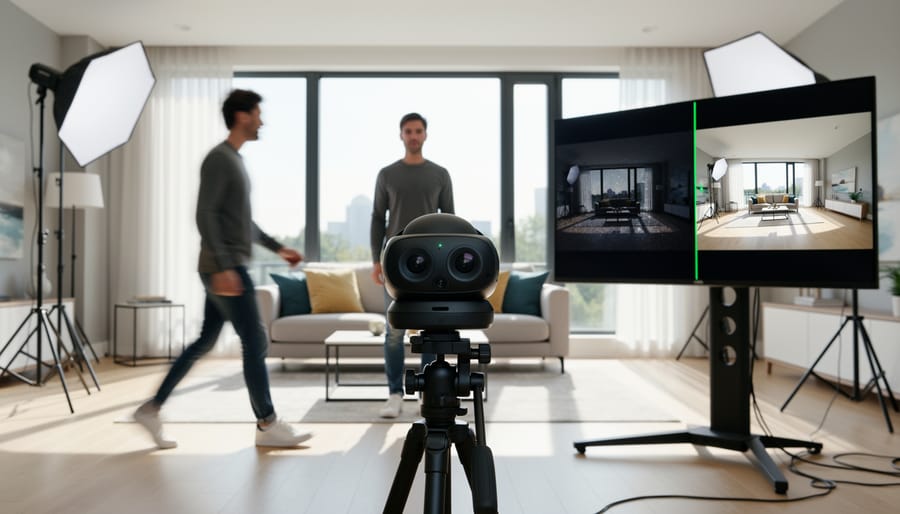
Once you’ve dialed in your settings, press record and immediately check your camera’s display or connected app to confirm both lenses are capturing. Many 180-degree VR cameras show dual feed previews, look for symmetry between the left and right views.
During recording, stay behind the camera or completely out of the 180-degree capture zone. Even a small part of your body entering the frame creates an immersion-breaking element that’s difficult to remove in post. If you must adjust something, pause recording first.
Monitor your recording time closely. Most VR cameras record at high bitrates, filling a 128GB card in 45-60 minutes at 5.7K resolution. Set a timer for your longest anticipated take and keep spare cards ready. Overheating is another real constraint, cameras often shut down after 20-30 minutes of continuous recording, so plan for natural breaks in your scene.
Watch your camera’s temperature indicator. If it starts showing warnings, stop recording and let it cool for five minutes. Forcing it to continue risks corrupted files or permanent sensor damage.
Between takes, quickly review the footage in-camera. You’re checking for obvious problems: lens flares, unexpected reflections, or exposure shifts. Detailed stereoscopic review happens later in the headset.
Post-Production Workflow
Stitching and Initial Processing
Modern 180-degree VR cameras typically handle stitching automatically during recording or through companion software, making the process much simpler than traditional 3D photography workflows. When you import your footage, most cameras like the Canon EOS VR or Insta360 EVO will produce pre-stitched files that combine both lens perspectives into a single stereoscopic video.
If your camera requires manual stitching, launch the manufacturer’s software and import your raw dual-lens files. The software analyzes overlapping areas between the left and right lenses to create a seamless stereoscopic image. This usually takes a few minutes per clip depending on resolution and length.
Check the stitch line carefully by scrubbing through your footage. Look for misaligned vertical lines, doubled objects, or visible seams running down the center. These issues often occur when subjects were too close to the camera or when movement happened during recording. Most software offers automatic correction, but complex scenes may need manual adjustment using control points to align specific features between the two views.
Once stitching looks clean, export a master file in your editing software’s preferred format before color grading or adding effects.
Exporting for VR Platforms
Getting your 180-degree VR video onto actual platforms requires more than just hitting export. Each platform has specific technical requirements, and getting them wrong means your carefully shot footage won’t display correctly in headsets.
For YouTube VR, export your video at the highest resolution your camera captured, typically 4K (3840×2160) or 5.7K (5760×2880). Use H.264 codec with a bitrate between 40-80 Mbps for 4K content. The critical step is injecting spatial metadata using Google’s Spatial Media Metadata Injector tool before upload. Select “Stereoscopic 3D (top/bottom)” and specify the projection as “Equirectangular” with a 180-degree horizontal field of view. Without this metadata, YouTube displays your VR video as flat footage.
Meta Quest devices through Quest TV or Horizon Worlds prefer H.265 (HEVC) encoding at 50-100 Mbps for better quality at smaller file sizes. Export in MP4 format with AAC audio. Most modern VR editing software includes Quest-specific presets that handle the technical specifications automatically.
For standalone VR apps or custom experiences, you’ll typically need side-by-side equirectangular projection at your camera’s native resolution. Always check each platform’s current specifications before final export, requirements update regularly as VR technology advances.
Testing and Verifying Your VR Content
The only way to truly verify your 180-degree VR content is to watch it in an actual VR headset, not on a flat screen. Load your exported file onto a Meta Quest, Pico, or PSVR2 and put the headset on. What looks fine on your computer monitor can reveal significant problems when viewed in VR, where depth perception and immersion are critical.
Start by checking stereoscopic alignment. Look at objects in the mid-ground, about six to ten feet from where the camera was positioned. Do they appear as single, solid objects with natural depth, or do you see ghosting or double images? If you’re experiencing eye strain or headaches within the first minute, your stereoscopic distance was likely set incorrectly during capture. Minor alignment issues can sometimes be fixed with offset adjustments in your editing software, but severe misalignment usually requires a reshoot.
Next, examine the stitching seams. In 180-degree cameras with dual lenses, there’s typically a vertical stitch line where the two images meet. Slowly turn your head left and right to scan the entire field of view. The seam should be invisible or nearly invisible. If you notice objects appearing to jump or warp as your gaze crosses the stitch line, check whether your stitching software offers calibration tools. Some cameras require periodic lens calibration, especially after firmware updates.
Pay attention to comfort throughout. Watch your content for at least three to five minutes straight. Does your neck feel comfortable with the camera height you chose? If you positioned the camera too low, viewers will feel like they’re crouching. Too high, and they’re unnaturally tall. The camera should have been at average seated or standing eye level, roughly 5 to 5.5 feet for seated content.
Test spatial audio sync by turning your head while dialogue or sound effects play. Audio sources should remain anchored to their visual positions. If a person speaks on your left but the audio shifts when you turn, your spatial audio wasn’t properly encoded or the metadata got stripped during export.
For motion content, watch for any judder or frame rate issues that might cause motion sickness. If you shot at 30fps, consider whether 60fps would have been smoother for the amount of movement in your scene. Low frame rates combined with camera movement are a common cause of VR discomfort.
When deciding between fixing in post versus reshooting, use this guideline: comfort and alignment issues almost always require reshooting, while color correction, minor exposure adjustments, and small stitching improvements can be handled in post-production. If watching your content makes you feel queasy or gives you a headache, don’t release it. The VR experience should feel natural and comfortable within two minutes of putting on the headset.
Next Steps and Advanced Techniques
Once you’ve successfully captured and produced your first 180-degree VR project, you’re ready to explore techniques that elevate your content from functional to compelling.
Start experimenting with controlled camera movement. Unlike static shots, adding slow dolly movements or gentle crane motions can dramatically enhance depth perception in VR. Keep movements smooth and deliberate, sudden changes cause discomfort. A motorized slider moving at half your normal video speed works well for most VR scenes. Always maintain the 180-degree forward focus; lateral movements work better than rotation.
Interactive elements transform passive viewing into engagement. Many VR platforms now support clickable hotspots within 180-degree content, letting viewers trigger additional information, jump to related scenes, or reveal hidden details. Tools like Unity and Unreal Engine allow you to add these layers, though they require learning basic spatial design principles.
Consider hybrid projects that blend 180 and 360-degree capture strategically. Shoot establishing shots in full 360 to orient viewers in the space, then switch to 180-degree for detailed, narrative-focused sequences where you control attention. This approach maximizes storytelling while managing file sizes and production complexity.
Knowing when to choose each format comes with experience. Use 180-degree for interviews, demonstrations, and any content where the subject faces the camera, the doubled resolution in your active viewing area outweighs the limited field. Reserve 360 for exploratory experiences where viewers should look anywhere.
For continued learning, explore specialized VR creator communities on Discord and Reddit, follow technical blogs from camera manufacturers, and study published VR projects on platforms like YouTube VR to see these techniques in action.
Common Questions About 180-Degree VR Cameras
What’s the main difference between 180-degree and 360-degree VR capture?
A 180-degree VR camera captures only the front hemisphere of a scene, while a 360-degree camera records everything around it. The 180-degree format reduces file sizes and post-production complexity while providing a more controlled, cinema-like viewing experience where you direct the viewer’s attention forward.
How much storage space do I need for 180-degree VR footage?
Expect roughly 5-8GB per minute of high-resolution stereoscopic 180-degree footage at 5.7K resolution. A typical 10-minute scene requires 50-80GB of raw footage, so budget at least 256GB of fast memory cards and 1-2TB of external storage for your project files and exports.
Can I convert 360-degree footage to 180-degree after shooting?
Yes, you can crop 360-degree footage to 180 degrees in post-production, essentially selecting which half of the sphere to keep. However, you can’t go the other direction, 180-degree footage cannot be expanded to full 360 since the rear hemisphere was never captured.
Will my 180-degree VR videos work on any VR headset?
Most modern VR headsets including Meta Quest, PlayStation VR2, Valve Index, and Pico support standard 180-degree stereoscopic formats. The key is exporting with proper metadata that identifies the video as 180-degree content, which tells the headset how to display it correctly.
When should I choose 180-degree over 360-degree capture?
Use 180-degree VR when you want a narrative, front-facing experience similar to traditional cinema, interviews, concerts, sports from a fixed viewpoint, or any scene where the action happens in front of the viewer. Choose 360-degree when the viewer needs to explore the entire environment freely.
Do I need special editing software for 180-degree VR footage?
While dedicated VR editing tools like Adobe Premiere Pro with VR plugins, DaVinci Resolve Studio, or Final Cut Pro X handle 180-degree footage best, you don’t always need specialized software. Many 180-degree cameras include basic stitching apps, and some cameras output pre-stitched files that work in standard video editors if you’re just doing simple cuts.
These questions come up repeatedly in online forums and camera review comments, especially from creators making their first jump into VR content. The storage concern is particularly important because newcomers often underestimate how quickly high-resolution stereoscopic footage fills drives. I’ve seen too many shoots end early because someone showed up with a single 64GB card thinking it would be enough for an afternoon.
The format conversion question matters because some creators already own 360-degree cameras and wonder if they can work in 180-degree without new gear. You can, but you’re essentially throwing away half your captured data and potentially working with lower effective resolution for the front-facing view than a dedicated 180-degree camera would provide.
Headset compatibility worries are common too, though they’re less of an issue in 2026 than they were a few years back. The industry has largely standardized around equirectangular projection formats with proper metadata flags. As long as you export correctly and test on your target platform, your content should display properly across different headsets. The bigger compatibility concern is resolution and frame rate, older or mobile-focused headsets might struggle with 8K footage, so consider your audience’s hardware when choosing export settings.


 By
By