By
By 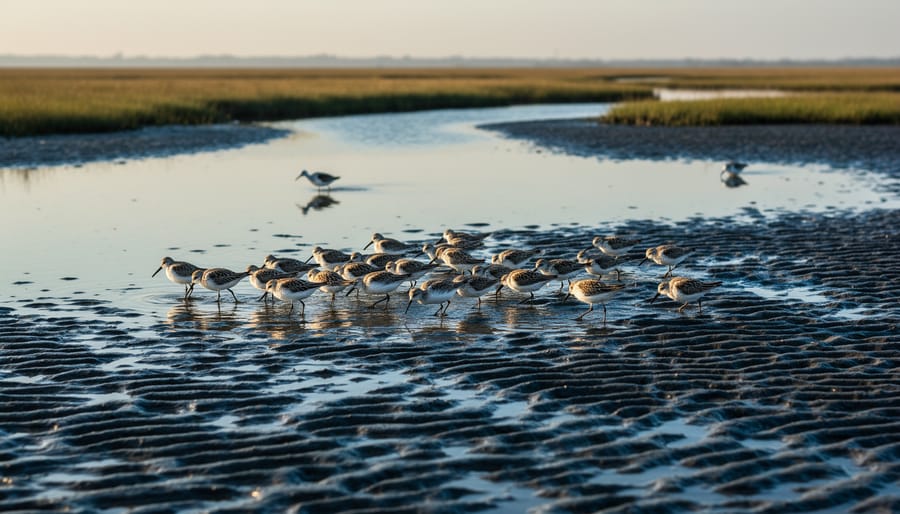
Tide Views Preserve offers photographers a rare window into coastal transformation, where twice-daily tidal cycles reshape mudflats, salt marshes, and shallow bays into dramatically different landscapes within hours. The preserve’s expansive tidal flats become a stage for shorebird activity during low tide, while high tide compresses wildlife into concentrated feeding zones and creates mirror-like reflections across flooded marshes. Timing your visit to coincide with specific tidal phases is essential: arrive two hours before low tide to catch wading birds working the retreating waterline, or schedule your shoot around golden hour during high tide when the flooded landscape takes on warm, saturated tones.
What sets this location apart is the predictable rhythm it offers. Unlike inland wildlife spots where animal behavior follows complex patterns, tidal preserves operate on a clock you can set your calendar by. The birds follow the water, the water follows the moon, and you can plan shoots weeks in advance with confidence. This reliability makes Tide Views Preserve particularly valuable for photographers building portfolio work or planning dedicated trips rather than hoping for lucky encounters.
The preserve spans several distinct zones, each responding differently to tidal movement. The northern flats expose first during outgoing tide, drawing early-feeding species. The southern marsh channels hold water longer, creating brackish pools that concentrate fish and the herons that hunt them. Understanding these micro-habitats and their tidal timing transforms a casual visit into a targeted photographic mission. You’re not just showing up to see what happens. You’re intercepting specific moments in a natural cycle that repeats with astronomical precision.
Why Tide Views Preserve Is Worth Visiting for Photographers
Tide Views Preserve stands out as a photographer’s laboratory where the ocean’s rhythm dictates an ever-shifting canvas. Unlike static landscapes, this preserve transforms every six hours, offering fundamentally different compositions depending on when you arrive. A mudflat at dawn might become a mirror-like lagoon by afternoon, then reveal intricate sand ripples and tidal channels by evening. This constant reinvention means you can return dozens of times and never shoot the same scene twice.
The tidal influence creates a predictable yet varied shooting schedule. Tidal cycles with highs and lows roughly 12.5 hours apart give photographers two distinct windows daily, each offering contrasting opportunities. High tide brings water to the marsh edges, creating reflections that double your compositional elements and soften horizons with gentle wave action. Low tide exposes geological textures, substrate patterns, and feeding zones that concentrate wildlife in predictable locations.
The preserve’s tidal ecosystem supports diverse photographic subjects throughout the year:
- Tidal pools teeming with anemones, crabs, and starfish for macro work
- Migratory shorebirds (dunlins, sandpipers, plovers) foraging on exposed flats
- Spartina marsh grasses shifting from green to golden depending on season
- Erosion patterns and sediment layers revealed in tidal channel banks
- Sunrise and sunset reflections across flooded salt marsh at high tide
- Wading birds (herons, egrets) hunting during mid-tide transitions
Accessibility adds practical value. Most shooting locations sit within a half-mile walk from parking, manageable even with a telephoto kit and tripod. The preserve’s compact size lets you scout multiple spots during a single tidal cycle, learning which areas work best at which stages. This efficiency matters when you’re working within a narrow window of optimal light and tide simultaneously.
What makes Tide Views Preserve truly valuable is how it teaches tidal thinking. Once you understand how water level affects composition, subject availability, and light interaction here, you can apply that knowledge to any coastal location worldwide.
Top Photography Spots at Tide Views Preserve
1. The Main Tidal Flats
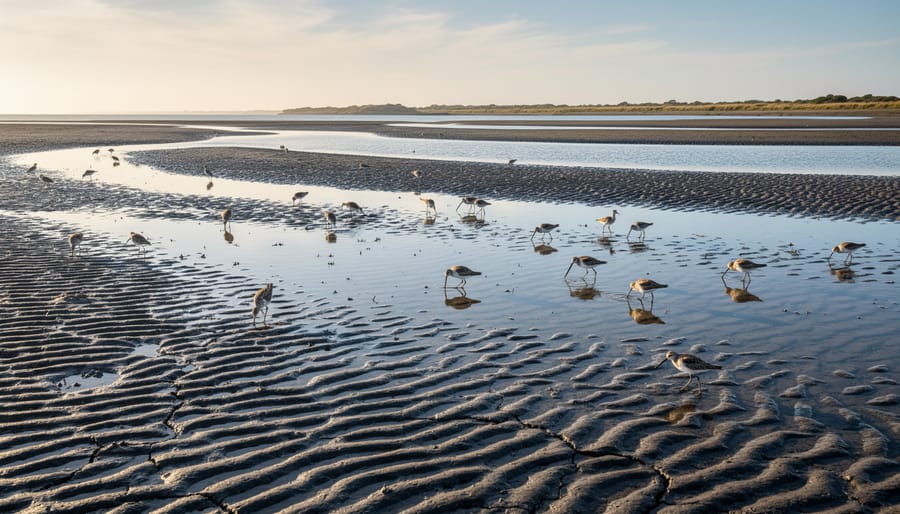
The Main Tidal Flats represent Tide Views Preserve’s signature photographic canvas, transforming completely over a six-hour cycle. At dead low tide, roughly 300 acres of mudflat stretch toward the horizon, revealing intricate patterns of tidal channels, ribbed sand formations, and scattered shell deposits that create natural leading lines and textural variety.
For texture and pattern work, shoot during the two hours following low tide. The recently exposed substrate shows the sharpest ridge patterns from receding water, with morning light raking across the flats at a low angle to maximize shadow definition. A 70-200mm lens works beautifully for isolating sections of repeating patterns, while a 24-70mm handles wider compositions that incorporate the sky and distant tree line. Position yourself near the main access boardwalk where firmer sand allows stable tripod placement.
Shorebird photography peaks during rising tide stages, roughly three to five hours after low water. As the tide advances, it concentrates foraging dunlins, sandpipers, and willets into progressively narrower feeding zones, bringing them closer to shoreline observation points. A 400mm or longer telephoto becomes essential here. The birds move constantly, so shoot at 1/1000s minimum and use continuous autofocus.
Safety matters on these flats. Walk no farther than you can cover in fifteen minutes of brisk return pace, tides rise faster than most people anticipate, and the softest mud lies in the lowest areas. The substrate transitions from firm near shore to increasingly sticky farther out. Wear knee-high rubber boots, not sneakers, and keep one eye on the waterline. Check your tide app before stepping out, and turn back when you notice water filling the smallest channels around your position.
2. The Salt Marsh Overlook
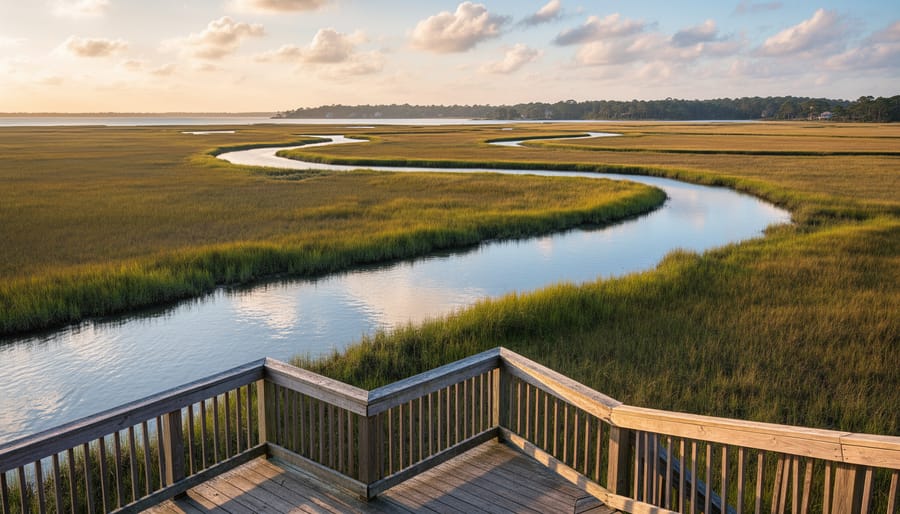
The Salt Marsh Overlook sits approximately 15 feet above the marsh floor, accessed via a short boardwalk loop that makes it one of the preserve’s most photographer-friendly locations. This elevated perspective transforms how you see the landscape, what appears as a flat expanse from ground level reveals itself as an intricate network of tidal channels, meandering creeks, and vegetated hummocks that create natural compositional layers.
Golden hour delivers the overlook’s most dramatic light. Arrive 90 minutes before sunset when the sun sits low enough to rake across the marsh horizontally, illuminating the cordgrass in warm amber tones while casting long shadows that emphasize the terrain’s subtle undulations. The tidal channels often reflect sky color with surprising intensity during this window, particularly when a rising tide fills them with clean water. Dawn works equally well, though morning light tends toward cooler tones that complement the marsh’s greens and blues.
The rising tide creates some of the overlook’s best opportunities. As water flows inland through the channel network, it establishes strong leading lines that guide viewers through your frame, one of the essential landscape photography secrets for coastal compositions. Time your visit for mid-incoming tide when channels are filling but haven’t yet flooded the marsh grass; this contrast between water and vegetation provides maximum visual interest.
For camera settings, bracket your exposures or shoot in RAW to handle the coastal light’s extreme dynamic range. A polarizing filter cuts glare from water surfaces and deepens sky saturation. Long exposures of 1-4 seconds smooth tidal flow through channels, creating a painterly effect; bring a sturdy tripod and neutral density filter for midday shooting when you want motion blur despite bright conditions.
3. The Rocky Outcrop and Tidal Pools
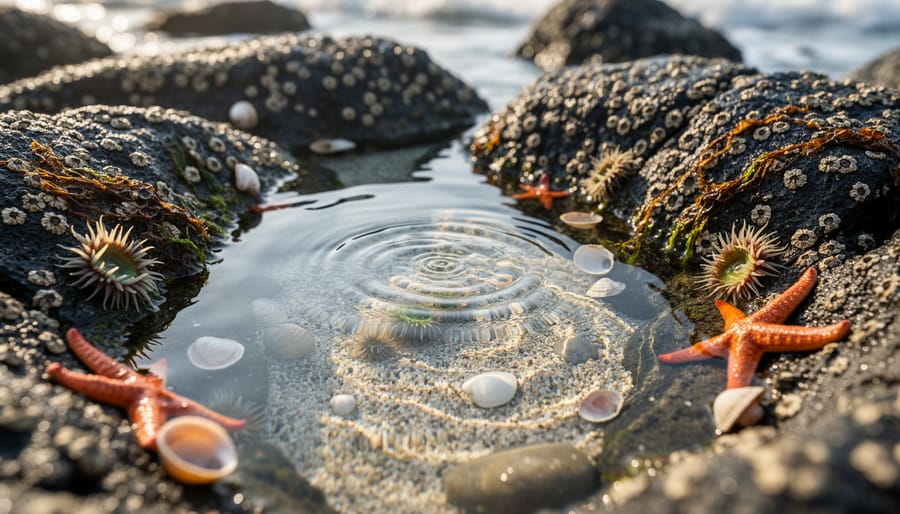
The rocky outcrop becomes your creative playground once the tide drops below the halfway mark, revealing a textured landscape of weathered granite and shallow depressions brimming with marine life. This area rewards patience and careful timing, arrive too early and waves obscure your access, too late and direct overhead light flattens the scene.
Tidal pools here offer exceptional macro subjects during the intertidal zone between tides when water is relatively still. You’ll find vibrant anemones clinging to rock walls, hermit crabs navigating miniature underwater canyons, and starfish pressed against pool floors. The clearest water occurs about two hours after high tide as suspended sediment settles. A polarizing filter cuts surface glare, revealing crisp detail beneath the waterline. Apply the macro close-up secrets you’ve learned to capture intricate textures in anemone tentacles or barnacle clusters, focus stacking works beautifully here if you bring a sturdy low-profile tripod.
As the tide climbs back toward mid-level, shift your attention to wave dynamics. Position yourself safely above the splash zone and use the jagged rocks as foreground anchors, framing the marsh beyond. Shutter speeds around 1/15 to 1/4 second render wave motion as silky veils against dark stone, while faster speeds freeze spray patterns mid-burst.
Gear protection matters in this environment. Keep a microfiber cloth accessible for lens surfaces, carry your camera in a sealed bag between compositions, and consider weather-sealed bodies if you own them. Salt spray travels farther than you expect, and a single droplet on your front element ruins an otherwise perfect frame.
4. The Estuary Mouth
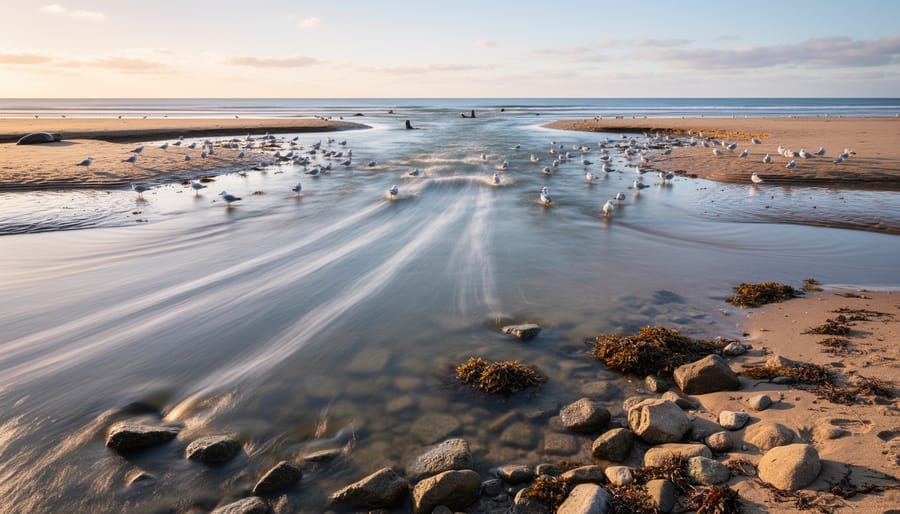
The estuary mouth offers some of the preserve’s most dynamic photography because the interaction between freshwater and tidal currents creates visible turbulence and swirling patterns in the water. At high tide, the channels run deep and wide, with strong currents that carve distinct lines through the landscape. These moving water features work beautifully for long-exposure shots, use a neutral density filter and exposures of one to four seconds to render the current as smooth, silky bands that guide the eye through the frame.
As the tide drops, extensive sandbars emerge in the middle of the estuary, fundamentally changing your composition. What was a broad expanse of water becomes a series of narrow channels threading between exposed sand, creating opportunities for aerial perspectives if you can find an elevated position nearby. The wet sand reflects sky tones during golden hour, adding a secondary light source to your compositions.
Bird activity surges during tidal transitions when the shifting water exposes or covers feeding areas. Herons, egrets, and various shorebirds concentrate here to hunt fish and invertebrates pushed by the changing water levels. The action photography tips you’ve practiced elsewhere apply here, pre-focus on likely hunting spots, use continuous autofocus, and shoot in bursts when birds dive or strike.
Plan to arrive about an hour before peak tidal change. This gives you time to scout positions and catch the wildlife activity that peaks as the tide turns. Bring a telephoto lens in the 400-600mm range for birds and a wider lens for capturing the estuary’s sweeping patterns.
5. The Coastal Forest Edge
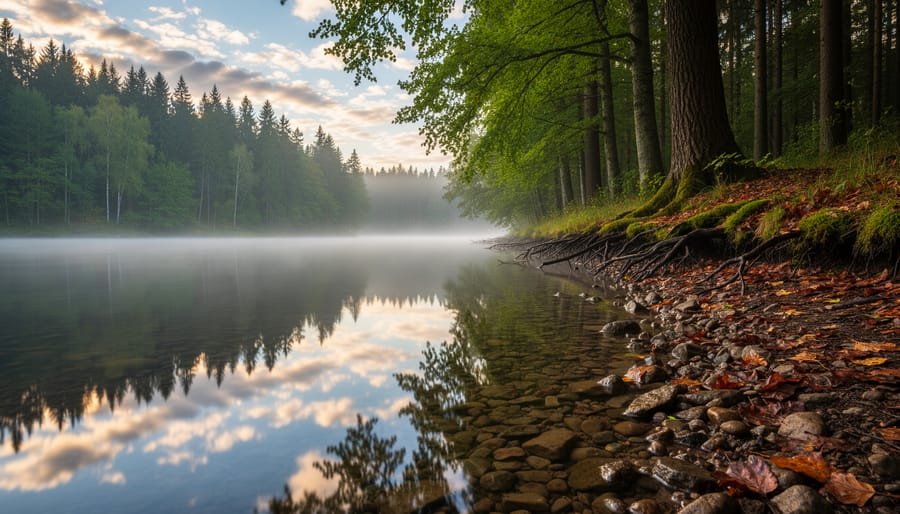
The coastal forest edge represents the preserve’s most versatile photography location, offering compelling compositions regardless of tidal stage. This transition zone where maritime forest meets salt marsh creates natural layers, dark tree trunks and canopy in the background, golden marsh grasses in the middle ground, and tidal water in the foreground when present.
During high tide, water pushes into the forest margin, transforming the scene completely. The flooded zone creates mirror-like reflections of tree trunks and overhanging branches, particularly effective in the still conditions of early morning. Position yourself to capture these reflections with the forest canopy providing natural framing. A polarizing filter helps manage glare while maintaining some reflection intensity.
The habitat diversity here attracts bird species you won’t find in the open flats. Herons and egrets hunt along the forest edge during rising tides, using trees as perches between feeding sessions. Wood ducks frequent the area during migration periods, and yellow-crowned night herons nest in the maritime forest canopy during spring and summer.
Light quality matters more here than at exposed locations. Midday sun creates harsh contrast between bright marsh and shaded forest, but this same contrast works beautifully during golden hour when warm light rakes across the marsh while forest remains in gentle shadow. Overcast conditions excel for this location, eliminating the contrast problem entirely and allowing you to shoot throughout the day.
This spot serves as your insurance policy. Missed the low tide window at the flats? The forest edge delivers at high tide. Harsh midday sun ruining coastal exposures? The partial shade here moderates contrast. Smart photographers scout this location first, knowing it offers creative possibilities when other areas don’t cooperate.
Practical Information for Visiting Tide Views Preserve
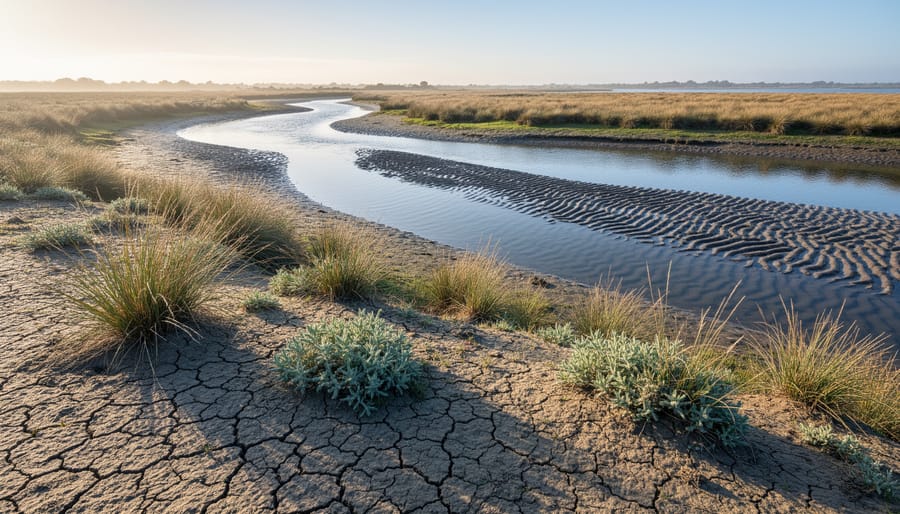
Tide Views Preserve sits along the southeastern coast approximately 12 miles north of Port Elgin, accessible via County Road 33. Turn east at the brown preserve sign onto Tidal Flats Road, which leads directly to the main parking area after half a mile of gravel surface.
The preserve maintains open access year-round, though your experience changes dramatically with seasons. Summer brings the fullest range of wildlife activity but also peak visitor numbers, while spring and fall migration periods offer exceptional bird photography with fewer crowds. Winter access remains viable, but expect limited facilities and prepare for harsher coastal conditions.
| Element | Details |
|---|---|
| Access Hours | Dawn to dusk daily, year-round |
| Parking | Free gravel lot, 25 spaces; overflow area during peak season |
| Trail Difficulty | Easy to moderate; mostly flat with some uneven coastal terrain |
| Facilities | Vault toilets at parking area; no running water (seasonal portable toilets added summer) |
| Seasonal Notes | Some marsh trails close April-June for nesting birds |
The primary trail system spans roughly two miles of interconnected paths, all starting from the main parking area. Surface conditions vary: boardwalks cross the wettest sections, while exposed areas consist of packed earth that turns muddy after rain. Photographers should note that the tidal flat access points involve walking on substrate that ranges from firm sand to softer mud depending on recent tidal exposure.
No entrance fee applies, and the preserve operates on a pack-in-pack-out waste system. Cell service proves spotty once you leave the parking area, so download tide charts and maps before arrival. The nearest services (gas, food, gear shops) sit back in Port Elgin, so fuel up and eat beforehand if planning an extended shoot.
Understanding and Planning Around Tidal Schedules
Planning your visit around tidal schedules transforms your experience at Tide Views Preserve from guesswork into precision. Start with NOAA’s tide predictions website or the preserve’s local reference station, most coastal areas have a nearby station listed with predicted high and low tides for each day. You’re looking at a roughly 12-hour cycle from high tide to high tide, which means a 6-hour window between high and low. That window is your shooting timeline.
Understanding what each tidal stage offers helps you choose when to arrive. Low tide exposes the mudflats and tidal pools (sections 3.1 and 3.3), giving you 1-2 hours of prime shooting time before water begins returning. Mid-tide, about 3 hours after high or low, activates the estuary mouth with visible current patterns and bird activity. High tide fills the salt marsh channels and brings water to the forest edge, creating the reflection opportunities discussed in sections 3.2 and 3.5. If you want multiple subjects in one visit, arrive 2 hours before low tide: you’ll catch the tail end of receding water, the low-tide exposure, and the first hour of incoming tide.
For reliable predictions, download apps like Tide Alert, Windy, or Tides Near Me, which show hourly water levels and send notifications before significant changes. These tools work like night photography tips that help you plan around golden hour: you’re working with natural cycles that won’t wait. Build in 30-45 minutes of buffer time after your target tide stage, since the best light often coincides with transitional water levels. Check your chosen date a week ahead, note the exact high and low times, then add your preferred shooting window to those benchmarks. A low tide at 7:00 AM means you should be setup by 6:30 AM, ready as textures emerge and birds arrive to forage.
Local Tips for Photographing Tide Views Preserve
Spring and fall migrations bring peak opportunities at Tide Views Preserve, with April through May offering shorebird diversity during northward movement and August through October delivering southbound concentrations plus juvenile plumage variations. Nesting season from late May through July provides breeding behavior photography but requires extra distance and caution around sensitive areas. Winter months see reduced crowds and stark, minimalist landscapes, though fewer species and harsh conditions demand resilience.
Weather considerations extend beyond tide timing. Overcast skies work beautifully for tidal pool macro work by eliminating harsh reflections, while fog rolling in from the ocean creates atmospheric estuary shots but challenges autofocus systems. Wind patterns shift with tidal flow, incoming tides often bring onshore breezes that kick up spray near rocky areas, making weather sealing essential. Early morning shoots typically offer calmer conditions before afternoon sea breezes develop.
Weekday mornings see the fewest visitors, particularly outside summer months. Most casual visitors arrive mid-morning and leave by mid-afternoon, so early and late tidal windows often provide solitude regardless of the stage. Local birdwatchers concentrate at the estuary mouth during peak migration, so alternative spots like the salt marsh overlook offer quieter photography during busy periods.
Gear adapted to coastal environments makes sessions more productive:
– Tall waterproof boots for crossing mudflats and shallow channels
– Microfiber lens cloths in waterproof bags for salt spray removal
– Tripod with rubber or spiked feet that grip on wet sand and mud
– Spare batteries, as cold coastal air drains power faster
– Polarizing filter to cut water glare and enhance sky contrast
– Sturdy travel photo accessories bag with weather protection
Telephotos in the 100-400mm range handle most wildlife and landscape compression needs, while a wide angle captures expansive mudflat patterns. Weather-sealed bodies and lenses withstand mist and occasional spray far better than unprotected gear.
Respect wildlife buffer zones marked by preserve signs, keep at least 50 feet from feeding birds, and never chase subjects for closer shots. Scout locations during an inconvenient tide, noting compositions and light angles, then return during optimal conditions with a clear shooting plan already established.
Common Questions About Photographing Tide Views Preserve
Photographers visiting Tide Views Preserve for the first time often have similar questions about logistics, timing, and regulations. Here are answers to the most common queries that’ll help you plan a successful shoot and avoid preventable mistakes.
What time of day works best with tidal patterns?
The golden hours around sunrise and sunset offer the best light regardless of tide, but you’ll get the most dramatic compositions when these overlap with rising or falling tides. Check tide tables a week ahead and plan your visit when low tide occurs 1-2 hours after sunrise or before sunset for optimal conditions.
Do I need special permits for commercial photography?
Personal and editorial photography requires no permit, but commercial shoots involving models, props, or assistant crews typically need advance permission from the preserve management. Contact the administration office at least two weeks before your planned shoot date.
How close can I get to wildlife?
Maintain at least 25 feet from shorebirds and 50 feet from nesting areas, which are marked seasonally. If birds flush or alter their behavior, you’re too close, back up and use a longer lens instead.
What’s the best tide stage for beginners?
Start with the incoming tide about two hours after low water. You’ll see the landscape transform in real time, the light on wet surfaces improves continuously, and you have a clear exit timeline before paths become submerged.
Can I visit during all seasons?
The preserve stays open year-round, though winter storms occasionally close access roads for 24-48 hours. Spring and fall offer peak bird activity, summer brings the most stable weather, and winter provides dramatic skies with fewer visitors.
Are drones allowed?
Drone use is prohibited within preserve boundaries to protect nesting birds and maintain the experience for other visitors. Violators face fines and potential equipment confiscation.
If you miss your planned tide window, the coastal forest edge and salt marsh overlook remain productive at any tidal stage. These elevated positions offer strong compositions regardless of water levels, making them reliable backup options when timing doesn’t work out. You can also use an off-tide visit to scout locations and plan camera positions for your next attempt when conditions align better.
Tide Views Preserve demonstrates why the best coastal photography happens when you sync your schedule with the ocean’s rhythm, not just the sun’s position. The preserve transforms every six hours, offering mudflat textures at low tide, mirror-like marsh reflections at high tide, and concentrated wildlife activity during the transitions between. No two visits look identical, yet the tidal patterns make each transformation predictable enough to plan around.
Your success here hinges on three steps: check the tide chart before you leave home, arrive an hour before your target tidal stage, and scout one cycle to shoot the next. This approach works at Tide Views and translates to any tidal location, estuaries, coastal wetlands, rocky shores, where water movement dictates what you’ll see through the viewfinder.
The preserve rewards photographers who treat tides as creative partners rather than obstacles. You’ll capture compositions that landlocked locations simply can’t offer, and you’ll develop an intuition for reading coastal environments that elevates your work across all shoreline subjects. Pack your gear with tidal realities in mind, respect the wildlife that depends on these rhythms, and give yourself permission to work on nature’s schedule rather than your own.





 By
By