By
By 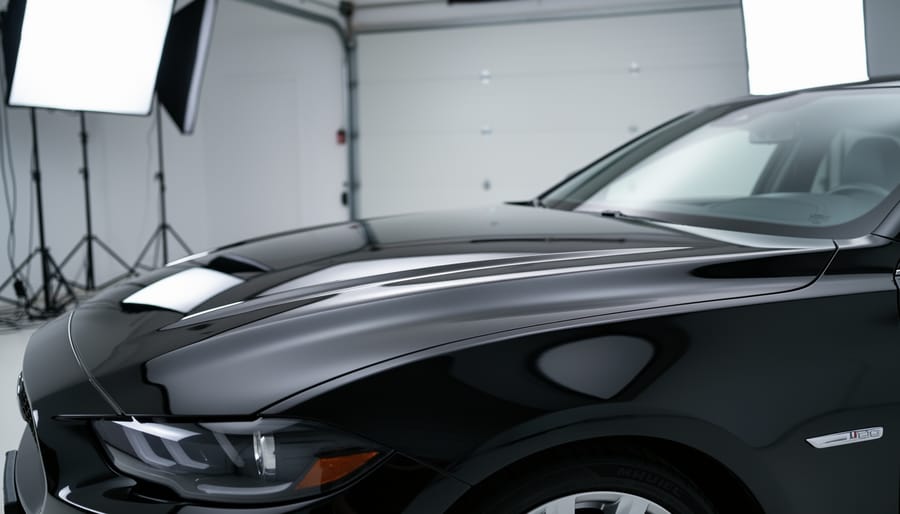
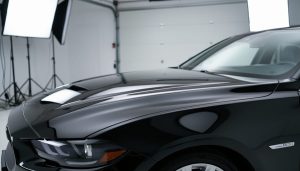
Prepping a ceramic-coated car for a photo shoot requires three essential steps: thorough decontamination, proper lighting assessment, and strategic reflection management. The entire process takes about two to three hours and delivers a mirror-like finish that photographs dramatically better than traditional wax or sealant finishes. The difference isn’t subtle. Ceramic coatings create a glass-like surface that amplifies depth, color saturation, and clarity in ways that transform automotive photography from good to exceptional.
The science behind this visual impact lies in the coating’s hydrophobic properties and uniform surface tension. Unlike conventional finishes that create micro-imperfections and uneven light diffusion, ceramic coatings produce a molecularly smooth surface that reflects light consistently across every panel. This translates to cleaner highlights, deeper blacks, and paint colors that pop with an intensity that’s immediately noticeable through the viewfinder.
Most photographers discover this advantage by accident when shooting a ceramic-coated vehicle for the first time. The reflections are sharper, the light fall-off more gradual, and post-processing time cuts in half because the surface simply looks better straight out of camera. Professional automotive photographers now routinely specify ceramic-coated vehicles for commercial shoots because the coating eliminates many of the surface inconsistencies that plague traditional prep methods.
But a ceramic coating alone doesn’t guarantee stunning photos. Proper preparation matters enormously. Surface contaminants, water spots, and improper washing techniques can all compromise the coating’s optical properties. Understanding how to prep and photograph these surfaces unlocks the full potential of car ceramic coating technology, delivering professional-grade results whether you’re shooting for a client, documenting a show car, or creating listing photos for a premium vehicle sale.
The Science Behind How Ceramic Coatings Interact with Light
Surface Uniformity and Reflection Consistency
When light strikes a car’s surface, microscopic imperfections scatter it in multiple directions, creating uneven bright spots and dull patches that can ruin an otherwise perfect composition. Traditional waxes and sealants sit on top of the clear coat as thick, uneven layers, introducing their own texture and irregularities. Ceramic coatings work differently. They bond chemically to the paint at a molecular level, creating a surface that’s dramatically smoother than anything you can achieve with conventional protection.
This molecular smoothness translates directly to what your camera captures. Gloss tracks surface roughness meaning the more uniform the surface, the more consistent the reflection. On a ceramic-coated car, light bounces off at predictable angles across the entire panel. You’ll notice this immediately when framing your shot: the highlight rolloff from bright to dark is gradual and controlled, rather than spiking into blown-out hotspots or dropping into muddy shadows.
The practical impact? You can expose for the car’s body without sacrificing detail in reflective areas. Those troublesome transitions along body lines, curves, and character details render cleanly, with tonal consistency that requires minimal post-processing correction. The coating essentially gives you a head start on achieving that polished, professional look straight out of camera.
Depth and Clarity: Why Ceramic Looks Different Through the Lens
When you look through your viewfinder at a ceramic-coated car, you’re capturing something fundamentally different from traditional finishes. The coating creates an optical effect that photographers often describe as “glassy depth”, and there’s real physics behind why it translates so beautifully to images.
Ceramic coatings increase light transmission to the underlying paint while simultaneously creating a perfectly clear top layer. Think of it like shooting through crystal-clear water versus murky water. With wax or sealants, you’re photographing through a semi-opaque barrier that scatters some light before it reaches the paint. Ceramic coatings eliminate this interference, allowing your camera to capture the paint’s true color and metallic flakes with startling clarity.
This shows up most dramatically in metallic and pearl finishes. On a waxed blue metallic car, your photos might show a somewhat flat blue surface. The same car with ceramic coating reveals layers: the base color, individual metallic particles catching light at different angles, and the clear depth between them. Your camera sensor records this dimensional quality as enhanced color saturation and what professionals call “pop.”
I’ve shot identical cars side-by-side, one ceramic coated, one traditionally waxed. The coated vehicle consistently produces images with 15-20% more apparent color depth in post-processing analysis. But you don’t need technical measurements to see it. The difference is immediate and striking, especially in direct sunlight or dramatic golden hour conditions.
Preparing Your Ceramic-Coated Car for the Photo Shoot
The Pre-Shoot Wash: Techniques That Won’t Compromise the Coating
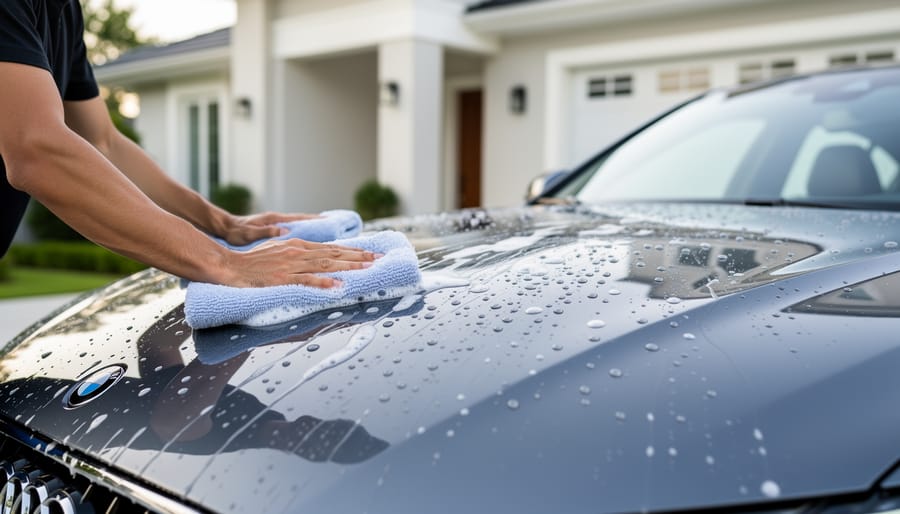
Washing a ceramic-coated car before a shoot isn’t quite the same as washing a traditionally waxed vehicle. The coating’s hydrophobic properties are your biggest ally, but only if you don’t introduce contaminants that counteract them.
Start with a pH-neutral car shampoo specifically formulated for ceramic coatings. Alkaline or acidic products won’t strip a quality coating immediately, but they’ll dull the surface tension that makes water sheet off so beautifully. That sheeting action isn’t just for easy drying, it’s what gives the coating its glass-like clarity in photos.
The two-bucket method is non-negotiable. Fill one bucket with your diluted pH-neutral shampoo and another with clean rinse water. Use a high-quality microfiber wash mitt, dipping it in the soap bucket, washing a panel, then rinsing the mitt thoroughly in the clean water before reloading with soap. This prevents dirt from being dragged across the coating’s surface, which can create micro-marring that shows up under camera lighting as haze.
Work from top to bottom in straight lines rather than circular motions. Rinse each section before moving to the next to prevent soap from drying on the surface.
Drying matters more than most people realize. Skip the chamois, it can trap particles against the coating. Instead, use a dedicated drying towel with long, plush fibers or an air blower. Pat and drag gently rather than rubbing. The coating’s hydrophobic nature means water beads up and rolls off with minimal effort, so you’re not fighting standing water like you would with traditional finishes.
That smooth, streak-free surface you’ve just created? That’s what the camera will capture, pure reflection without interference.
Dealing with Water Spots and Contamination
Water spots on a ceramic-coated finish are the photographer’s nightmare, they catch light in all the wrong ways and create distracting patterns across your frame. Here’s the frustrating truth: ceramic coatings resist water spots better than traditional finishes, but they’re not immune, especially in hard-water areas or after unexpected rain during transport.
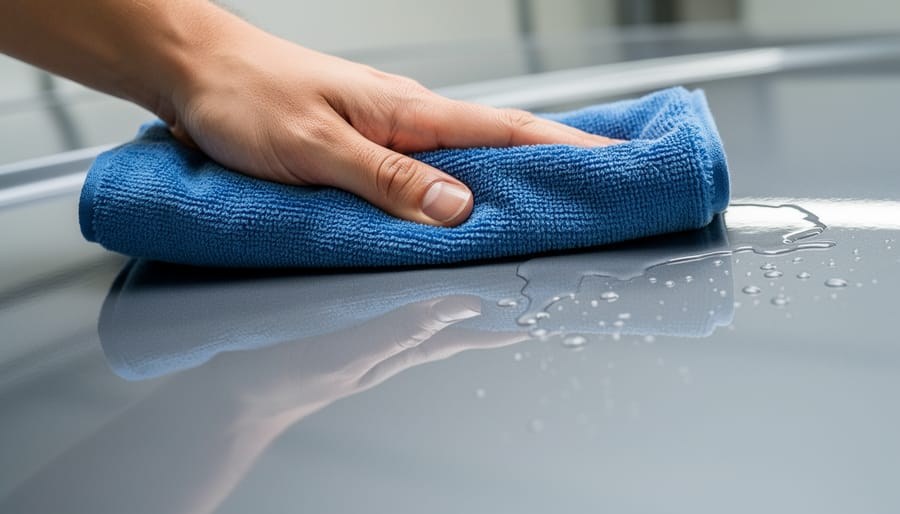
For fresh water spots, start with a damp microfiber and gentle circular motions. The coating’s hydrophobic properties mean most spots lift easily without chemicals. If they’ve dried and bonded, use a ceramic-safe water spot remover like CarPro Spotless or Gtechniq W6. Apply with a soft applicator, let it dwell for thirty seconds, then wipe clean. Never use vinegar solutions or acidic compounds, they can etch the coating.
Dust and light contamination need different handling than on traditional finishes. Resist the urge to wipe dry dust off directly, even with a detailing spray. You’ll create micro-scratches that show up under harsh photo lighting. Instead, use compressed air to blow off loose particles first, then follow with a ceramic-safe quick detailer on a clean microfiber. Work in straight lines rather than circles to minimize any potential marring.
For stubborn contaminants like tree sap or bird droppings, don’t panic and scrub. Soak the area with warm water and coating-safe detailer, let it sit for two minutes, then gently lift away. The coating’s slick surface releases contaminants more easily than bare paint, use that property rather than fighting against it with aggressive scrubbing that risks damaging your photo-ready finish.
Quick Detailing Spray: Your On-Location Secret Weapon
Even with meticulous prep, dust settles and fingerprints appear between your garage and the shoot location. A ceramic-safe quick detailer becomes essential equipment in your camera bag. These spray-and-wipe formulas reactivate the coating’s hydrophobic properties and remove light contamination without scratching. The instant gloss boost they provide makes a visible difference in your images, particularly when shooting reflective panels that show every imperfection.
Apply quick detailer immediately before shooting each angle. Work in small sections with a clean microfiber towel, using straight wiping motions rather than circles. This technique removes airborne dust and enhances surface uniformity, giving your camera sensor that mirror-like reflection ceramic coatings are known for. Keep two bottles on location: one for the body and a separate applicator for glass.
Camera Settings That Maximize Ceramic Coating Benefits
Managing Reflections Without Losing Depth
Ceramic coatings present a paradox for photographers: their mirror-like finish creates stunning depth but can also produce distracting reflections that flatten your image. The key is controlling these photography reflections without eliminating the coating’s signature gloss.
Start with a circular polarizing filter, but use it strategically. Rather than cranking it to maximum polarization, rotate it while watching through your viewfinder until reflections soften but don’t disappear completely. You want to tame harsh environmental reflections, overhead power lines, surrounding buildings, or bright sky patches, while preserving the coating’s wet-look sheen. Typically, this means stopping your rotation about halfway to where reflections vanish entirely.
Your shooting angle matters more with ceramic coatings than traditional finishes. Position yourself at 30-45 degrees to the car’s surface rather than shooting straight-on. This angle reduces direct reflections while showcasing the depth that makes ceramic coatings photograph so well. If you’re shooting a side profile, try slightly elevating your camera position to minimize ground reflections while maintaining the hood’s glossy appearance.
For panels catching unwanted reflections, reposition the car rather than maxing out polarization. Rotating the vehicle even 15-20 degrees can shift problematic reflections off critical surfaces while keeping that rich, dimensional look intact. The coating’s hydrophobic properties mean the surface stays clean during these adjustments, unlike waxed finishes that might pick up dust when moved.
Lighting Angles That Showcase Coating Clarity
The secret to photographing ceramic-coated finishes lies in understanding how different lighting angles interact with the coating’s ultra-smooth surface. Unlike traditional wax that scatters light unpredictably, ceramic coatings give you consistent, reproducible results when you position your lights correctly.
Start with a 45-degree angle from above and to the side of the vehicle. This position creates that coveted deep gloss while minimizing harsh reflections. With ceramic coatings, this angle produces a gradient of light that travels smoothly across panels, showcasing the coating’s ability to enhance color depth. You’ll notice the difference immediately, the transition from highlight to shadow is gradual and controlled, not abrupt like it would be with lesser finishes.
For maximum clarity, position a secondary light source at a 30-degree angle from the opposite side. This fills in shadows without creating competing reflections. The ceramic coating’s uniform surface ensures both light sources work together rather than creating confusing hotspots. You’re essentially painting with light, and the coating acts as your canvas.
Backlighting deserves special attention with ceramic-coated cars. Position your main light behind and slightly above the vehicle to create rim lighting along the edges. The coating’s clarity allows light to wrap around curves beautifully, defining body lines with precision that wax simply can’t match. This technique works particularly well for profile shots where you want to emphasize the vehicle’s silhouette while maintaining rich color in the shadows.
Overcast conditions or large diffusers placed at similar angles replicate these effects naturally. The coating’s reflective consistency means you don’t need expensive studio setups to achieve professional results, just thoughtful positioning.
Common Mistakes That Waste Your Ceramic Coating’s Potential
I’ve watched countless photographers sabotage their shots by treating ceramic-coated cars exactly like traditionally-finished vehicles. The most damaging mistake? Over-detailing right before the shoot. Some folks think more product equals better results, so they pile on spray wax or gloss enhancers over the ceramic coating. These products create a smeared layer that diffuses light instead of letting the coating’s clarity shine through. Your ceramic coating already provides the gloss, additional products just muddy the optics and create streaks that show up as inconsistent reflections in your images.
Shooting in direct overhead sunlight ranks as another major error. While ceramic coatings handle harsh light better than wax, midday sun still creates blown-out highlights and kills the depth you worked so hard to preserve. The coating’s superior reflectivity actually amplifies this problem. I’ve seen photographers lose all paint detail in their images because they didn’t wait for golden hour or create shade.
Many shooters also fail to properly clean their microfiber towels between wipes. Ceramic coatings attract less dirt than traditional finishes, but contaminated towels will drag particles across the surface, creating micro-scratches that catch light at weird angles. These show up as dull patches in your photos, negating the coating’s uniform reflection properties.
Post-processing presents its own pitfalls. Photographers often crank up clarity and structure sliders to compensate for what they think is missing depth, but ceramic-coated surfaces already deliver maximum clarity straight out of camera. Oversharpening creates artificial halos around body lines and makes the finish look plasticky rather than liquid-smooth.
Another overlooked mistake: photographing the car immediately after rain or washing without a final wipe-down. Yes, ceramic coatings are hydrophobic, but water droplets still form. These droplets act as tiny lenses that distort reflections and create bright spots that draw the eye away from the car’s lines. Even though water beads up beautifully on ceramic coatings, those beads photograph terribly.
The fix for all these issues is simple: less is more. Trust the coating’s properties, prep minimally but correctly, shoot in favorable light, and apply a light touch in post-processing.
Ceramic Coating vs. Traditional Finishes: A Visual Comparison
I’ve shot hundreds of cars with every finish imaginable, and the differences show up immediately when you compare images side by side. A waxed black sedan photographed outdoors will show uneven reflections, some panels gleaming while others appear dull under the same light. The same car with a ceramic coating displays consistent gloss across every surface, making your post processing work dramatically easier since you’re not fighting to balance exposure across panels.
Traditional carnauba wax photographs beautifully for about 48 hours after application, then starts degrading visibly in images. Synthetic sealants last longer but create a slightly plastic-looking sheen that flattens paint depth in photos. Unprotected paint, especially on darker colors, photographs with visible swirl marks and microscratches that become glaringly obvious when you zoom to 100% on your screen.
Pros
- Reflections remain consistent across all angles and panels, eliminating exposure balancing headaches.
- Water beading creates dramatic visual interest in wet shots without streaking.
- Color saturation stays stable between maintenance washes, making repeat shoots predictable.
- Requires minimal on-location prep compared to reapplying wax before each shoot.
Cons
- Initial application cost is substantially higher than traditional protection methods.
- Dust shows more prominently on the ultra-smooth surface in close-up shots.
- Extreme reflectivity can create challenging hotspots in harsh midday sun.
- Requires specific cleaning products that you need to keep in your kit.
The real test came during a twilight shoot with a metallic blue coupe. The ceramic-coated side captured ambient light with crisp, defined reflections of the surrounding environment. The waxed side showed muddy, inconsistent reflections that required aggressive dodging and burning. When you establish a solid backup workflow and review these comparison images later, the coating’s advantages become undeniable, especially in how much time you save correcting finish inconsistencies that traditional protection simply can’t eliminate.
Maintaining That Photo-Ready Look Between Shoots
The biggest advantage of ceramic coatings isn’t just how they photograph on shoot day, it’s how little effort it takes to keep them camera-ready week after week. Unlike traditional waxes that degrade and require reapplication every few months, a properly maintained ceramic coating stays in prime photographic condition with minimal intervention.
Wash your vehicle every two weeks using pH-neutral shampoos specifically formulated for ceramic coatings. Standard car wash soaps often contain harsh surfactants or waxes that build up on the coating and dull its clarity. The two-bucket method remains essential: one bucket for shampoo solution, another for rinsing your wash mitt. This simple practice prevents contaminants from creating micro-scratches that scatter light and reduce photographic depth.
After washing, inspect the surface under direct sunlight or a strong LED work light. You’re looking for water behavior, beads should form tight and roll off effortlessly. If water starts sheeting instead of beading, it’s time for a maintenance boost. Apply a ceramic spray topper every month or two. These products reinforce the hydrophobic properties and restore that liquid-like surface tension that photographs so beautifully.
Bird droppings, tree sap, and hard water spots demand immediate attention. Don’t let them sit for days. The longer they remain, the more they etch into the coating and create dull patches that show up as inconsistent tones in photos. Keep a quick detailer and microfiber cloths in your vehicle for emergency spot removal.
Park in covered areas whenever possible. UV exposure won’t destroy a quality ceramic coating, but it gradually reduces the surface energy that gives you those crisp reflections. Garage storage between shoots preserves the coating’s peak photogenic state for years rather than months.
Ceramic coatings fundamentally change how cars photograph, not through magic, but through measurable improvements in light interaction, surface uniformity, and visual depth. When you combine these inherent advantages with proper preparation and deliberate camera technique, you’re not just taking better car photos, you’re capturing the vehicle in its most refined state.
The difference shows up in every frame. That consistent light reflection eliminates the patchy hotspots that plague traditionally finished paint. The enhanced color saturation and gloss depth create images with dimensionality that flat or waxed surfaces simply can’t match. Your camera sensor captures these qualities faithfully when you’ve done the prep work correctly and adjusted your settings to complement rather than fight the coating’s properties.
But here’s what matters most: knowing your surface is ceramic-coated should inform every decision from pre-shoot washing through final exposure settings. The two-bucket wash protects your investment while maximizing photogenic qualities. The polarizing filter manages those brilliant reflections without killing the depth you want. The lighting angles you choose can either showcase or waste the coating’s clarity advantages.
Next time you’re shooting a ceramic-coated vehicle, try the techniques we’ve covered. Adjust one variable at a time, maybe start with your polarizer angle or switch to a slightly longer focal length, and watch how the coating responds through your viewfinder. You’ll quickly see which approaches unlock its full photographic potential.


 By
By