By
By 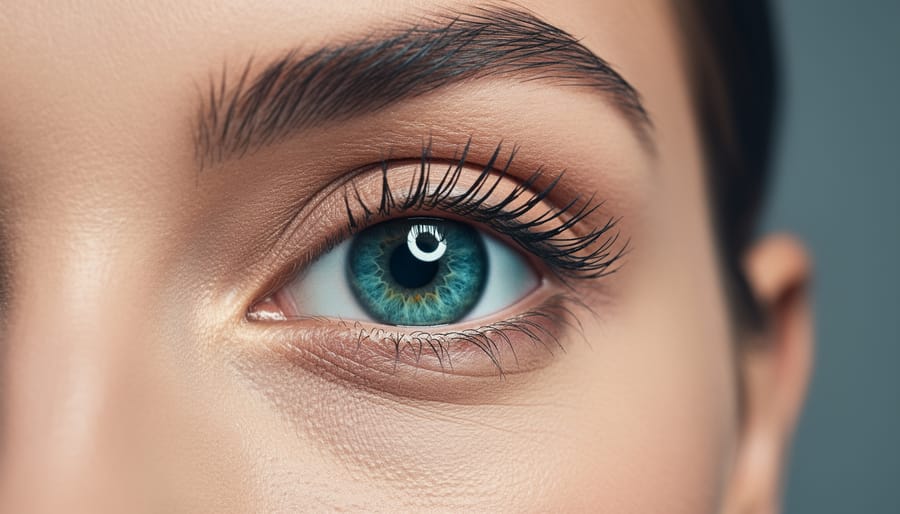
Human macro photography means capturing extreme close-ups of eyes, skin, lips, and other features at magnifications of 1:1 or greater, revealing textures and details invisible to the naked eye. Unlike photographing static flowers or insects, you’re working with a living subject who blinks, breathes, and needs to stay comfortable while you position a lens just inches from their face. The technique demands specialized macro lenses (typically 90mm to 180mm), precise manual focus, careful lighting to avoid harsh shadows or discomfort, and constant communication to keep your subject relaxed.
The challenge is twofold: technical precision and human connection. At macro magnifications, even the slightest movement throws focus off completely, yet you can’t ask someone to hold their breath indefinitely or keep their eye frozen open. You’ll need to master focus stacking for depth of field, use continuous LED lights rather than jarring flashes, and position your camera on a sturdy tripod or focus rail to minimize shake. Safety becomes paramount when working so close to delicate areas like eyes, requiring impeccable hygiene, non-toxic materials, and clear consent protocols.
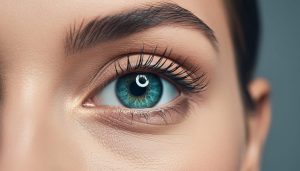
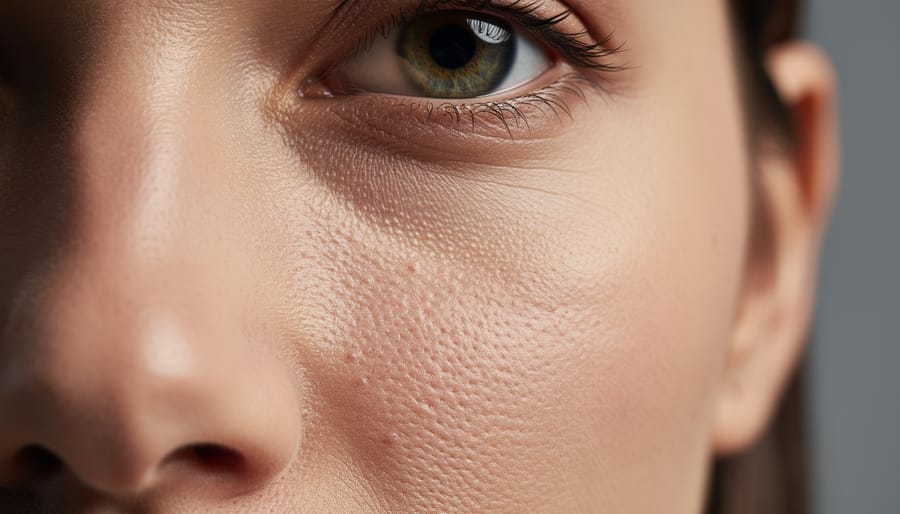
What makes human macro photography compelling is the same thing that makes it difficult: you’re revealing intricate details of someone’s most personal features. The iris becomes a galaxy of color and pattern. Skin shows a landscape of pores and fine lines. These images can be striking or unsettling, beautiful or clinical, depending entirely on your approach, lighting choices, and relationship with your subject.
This guide walks through the specific equipment, safety measures, shooting workflow, and quality checks that separate successful human macro work from blurry, uncomfortable experiments.
What Makes Human Macro Photography Different
Working with human subjects at macro magnifications introduces challenges you’ll never face photographing flowers or jewelry. Your subject breathes, blinks, and experiences micro-movements from their pulse, factors that become enormously amplified when you’re working at 1:1 magnification or greater. A barely perceptible tremor in someone’s hand translates to significant motion blur when you’re photographing the ridges of their fingerprint.
Subject comfort becomes a critical technical consideration, not just a courtesy. When your lens sits inches from someone’s eye to capture iris details, they’re naturally uncomfortable, which increases tension and involuntary movement. Bright continuous lighting, often necessary for focusing precision, can cause watering, squinting, or reflexive blinking. You’ll need to work quickly while maintaining a reassuring presence, balancing technical demands against your subject’s tolerance for the session.
The ethical dimension also sets human macro work apart. Photographing someone’s pores, wrinkles, or imperfections at extreme magnification reveals intimate details they may feel vulnerable sharing. You must establish clear consent and respect boundaries before the session, discussing exactly what features you’ll photograph and how images will be used. Unlike landscape or product macro photography, where you control every variable, human subjects introduce unpredictability that demands adaptive problem-solving. You’ll adjust your approach based on each person’s comfort level, skin type, lighting sensitivity, and ability to remain still, factors that make this discipline as much about interpersonal skill as technical expertise.
Essential Gear for Human Macro Photography
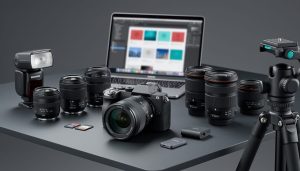
Choosing the Right Macro Lens
Focal length matters more with human subjects than with flowers or insects. A 90-105mm macro lens keeps you roughly 8-12 inches from your subject’s face at 1:1 magnification, close enough for precise framing but far enough that your subject doesn’t feel crowded or claustrophobic. Shorter 50-60mm macros force you uncomfortably close, creating an awkward dynamic and often casting shadows from your own body. Longer 180mm lenses increase working distance but magnify every tiny movement, making sharp focus harder to achieve with a breathing, blinking person.
Look for true 1:1 magnification capability. This ratio means the subject appears life-size on your camera sensor, essential for capturing the texture of an iris, individual eyelashes, or skin pores with the detail that defines macro work.
Image stabilization becomes critical when photographing living subjects. Even on a tripod, your subject’s micro-movements, heartbeat, breathing, muscle tension, introduce blur. Stabilization compensates for small vibrations and gives you a fighting chance at sharpness during those brief moments of stillness between breaths. For handheld work during setup or composition checks, it’s indispensable.
Lighting Solutions That Work
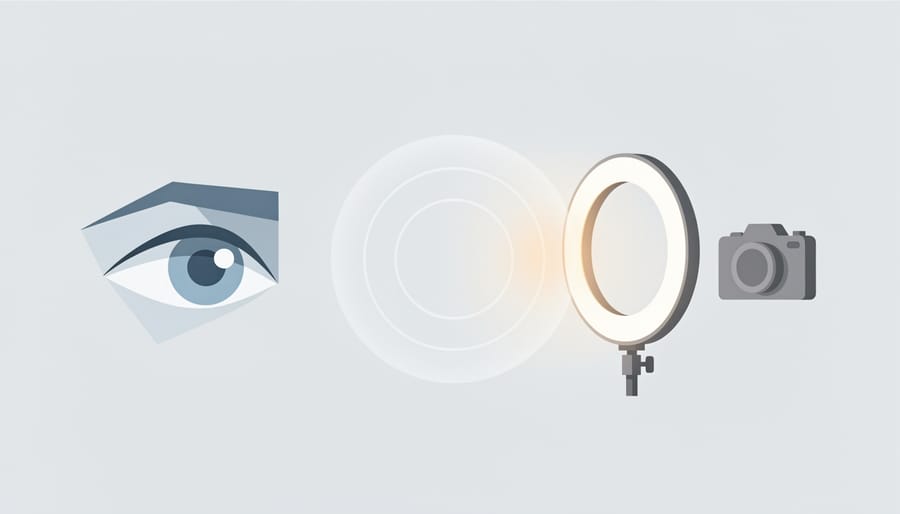
Continuous LED panels give you what you see, no surprises, no guesswork. When you’re working millimeters from someone’s eye or lip, watching focus shift with every micro-movement, the last thing you need is to fire a test flash and check the back of your camera. LEDs let you adjust intensity in real time while your subject stays comfortable. A ring light mounted on your lens creates even, shadow-free illumination that works beautifully for skin texture and eyes, though it can look flat if you’re after drama. Twin flash setups offer more modeling control and standard lighting techniques apply, but you’ll burn through test shots dialing in power and position.
For someone just starting, a one light setup with a small LED panel positioned at 45 degrees covers most human macro scenarios. Natural window light can work outdoors or near large windows, but it shifts constantly and rarely provides enough intensity for the fast shutter speeds you’ll need at macro distances.
Critical Safety and Comfort Considerations
Working this close to someone’s face and eyes requires serious attention to safety and comfort. Unlike photographing flowers or insects, you’re dealing with a living person who can experience discomfort, eye strain, and potential harm from improper technique.
The biggest risk comes from continuous lighting positioned near the eyes. Bright LED panels and ring lights can cause temporary vision spots, headaches, and genuine discomfort when held too close or used for extended periods. Always start at lower power settings and gradually increase only if necessary. Position lights at comfortable angles rather than directly in front of the subject’s face, and never use lights bright enough to make your subject squint or turn away.
Communication matters more in human macro work than almost any other photography discipline. Explain what you’re doing before each step, especially when moving lights or your camera closer to their face. Ask permission before touching their face to adjust position, and establish a clear signal they can use to pause the session if they need a break. Some subjects find the extreme proximity uncomfortable even when they’ve agreed to participate.
Maintain appropriate working distance based on your lens choice. A 100mm macro lets you stay 6-12 inches from the subject’s face while achieving high magnification, whereas a 60mm macro forces you uncomfortably close. This physical distance isn’t just technical, it’s about respecting personal space and avoiding an intimidating setup.
Sanitation becomes critical when photographing multiple subjects in succession. Clean any surfaces subjects touch between sessions, wash your hands, and avoid asking subjects to touch their faces between shots. If you’re photographing eyes or mouths, ensure your equipment never makes contact with skin.
Know when to decline a shot. Never photograph eyes with active infections, open wounds, or irritated skin without medical guidance. Skip macro photography of areas with fresh piercings, active acne cysts, or visible rashes, both for the subject’s comfort and to avoid exacerbating conditions. If a subject has light sensitivity or recent eye surgery, macro photography with continuous lights isn’t appropriate.
Finally, obtain explicit consent not just for the session but for how you’ll use the images. Human macro photographs are intimate and highly identifiable even when showing just an eye or lips. Discuss usage rights upfront, provide model releases, and share final images with subjects before publishing. This ethical foundation protects both you and the people who trust you with such vulnerable, detailed portraits.
Setting Up Your Macro Photography Session
Before you raise the camera, proper preparation separates frustrating sessions from successful ones. Human macro photography demands a controlled environment where both photographer and subject can work comfortably for extended periods.
Start by choosing a room with ample space and controllable lighting. Natural light from a large window works beautifully for fill, but you’ll need supplemental continuous lighting to maintain consistent exposure and help with focusing. Position your setup away from air vents or fans, even subtle air currents become problematic at macro magnifications. The room should be warm enough that your subject won’t shiver or tense up during longer sessions.
Here’s your systematic approach to session preparation:
- Clear a workspace with at least six feet of clearance around your shooting position to accommodate light stands, tripod legs, and comfortable subject positioning.
- Set up your tripod at a height that allows you to shoot without uncomfortable crouching, you’ll be making frequent micro-adjustments and reviewing images.
- Mount your camera and macro lens, then configure continuous LED panels or ring light at 45-degree angles from your subject’s position, applying the same principles as portrait lighting but with closer placement.
- Position a comfortable chair or stool for your subject with a headrest or wall support, staying motionless becomes easier when they can rest against something stable.
- Test your camera settings with a stand-in object: start with f/8 for a balance between sharpness and workable depth of field, ISO 400-800 to keep shutter speeds around 1/160s or faster, and manual focus mode.
- Enable focus peaking and magnified live view on your camera’s LCD, and attach your remote trigger to eliminate camera shake from pressing the shutter.
Camera settings require careful balancing. While f/16 might seem ideal for depth of field, diffraction robs sharpness at macro distances. Most macro lenses perform best between f/5.6 and f/11. If depth of field becomes too shallow, plan for focus stacking, capture multiple frames at slightly different focus points that you’ll blend in post-processing.
Keep a lens cloth and blower nearby. At these magnifications, even a fingerprint on the front element shows up as haze. Have water available for your subject and maintain conversational warmth throughout setup, technical precision matters, but so does keeping your subject relaxed and engaged.
The Shooting Process: Step-by-Step
Achieving Precise Focus
At macro magnifications, your depth of field shrinks to millimeters or less, a fraction of an eyelash can separate tack-sharp from blurry. Manual focus is essential here because autofocus systems struggle to lock onto such shallow planes, often hunting endlessly or choosing the wrong detail entirely.
Switch your camera to manual focus and activate focus peaking if available. This feature highlights in-focus areas with colored outlines, making it easier to see exactly where your plane of sharpness falls across skin texture or an iris. Combine this with magnified live view, zooming to 10x magnification on your LCD or electronic viewfinder. This lets you see details your naked eye can’t, confirming critical sharpness on specific features like individual eyelashes or the ridge of a lip.
Start by positioning your focus point on the most important element, typically the nearest eye when photographing a face, or the central detail of lips or skin texture. Make micro-adjustments using your lens’s focus ring, moving in tiny increments. Even quarter-turn adjustments can shift your focus plane noticeably at 1:1 magnification.
Subject micro-movements present the biggest challenge. A heartbeat causes visible motion at this scale. Have your subject take a breath, exhale slowly, then hold still for two to three seconds while you shoot. Time your shutter release for this stable moment. Some photographers find that asking subjects to focus their gaze on a specific point reduces involuntary eye movement and helps maintain position.
Managing Subject Movement
Even with perfect focus, subject movement remains the biggest challenge in human macro photography. At magnifications where individual skin cells become visible, every breath, heartbeat, and micro-twitch translates into blur.
Start by explaining the reality to your subject: they cannot hold perfectly still, and that’s okay. Ask them to take a normal breath, exhale slowly, then pause naturally before the next inhale. Take your shots during this brief still moment between breaths. Don’t ask people to hold their breath forcefully, it creates tension and shakier results.
Use burst mode, but strategically. Fire a three-to-five frame sequence during each breathing pause rather than spraying continuous shots. This increases your odds of capturing one perfectly sharp frame while the subject remains still enough.
For features near pulse points, temples, neck, eyelids, you’ll see rhythmic movement from blood flow. Time your shots between heartbeats if possible, or simply accept you’ll need to take more frames. A remote trigger eliminates the camera shake from pressing the shutter, turning subject movement into your only variable.
Comfortable subjects move less. If someone’s straining to hold a position, they’ll inevitably shift or tremble. Provide physical support where possible and keep sessions short.
Capturing the Shot
When you’re ready to capture, set your camera to a 2-second self-timer or use a remote trigger, even the gentlest press on the shutter button can introduce vibration that ruins sharpness at macro magnifications. If your camera offers it, enable mirror lock-up on DSLRs or switch to electronic shutter on mirrorless bodies to eliminate the last sources of internal shake.
For features with complex depth like an eye or textured skin, shoot a bracket of 5-10 frames, adjusting focus slightly between each shot. These will merge in post for edge-to-edge sharpness that a single frame can’t deliver. Move the focus point in tiny increments, often just a millimeter or two forward through the plane of the subject.
After each burst, show your subject the results on the back screen. This isn’t just courtesy; it lets them see what you’re capturing and gives them a chance to voice any concerns about how they’re being portrayed at this intimate scale. If they’re uncomfortable with a particular angle or detail, delete those frames immediately and adjust your approach. This collaborative review builds trust and often yields better expressions and cooperation for subsequent shots.
Verifying Your Results and Next Steps
Once you’ve captured your shots, resist the urge to wrap up immediately. Macro photography’s paper-thin depth of field and extreme magnification make in-session review absolutely critical, what looks sharp on a camera screen can reveal soft focus or motion blur at 100% magnification on your computer.
Zoom in to at least 100% on your camera’s LCD, examining the precise point where you focused. With human features, check that eyelashes are crisp and individual, skin pores show clear definition, or lip texture displays distinct ridges. If you’re reviewing an iris shot, the collarette (the ring pattern around the pupil) should show sharp detail. Any softness here means refocusing and reshooting before your subject leaves.
Motion blur is your next checkpoint. At macro magnifications, even a subject’s pulse can create blur that isn’t obvious at normal magnification. Look for telltale directional smearing rather than overall softness. If you spot blur in multiple frames from the same sequence, you’ll need to adjust your approach, perhaps shooting between breaths or increasing shutter speed.
Before concluding your session, verify these quality standards:
- Critical focus point is tack-sharp at 100% magnification
- No motion blur or directional smearing in key areas
- Lighting is even without harsh shadows or blown highlights
- Exposure preserves detail in both highlights (skin shine) and shadows (creases, pores)
- If focus-stacking, you’ve captured enough frames with proper overlap between focal planes
- Subject’s comfort level remained appropriate throughout
Don’t assume you can “fix it in post.” While basic adjustments work fine, severe underexposure, blown highlights on skin, or soft focus can’t be rescued. When in doubt, reshoot that angle.
For post-processing, human macro work demands restraint. Skin texture at this magnification shows every pore and fine line, oversharpening creates unnatural, harsh results. If you’ve shot a focus-stacked sequence, specialized software like Helicon Focus or Photoshop’s auto-align and auto-blend functions will merge your frames, but expect to spend time refining the composite where movement occurred between shots.
Common Challenges and Troubleshooting
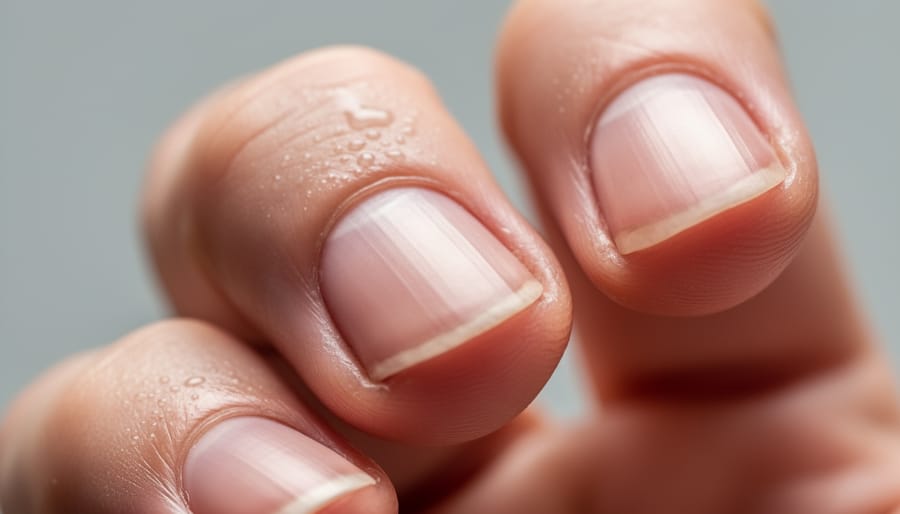
Even experienced macro photographers encounter obstacles when working with human subjects. Understanding these common issues and their solutions will save you frustration and help you deliver consistent results.
Reflections and shine present the most frequent technical challenge. Oily skin creates hot spots that blow out detail, particularly on foreheads, noses, and cheeks. Keep blotting papers or a clean powder puff nearby, and ask subjects to gently blot their skin between shots. For eye reflections that distract from natural catch lights, adjust your light position rather than moving the subject, shifting your ring light slightly off-axis often eliminates unwanted glare while maintaining even illumination.
Managing nervous subjects requires patience and clear communication. Explain what you’re doing at each step, show them test shots on your camera’s display, and never rush the process. Many people tense up when asked to hold still, which ironically causes more movement. Instead of demanding stillness, give subjects something specific to focus on, a mark on the wall or a gentle instruction to breathe normally and relax their jaw. Taking short breaks every few minutes prevents fatigue and maintains their comfort.
Movement compensation becomes critical at magnifications where even pulse-induced micro-movements show as blur. Shoot during the natural pause after exhalation when the body is most still. If you’re photographing lips or facial features, ask subjects to press their head gently against a cushioned support, which stabilizes without causing discomfort. For shots of hands, have subjects rest their arm on a padded surface rather than holding it in mid-air.
How do I handle uneven lighting on curved facial features?
Use a diffused light source positioned at roughly 45 degrees to the subject, and consider adding a white reflector on the opposite side to fill shadows. Curved surfaces need softer light with broader coverage than flat ones.
What if my subject keeps blinking during the shot?
Use burst mode and shoot between blinks, or ask the subject to close their eyes, then open on your count. Most people can hold their eyes open for 5-10 seconds if they know exactly when you’ll capture the image.
How do I reduce the appearance of skin texture I don’t want to emphasize?
Adjust your lighting angle to be more frontal rather than side-lit, which reduces texture emphasis. You can also slightly diffuse your light source or position it farther from the subject.
When technical precision conflicts with subject comfort, prioritize the person over the perfect shot. A slightly softer image from a relaxed subject beats a technically sharp photo of someone visibly uncomfortable. If you find yourself spending more than two minutes on a single composition, step back, reassess your approach, and consider whether the shot is worth the subject’s patience. Building trust and maintaining comfort ensures subjects will work with you again and allows you to capture genuine expressions rather than tense, artificial poses.
Human macro photography reveals a hidden universe that exists on the surface of our own skin, a landscape of textures, patterns, and details that remain invisible during everyday interactions. Mastering this technique requires equal parts technical precision and interpersonal skill, making it one of the most rewarding challenges in the broader field of macro photography.
The intricate details you’ll capture, the crystalline structure of an iris, the delicate architecture of eyelashes, or the surprising topography of skin pores, transform familiar features into abstract art. These images remind us that extraordinary beauty exists at every scale, waiting for photographers willing to look closer.
Success in this specialized discipline comes from practice with willing, patient subjects who understand the process. Every session sharpens your technical abilities while teaching you to balance equipment demands with human comfort. The patience required to nail focus on a moving subject and the communication needed to keep someone relaxed become skills as essential as understanding aperture or shutter speed.
Start with enthusiastic friends or family members who’ll tolerate multiple attempts. Explain what you’re doing and show them the results, most people find these intimate portraits fascinating once they see the final images.
The boundary between scientific documentation and artistic expression dissolves when you photograph humans at macro magnifications. You’re not just making pictures; you’re revealing the remarkable complexity of the human form in ways that challenge how we see ourselves.

 By
By