By
By 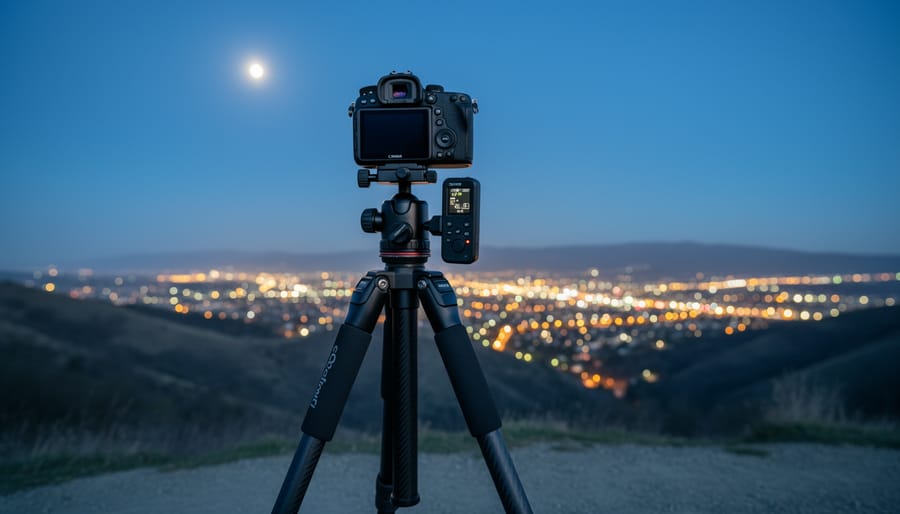
Creating professional 4K timelapse videos involves capturing hundreds or thousands of high-resolution still images at set intervals, then sequencing them into smooth video that compresses hours, days, or even months into seconds. The process requires a sturdy tripod, a camera capable of shooting 4K resolution (at least 3840 x 2160 pixels), an intervalometer to automate captures, and post-production software that can handle the substantial file sizes. Most photographers can master the fundamentals in a weekend, though achieving cinema-quality results takes practice with exposure management and motion control.
The appeal of 4K timelapse lies in its ability to reveal patterns invisible to real-time observation: clouds morphing across landscapes, cities pulsing with traffic, stars wheeling overhead, or construction projects rising from dirt to completion. The 4K specification matters because it delivers roughly four times the pixel count of standard HD, allowing you to crop, zoom, or stabilize footage in post-production without sacrificing sharpness in the final output. That extra resolution headroom has made 4K the professional standard for timelapse work in 2026.
The technical demands are real. A single 24-hour timelapse shot at five-second intervals generates nearly 17,300 RAW images, easily consuming 500GB or more of storage and requiring processing power that can choke older computers. Planning your shot becomes essential: you need to calculate interval timing based on your subject’s speed, determine total shoot duration, manage power for extended captures, and protect your gear from weather or theft during unattended shoots.
This guide walks you through the complete workflow, from selecting the right equipment and scouting locations to processing thousands of frames and exporting broadcast-ready footage.
What You’ll Need: Essential Gear and Software
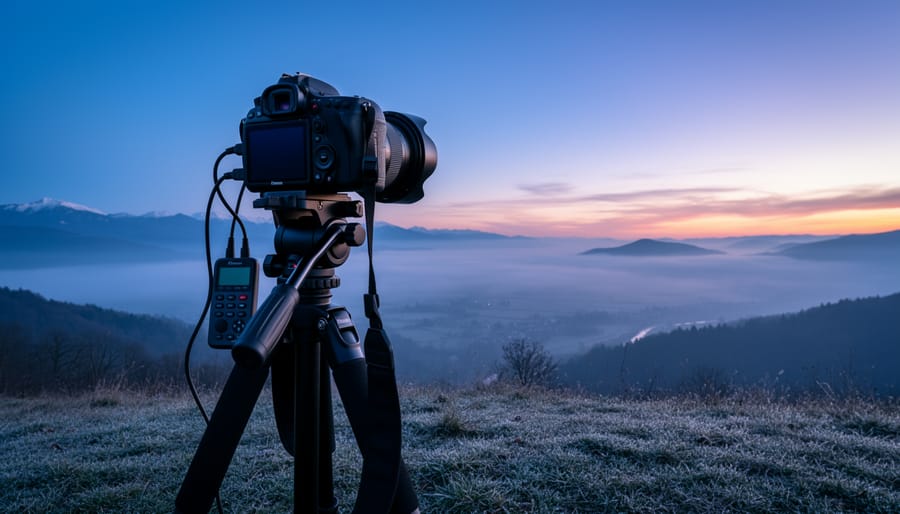
Getting solid 4K timelapse results depends more on having the right tools than you might think. You don’t need to empty your bank account, but certain gear is non-negotiable while other items simply make your life easier or unlock advanced techniques.
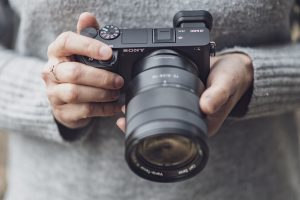
Your camera body needs native 4K capability, which means most mirrorless and DSLR cameras from the past five years will work. What matters more than megapixel count is whether your camera can shoot in manual mode with complete control over exposure settings, and ideally, whether it has a built-in intervalometer. Full-frame sensors give you better low-light performance for dawn or dusk sequences, but APS-C cameras work perfectly well for most daylight timelapses. Check that your camera can handle thousands of continuous actuations, you’ll rack up shutter counts quickly with this technique.
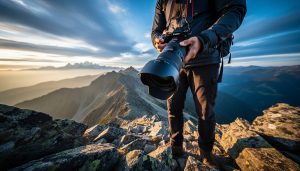
Lenses determine your creative options, and the sharpness across the frame becomes more noticeable at 4K resolution. A fast prime lens (f/2.8 or wider) gives you flexibility in lower light and shallow depth effects, while a good quality zoom offers compositional versatility without changing your setup mid-shoot. Whatever glass you choose, avoid lenses with significant barrel distortion or soft corners that become glaring issues when viewers watch on large screens.
Here’s the complete equipment breakdown by category:
- Camera body: 4K-capable with full manual controls, RAW shooting ability preferred, reliable battery performance
- Lenses: Sharp primes or quality zooms appropriate to your subject distance and field of view needs
- Tripod system: Sturdy tripod rated for at least twice your camera weight, quality ball head or video head
- Intervalometer: External wired trigger for precise interval control, or rely on in-camera interval timer if available
- ND filters: Variable or graduated neutral density filters to manage changing light and maintain motion blur
- Power solutions: Multiple spare batteries, AC adapter for accessible locations, or external battery pack for extended shoots
- Storage: Fast UHS-II SD cards or CFexpress with generous capacity, 4K RAW sequences eat storage fast
- Post-processing software: Adobe Lightroom and Premiere Pro, DaVinci Resolve, LRTimelapse, or similar sequence assembly tools
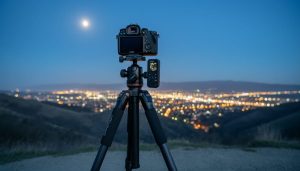
The tripod deserves special attention because any instability becomes magnified across hundreds or thousands of frames. Carbon fiber models reduce weight for location work but aluminum performs just as well if you’re not hiking far. Make sure your head locks down completely with no drift during long captures.
ND filters for timelapse work become essential when shooting in daylight with slower shutter speeds that create natural motion blur. A variable ND lets you adjust density without removing the filter mid-sequence, while fixed-density filters offer better optical quality if you can predict your needs accurately.
For motion control gear like sliders or panning heads, consider these strictly optional for your first timelapses. Master static compositions first, then invest in motorized equipment once you understand interval timing and exposure management. That progression saves you from fighting multiple variables simultaneously while learning the craft.
Critical Settings and Precautions Before You Start
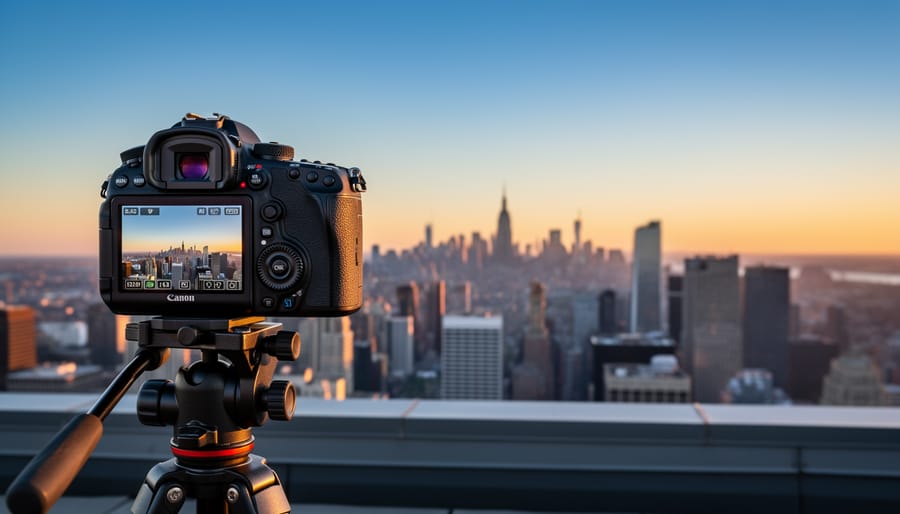
Before you press the shutter button for the first time, lock down your camera settings and prepare for potential pitfalls that can destroy hours of work. Unlike conventional video, timelapse sequences magnify small inconsistencies into jarring flicker and exposure jumps.
Start with your exposure triangle. Set manual mode, then choose an aperture that gives you sufficient depth of field for your entire scene, f/8 to f/11 works well for most landscapes. Lock your ISO at the lowest native value (typically 100 or 200) to minimize noise across thousands of frames. For shutter speed, follow the 180-degree rule: if you’re shooting one frame every two seconds, use a one-second exposure. This creates natural motion blur in each frame, making the final sequence smooth rather than stuttery.
White balance must be manually set to a specific Kelvin value, not auto. If you’re working outdoors and plan to shoot in natural light across sunrise or sunset, choose 5500K as a neutral starting point that you can adjust during color grading. Auto white balance will shift as clouds move or the sun changes position, creating color flicker that’s nearly impossible to fix.
Switch to manual focus and use live view at 10x magnification to nail critical sharpness. Focus on a point about one-third into your scene for maximum depth of field, then tape down the focus ring with gaffer tape. Even a slight bump can shift focus mid-sequence.
Data management requires planning. A 4K timelapse of 300 frames shot in RAW can consume 3-4GB. Verify you have sufficient card capacity for your planned duration plus 20 percent buffer, and use cards rated for sustained write speeds. Bring multiple batteries, long exposures drain power faster than normal shooting. Calculate your expected frame count and multiply by your camera’s power consumption per shot to determine whether you need an external battery pack or AC adapter for multi-hour sequences.
Weather protection matters for outdoor timelapses lasting hours. Rain, dust, and temperature swings can fog lenses or cause condensation inside the camera body. Use rain covers or weatherproof housings, and consider lens heaters for cold conditions. Secure legal permission for long-duration shoots on private property or in regulated public spaces where unattended equipment might raise concerns.
Planning Your 4K Timelapse Shot
Planning separates amateur snapshots from cinematic sequences. Before you press record, you need to nail down four critical decisions: where you’re shooting, what interval matches your subject’s motion, how long the shoot will run, and how you’ll compose for 4K’s unforgiving resolution.
Start with location scouting at the actual time you plan to shoot. Light changes dramatically throughout the day, and what looks stunning at noon might be washed out at golden hour. Check for obstacles that’ll enter your frame, foot traffic that could bump your tripod, and power sources if you’re shooting for hours. Scout with your phone’s camera at 4K to preview framing options.
Interval timing makes or break your sequence. Fast-moving subjects need shorter intervals; slow subjects need longer gaps between frames. Clouds drifting across the sky work well at 3-5 second intervals. Construction projects or shadows moving across buildings need 15-30 seconds. Stars trailing across the night sky require 20-30 seconds. A sunset’s color shift happens over 30-60 minutes, so 5-10 second intervals capture the drama without bloating your file count. If you plan to add motion to timelapse with a slider or gimbal, shorter intervals (1-2 seconds) smooth out the mechanical movement.
Calculate your shoot duration with this formula: (desired video length in seconds × frame rate) × interval = total shoot time. Want 10 seconds of final video at 24fps with 5-second intervals? That’s 240 frames × 5 seconds = 1,200 seconds or 20 minutes of shooting. Most timelapses need 200-300 frames minimum to avoid feeling choppy. Apps like PhotoPills or The Photographer’s Ephemeris handle these calculations and factor in sunrise/sunset times for your location.
Compose wider than you think you need. 4K resolution lets you stabilize or reframe in post, but only if you’ve left breathing room around your subject. Avoid placing critical elements at frame edges where lens distortion lives. The rule of thirds still applies, but think about how your subject will move through the frame over time. Will that cloud formation drift left? Will shadows sweep right to left? Position your static elements to complement the motion path, not fight it.
Test your interval with 20-30 frames before committing to the full shoot. Review the sequence on your camera’s playback to verify the motion looks smooth, not stuttery or too slow.
Step-by-Step: Setting Up and Shooting Your 4K Timelapse
Step 1: Position and Stabilize Your Camera
Your timelapse is only as stable as your foundation. I’ve watched countless sequences ruined by tiny movements that compound over hundreds of frames, creating nausea-inducing drift in the final video.
Start by extending your tripod legs fully and pressing each foot firmly into the ground. On soft terrain like grass or sand, push down until you feel resistance, don’t just rest the feet on the surface. For concrete or hard surfaces, use a sandbag or weight hung from the center column to lower the center of gravity. A 10-pound camera bag works perfectly.
Level your camera using the tripod’s built-in bubble level, then verify with your camera’s electronic level. You want precision here, even a half-degree tilt becomes obvious when clouds drift across a tilted horizon for three hours.
Wind is your enemy. Retract the center column completely if possible; raising it creates a lever that amplifies every gust. In moderate wind, hang weight from the center hook and consider shielding your setup with your body or vehicle during the first few test frames.
For uneven terrain, extend legs to different lengths rather than forcing level with the center column. Lock every adjustment knob twice, vibration loosens them over time.
Step 2: Frame Your Composition for Cinematic Impact
Framing a 4K timelapse differs fundamentally from still photography because you’re capturing motion over time, not a frozen moment. Start by identifying your subject’s movement path, whether it’s clouds drifting across the sky, traffic flowing through an intersection, or shadows sweeping across a landscape, and compose so this motion travels through your frame rather than simply entering and exiting quickly.
Apply timelapse composition tips like the rule of thirds, but build in more negative space than you would for stills. 4K resolution gives you 3840×2160 pixels to work with, which sounds generous until you factor in post-production stabilization that can crop away 10-15% of your frame edges. Leave breathing room on all sides, especially in the direction your subject moves.
Consider foreground elements that add depth and scale, a tree branch, building edge, or rock formation anchoring the bottom third while your main action unfolds behind it. Position key visual elements knowing they’ll shift slightly during stabilization, and avoid placing critical details right at frame edges where cropping will eliminate them.
Step 3: Lock In Your Camera Settings
Switch to full manual mode immediately, no auto ISO, no auto white balance, no autofocus. Any automated setting will cause flickering as lighting shifts over your sequence.
Start with aperture. For landscapes or cityscapes where you want everything sharp, use f/8 to f/11. Narrower apertures like f/16 risk softness from diffraction at 4K resolution. If you’re isolating a subject, f/2.8 to f/5.6 works, but confirm your focus point won’t shift during the shoot.
Set ISO to your camera’s native base value, typically 100 or 200. Lower ISO preserves shadow detail and minimizes noise across thousands of frames. If you’re shooting into dusk, resist bumping ISO, better to use a slower shutter speed or wider aperture.
Shutter speed follows the 180-degree rule: set it to double your interval. If you’re shooting every two seconds, use a one-second shutter. This creates natural motion blur in each frame. Shorter shutter speeds produce staccato movement; longer ones risk overexposure in bright conditions.
Lock white balance to a preset matching your scene, daylight, cloudy, shade. Never use auto white balance. For sunrise or sunset sequences where color temperature changes dramatically, shoot RAW to correct color shifts in post without banding.
Enable RAW capture if your camera supports it and you have sufficient card space. RAW gives you latitude to fix minor exposure inconsistencies and deflicker more effectively during processing.
Step 4: Configure Interval and Duration
Once your camera settings are locked, pull out your interval calculator one last time. If you’re shooting a sunset that lasts 45 minutes and want 10 seconds of final footage at 24fps, you need 240 frames, so divide 45 minutes by 240 to get an 11-second interval. Program that into your intervalometer or camera’s built-in interval timer, then set the total number of shots to 240 (or slightly more as insurance).
Most intervalometers let you configure an automatic shut-off after a set number of frames or duration. Use it. This prevents accidentally filling your card or draining batteries on an unattended camera. Before committing to the full sequence, fire off 5-10 test frames at your programmed interval. Review them on your LCD: check sharpness, exposure consistency, and confirm the intervalometer is triggering reliably. If anything looks off, adjust now, not 200 frames in.
Step 5: Start the Sequence and Monitor Progress
Once you’ve verified your settings, press the shutter or start button on your intervalometer to begin capture. Resist the urge to chimp every frame, checking your LCD draws power and risks bumping the camera. Instead, wait through three or four cycles, then review one image to confirm exposure and focus are locked in.
For static subjects like clouds or architecture, you can safely step away after the first few minutes, but keep the camera within sight if possible. Moving subjects, crowds, traffic, wildlife, may require you to stay nearby to watch for unexpected changes in lighting or composition that could compromise the sequence.
If light shifts dramatically mid-shoot (sun breaking through clouds, streetlights switching on), you face a tough call. Stopping to adjust settings will create a visible jump in the final video. For most scenarios, let the sequence run and fix exposure transitions in post with ramping tools like LRTimelapse. Only intervene if the current exposure will blow out highlights or crush shadows beyond recovery. When you must adjust, do it between frames, work quickly, and note the frame number where the change occurred so you can blend the transition during editing.
Processing Your 4K Timelapse Sequence
You’ve captured thousands of individual 4K frames, now you’ll transform them into a polished cinematic sequence. The post-production workflow determines whether your timelapse looks professionally finished or amateurish, so approach this phase methodically.
- Import your image sequence into your chosen editing software. In Adobe Premiere Pro, navigate to File > Import and select the first image in your sequence, checking “Image Sequence” before clicking Open. DaVinci Resolve follows a similar process through the Media Pool. Organize your footage into clearly labeled bins or folders immediately, you’ll thank yourself when working with multiple sequences.
- Address flicker before anything else. Even with locked camera settings, subtle exposure variations happen. LRTimelapse excels here for RAW sequences, analyzing brightness changes across frames and generating smooth transitions. For JPEG sequences, most editing programs include deflicker filters (Premiere’s Lumetri has one under Effects > Video Effects > Time). Apply deflicker adjustments conservatively; over-correction creates an artificially smooth, plasticky look.
- Handle color correction and exposure adjustments consistently. If you shot RAW, batch-process the entire sequence in Lightroom or Capture One first, then reimport. For sequences shot in-camera as JPEGs, use your editor’s color wheels or curves, applying the same adjustments to all frames. This step fixes any overall exposure or white balance drift that survived your locked settings.
- Apply your cinematic color grading to establish the final aesthetic. This differs from correction, you’re crafting a mood rather than fixing problems. Techniques like Scinetone grading in Resolve can elevate your timelapse from documentary to filmic. Push contrast gently, add warmth or coolness intentionally, and consider subtle vignetting to draw eyes toward your composition’s center.
- Determine whether motion blur enhancement would benefit your sequence. Timelapse inherently creates staccato movement because each frame captures a frozen instant. Software like ReelSmart Motion Blur or RSMB analyzes frame-to-frame changes and generates artificial blur that mimics what a video camera would capture. This smooths motion considerably but requires rendering time. Skip it for star trails or architectural sequences where sharpness matters; apply it when you want cloud movement or traffic to feel more fluid.
- Export with proper 4K codec settings. Select 3840×2160 resolution, H.264 or H.265 codec (H.265 gives smaller files with equivalent quality), and set your bitrate to at least 50 Mbps for high-quality results, higher if your sequence has complex motion or detail. Choose 23.976, 24, or 25 fps depending on your project’s standard. Uncheck any frame blending options that might be enabled by default.
Before finalizing, preview your entire sequence at full resolution. Watch specifically for any remaining flicker (often visible in skies), abrupt color shifts between frames, or compression artifacts that indicate your bitrate’s too low. Scrub through slowly and confirm sharpness holds throughout, soft patches suggest focus shifted during capture or aggressive motion blur was applied.
Save your project file even after exporting. You’ll likely want to tweak grades or try different export settings as you refine your technique, and rebuilding from scratch wastes time. Keep your original image sequence archived until you’re certain the final video meets your standards.
How to Know Your Timelapse Succeeded (and What to Do Next)
Your sequence is captured and processed, now you need to verify the results before declaring it done. Play your timelapse at full resolution on a calibrated monitor, not just your camera’s LCD. Watch it multiple times, focusing on different quality markers each viewing.
First pass: look for flicker. Exposure variations between frames create a distracting pulsing effect that screams amateur work. Scrub through frame-by-frame in your editor and watch the histogram, it should flow smoothly without sudden jumps. If you spot flicker, revisit your deflicker settings or consider LRTimelapse for more sophisticated correction.
Second pass: evaluate motion smoothness. Does cloud movement feel natural, or does it stutter? Do cars glide across the frame or jump awkwardly? Jerky motion usually means your interval was too long for the subject’s speed. Make a note for next time, faster intervals for quicker subjects.
Third pass: check sharpness and focus throughout. Zoom to 100 percent and scan across different frames, especially if you were shooting during temperature changes that can shift focus. Any soft frames will stand out brutally at 4K resolution.
Final pass: assess the cinematic quality holistically. Does it tell a story or convey the feeling you intended? Is the color grade enhancing the mood? Would you proudly include this in a client presentation or portfolio piece?
When problems appear, be honest about whether they’re fixable in post or inherent to the capture. Heavy flicker, severe motion blur from wind shake, or exposure swings exceeding two stops rarely salvage well. Learn from the failure and reshoot if it matters.
Once you’ve validated a solid sequence, your next moves depend on your goals. If you’re building skills, tackle a more challenging subject, try a holy grail sunrise timelapse where you manually adjust exposure throughout, or add a motorized slider for parallax motion. Experiment with hyperlapse by moving your camera between intervals to create dramatic traveling shots through space.
If you’re working on client projects, consider how this timelapse fits into a broader narrative. It might serve as an establishing shot, a transitional element between scenes, or a climactic moment showing passage of time. Many cinematographers keep a library of quality 4K timelapses, cityscapes, nature scenes, weather patterns, ready to drop into edits when needed.
Document what worked: interval timing, location conditions, camera settings, any challenges you solved. This reference becomes invaluable when you’re planning similar shoots or teaching others. Every successful timelapse expands your technical knowledge and creative confidence, pushing you toward increasingly ambitious cinematic sequences.
Common Questions About Shooting 4K Timelapse
Common Questions About Shooting 4K Timelapse
Even experienced photographers hit snags when shooting their first 4K timelapses. Here are the answers to the questions that come up most often, drawn from real-world shooting scenarios.
Is 4K really worth it over 1080p for timelapse?
Yes, especially for professional or cinematic work. 4K gives you cropping flexibility in post-production, delivers sharper detail on large displays, and future-proofs your content as 4K becomes the standard delivery format.
How much storage do I actually need for a 4K timelapse shoot?
Budget roughly 25-30MB per RAW image from a modern full-frame camera. A 3-hour shoot at 5-second intervals produces about 2,160 images, requiring 50-65GB of card space plus matching backup capacity.
Should I shoot RAW or JPEG for 4K timelapse?
RAW provides maximum flexibility for exposure correction and deflickering in post, which is critical for long sequences with changing light. JPEG works if your exposure is perfect and lighting is stable, but offers far less recovery latitude.
What camera specs do I need at minimum for quality 4K timelapse?
Any camera that shoots at least 8-megapixel stills can produce 4K video (3840×2160 requires 8.3MP). However, 16MP or higher is recommended to allow for stabilization cropping and composition adjustments without quality loss.
Battery management confuses many shooters planning multi-hour sequences. Most mirrorless cameras consume 2-3 percent battery per 100 shots in timelapse mode, meaning a single battery handles roughly 1,500-2,000 frames before dying. For shoots exceeding three hours, bring spare batteries or use a battery grip with dual slots. An AC adapter or USB power bank with dummy battery works for static locations near power sources, eliminating battery anxiety entirely.
Changing light conditions, especially during sunrise or sunset, create exposure challenges that trip up beginners. The solution is not to use auto exposure, which creates jarring jumps between frames. Instead, shoot RAW and let the light change gradually across your sequence. You will correct the exposure ramp during post-processing using deflicker tools or manual keyframe adjustments, which produces smooth transitions that auto mode cannot match.
Interval selection remains the most common source of confusion. The rule of thumb works like this: divide the speed of your subject’s movement into interval categories. Clouds moving at moderate speed need 3-5 second intervals. Slower subjects like shadows creeping across a building need 10-30 seconds. Very slow changes like construction progress or plant growth require 1-5 minute intervals. When in doubt, test a 50-frame sequence at your planned interval, review the playback speed, and adjust before committing to the full shoot. Intervals that are too short create unnaturally fast motion, while intervals that are too long produce jumpy, stuttering movement that looks amateur rather than cinematic.
You’ve now got everything you need to shoot compelling 4K timelapse sequences. The technical side, gear, settings, intervals, matters less than understanding why each choice affects your final image. Start simple. Shoot a sunset from your backyard. Capture clouds moving over a familiar building. These straightforward subjects let you focus on nailing exposure consistency and smooth motion without logistical headaches.
Once you’ve processed a few sequences and spotted the patterns in what works, push further. Try morning fog burning off a landscape. Film rush hour traffic from an overpass. Experiment with longer durations or tighter intervals. Each shoot teaches you something about timing, light, and the subtle rhythms that make timelapse footage feel cinematic rather than merely sped up.
The difference between adequate timelapse and truly engaging work comes down to repetition. You’ll develop instincts for reading light changes, predicting subject movement, and knowing when a scene has enough visual interest to sustain thirty seconds of screen time. Those instincts only develop through practice.
Set up your camera this week. Shoot something. The learning happens in the field, not in articles.


 By
By