By
By 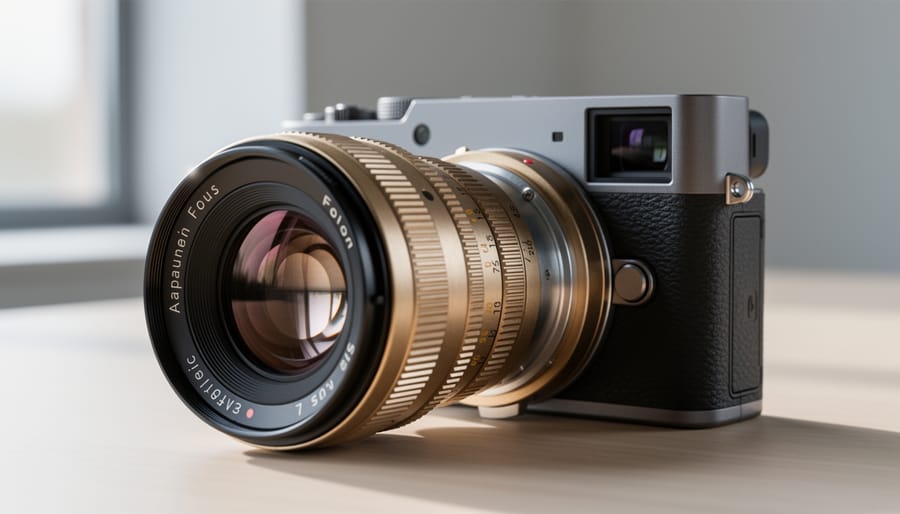
Adapting vintage lenses to modern camera bodies requires just three components: the lens itself, a compatible lens mount adapter, and a camera with the ability to operate in manual or aperture-priority mode. The entire process takes less than five minutes once you’ve identified the correct adapter for your specific lens mount and camera system, and it opens up decades of optical history to contemporary digital shooters.
This practice has surged in popularity over the past several years as photographers discover that classic glass from the 1960s through 1990s delivers unique rendering characteristics, build quality, and value that modern autofocus lenses often can’t match at similar price points. A Soviet-era Helios 44-2 with its distinctive swirly bokeh might cost $40, while a German-made Zeiss Contax lens can rival the sharpness of contemporary optics at a fraction of the cost.
The adapter itself is a precision-machined spacer that bridges the difference between your lens’s original mount (Canon FD, Nikon F, M42, Contax/Yashica, Pentax K, and dozens of others) and your camera’s mount (typically Sony E, Canon RF, Nikon Z, Fujifilm X, or Micro Four Thirds in 2026). Understanding flange distance, the physical gap between mount and sensor, is the single most important compatibility factor. A lens designed for a camera with a shorter flange distance cannot focus to infinity on a body with a longer one, which is why mirrorless cameras with their reduced flange distances have become ideal platforms for adapted glass.
The trade-offs are straightforward: you’ll lose autofocus and, in most cases, electronic aperture control and EXIF data recording. But you’ll gain access to optical character that’s difficult to replicate with modern designs.
Understanding Lens Mounts and Compatibility
The secret to successfully adapting vintage lenses lies in understanding two fundamental concepts: flange distance and mount compatibility. Flange distance is the physical measurement between the lens mount and the camera’s sensor (or film plane). Every lens mount system has a specific flange distance, Canon FD lenses sit 42mm from the sensor, Nikon F mount requires 46.5mm, M42 screw mount needs 45.46mm, Pentax K demands 45.46mm, and Leica M rangefinder lenses work at just 27.8mm. These flange focal distance differences determine which vintage lenses you can adapt to your modern camera body.
Here’s the golden rule: you can only adapt a lens when its native flange distance is greater than your camera’s flange distance. The adapter fills that gap. If the vintage lens has a shorter flange distance than your camera, you’re out of luck, there’s physically no way to maintain proper focus to infinity without optical elements that degrade image quality.
This is why mirrorless cameras revolutionized vintage lens adaptation. Canon RF mount sits at 20mm, Sony E-mount at 18mm, Nikon Z-mount at 16mm, and Micro Four Thirds at just 19.25mm. With such short distances, these systems accept adapters for nearly every vintage mount ever made. A Canon EOS DSLR with its 44mm flange distance can adapt Nikon F lenses but not Canon FD, while a Canon RF mirrorless body handles both easily.
Identifying your vintage lens mount usually requires examining the rear of the lens. Nikon F lenses have a distinctive bayonet with three tabs and often display “Nikon” engraving. Canon FD lenses feature a breech-lock or bayonet mount (FD vs. FDn) with no electronic contacts. M42 lenses use a threaded screw mount that’s easy to spot. Pentax K mounts look similar to M42 but use a bayonet with a metal tab. Leica M lenses are compact rangefinder glass with a simple bayonet.
The lens compatibility question extends beyond physical mounting. You’ll lose autofocus and electronic aperture control with most adapters, reverting to fully manual operation. Some modern mirrorless cameras handle this better than others, Sony and Fujifilm provide excellent focus peaking and magnification aids, while Canon’s RF system offers robust manual focus support. DSLRs work but lack the live-view advantages that make manual focusing practical for everyday shooting.
What You’ll Need: Tools and Adapters
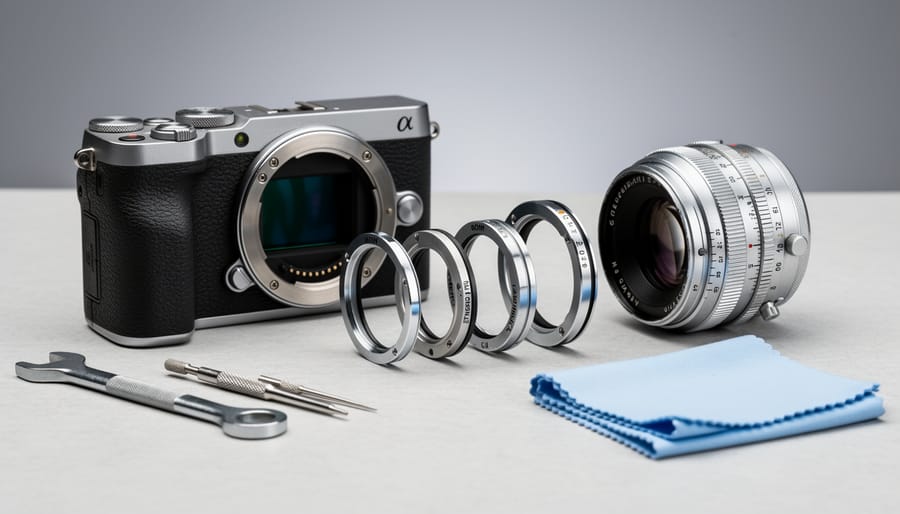
The core requirement is a mount adapter matched to your specific lens and camera combination. These metal rings bridge the physical and optical gap between vintage glass and modern bodies. You’ll find two main categories: basic “dumb” adapters that provide only mechanical mounting, and “smart” adapters with electronic contacts that can enable aperture control or focus confirmation on some systems.
For most photographers starting with vintage lenses, a quality dumb adapter is sufficient and far more affordable. These precision-machined rings cost between $25 and $80 from reputable manufacturers like K&F Concept, Fotodiox, and Novoflex. Cheaper alternatives under $15 exist but often suffer from poor tolerances that prevent infinity focus or cause the lens to wobble. Smart adapters with electronic features run $100 to $400, depending on functionality.
Beyond the adapter itself, you’ll need basic maintenance supplies and helpful lens accessories:
- Microfiber cleaning cloths and lens cleaning solution for removing dust and oils from glass surfaces
- Rocket air blower to clear debris from mount contacts without scratching
- Rear lens cap compatible with your vintage mount to protect the glass during storage
- Body cap for your camera to prevent dust entering the sensor when swapping lenses
- Small flashlight or headlamp for inspecting the rear element and adapter alignment
Optional tools include focus confirmation chips, which are thin electronic strips you can attach to dumb adapters to enable your camera’s focus assist beep. These cost $8 to $15 and work with varying reliability across camera models. A lens spanner wrench helps if you need to adjust adapter spacing for infinity focus calibration, though most adapters come pre-calibrated.
Where you buy matters in 2026. Specialized retailers like B&H Photo and Adorama stock verified adapters with return policies. Amazon offers convenience but requires careful vetting of third-party sellers. Avoid unbranded adapters from auction sites unless you’re comfortable with potential fitment issues.
Safety and Compatibility Warnings
Before you screw any adapter onto your camera, understand what can go wrong. Even with the right adapter, adapting vintage lenses carries real risks if you overlook compatibility fundamentals or rush the process. Taking five minutes to verify clearances and check quality can save you from expensive repairs.
The biggest physical danger on DSLRs is mirror strike. If your lens’s rear element protrudes too far into the camera body, it can collide with the mirror during exposure, shattering glass and potentially damaging the mirror mechanism itself. This is especially common when adapting lenses with short flange distances (like Canon FD or Minolta MD) to DSLRs. Mirrorless cameras eliminate this problem entirely since there’s no moving mirror, which is why they’re the safer choice for adaptation. If you’re using a DSLR, research your specific lens and camera combination beforehand to confirm mirror clearance risks before mounting anything.
Infinity focus is another critical consideration. Some lens-to-camera combinations simply can’t achieve infinity focus due to flange distance math. The adapter might fit physically, but your lens will only focus on close subjects, making it useless for landscapes or distance work. Check adapter specifications and user reports for your exact combination before buying.
Electronic contacts pose a different hazard. Many modern cameras display error messages or refuse to fire when they detect a lens without electronic communication. You’ll need to enable “shoot without lens” or similar settings in your camera menu. Some adapters include electronic pins or chips, but cheap versions can short out or send incorrect signals. Stick with known adapter brands.
Finally, recognize when adaptation isn’t feasible. Some mount combinations require adapters so thick they become impractical, and certain lens designs simply won’t work safely on specific camera systems, no matter how good the adapter.
Step-by-Step: Mounting Your Vintage Lens
Preparing the Lens and Adapter
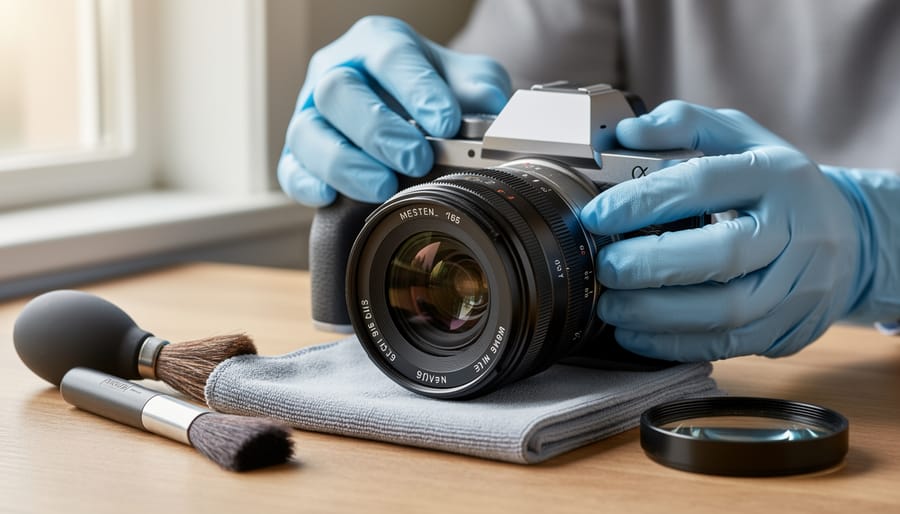
Before attaching anything to your camera, inspect the vintage lens thoroughly. Hold it up to a bright light source and examine the glass elements from both ends. Look for internal fungus (web-like patterns or spots inside the glass), haze (cloudiness that won’t wipe away), separation (edges where elements appear to be delaminating), and scratches on the front or rear elements. Small dust specks rarely affect image quality, but fungus, haze, and lens coating damage will degrade sharpness and contrast.
Clean the rear element gently with a microfiber cloth and lens cleaning solution if needed, this surface sits closest to your sensor and any debris here can appear in images. Use a soft brush or blower to remove dust from the lens mount threads and adapter ring. Never force or cross-thread anything.
To attach the adapter ring, align the mounting index marks on the lens and adapter, then rotate smoothly until it locks into place. The fit should be snug but not require excessive force. Some adapters have a small set screw that tightens against the lens mount for added security, check your specific adapter’s instructions. Once attached, the adapter becomes part of the lens assembly and typically stays mounted during storage and use.
Mounting to Your Camera
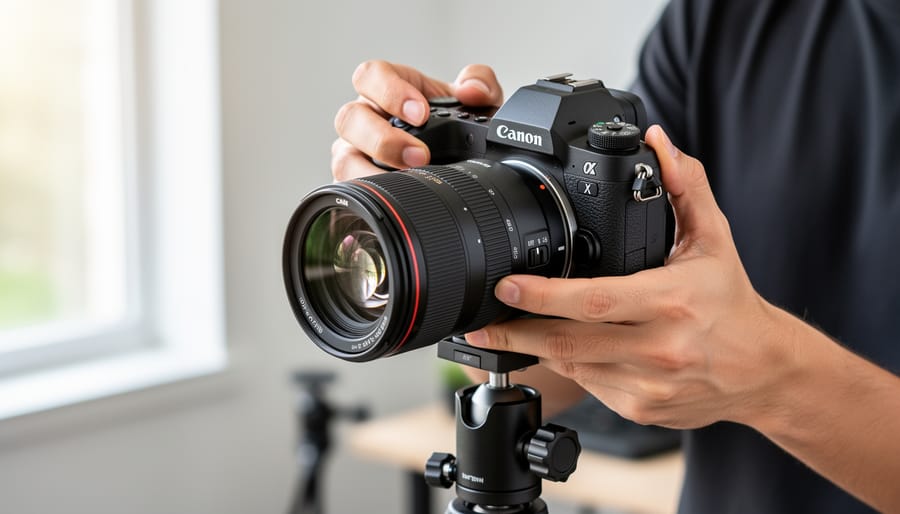
With the adapter firmly attached to your vintage lens, you’re ready to mount the assembly to your camera body. Remove your camera’s body cap and any rear cap from the adapted lens, keeping both elements dust-free.
Locate the mounting index marks, usually a white or red dot, on both the adapter and your camera’s lens mount. Align these marks carefully, then insert the lens straight into the mount without forcing it. You should feel it seat smoothly into place.
Rotate the lens clockwise (for most systems) until you hear or feel a definite click. This indicates the bayonet has engaged properly. The lens should now sit flush against the camera body with no visible gaps.
Gently attempt to wiggle the mounted lens. There should be zero play or movement at the connection point. Any looseness suggests either an incorrectly seated adapter or a poor-quality adapter that won’t maintain proper alignment during shooting.
Check the lens from multiple angles to confirm it’s mounted straight, not canted to one side. A properly seated adapted lens should feel as secure as a native lens, though you may notice it lacks the electronic communication pins that modern lenses use.
Initial Camera Settings
Once your lens is physically mounted, configure your camera for manual shooting. First, switch to manual focus mode in your camera’s menu, some bodies require enabling “shoot without lens” or “release shutter without lens attached” to fire at all. This setting tells the camera to operate even when it doesn’t detect electronic lens contacts.
Next, activate focus peaking if your camera offers it. This feature highlights in-focus areas with colored outlines (usually red, yellow, or white), making manual focusing significantly easier. Pair this with focus magnification, typically accessed by pressing a dedicated button or the rear dial, to zoom in 5× or 10× on your subject for critical focus verification.
Since adapted lenses operate with manual aperture control, set your camera to aperture priority or full manual mode. Many photographers prefer manual mode for complete control. Finally, configure in-body image stabilization (IBIS) if available. Enter the lens focal length manually so the stabilization system knows how much correction to apply, this compensates for the missing electronic communication between lens and body.
Shooting with Adapted Lenses: What Changes
Shooting with adapted vintage lenses transforms your photography workflow in fundamental ways. You’re stepping back to a more manual, deliberate approach that requires different techniques than you’re used to with modern glass.
The most obvious change is manual focus. Your camera’s autofocus system won’t engage, meaning you’ll rely entirely on turning the focus ring yourself and judging sharpness through the viewfinder or LCD. Enable focus peaking in your camera settings, it highlights in-focus edges with colored overlays, and use magnification to zoom into critical areas when precision matters. For moving subjects, pre-focus on a zone and wait for your subject to enter that plane of sharpness.
Aperture control shifts to the lens itself rather than your camera’s command dial. You’ll physically rotate the aperture ring on the lens barrel, which means you need to adjust exposure before each shot. Most adapted setups only meter at the taking aperture you’ve selected, so you’ll see the viewfinder darken as you stop down to smaller f-stops like f/8 or f/11. This is actually helpful for judging depth of field in real time.
Here’s what changes when you mount vintage glass:
- No autofocus or image stabilization, shoot at higher shutter speeds or use a tripod
- Manual aperture control only, adjust exposure via the lens ring before each shot
- Missing EXIF data, your camera won’t record focal length, aperture, or lens model
- Inconsistent metering, some adapters break communication entirely, requiring full manual exposure
- Gain slower, more intentional shooting, forces you to think through composition and settings
- Gain unique character, vintage rendering, bokeh, and color response modern lenses don’t replicate
Metering behavior varies wildly depending on your adapter and camera combination. Many mirrorless cameras will meter correctly in aperture priority or manual mode, reading light through the adapted lens. Some DSLR setups lose metering communication completely, forcing you into full manual exposure using the histogram or external meter.
In practice, adapted lenses excel at deliberate shooting: portraits where you have time to nail focus, landscapes on a tripod, street photography with zone focusing techniques, and any scenario where you’re working methodically rather than chasing fast action. They’re challenging for wildlife, sports, or anything requiring rapid autofocus tracking.
Testing and Verifying Your Setup
Once you’ve mounted your vintage lens, run through these verification steps before heading out to shoot. A few minutes of testing now can save you from discovering problems mid-session.
Start with infinity focus. Point your camera at a distant object, a building several blocks away or a far treeline, and turn the focus ring all the way to the infinity mark. The image should be perfectly sharp when focused to infinity. If it’s soft, your adapter may have incorrect spacing, which is a common issue with cheap no-name adapters. Try a different distant subject to confirm; if infinity focus consistently falls short, you’ll need a better adapter.
Next, test the aperture through its full range. Set your lens to its widest aperture and take a shot, then stop down incrementally (f/2, f/2.8, f/4, and so on) while photographing the same scene. Review each image to ensure the aperture blades are actually closing and the exposure is changing as expected. Some vintage lenses have sticky aperture mechanisms after decades of storage, and you’ll want to know now rather than during a paid shoot.
Check for light leaks and vignetting by photographing a white wall or bright sky at various apertures. Dark corners or unexpected light streaks usually indicate either a poorly sealed adapter or one that’s slightly misaligned. A small amount of vignetting wide open is normal with some vintage glass, but irregular patches or severe darkening suggest an adapter problem.
To verify your setup is solid:
- Gently wiggle the mounted lens. Any play or looseness means the adapter isn’t seating properly, dismount and reattach, ensuring the bayonet clicks securely.
- Shoot a test sequence while adjusting focus from minimum distance to infinity, checking that the focus ring moves smoothly without binding or catching.
- Review images at 100 percent magnification for sharpness in the center and corners, comparing results against typical performance expectations for that lens.
- Take several frames with the camera held at different angles to confirm the adapter stays firmly attached under normal handling.
If everything checks out, you’re ready to explore what your vintage glass can do. Many photographers find it helpful to keep notes on which adapters work reliably with specific lens recommendations building a mental database of trusted combinations over time. This verification routine becomes second nature after a few lenses, taking just minutes to confirm your setup is safe and functional.
Common Problems and Troubleshooting
When you first adapt a vintage lens, you’ll likely encounter at least one of these fixable problems. Here’s how to resolve the most common issues.
Loose or Wobbly Adapter
If the adapter rocks or shifts on your camera, don’t force it tighter. Check that you’ve fully seated the adapter by rotating it until you feel a firm click. Some adapters include small adjustment screws on the mount ring, tighten these carefully with the appropriate hex key. If wobble persists, the adapter’s tolerances are too loose for your specific camera body. Return it and try a different brand, since even slight movement degrades sharpness and can damage your mount over time.
Can’t Achieve Infinity Focus
This usually means your adapter is slightly too thick. Test by focusing on a distant object (buildings, mountains) and checking if the focus ring stops before the image becomes sharp. Quality adapters are machined to precise tolerances, but budget options sometimes add an extra 0.2mm that prevents true infinity focus. Unfortunately, there’s no DIY fix, you need a properly manufactured adapter. Before returning it, confirm the lens itself focuses to infinity by testing it on its original camera body if possible.
Aperture Blades Won’t Stop Down
Many vintage lenses used mechanical levers that no longer connect when adapted. If your aperture stays wide open regardless of the ring position, check whether the lens has a manual aperture lock or preset ring, some designs require you to “unlock” the diaphragm first. For lenses with automatic aperture mechanisms (like Canon FD), you may need to permanently set the aperture to manual mode using a small switch or by removing a pin. Consult lens-specific guides for your exact model.
Unexpected Vignetting or Dark Corners
Severe vignetting that doesn’t match the lens’s known characteristics suggests the adapter is protruding into the light path. Remove the lens and inspect the adapter’s rear opening, it should be completely clear with no metal intruding. If you see obstruction, the adapter is incompatible with that lens’s rear element design. Mild vignetting is normal with many vintage wide-angle lenses on modern sensors and isn’t an adapter defect.
Replace any adapter that shows metal flaking, cracks, or cross-threading after a few mounting cycles. Quality adapters last for years.
Frequently Asked Questions
Will adapted vintage lenses produce sharp, usable images on modern cameras?
Yes, quality vintage glass often delivers excellent sharpness and character that rivals modern lenses, though performance varies by lens condition and optical design. Many classic lenses from Zeiss, Leica, and premium Japanese manufacturers from the 1970s-80s hold up remarkably well, especially when stopped down to f/4 or f/5.6.
Which camera brand works best for vintage lens adaptation?
Sony E-mount and Fujifilm X-mount mirrorless cameras are ideal due to their short flange distances, allowing adaptation of nearly any vintage lens mount. Canon RF and Nikon Z systems also work well, though Sony offers the widest compatibility range.
Can I get autofocus with adapted vintage lenses?
No, standard mechanical adapters require full manual focus since vintage lenses lack electronic communication with modern camera bodies. Some advanced adapters claim autofocus functionality, but these are limited to specific lens-camera combinations and generally perform slowly compared to native autofocus lenses.
How long do lens adapters typically last?
Quality brass or aluminum adapters from reputable manufacturers last indefinitely with normal use. Cheap adapters with loose tolerances may develop play or wobble within months, potentially damaging your camera mount, so investing in well-reviewed brands pays off long-term.
Beyond these core concerns, beginners often wonder which vintage lenses to try first. Start with affordable, common mounts like M42 screw-mount or Canon FD, both offer excellent optics at reasonable prices and adapt easily to most mirrorless systems. A 50mm f/1.8 or f/1.4 in either mount typically costs between $30 and $80 and provides an ideal learning ground for manual focus technique without major financial risk.
Cost is another frequent consideration. Basic adapters run $15 to $40 for simple mechanical rings, while premium versions with better machining and tighter tolerances cost $60 to $120. The vintage lenses themselves range from $20 for common consumer glass to several hundred dollars for professional primes. You can build a capable three-lens kit (wide, normal, telephoto) for under $200 total if you shop carefully.
Don’t expect adapted vintage lenses to handle like your native glass. You’ll work slower, miss some shots while focusing manually, and occasionally struggle in low light without autofocus assist. But that deliberate pace often improves your compositional discipline, and the unique rendering of classic optics, slightly softer wide open, with distinctive bokeh and color characteristics, adds a creative dimension that clinical modern lenses sometimes lack.
Adapting vintage lenses to your modern camera isn’t nearly as intimidating as it might seem at first. With a quality adapter matched to your lens mount and camera system, you can start shooting manual glass in an afternoon. The process boils down to understanding compatibility basics, choosing the right hardware, and getting comfortable with manual controls, skills that’ll improve your photography beyond just using old lenses.
The real reward comes when you experiment. Try different focal lengths, aperture characteristics, and rendering styles that modern glass simply doesn’t replicate. Some lenses will become daily drivers; others might suit specific projects. You’ll develop preferences for certain mount systems and learn which optical traits matter most to your work.
Start with affordable, well-regarded lenses from systems like M42 or Pentax K. Check online communities and vintage lens databases for recommendations specific to your camera brand. As you gain experience, you’ll recognize quality glass when you see it and understand which adaptations work best for your shooting style.
The combination of modern sensors and vintage optics creates something neither can achieve alone, and now you have everything you need to explore that creative space yourself.

 By
By