By
By 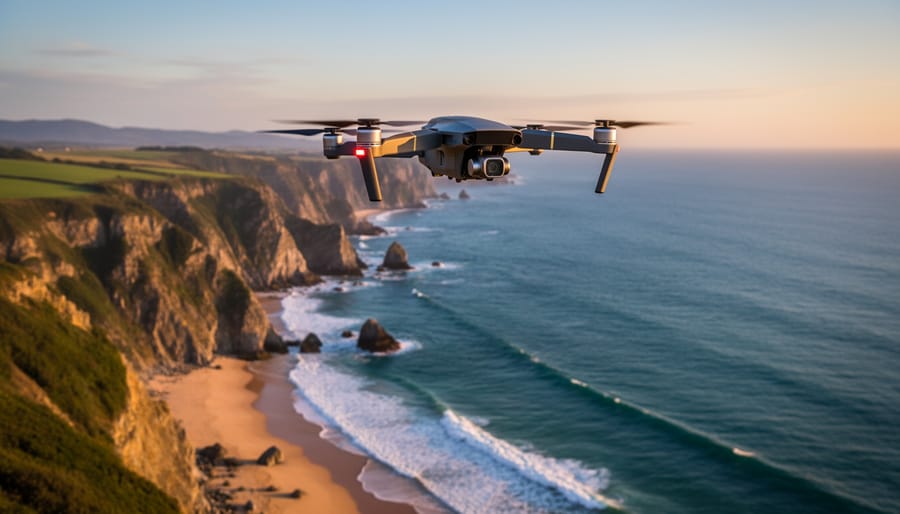
Quadcopter photography lets you capture stunning natural landscapes from perspectives previously reserved for helicopter pilots and mountaineers, and getting started requires only a consumer drone (typically $500-$2000), basic flight skills you can learn in an afternoon, and knowledge of airspace regulations in your area. The process involves planning your shot location, checking weather and legal restrictions, launching your quadcopter, composing aerial frames while maintaining line of sight, and landing safely with memory card full of unique images. Most beginners fly their first successful landscape mission within their first three flights.
The barrier to entry has dropped dramatically since the early days of drone photography. Modern quadcopters come equipped with GPS stabilization, obstacle avoidance sensors, and cameras capable of shooting 20-megapixel stills and 4K video. You don’t need a background in aviation or advanced technical skills. What you do need is patience to learn the fundamentals, respect for safety protocols, and an eye for composition that translates from ground-level photography to aerial perspectives.
Natural landscapes present ideal subjects for your first drone flights. Wide open spaces give you room to practice without navigating tight obstacles, and the visual payoff is immediate. A forest canopy at sunrise, coastal cliffs meeting the ocean, or mountain ranges stretching toward the horizon all transform when viewed from 200 feet up. The technical challenge lies in balancing flight control, camera settings, and artistic vision simultaneously, but the learning curve rewards practice quickly. This guide walks you through everything from pre-flight checklists to post-capture verification, ensuring your first aerial landscape shoot produces images worth sharing.
Essential Gear and Equipment for Quadcopter Landscape Photography
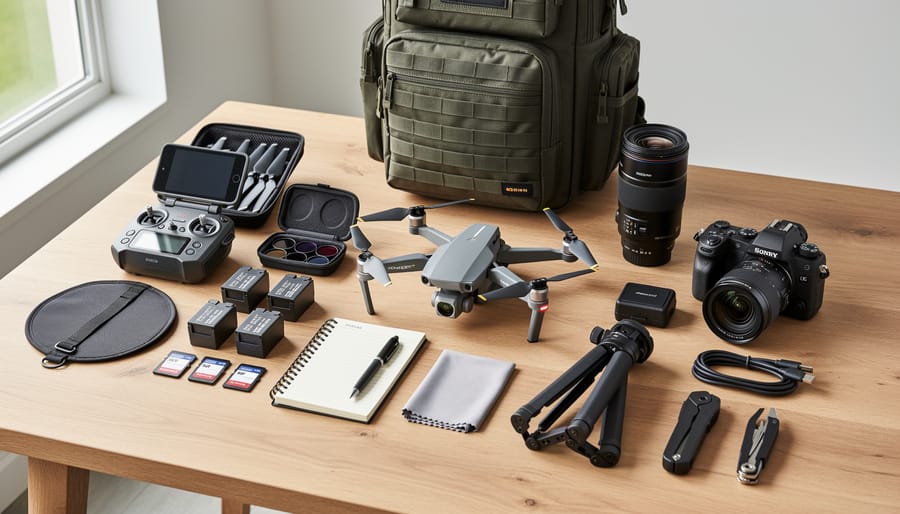
Your quadcopter is only as good as the ecosystem of gear supporting it. Before you launch for that first landscape shot, you need a reliable setup that won’t leave you stranded mid-mission or missing the golden hour because of a dead battery.
Choosing Your Quadcopter
For natural landscapes, you need stability, camera quality, and enough flight time to compose your shots without rushing. Consumer models like the DJI Mini series offer portability and 4K cameras starting around $500, making them ideal if you’re hiking to remote locations. They handle moderate wind and deliver sharp imagery for social media or personal projects. Prosumer models, think DJI Air or Mavic, start closer to $1,000 but give you larger sensors, adjustable apertures, and better low-light performance. If you’re shooting for print or commercial work, these are worth the investment. The larger sensor captures more detail in shadows and highlights, critical when you’re photographing expansive terrain with dramatic light.
Camera Specifications That Actually Matter
Sensor size trumps megapixels for landscape work. A 1-inch sensor on a prosumer model handles high-contrast scenes, bright skies meeting dark forests, far better than a smaller sensor at 48 megapixels. Look for RAW shooting capability; JPEG compression throws away the tonal information you need for serious editing. Video specs matter too, even if you’re focused on stills. 4K at 60fps gives you flexibility to extract high-resolution frames or add motion to your portfolio.
Batteries and Flight Time Reality
Manufacturers quote 30 to 40 minutes of flight time, but expect 20 to 25 minutes in real conditions with wind and cold. For landscape work, carry at least three batteries. One isn’t enough to experiment with compositions, and two leaves no safety margin if you need to reposition or the light suddenly improves. Batteries run around $100 to $150 each for prosumer models. In cold weather, keep spares in an inside pocket; a battery at 40°F delivers maybe 60% of its rated capacity.
Essential Accessories Checklist
Before heading into the field, make sure you have:
- High-speed microSD cards (V30 rating minimum, 128GB or larger) for 4K video and RAW bursts
- ND filters (ND8, ND16, ND32) to control shutter speed in bright conditions and achieve natural motion blur
- Circular polarizing filter to reduce glare from water and enhance sky saturation
- At least two sets of spare propellers, they’re fragile and easily damaged on rough terrain
- Portable landing pad to protect gimbal and camera from dust and debris during takeoff
- Mobile device with sufficient screen brightness (600 nits minimum) to see your composition in sunlight
- Lens cloth and sensor cleaning kit for maintaining camera clarity in dusty environments
Budget-Friendly Starter Kit
You can start landscape drone work for under $700 total: a DJI Mini 4K ($500), one extra battery ($80), a 128GB card ($30), a basic ND filter set ($40), and spare props ($15). This setup handles most daylight landscapes and lets you learn composition and flight skills before investing in prosumer gear. For serious work, budget $1,500 to $2,000: a model with a 1-inch sensor, fly-more combo with three batteries, professional filter set, and a tablet with a bright display for better image review in the field.
The right accessories turn a quadcopter into a dependable landscape tool. Skimping on batteries or cards means missing shots; investing wisely means you’re ready when the light turns magical. Pair your drone gear with solid knowledge of camera settings fundamentals, and you’re equipped to capture landscapes that were impossible from ground level just a decade ago.
Safety, Legal Requirements, and Pre-Flight Considerations
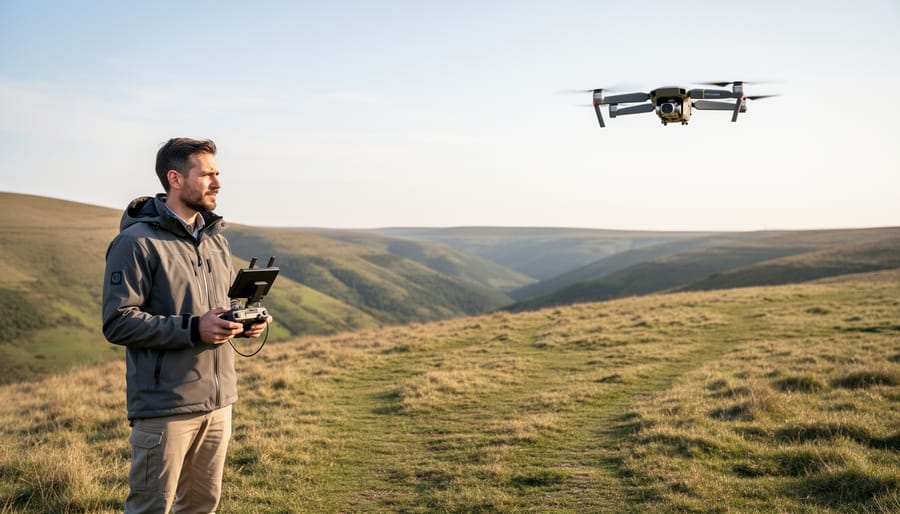
Before you launch a quadcopter to photograph natural landscapes, you need to understand the legal framework and safety protocols that protect both you and the environment. Flying without proper knowledge can result in fines, equipment confiscation, or harm to sensitive ecosystems.
In the United States, the Federal Aviation Administration regulates all drone operations through Part 107 airspace rules which require recreational pilots to pass the TRUST test (a free online course) and commercial operators to hold a Remote Pilot Certificate. You must register your quadcopter if it weighs more than 0.55 pounds, and you’re required to maintain visual line of sight at all times. Many popular landscape destinations fall within restricted airspace, national parks generally prohibit drone flights entirely, while national forests may allow them with specific limitations. Before traveling to any location, check airspace classifications using apps like B4UFLY or AirMap to identify no-fly zones, temporary flight restrictions, and altitude limits.
Weather conditions determine whether you can fly safely. Wind speeds above 20 mph will compromise stability and image quality, while FAA weather visibility minimums require at least three miles of visibility for legal operation. Rain, fog, and snow create moisture risks for electronics and obscure your view of the aircraft. Cold temperatures drain batteries faster, expect 30-40% reduced flight time below freezing, so carry extras and keep them warm against your body until you’re ready to fly.
Wildlife proximity demands careful consideration. Low-altitude flights can disturb nesting birds, frighten ground animals, and disrupt migratory patterns. Stay at least 300 feet from visible wildlife and avoid sensitive areas during breeding seasons. Following Leave No Trace principles means minimizing your environmental impact: don’t trample vegetation to reach launch sites, pack out all equipment including broken propellers, and respect closures designed to protect fragile landscapes.
Battery safety extends beyond flight time. Never leave lithium polymer batteries fully charged for extended periods, store them at 40-60% capacity in fireproof bags, and inspect them for swelling or damage before each use. Establish emergency procedures before takeoff: know your return-to-home function, identify safe landing zones if you lose signal, and have a plan for retrieving a downed aircraft from difficult terrain without causing additional environmental damage.
Preparing for Your Landscape Photography Flight
Preparation separates successful aerial shoots from wasted battery charges and missed opportunities. Before you even pack your quadcopter, invest time in research and planning that directly impacts your results.
Start by scouting your location remotely through satellite imagery and topographic maps. Google Earth lets you preview terrain features, identify potential obstacles like power lines or cell towers, and spot compositions that might work from 200 feet up. If possible, visit the site beforehand on foot. Walk the area where you’ll operate, note launch spots with clear sightlines, and identify backup landing zones in case you need to bring the drone down quickly.
Weather determines everything in aerial landscape work. Check forecasts for wind speed at ground level and aloft, most consumer quadcopters struggle above 20 mph winds, and gusts will ruin image sharpness. Cloud cover affects your light quality, but also remember that temperature impacts battery performance. In cold conditions below 40°F, batteries drain 30-40% faster, so plan for shorter flight windows.
Timing your flight for optimal light requires more than checking sunrise times. Arrive 30 minutes before golden hour begins so you’re ready when the light peaks. In autumn and winter, that golden window closes fast. Summer offers longer shooting periods but harsher midday light. Scout your composition’s orientation beforehand, shooting into the sun creates silhouettes and lens flare; shooting with the sun behind you provides even illumination but flatter contrast.
Before launching, plan your flight path mentally or sketch it out. Will you fly a straight line, orbit a feature, or climb vertically while panning the gimbal? Knowing your sequence prevents aimless hovering that drains batteries.
Set your camera to RAW format, configure bracketing if your model supports it, and switch to manual exposure mode. Calibrate your compass and IMU at the launch site following your quadcopter’s specific procedure. These three minutes of calibration prevent drift and flyaways that end shoots prematurely. Verify your return-to-home altitude exceeds the tallest obstacle between you and your launch point.
Step-by-Step Process for Capturing Landscape Images
Setting Up Your Quadcopter at the Location
Once you’ve arrived at your chosen location, take a moment to survey the immediate area before unpacking your quadcopter. Look for flat, stable ground free of tall grass, loose dirt, or standing water, a clear patch of rock, short grass, or firm soil works best. This landing spot becomes your reference point for the entire flight.
Power on your remote controller first, then the quadcopter itself. This sequence ensures your drone connects to the controller rather than searching for a previous device. Launch the manufacturer’s app on your mobile device and wait for the live camera feed to appear, confirming the connection is stable.
Before takeoff, initiate compass calibration if your app prompts you or if you’re flying in a new location. This typically involves rotating the quadcopter horizontally 360 degrees, then vertically. The process takes about 30 seconds and prevents navigation errors that could send your drone off course mid-flight.
Next, set your return-to-home altitude in the app settings. For landscape work, 120 feet is a safe default that clears most trees and terrain obstacles. This ensures your quadcopter can navigate back autonomously if signal is lost.
Finally, configure any intelligent flight modes you plan to use. For landscapes, orbit mode captures sweeping panoramas around a point of interest, while waypoint mode lets you pre-program a flight path over ridgelines or valleys. Test these controls at low altitude before committing to your main shots.
Takeoff and Initial Positioning
With your quadcopter powered on and calibrated, push the throttle sticks gently inward and downward to start the motors. Let them spin at idle for two seconds, this confirms all rotors are responding correctly. Now smoothly push the left stick upward to lift off. Rise to about six feet and hover there. Don’t rush. This pause lets you verify the quadcopter holds steady and responds predictably to your inputs.
Once stable, ascend gradually to your planned composition height. Start at 50-80 feet for your first landscape frame, high enough to reveal terrain patterns but low enough that you maintain clear visual contact. As you climb, glance between your screen and the actual quadcopter every few seconds. This habit prevents disorientation, especially when shooting in open landscapes where distance cues disappear quickly.
Now position the drone laterally using gentle stick movements. If you’re framing a mountain ridge, move forward or sideways until the ridge aligns properly in your viewfinder. Use the gimbal dial (usually the right shoulder wheel) to tilt the camera angle. A slight downward tilt reveals foreground detail; level or slightly upward captures expansive skies. For natural landscapes, a 20-30 degree downward angle often balances sky and land beautifully.
Watch your orientation indicator on screen constantly. When the quadcopter points away from you, stick directions reverse intuitively. If you feel confused about which way is forward, rotate the drone to face you, reorient mentally, then turn it back. Practice these positioning movements in open space before attempting complex compositions near obstacles.
Composing and Capturing Your Shots
With your quadcopter positioned and stable, you’re ready to compose and capture your landscape shots. The fundamentals of landscape composition still apply from above, but aerial perspectives reveal patterns and relationships invisible from the ground.
Start by activating your camera’s RAW format in the settings menu. RAW files preserve maximum detail in skies and shadows, essential when you’re dealing with the high dynamic range of natural landscapes. Position your quadcopter so the horizon sits along the upper or lower third of your frame rather than dead center, this creates more compelling images than symmetrical splits.
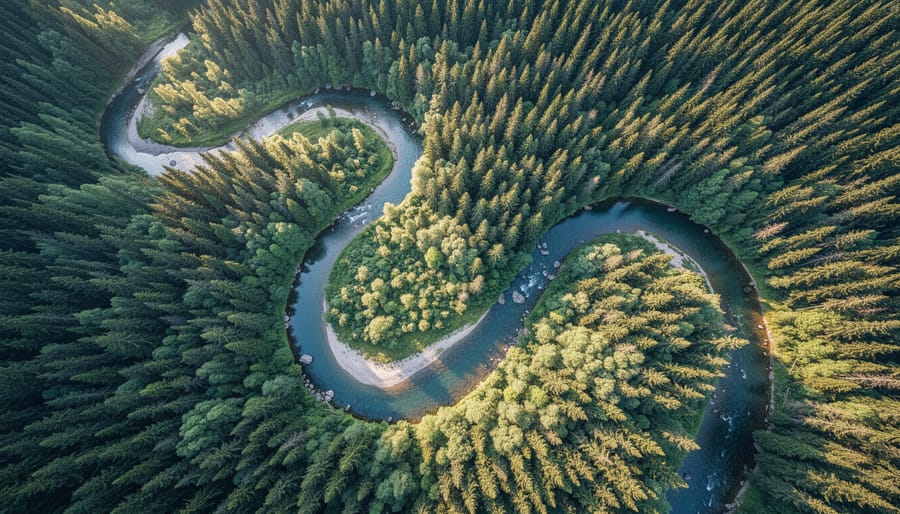
Look for leading lines in the terrain below: rivers, ridgelines, tree lines, or trails that guide the viewer’s eye through the frame. A winding creekbed becomes a powerful compositional element when viewed from 200 feet up. Adjust your altitude to emphasize these features, dropping lower to compress foreground elements or rising higher to showcase the broader context.
- Capture a baseline shot at your initial altitude and framing
- Shoot three bracketed exposures (under, correct, over) for HDR flexibility
- Adjust altitude by 50 feet and reframe, capturing another bracketed sequence
- Pan horizontally to include different foreground elements while maintaining the same background
- Switch to video mode and execute a slow reveal or orbit movement
- Return to your strongest composition for final stills
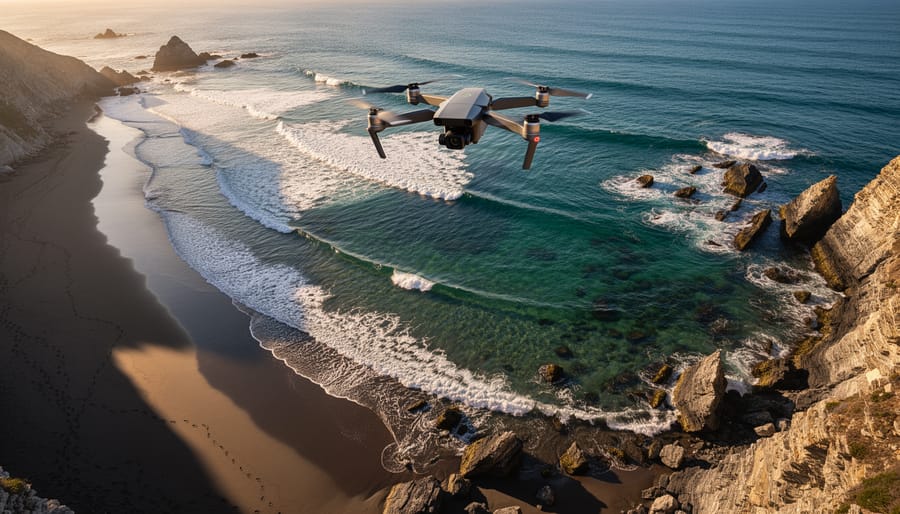
Many of the landscape photography secrets that work on the ground, like waiting for directional light to sculpt terrain, become even more dramatic from altitude. Shoot more variations than you think you need. A coastline might look flat at 100 feet but reveal stunning texture and patterns at 300 feet where you can see waves interacting with rock formations across a broader area.
Landing and Post-Flight Procedures
Initiate return-to-home by pressing the RTH button or manually guiding the quadcopter back while maintaining visual contact. Descend slowly in a controlled hover, landing on level ground away from debris. Once settled, disarm the motors immediately and power down the controller before the aircraft. Remove the battery within five minutes to prevent overheating, let it cool at ambient temperature for 30 minutes before recharging. Transfer footage to your phone or laptop on-site as a backup, checking that files aren’t corrupted. Inspect propellers for damage and clean any dust from sensors before packing up.
Camera Settings and Technical Adjustments for Natural Landscapes
Getting your camera settings right matters more in aerial work than you might expect. At altitude, factors like vibration, constantly changing light angles, and the inability to reshoot quickly demand more deliberate technical choices upfront.
ISO: Prioritize Clean Skies
Start with your base ISO (typically 100 or 200) whenever possible. Sky gradients amplify noise more than terrestrial subjects, so keeping ISO low preserves smooth tonal transitions in clouds and distant horizons. If light drops at dusk or dawn, push ISO cautiously, most modern drone cameras handle ISO 400 cleanly, but quality degrades fast beyond 800. In landscape work, a slightly underexposed raw file that you lift in post produces cleaner results than a high-ISO capture.
Shutter Speed and Vibration Management
Unlike handheld ground photography, your quadcopter introduces micro-vibrations even in calm air. A shutter speed faster than 1/160s compensates for most gimbal movement and keeps landscape details sharp. For still images, 1/250s or faster works well in bright conditions. If you’re capturing video clips, follow the 180-degree shutter rule (shutter speed double your frame rate) and rely on ND filters to prevent overexposure. Without an ND filter on a sunny afternoon, you’ll end up with stuttery, oversharpened motion that screams amateur.
Aperture Choices at Altitude
Depth of field behaves differently from above. Since everything in a landscape shot sits relatively far from the camera, you don’t need f/16 to keep foreground and background sharp. f/5.6 to f/8 delivers edge-to-edge sharpness without introducing diffraction softness, which plagues smaller drone sensors at narrow apertures. Shooting wide open (f/2.8 or larger) rarely makes sense in landscape work, you sacrifice sharpness uniformly across the frame for no compositional gain.
White Balance for Time of Day
Auto white balance handles most midday scenarios accurately, but sunrise and sunset demand manual intervention. Warm tones define golden hour landscapes, so switching to daylight or cloudy presets (around 5500K, 6500K) preserves those amber hues instead of neutralizing them. Shooting raw gives you white balance flexibility in post, but getting close in-camera saves editing time and helps you preview results on-site. For blue hour (just after sunset or before sunrise), try tungsten or a cooler preset to emphasize the deep blues without oversaturating them.
Exposure Compensation and Histograms
Landscapes with bright skies fool your drone’s meter into underexposing foreground terrain. Dial in +0.3 to +0.7 stops of exposure compensation when the horizon dominates your frame, then check the histogram on your controller screen. You want the graph weighted toward the right (brighter values) without clipping highlights. If the sky blows out, recovery in post looks ugly, better to shoot a bracketed sequence (three shots at -1, 0, +1 EV) and blend them later if dynamic range exceeds your sensor’s capability.
Understanding these settings connects directly to broader nature camera settings principles, adapted for the aerial environment where you can’t adjust on the fly as easily as on the ground.
Reviewing Your Results and Troubleshooting Common Issues
Don’t wait until you’re home to check your work. Review images immediately after landing while you still have battery power and daylight to reshoot if needed. Zoom in on your phone or tablet to at least 100% magnification and scrutinize the sharpest areas, like trees or rock formations. If the detail looks soft or smudged, you’ve likely got motion blur from wind or a shutter speed that was too slow for the movement.
Check your histogram to verify exposure. Blown highlights in skies are nearly impossible to recover, and crushed shadows in forested valleys lose critical detail. If you see clipping on either end, note which frames need bracketing or exposure compensation adjustments for the re-fly.
Common problems reveal themselves quickly. Motion blur means you need to increase shutter speed or wait for calmer air. If the horizon tilts despite your quadcopter being level, the gimbal may have drifted during flight, recalibrate before your next takeoff. Overexposed sections often come from shooting midday without ND filters; underexposed foregrounds happen when you meter for bright skies without bracketing.
A successful landscape shot has sharp detail throughout the frame, balanced exposure that preserves both sky and land information, and a composition that holds your attention. If something feels off, trust your gut and fly again. Batteries are cheaper than regretting a missed shot.
Once you’re confident in your captures, apply the same field-tested techniques you’d use for ground-based landscape work during post-processing. Import your RAW files, adjust white balance and exposure, enhance local contrast, and consider stacking bracketed shots for extended dynamic range. Your aerial perspective deserves the same careful editing attention as any terrestrial landscape photograph.
Common Questions About Quadcopter Landscape Photography
What weather conditions are safe for quadcopter landscape photography?
Fly only when winds are below 20 mph, visibility exceeds 3 miles, and no precipitation is forecast. Avoid flights during temperature extremes (below 32°F or above 104°F), in fog, or when storms are within 30 miles of your location.
How long can I actually fly before needing to land?
Most consumer quadcopters provide 20-25 minutes of flight time per battery in ideal conditions, but plan for 15-18 minutes of usable shooting time. Always land with at least 20% battery remaining as a safety buffer, and carry three to four batteries for a productive landscape session.
Do I need special permits to fly in national parks?
Yes, launching, landing, or operating drones is prohibited in all U.S. National Parks without a special use permit, which is rarely granted. Many state parks and wilderness areas have similar restrictions, so always check with land managers before your trip and scout alternative viewpoints outside protected boundaries.
How difficult is it to learn quadcopter photography?
Expect to spend 5-10 practice flights mastering basic controls and spatial orientation before attempting serious landscape compositions. Most pilots feel comfortable with core techniques within a month of regular practice, though refining your artistic eye for aerial perspectives takes considerably longer.
Wind deserves special attention because it’s the factor that grounds more landscape flights than anything else. Gusts create two problems: they drain batteries faster as motors work harder to maintain position, and they introduce camera shake that ruins sharpness even with gimbal stabilization. If you’re hearing wind noise in your ears or seeing trees swaying noticeably, it’s too windy to fly. Launch in calm morning conditions whenever possible, as winds typically increase throughout the day in mountainous terrain.
Cold weather dramatically reduces battery performance, sometimes cutting flight time by 40% when temperatures drop below freezing. Keep spare batteries warm inside your jacket until you’re ready to swap them, and consider hand warmers in your gear bag. The battery itself will generate some heat during flight, but starting cold means you’ll see low-battery warnings much sooner than the specs suggest. Some pilots avoid winter flights entirely below 20°F, while others accept the shorter sessions as part of capturing snowy landscapes.
Never fly near active wildfires, during wildlife nesting seasons in sensitive areas, or when your landscape photography intersects with climate change photography documenting fragile ecosystems where disturbance could impact ongoing research. Respect closures, avoid dawn and dusk in areas with active predators hunting, and remember that just because you can fly somewhere legally doesn’t mean you should.
Quadcopter landscape photography opens up perspectives that were once accessible only to helicopter pilots or mountaineers willing to haul heavy gear to remote peaks. You’ve now got the complete roadmap: the gear you need, the legal boxes to check, the pre-flight planning that prevents wasted trips, and the step-by-step process from takeoff to landing. The technical settings and composition techniques we’ve covered will help you capture images that showcase natural landscapes in ways ground-based photography simply can’t match.
Start simple. Your first few flights should focus on mastering basic controls and safe operation rather than chasing the perfect golden-hour composition. Pick accessible locations with forgiving terrain, fly in calm conditions, and give yourself permission to capture straightforward overhead shots before attempting complex flight paths or dramatic angles. As your confidence builds, you’ll naturally start experimenting with different altitudes, angles, and lighting conditions.
Never compromise on safety or legal compliance, no matter how tempting the shot. Check airspace restrictions before every flight, respect wildlife and other visitors, and always have a backup plan if conditions deteriorate. The landscapes will still be there tomorrow, but a crashed quadcopter or a hefty fine from flying in restricted areas will end your aerial photography journey before it really begins.
Keep developing your skills by studying how light interacts with terrain from above, learning advanced camera techniques, and connecting with other drone photographers who can share location tips and creative approaches. Each flight teaches you something new about reading weather, anticipating how landscapes will look from altitude, and timing your shots for maximum impact.



 By
By