By
By 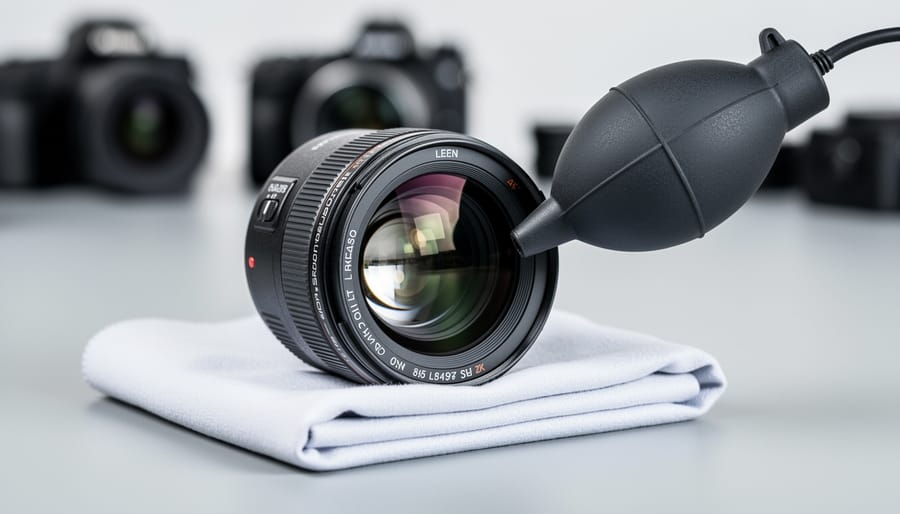
Cleaning a camera lens properly takes about five minutes and requires just three tools: a rocket blower, a microfiber cloth, and lens cleaning solution. The technique matters more than the products. Most lens damage doesn’t come from dust or fingerprints, but from aggressive cleaning with the wrong materials or unnecessary wiping when a simple puff of air would suffice.
Here’s what photographers get wrong: they clean too often and too roughly. That smudge you’re obsessing over in your viewfinder? It probably won’t show up in your images unless you’re shooting at f/16 or smaller. A few specks of dust are invisible in final photos, but repeated scrubbing with dry tissues or your shirt creates micro-scratches that genuinely degrade image quality over time.
The good news is that proper lens cleaning is straightforward once you understand the physics at play. Glass coatings are surprisingly durable when treated correctly, but remarkably fragile when you drag particles across the surface. Think of dust as tiny rocks. If you wipe before blowing, you’re essentially dragging those rocks across your lens in circular patterns. The technique we’ll walk through eliminates this risk entirely.
This guide covers everything from basic dust removal (which solves 80% of lens issues) to tackling stubborn oil smudges and water spots. You’ll learn exactly when cleaning is necessary, which materials are safe for modern lens coatings, and how to verify you’ve achieved optical cleanliness without making things worse. Whether you’re shooting a professional assignment or just want your gear performing at its best, these methods work for any lens from any manufacturer.
When Your Lens Actually Needs Cleaning (And When to Leave It Alone)
Most photographers clean their lenses far too often. That tiny speck of dust you’re obsessing over? It’s probably not affecting your images at all, and repeatedly wiping your lens to remove it risks causing real damage to the delicate coatings that actually matter for image quality.
Here’s the reality: a few particles of dust on your front element won’t show up in your photos. Light passes through that dust so quickly that it doesn’t have time to create a visible defect in your image. You’d need a substantial amount of debris, or debris directly blocking a significant portion of the glass, before you’d notice any impact on sharpness or contrast. The front element can handle more neglect than you think.
What actually degrades image quality are oils and smudges. Fingerprints, water spots, and greasy residue create visible problems: reduced contrast, flare in backlit situations, and that characteristic hazy look in your photos. These are the contaminants worth addressing.
You also need to distinguish between dust on the lens surface and dust inside the lens barrel. Internal dust is completely normal and exists in virtually every lens, even brand new ones fresh from the factory. Unless you see large, obvious particles floating around inside, which might indicate a broken seal, internal dust is harmless and impossible to clean without disassembling the lens. Leave it alone.
Clean your lens when you can see or feel actual grime on the glass surface. If you’re shooting into the sun and getting more flare than usual, or if your images look hazier than they should, then it’s time. Otherwise, put the cloth down and go shoot.
Essential Tools and Materials for Safe Lens Cleaning
What to Avoid: Cleaning Materials That Damage Lens Coatings
The temptation to grab whatever’s nearby can permanently damage your lens. Window cleaners like Windex contain ammonia that dissolves anti-reflective coatings within seconds. Rubbing alcohol, acetone, and kitchen cleaners cause similar destruction. Even plain water leaves mineral deposits as it dries.
Paper towels and facial tissues act like fine sandpaper on optical glass, their wood fibers creating microscopic scratches that accumulate into visible haze. Regular clothing isn’t much better, you should avoid a t-shirt or sleeve because cotton and synthetic fabrics trap grit that scores the coating with every wipe.
Compressed air cans pose a different threat. The propellant exits as freezing liquid droplets that crack lens elements and leave oily residue. Even breathing directly on the glass before wiping introduces saliva particles that bond to coatings.
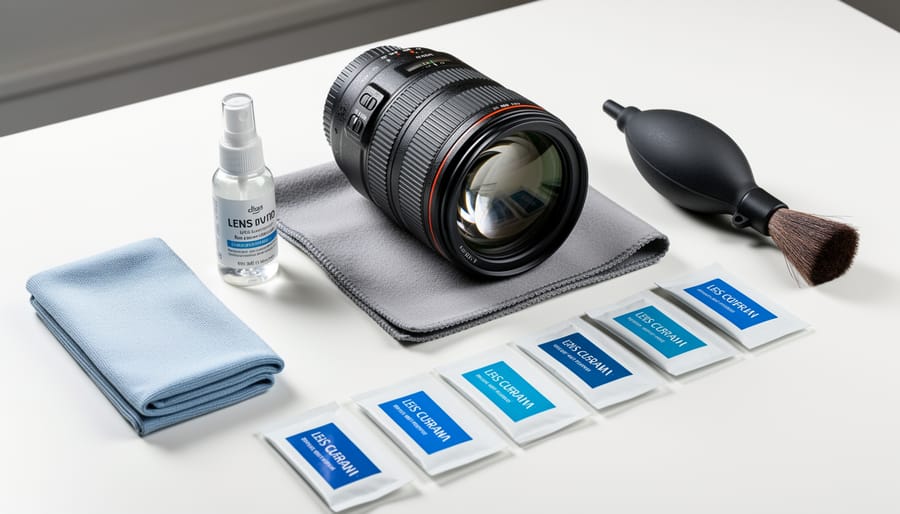
Stick with purpose-made supplies: a microfiber cleaning cloth designed for optics, proper lens cleaning solution, and manual blowers. Your thousand-dollar lens deserves the five-dollar investment in correct tools.
Safety Precautions Before You Begin
Before you touch that lens, take a minute to set yourself up for success and avoid turning a simple cleaning into an expensive repair.
Work somewhere clean and well-lit where you won’t introduce more contamination than you remove. A cluttered kitchen counter covered in crumbs isn’t the place. Choose a spot away from fans, open windows, or anything that’ll blow dust around while you’re working. Good overhead lighting helps you actually see what you’re doing and spot smudges you might otherwise miss.
Always remove the lens from the camera body before cleaning. This prevents accidentally getting cleaning solution or debris inside the camera, protects the sensor from contamination, and gives you proper access to both the front and rear elements. When you take it off, immediately cap the camera body to keep dust out.
Give the lens a gentle inspection before you start. Hold it up to the light and look along the barrel for any signs of impact damage, cracks in the glass, or separation between lens elements. Rotate the focus and zoom rings slowly to check for grinding, unusual resistance, or any loose parts rattling inside.
Similarly, if the lens has taken a hard knock or been dropped, even if it looks fine externally, internal elements might be misaligned. Cleaning won’t fix optical problems, and forcing a damaged lens through the cleaning process could make things worse. When in doubt, a repair shop can assess whether it needs service or just surface cleaning.
Finally, check your lens cap and rear cap before you finish. Dirty caps just recontaminate a freshly cleaned lens, so give them a quick wipe down too.
Step-by-Step: How to Clean Your Camera Lens Properly
Step 1: Remove Loose Dust and Debris
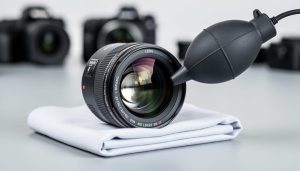
The rocket blower is your first and most important line of defense because it removes particles without any physical contact. Hold the blower about two inches from the lens surface and angle the lens slightly downward so gravity helps dislodged particles fall away rather than resettling. Give several firm squeezes, working around the entire circumference of the glass. Never blow first with your mouth, your breath contains moisture that can create new problems.
Here’s the critical mistake many photographers make: reaching for a brush or cloth before blowing. Those loose dust particles act like sandpaper when dragged across your lens coating. Always blow first, even if you think there’s barely any dust visible. For the front element, remove the lens hood if attached to access the edges where dust accumulates. The rear element needs extra care since it’s often more exposed when you’re changing lenses, blow it while holding the lens mount-side down.
A quality rocket blower (not a compressed air can, which can spray propellant) should be part of your essential cleaning system care kit. One thorough blowing session eliminates 80-90% of typical dust contamination without touching the glass at all.
Step 2: Gentle Brushing for Stubborn Particles
After blowing away loose dust, you might notice particles that refuse to budge. This is when a dedicated lens brush becomes necessary, but timing matters. Never brush first, always blow first. Brushing before blowing risks dragging abrasive particles across the glass, creating microscopic scratches that accumulate over time.
A proper lens brush has ultra-soft, natural bristles that won’t scratch lens coatings. Hold the brush at a shallow angle and use light, sweeping strokes from the center outward. Think of it as gently coaxing particles off the surface rather than scrubbing them away. The bristles should barely bend as they contact the glass.
Keep the brush itself clean by storing it in a protective case and never touching the bristles with your fingers. Skin oils transfer to the bristles and then onto your lens. Between uses, give the brush a few quick flicks to dislodge any particles it picked up during cleaning.
If particles still won’t move after gentle brushing, stop. You’re dealing with stuck-on contamination that requires wet cleaning, not more aggressive brushing that risks damage.
Step 3: Applying Cleaning Solution Correctly
Only reach for cleaning solution when blowing and brushing haven’t removed the smudge. Oils from fingerprints and stubborn residue need liquid, but using too much creates new problems.
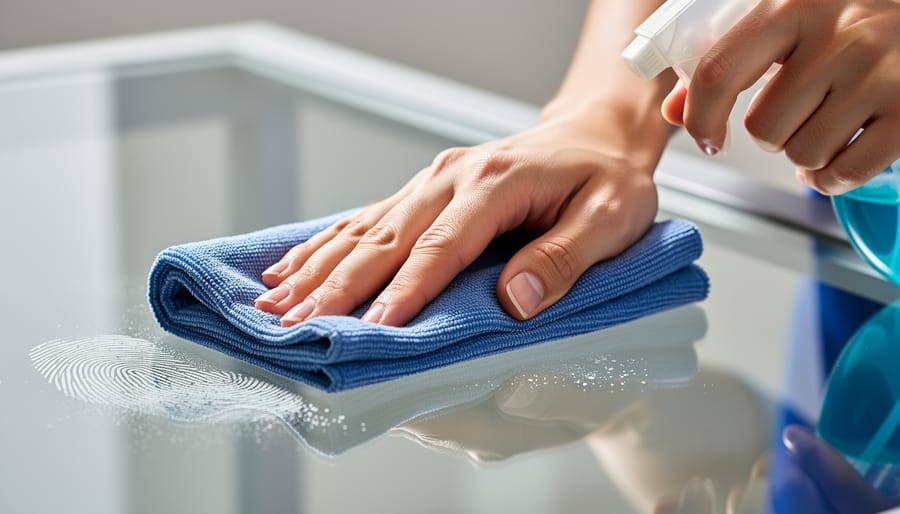
Apply solution to your microfiber cloth, never directly onto the lens. Spraying or dripping liquid onto glass risks solution seeping into the lens barrel, where it can damage internal elements or fog up interior glass surfaces. Two to three drops on your cloth is plenty for an entire lens element.
Use a dedicated lens cleaning solution, not eyeglass cleaner or household products. Camera lens coatings are more delicate than eyeglass coatings, and some multipurpose cleaners contain additives that leave residue or degrade anti-reflective treatments. Isopropyl alcohol works in a pinch but should be diluted to 90% concentration or less.
Fold your microfiber cloth into quarters so you have a fresh, slightly damp section to work with. The cloth should feel barely moist, not wet. If you can see moisture on the glass after wiping, you’ve used too much.
Work quickly once solution is applied. Letting it sit and air-dry causes streaking. You want just enough moisture to dissolve oils as you wipe, then immediately follow with a dry section of the cloth to remove any remaining solution. This two-pass technique, one damp, one dry, prevents the cloudy film that frustrated photographers often see after cleaning.
Step 4: Wiping Technique That Prevents Streaks
The key to streak-free wiping is starting at the lens center and working outward in a gentle spiral motion. This technique pushes contaminants toward the edges rather than spreading them across the glass. Think of it like cleaning a record, you’re guiding dirt away from the most critical area.
Use light pressure, barely more than the weight of your hand. Many photographers press too hard, which can grind particles into the coating or create micro-scratches. If you feel yourself pushing, you’re doing it wrong. The cleaning solution does the work; your cloth just guides it.
Watch your microfiber cloth as you work. The moment you see a smudge transfer to the fabric, fold to a fresh section. Using the same dirty spot spreads oils around rather than removing them, guaranteeing streaks. For a typical lens cleaning, you’ll use three or four fresh sections of cloth, don’t try to conserve by reusing contaminated areas.
If streaks appear after your first pass, let the lens dry completely, then repeat with a barely-damp cloth using the same spiral technique.
Cleaning the Rear Element (The Often-Forgotten Surface)
Most photographers religiously clean their front elements while completely ignoring the rear glass, a backwards priority. The rear element sits much closer to your sensor, meaning dust or smudges here have a more direct impact on image quality. A fingerprint on the rear element can cause more noticeable flare and contrast loss than the same smudge on the front.
Cleaning the rear element requires extra care because it’s recessed and vulnerable. You can clean it while mounted to the camera body, which is actually safer than removing the lens entirely, you minimize the time your sensor sits exposed to airborne dust. Hold the camera body face-up on a clean surface, support it securely, and work quickly.
Use the same blow-brush-wipe sequence, but be aware of the confined space. Rocket blowers work fine for dust removal, but angle the nozzle carefully to avoid blasting debris toward your sensor. When wiping, use a wrapped finger technique with your microfiber cloth rather than the full cloth, you need precision in this tight area. One or two careful circular passes should be enough.
Wide-angle lenses with protruding rear elements demand special attention. That bulging back glass extends beyond the mount, making it extremely easy to accidentally touch during lens changes. These lenses need more frequent rear-element checks. Never set these lenses down rear-first, even for a second, and be especially gentle when cleaning around the protruding glass to avoid putting lateral pressure on the element.
How to Verify Your Lens Is Truly Clean
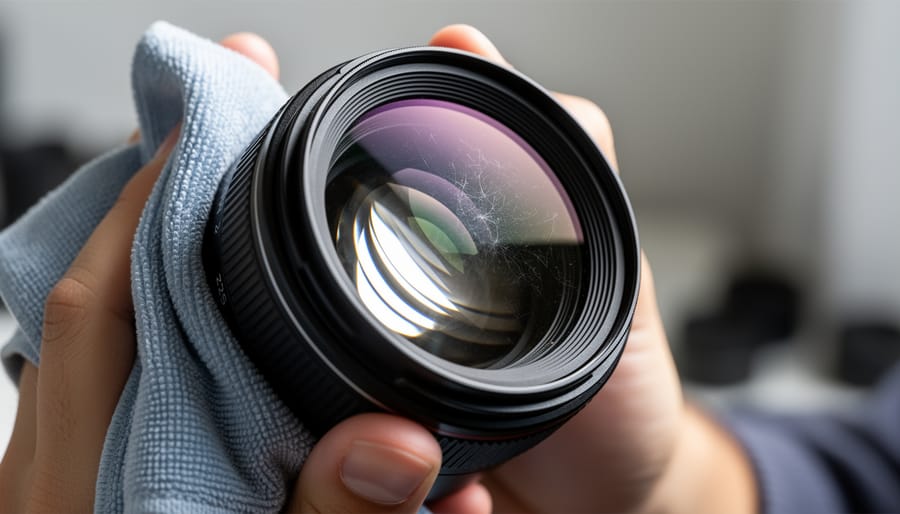
After you’ve completed the wiping process, the real test begins. Many photographers assume they’re done when the cloth comes away clean, but that’s only half the story. Your lens might still harbor subtle streaks or residue that won’t show up under normal room lighting but will definitely appear in backlit shots or when shooting toward light sources.
The most reliable inspection method is the flashlight technique. Hold a small LED flashlight or your phone’s light at a shallow angle to the front element, about 30 degrees works best. Slowly rotate the lens while watching how light reflects off the glass surface. Clean glass shows an even, consistent reflection. Smudges appear as darker patches or irregular spots, and streaks create visible lines in the reflection pattern. This angled light reveals contamination that looks invisible under overhead lighting.
Don’t just check the center. Work systematically from the middle outward in a spiral, tilting the lens slightly as you go. The edges catch fingerprint oils more easily, especially if you touched the barrel near the glass during cleaning. Flip the lens and repeat the inspection on the rear element using the same technique.
For final verification, shoot a test image. Point your camera at a bright, evenly-lit surface like a white wall or overcast sky at f/8 or smaller. Defocus slightly so you’re not capturing wall texture. Review the image at 100% magnification on your camera’s screen or computer. Surface contamination shows as soft, blurry blotches, often with defined edges. Internal dust appears as sharper, smaller dark specks that won’t budge no matter how much you clean, these are harmless and don’t require action.
If your test shot shows smudges or the flashlight reveals streaks, don’t panic. You’ve likely left cleaning solution residue or used too much liquid. Go back with a completely dry section of microfiber cloth and buff the affected area using light, circular motions. Truly clean glass should be nearly invisible under inspection, no hazing, no patterns, just clear reflections.
Dealing with Challenging Cleaning Scenarios
Sometimes standard cleaning techniques aren’t enough. When you encounter stubborn contaminants, a methodical approach prevents damage while removing what basic wiping can’t.
Dried Water Spots and Mineral Deposits
Hard water leaves mineral deposits that resist normal cleaning solutions. Apply lens cleaning fluid and let it sit for 30-60 seconds to dissolve the minerals before wiping. Multiple gentle passes work better than aggressive scrubbing. For persistent spots, slightly dampen the cloth with distilled water (never tap water) and use minimal circular pressure. If spots remain after three attempts, the coating itself may be etched, professional assessment becomes necessary.
Tree Sap and Sticky Residues
Never try to peel or scrape hardened sap. Dampen a microfiber cloth with lens cleaning solution and lay it directly on the affected area for several minutes to soften the residue. Wipe gently in one direction, then clean normally. Extremely stubborn sap may require isopropyl alcohol (70% concentration), but test on a UV filter first rather than your lens. The same UV filter cleaning techniques apply when working with alcohol-based solutions.
Coastal Salt Spray
Salt crystallizes and can scratch if wiped dry. Breathe on the lens to add moisture, then use slightly dampened microfiber to dissolve salt before wiping. Clean both elements, salt spray reaches everywhere.
Fungus Warning Signs
Fine web-like patterns or cloudy spots that won’t wipe away indicate fungus growth between elements. Stop immediately. Fungus requires professional disassembly and specialized treatment. Attempting DIY removal spreads spores and damages coatings permanently. If you spot early fungus, isolate that lens from others and seek professional service within days, not weeks.
Preventive Maintenance: Keeping Lenses Cleaner for Longer
The best cleaning technique is the one you rarely need to use. Smart preventive habits dramatically reduce how often you’ll handle your lenses, which means fewer opportunities to accidentally scratch coatings or introduce new dust.
UV filters serve as sacrificial front elements that take the abuse instead of your expensive glass. Wedding and event photographers routinely use them because a $30 filter is infinitely cheaper to replace than a $1,500 lens front element after an accidental bump. Keep the filter clean instead of constantly touching your actual lens. The image quality impact of a good quality filter is negligible compared to the protection it provides in real-world shooting conditions.
Beyond filters, your daily habits matter more than you’d think:
- Replace lens caps immediately after shooting, front and rear, not when you get home
- Store lenses in a dry cabinet or with silica gel packets to prevent moisture buildup and fungus growth
- Change lenses with the camera body facing downward to minimize dust entering the mount
- Use lens hoods not just for flare control but as physical bumpers that keep fingers and objects away from the glass
- Keep lenses in padded compartments where they won’t rub against each other during transport
Nature and wildlife photographers face harsh conditions that accelerate lens contamination. Many carry microfiber cloths for quick finger smudge removal but avoid full wet cleaning in the field where airborne dust can scratch during wiping. If you shoot in humid coastal environments, inspect lenses weekly for early moisture spots that can develop into fungus you’ll need to remove fungus before it etches the glass permanently.
Sports shooters working sidelines during rain simply accept that lenses will get wet, but they wipe only the filter and save thorough cleaning for controlled indoor conditions later. The key insight: protect aggressively, clean conservatively.
Common Questions About Lens Cleaning
How often should I clean my camera lenses?
Only clean when you notice visible smudges, fingerprints, or oils affecting your images. For most photographers, this means thorough cleaning every few months rather than after every shoot. Dust specs rarely impact image quality and don’t require immediate attention.
Do UV filters need different cleaning techniques than bare glass?
No, filters receive the same gentle treatment as lens elements. The advantage is you can clean them more aggressively if needed since replacing a scratched filter costs far less than repairing damaged lens coatings. This is precisely why many photographers use them as sacrificial protection.
Are lens pens actually effective or just marketing gimmicks?
Quality lens pens work well for light dust and minor smudges, making them convenient for field touch-ups. However, they struggle with oils and fingerprints where liquid solution outperforms them. Think of them as a supplement to proper cleaning supplies, not a replacement.
Is there any difference between cleaning zoom and prime lenses?
The cleaning technique remains identical, but zoom lenses have more complex internal mechanisms that can draw in dust when extending. Pay extra attention to the rear element area where the barrel retracts, as this collects more debris than fixed prime lenses.
One question that surfaces frequently concerns modern lens coatings versus older uncoated glass. Contemporary lenses feature multi-layer anti-reflective coatings that require gentler handling than vintage uncoated elements. These coatings scratch more easily, so the microfiber cloth and proper solution become even more critical. Older uncoated glass tolerates slightly more aggressive cleaning, but you still shouldn’t use paper products or household cleaners.
Weather-sealed lenses generate confusion about whether they need special cleaning attention. The sealing protects internal elements from moisture and dust, but the front and rear glass still get dirty the same way. Clean them using identical techniques, just appreciate that the sealing gives you extra insurance against environmental contamination reaching the internal optics.
Some photographers wonder if third-party cleaning solutions work as well as brand-name options. The honest answer is that most dedicated lens cleaning fluids perform similarly, provided they’re alcohol-based and designed specifically for optical coatings. Avoid generic eyeglass cleaners, which may contain additives that leave residue on camera lens coatings.
Protecting your camera lenses doesn’t require obsessive cleaning sessions or constant fretting over every speck of dust. The key is developing a light-touch approach: clean only when it affects your images, use the right tools when you do clean, and trust the process you’ve learned here.
Most lenses can go weeks or months between proper cleanings if you’re careful about caps and storage. When you do reach for your cleaning kit, remember that patience and gentleness win every time. A single careful cleaning using proper technique does far less damage than daily aggressive wiping with whatever’s nearby.
Make lens inspection part of your regular camera routine, the same way you check battery levels or format cards. A quick rocket blower before shoots, caps on between sessions, and a thorough clean only when you spot problems that matter. That’s the rhythm professional photographers follow, and it keeps glass pristine for decades.
You’ve invested in quality lenses because you care about image quality. The cleaning knowledge you now have protects that investment without turning maintenance into anxiety. Clean with confidence, shoot without worry, and trust that proper care becomes second nature with practice.





 By
By