By
By 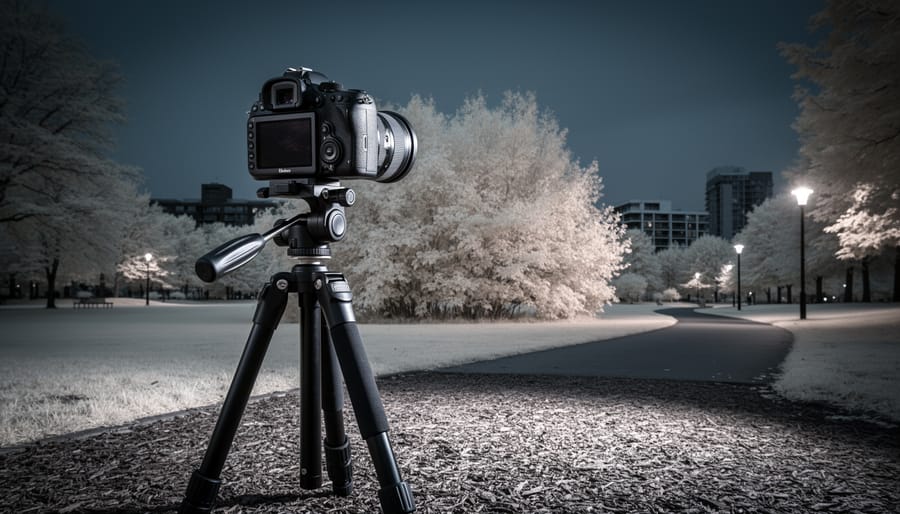
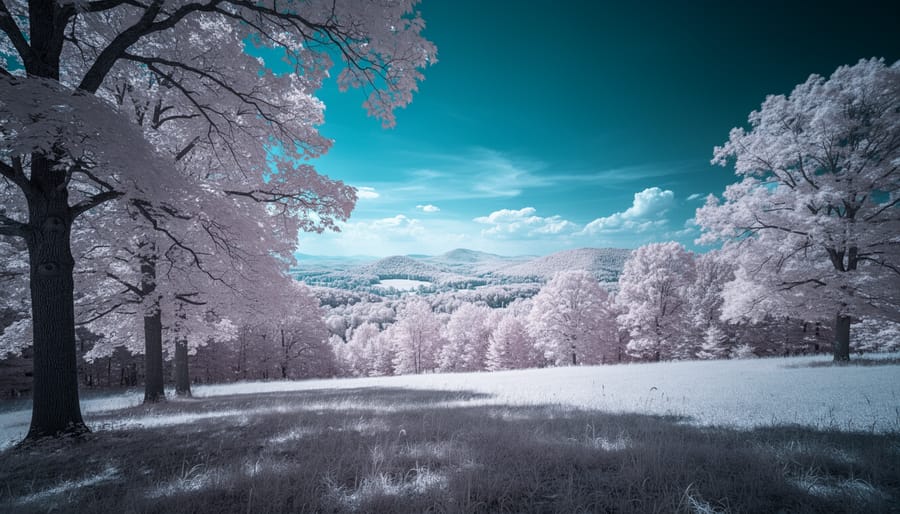
Infrared photography transforms your camera into a tool that sees beyond the visible spectrum, capturing light wavelengths between 700 and 1,200 nanometers to create surreal landscapes where foliage glows white, skies turn deep and dramatic, and everyday scenes take on an otherworldly quality. You’ll need either a converted camera with its infrared-blocking filter permanently removed (the most practical route for dedicated IR work) or an unconverted camera paired with a dark infrared filter that screws onto your lens, though the latter requires tripod-steady exposures of several seconds even in bright sunlight.
The technical barrier isn’t as high as it once was. Camera conversion services now cost between $250 and $400 and take about a week, while quality screw-on IR filters run $50 to $150 depending on the wavelength you choose. The 720nm filter produces the classic “Wood Effect” with white foliage and black skies that most photographers associate with infrared imagery, while 850nm and higher wavelengths yield increasingly monochromatic results with deeper contrast.
What makes infrared photography particularly appealing in 2026 is how it breathes new life into familiar scenes. That park you’ve photographed dozens of times becomes an alien landscape. Portrait work takes on a dreamlike softness with luminous skin tones. Architecture gains sculptural drama under IR’s unique rendering of materials and textures.
The learning curve involves understanding how different materials reflect infrared light, mastering white balance adjustments (your camera will struggle with IR’s color cast), and developing a workflow for the distinctive post-processing these files require.
What You’ll Need to Get Started with Infrared Photography
Camera Conversion Options Explained
You have three realistic paths into infrared photography, each with different trade-offs in cost, convenience, and commitment.
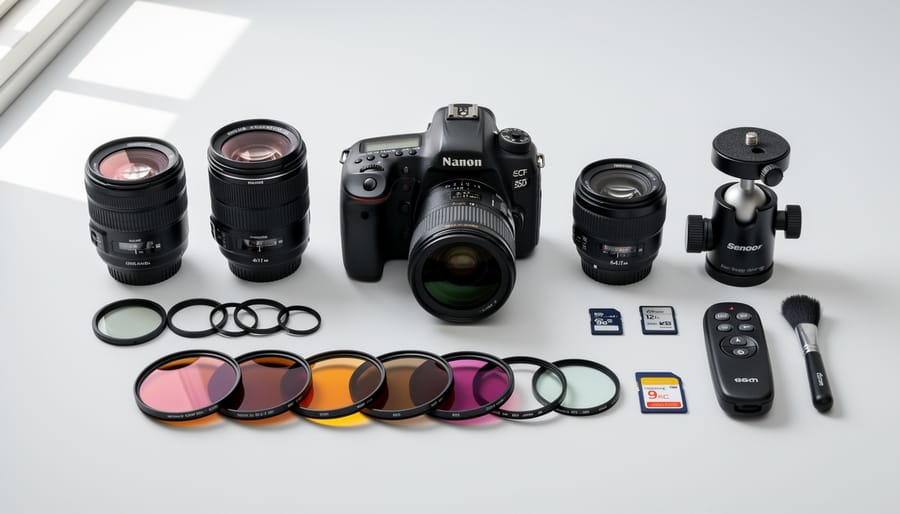
The simplest option is keeping your existing camera and buying a screw-on infrared filter. Filters typically cost between $50 and $200 depending on size and quality. This approach requires zero permanent changes to your gear. The downside? Exposure times stretch into multiple seconds even in bright sunlight because the filter blocks most visible light. You’ll need a sturdy tripod for every shot, and moving subjects become impossible to capture. Your camera’s autofocus won’t work through the filter, and composing through a viewfinder that’s nearly black takes patience.
Professional conversion removes your camera’s internal infrared-blocking filter and replaces it with one that passes only infrared light. Services like LifePixel, Kolari Vision, or MaxMax charge roughly $300 to $500 for the conversion. You’ll shoot handheld again with normal shutter speeds, autofocus works, and you can see through the viewfinder. The catch is permanence: your camera becomes infrared-only and can’t shoot regular photos anymore. Most photographers convert an older backup body rather than their primary camera.
DIY conversion costs under $50 if you’re comfortable disassembling your camera and have steady hands. Dozens of online guides walk through the process for popular models. But one slip destroys your sensor permanently, and you void any warranty. Unless you’re mechanically inclined and working with a camera you can afford to lose, the savings rarely justify the risk.
For testing the waters, start with a filter. If you fall in love with infrared’s aesthetic, convert an older camera body you already own.
Filter Wavelengths and Their Effects
Choosing an infrared filter wavelength fundamentally shapes your final image. The number, measured in nanometers, indicates which light wavelengths pass through, and each creates a distinct look.
590nm filters sit at the edge of the visible spectrum, allowing some red and orange light through alongside infrared. This creates the signature “color infrared” effect with vivid false colors, think magenta skies and golden foliage. It’s perfect if you want surreal color landscapes that still feel somewhat natural. You’ll get shorter exposures than deeper wavelengths, often just 1-2 stops slower than normal photography.
665nm filters push further into infrared while retaining subtle color information. Foliage turns pinkish-white, skies deepen to navy or teal, and you maintain decent contrast. Many photographers gravitate here for flexibility, you can process images as color or convert to black-and-white later. Expect exposures around 3-4 stops slower.
720nm filters represent the classic infrared sweet spot. Vegetation glows brilliant white, blue skies turn nearly black, and clouds pop dramatically. This wavelength works beautifully for black-and-white conversions with maximum “Wood Effect” drama. It’s the most popular choice for dedicated infrared work. Exposures typically run 5-6 stops slower than visible light.
850nm and deeper filters capture pure infrared, producing stark black-and-white images with minimal color contamination. The aesthetic turns ethereal and otherworldly, though extremely long exposures (often 30 seconds or more even in bright sun) make handheld shooting nearly impossible.
Important Safety and Technical Warnings
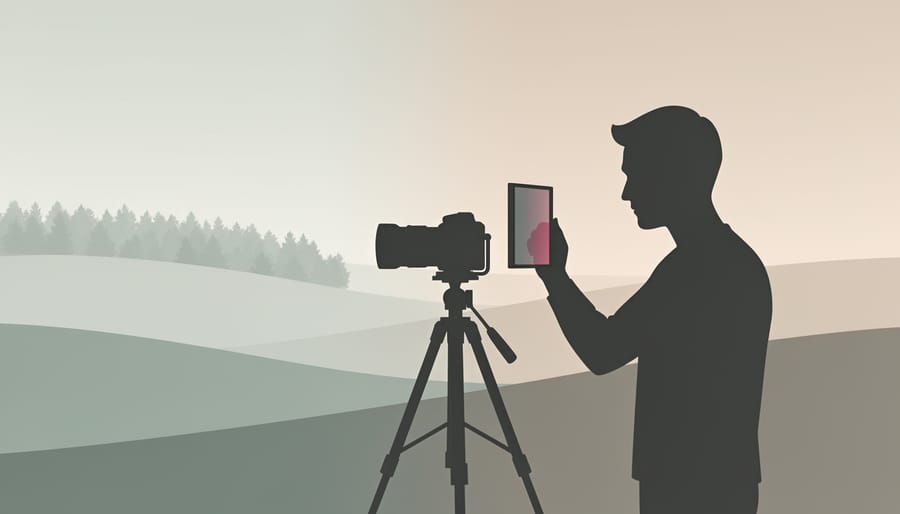
Before you dive into infrared photography, understand the technical challenges and potential pitfalls that can turn an exciting creative experiment into an expensive mistake. These aren’t minor inconveniences, they’re fundamental issues that affect every aspect of shooting.
If you’re considering DIY conversion by removing the infrared blocking filter yourself, know that opening a digital camera sensor chamber risks introducing dust particles directly onto the sensor, creating permanent spots in every image. You’ll also void your warranty immediately. The filter itself is delicate, and one wrong move can scratch the sensor or damage the ultrasonic cleaning mechanism. Unless you have experience with precision electronics work and a clean workspace, this is genuinely risky.
The technical challenges don’t end with conversion. IR requires focus shift compensation because infrared wavelengths focus at a different point than visible light, sometimes several millimeters off. Your camera’s autofocus system, calibrated for visible light, will consistently miss focus unless you compensate manually or use live view.
Lens hotspots present another nasty surprise. Many lenses, especially wide-angles and zooms, show a bright circular glow in the frame center when shooting infrared due to internal reflections and coatings designed for visible light. There’s no way to predict which lenses will hotspot without testing them first, and that expensive ultra-wide you own might be completely unusable for IR work.
Exposure metering becomes unreliable because your camera meter reads visible light, not infrared. Expect to bracket heavily and review histograms constantly until you develop an intuition for compensation, usually one to two stops over what the meter suggests, though this varies wildly by scene.
Step-by-Step: Shooting Infrared Photography
Setting Up Your Camera and Custom White Balance
Start by switching your camera to manual mode. Infrared light meters poorly in any automatic mode, and your camera’s meter will consistently underexpose by two to three stops because it isn’t calibrated for IR wavelengths. Manual gives you complete control over this compensation.
Set your ISO to 100 or 200 initially. Converted cameras shoot infrared at relatively normal ISOs, but if you’re using a screw-on filter on an unconverted camera, you’ll need much longer exposures regardless. Keep ISO low to minimize noise, which becomes more pronounced in infrared.
Custom white balance is critical. Point your camera at bright green grass or healthy foliage in sunlight, fill the frame, and set a custom white balance from that reading. This reference neutralizes the deep red cast that raw infrared files display and gives you a workable starting point. Without this step, your preview images will look uselessly red, making composition difficult.
Shoot in RAW format exclusively. These camera settings give you maximum flexibility during post-processing, where the real infrared magic happens through channel swapping and tonal adjustments. JPEG bakes in color decisions you can’t reverse.
Bracket your exposures by at least one stop in each direction. Your meter lies consistently in infrared, and what looks properly exposed on your LCD often isn’t. Check your histogram religiously, aiming to expose to the right without clipping highlights. Clouds and white foliage blow out quickly in IR.
Focusing Techniques for Infrared
Infrared light bends differently than visible light when passing through your lens, a phenomenon called focus shift. What looks sharp through your viewfinder will often be noticeably soft in the final infrared image. The offset varies by lens, some shift just a millimeter on the focus ring, others need significant adjustment.
Live view is your most reliable solution. Because it reads directly from the sensor, what you see sharp on the LCD will be sharp in your infrared capture. Zoom in to 10x magnification in live view, focus carefully on your subject, and you’re set. This method works with both converted cameras and filter setups, though filters make the screen darker and harder to judge.
Many older prime lenses feature a small red or white dot on the focus ring marking the infrared focus point. After focusing normally through the viewfinder, rotate the ring until your focused distance aligns with this IR mark. A lens focused at 10 feet in visible light might need adjustment to the 12-foot mark for infrared sharpness.
Without live view or IR marks, shoot a test series. Focus on a detailed subject, take a shot, then manually adjust focus slightly forward and backward in small increments. Review the results at 100% magnification to find your lens’s sweet spot. Note the offset direction, most lenses focus slightly beyond the visible-light point. Once you know your lens’s behavior, you can compensate instinctively, even when working quickly in the field.
Composition and Lighting Considerations
Infrared photography transforms familiar scenes into otherworldly landscapes, but you need to rethink composition entirely. Chlorophyll-rich foliage becomes brilliant white or pale pink, creating dramatic contrast against skies that render deep, almost black. This reversal makes summer your best season, lush trees and grass produce the strongest infrared glow, while bare winter branches lack the punch.
Blue skies with puffy white clouds deliver stunning results. The clouds pop against dark backgrounds, offering far more drama than flat overcast days. Shoot in midday sun when conventional photographers pack up; harsh overhead light that kills visible-spectrum images creates perfect infrared contrast.
Water behaves unexpectedly. Still lakes and ponds often turn dark and mirror-like, reflecting bright foliage beautifully. Moving water can appear either dark or glowing depending on angle and reflections. Architecture works brilliantly, brick, stone, and painted surfaces render with unusual tonal relationships that reveal texture invisible to the naked eye.
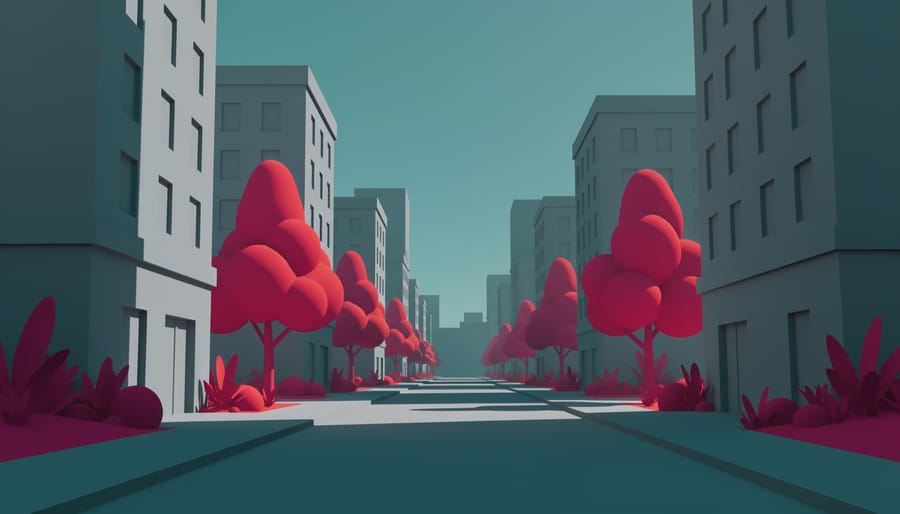
Scout locations in visible light first, then imagine them inverted. Parks, gardens, and tree-lined streets become your playground. While night photography demands long exposures and careful light management, infrared thrives in bright conditions. Night infrared combines both challenges but yields ethereal results. Golden hour still works, though the warm light matters less than sky clarity and foliage density.
Post-Processing Your Infrared Images
Your infrared RAW files will look strange straight out of camera, often with a strong red or magenta cast and muddy contrast. The real magic happens in post-processing, where you’ll transform those odd-looking captures into the signature surreal aesthetic infrared is known for.
Start by importing your RAW files into your processing software of choice. Lightroom, Photoshop, and Capture One all handle infrared files well, though each has slight workflow differences. The core adjustments remain the same across platforms.
- Set your white balance first. If you created a custom white balance in-camera using grass or foliage, your starting point will be closer to neutral. If not, use the white balance dropper tool on green foliage in your image, which should render as white or near-white in the final result.
- Swap the red and blue channels for color infrared work. In Photoshop, open the Channel Mixer (Image > Adjustments > Channel Mixer), select the Red output channel and set Red to 0% and Blue to 100%, then switch to the Blue output channel and set Blue to 0% and Red to 100%. This swap corrects the color cast and produces the characteristic blue skies and golden foliage of color IR photography.
- Adjust your tonal curve aggressively. Infrared images typically need more contrast than standard photos. Boost the contrast slider and then fine-tune with the curve, lifting shadows slightly while pulling down highlights to prevent blown-out foliage.
- Tackle remaining color casts using HSL sliders. You’ll often find cyan or magenta shifts in skies or yellow-green tones in foliage that need correction. Shift the hue sliders until skies look naturally blue and foliage appears white or golden.
- Increase clarity and texture to emphasize detail in foliage and clouds. Infrared captures incredible fine detail that benefits from these adjustments, but watch for haloing around high-contrast edges.
For dramatic black and white infrared images, skip the channel swap and convert directly to monochrome after your initial white balance adjustment. Crank the contrast higher than you would with visible-light black and white photography, the ethereal quality of infrared thrives on strong tonal separation between glowing foliage and dark skies.
The transformation from a muddy red RAW file to a finished infrared image is dramatic. Your initial attempts might look oversaturated or unnatural, but that’s part of infrared’s aesthetic. Experiment with different levels of channel mixing and color grading to develop your signature style, and save your favorite adjustments as presets for faster workflow on future shoots.
Testing Your Results and Troubleshooting Common Issues
After your first few infrared shoots, zoom to 100% on your computer and check every corner of each frame for sharpness. Infrared light focuses differently, so an image that looked sharp on your camera’s LCD might show soft edges or front/back focus issues at full size. If everything appears soft, you likely haven’t compensated enough for focus shift, revisit your focusing technique and test whether your lens has a consistent infrared focal plane you can mark.
Hotspots appear as a bright, circular area in the center of your images, especially at smaller apertures like f/8 or f/11. This happens when internal lens coatings reflect infrared wavelengths differently than visible light. Unfortunately, there’s no fix in post-processing that completely eliminates severe hotspots, you’ll need to avoid that lens for infrared work or shoot wide open where the effect often disappears. Test each lens at f/2.8, f/5.6, f/8, and f/11 against a uniform surface like a blue sky to identify problematic glass before a shoot.
Extreme color casts, magenta, cyan, or muddy mixed tones, typically mean your custom white balance needs refinement. Reshoot your white balance reference using bright green foliage in direct sunlight, then set it again in-camera. If colors still look off, you’ll correct them during RAW processing through channel swapping and targeted adjustments.
Excessive noise often comes from underexposure. Infrared sensors are less sensitive than they are to visible light, so what your meter suggests might leave you two stops darker than intended. Bracket your exposures and lean toward slight overexposure, you can recover highlights in post, but pulling up shadows in infrared files degrades quality fast. Just as with macro photography, precision in your capture workflow prevents hours of corrective editing later.
Frequently Asked Questions
Can you see infrared light with your eyes?
No, infrared light is invisible to human eyes. You won’t see the infrared glow while shooting, which is why you rely on your camera’s sensor to capture it.
Do all cameras work for infrared photography?
Most digital cameras have built-in infrared-blocking filters to prevent IR contamination in normal photos. While nearly all cameras can be converted for dedicated IR use, unconverted cameras require long exposures with external filters that make handheld shooting impractical.
How long are exposures when using infrared filters on an unconverted camera?
Expect exposures ranging from several seconds to 30 seconds or more, depending on available light and filter wavelength. Darker filters like 850nm block more visible light and require even longer exposures than 720nm filters.
Can you use autofocus for infrared photography?
Autofocus typically doesn’t work reliably with infrared because of focus shift. Live view with manual focus gives you the most accurate results, though some converted cameras can be calibrated for autofocus with specific lenses.
The expense question comes up constantly, and the honest answer depends on your approach. A screw-on 720nm filter costs between 50 and 150 dollars, making it an affordable entry point if you already own a camera and tripod. Professional conversion runs 300 to 400 dollars for a dedicated camera body, plus you need a spare camera to send in. Factor in a used camera body specifically for conversion, and you’re looking at 500 to 700 dollars total to get a setup that lets you shoot handheld. That’s a meaningful investment but far from prohibitive if infrared becomes a regular part of your work.
The difference between near-infrared and far-infrared matters less for photography than you might think. Near-infrared (the 700nm to 1200nm range) is what we capture with converted cameras and filters. Far-infrared sits beyond that spectrum and requires thermal imaging equipment, not standard camera sensors. When photographers talk about infrared photography, they mean near-infrared exclusively.
Infrared photography opens up a parallel world that exists right alongside our everyday vision, transforming familiar scenes into surreal landscapes where the rules of light and shadow are rewritten. You’ve now got the complete roadmap, from understanding conversion options and filter wavelengths through the practical realities of shooting and processing your images.
The beauty of infrared work in 2026 is that you don’t need to dive in headfirst. Grab a screw-on 720nm filter for under fifty dollars, mount it on a camera you already own, and spend an afternoon shooting foliage and clouds. You’ll quickly discover whether the aesthetic speaks to you and whether you’re willing to work within the technical constraints. If that test run ignites something, then consider a dedicated converted camera body.
What makes infrared compelling isn’t just the ghostly white trees or the jet-black skies. It’s the way this spectrum forces you to see composition differently, to anticipate how invisible light will render the world, to slow down and think through every technical decision. In an era where computational photography and AI enhancement dominate mainstream imaging, infrared remains stubbornly analog in its demands and rewards.
The learning curve is real, the frustrations are genuine, but that first perfectly exposed infrared image with glowing foliage against dramatic skies makes every technical hurdle worthwhile. Your infrared journey starts with a single frame.



 By
By