By
By 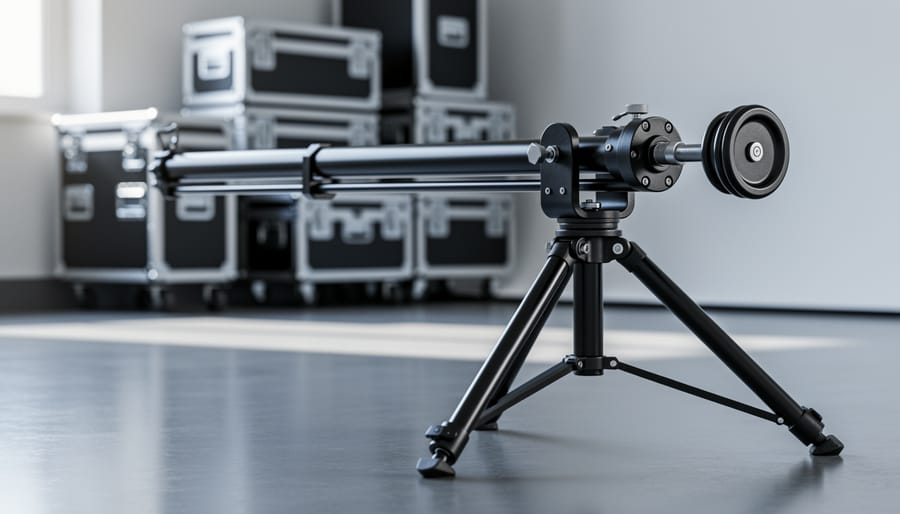
Nine times out of ten, a wobbly or jerky tripod jib traces back to a single culprit: an improperly balanced arm. Before you start second-guessing your gear or shopping for replacements, grab a spirit level and check whether your jib’s counterweight matches the camera load. If the arm drifts up or down when you release it at mid-height, you’ve found your problem.
The fastest diagnostic is simple. Loosen the jib’s pan lock, position the arm horizontally, and let go. A properly balanced jib should hold position without creeping. If it sags toward the camera or floats toward the counterweight, adjust the rear weights in small increments until the arm floats neutrally. This single fix resolves most stability complaints and costs you nothing but five minutes of careful tuning.
That said, balance is just the starting point. Tripod jibs are systems, not standalone tools, and performance issues often cascade from weak links elsewhere in the chain. A rock-solid jib on a flimsy tripod still delivers shaky footage. Worn pivot bearings, loose mounting plates, and under-tightened leg locks all masquerade as jib problems when the real failure sits lower in the support stack.
This guide walks you through the complete troubleshooting path, from quick field fixes to deeper mechanical checks. You’ll learn to diagnose whether the fault lies in balance, friction, or the tripod itself, then apply step-by-step corrections that restore smooth, controlled movement. We’ll also cover when a jib problem signals something more serious, like a bent boom or stripped threads, that requires professional repair or replacement rather than another round of adjustments.
Recognizing Instability: Is Your Jib Really the Problem?
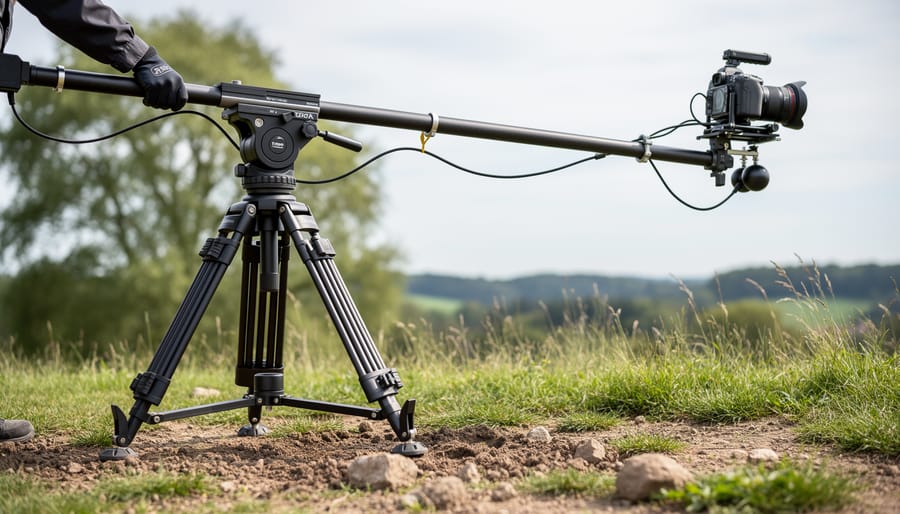
Before diving into fixes, you need to determine what’s actually causing your stability problems. The symptoms you’re seeing might point to the jib, but they could just as easily indicate tripod issues or setup mistakes. Misdiagnosing the source means wasting time on the wrong solution.
Start by observing exactly when and how the instability occurs. Does the jib wobble while you’re actively moving it, or does it drift after you’ve stopped? The timing and type of movement reveal different underlying problems. A jib that bounces at full extension suggests counterweight issues, while one that rotates unexpectedly when you’re not touching it often points to loose mounting hardware or an unlocked tripod head.
Here’s what common symptoms typically indicate:
- Wobbling during arm movement: Usually loose pivot points or worn bearings in the jib mechanism
- Drift or settling after you stop moving: Often indicates improper counterweight balance or a slipping tripod head
- Bouncing at extension: Almost always a counterweight problem or insufficient tripod weight capacity
- Unwanted rotation around the vertical axis: Tripod center column unlocked, head not tightened, or uneven leg spread
- Vibration that continues after movement stops: Wind interference, nearby vibration sources, or tripod on unstable ground
- Increasing instability as you extend the jib arm: Tripod too light for the jib’s load, or base spread too narrow
Test your setup systematically. First, lock the jib arm and move only the tripod head. If you notice play or movement, your tripod or head is the culprit. Next, with the tripod secured, operate the jib through its range of motion. If instability appears only during jib movement, you’re looking at a jib-specific issue. This simple isolation test saves you from tearing apart the wrong piece of equipment.
Pay attention to whether problems are consistent or intermittent. Consistent issues across all positions suggest fundamental setup problems like tripod inadequacy, while intermittent instability at specific extensions points to counterweight balance or mechanical wear at particular pivot points.
What’s Making Your Tripod Jib Unstable
Inadequate Tripod Support and Improper Setup
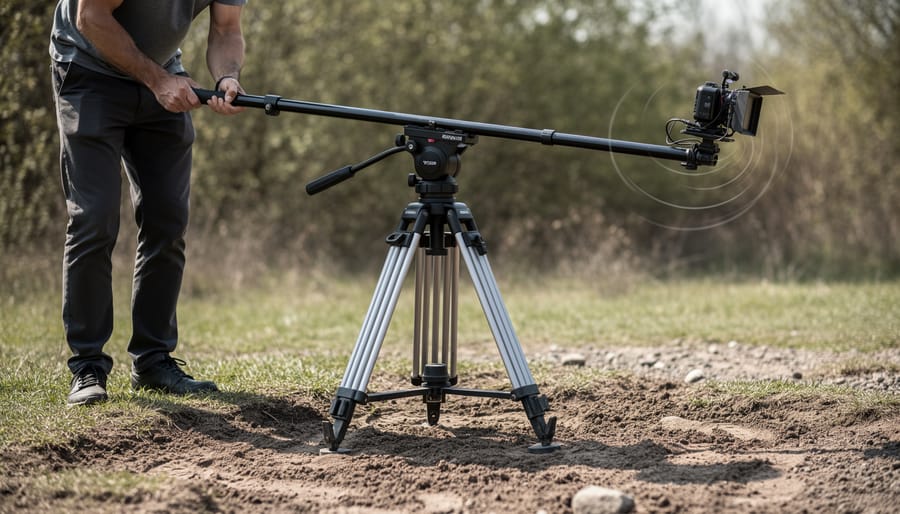
The most common culprit behind jib instability isn’t the jib itself, it’s the foundation supporting it. A tripod that works fine for a camera alone often can’t handle the leverage forces a jib creates. When you extend a jib arm, you’re multiplying the effective weight through mechanical advantage. A 10-pound jib with camera becomes 30+ pounds of rotational force at the tripod head, especially at full extension.
Start with weight capacity. If your tripod’s rated load is 20 pounds and your jib setup weighs 18, you’re asking for trouble. Jibs need headroom, aim for a tripod rated at least 50% above your total rig weight. Otherwise, you’ll get flex in the legs and drift in the head during movements.
Leg spreading matters more than most realize. Tripod legs pulled to their widest stance create a broader, more stable base that resists tipping. Legs set narrow concentrate forces on a smaller footprint, making the whole system wobble. Check that all leg locks are fully engaged too. A single unlocked section creates a weak point that flexes under load, translating to bouncy, unpredictable jib movement.
Ground surface plays a huge role. Soft dirt, sand, or carpet lets tripod feet sink and shift. On unstable surfaces, use a spreader or sandbags on the tripod’s center column base. Hard, level floors are ideal, but if you’re outdoors, press feet firmly into the ground and recheck stability before shooting.
Worn or Damaged Jib Components
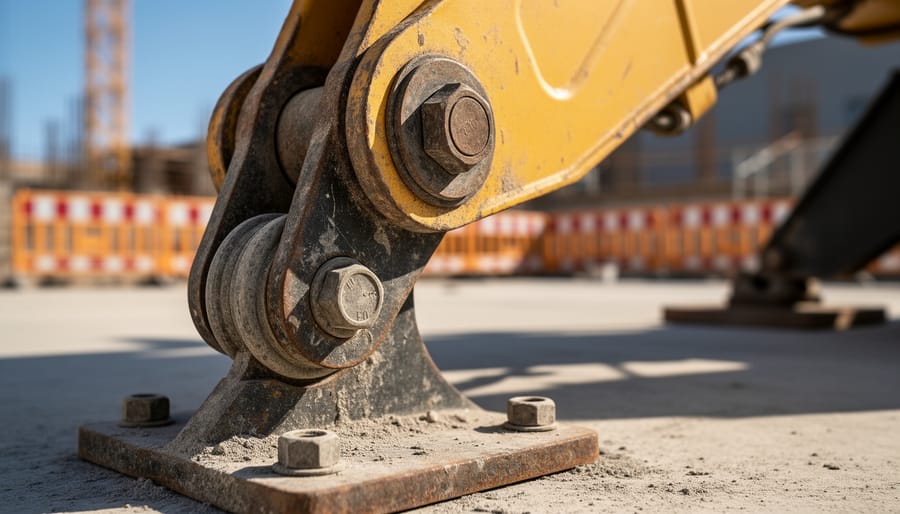
Over time, jib components wear down from regular use, and these small degradations accumulate into noticeable instability. Metal-on-metal contact at pivot points gradually wears away protective coatings and smooth surfaces, creating play where tight tolerance once existed. You’ll feel this as looseness or a slight grinding sensation when moving the arm.
Mounting hardware loosens through vibration and repeated setup cycles. Bolts that secured the jib to your tripod head six months ago may have backed out a quarter turn, creating just enough slack for wobble during movement. Lock washers compress, thread loctite breaks down, and what started as imperceptible movement becomes obvious instability.
Bearings suffer particularly when exposed to dust, moisture, or lack of lubrication. The smooth rotation you experienced when the jib was new gives way to rough spots, sticking, or uneven resistance. In extreme cases, bearings can seize partially, causing jerky movements that ruin shots.
Cables controlling counterweight or arm position fray where they pass through guides or around pulleys. A few broken strands might not fail completely but create uneven tension that affects balance precision. Inspect cable ends and high-friction points regularly.
Counterweight mechanisms themselves can develop problems. Mounting pins bend slightly, locking collars crack, or adjustment screws strip. Since counterweight balance is critical for jib stability, even minor damage here multiplies into major performance issues. The longer these problems go unaddressed, the more they stress other components, accelerating overall deterioration.
Improper Counterweight Balance
When you move your jib arm up or down, you’re fighting against gravity’s pull on both the camera end and the counterweight end. If those forces aren’t balanced, the jib won’t stay put where you position it, it’ll drift downward toward the heavier side or spring upward if the counterweight is too heavy.
The tricky part is that balance changes as you extend or retract the arm. A jib perfectly balanced at full extension becomes nose-heavy when shortened, because the camera moves closer to the pivot point while the counterweight stays the same distance away. Think of it like a seesaw: moving one person closer to the center while the other stays at the end tilts the balance dramatically.
Insufficient counterweight is the most common culprit. Many operators underestimate how much weight they need, especially after adding accessories like monitors or wireless transmitters to the camera end. Each ounce added out there requires significantly more counterweight on the opposite side to compensate. The longer your jib arm, the more pronounced this imbalance becomes, and the more unstable your shots will be at different operating angles.
Environmental Factors and User Technique
Even perfectly maintained equipment can appear unstable when environmental factors or user habits create problems. Wind is the most common culprit, even moderate breezes create surprising force on an extended jib arm, causing drift and oscillation that looks like mechanical failure. Operating outdoors without wind protection or extending the jib during gusts amplifies this effect dramatically.
Vibrations from nearby sources also translate directly to your jib. Traffic rumble, foot traffic on wooden floors, nearby machinery, or even HVAC systems can introduce shake that appears to come from the equipment itself. These vibrations travel through the tripod legs and manifest as instability, particularly at longer extensions where the jib acts as a lever.
User technique matters more than many realize. Jerky movements, releasing the jib arm too quickly, or failing to dampen momentum after repositioning all create wobble. Starting or stopping camera movement abruptly generates oscillation that takes several seconds to settle. Operating the jib too quickly for its weight capacity, or applying uneven pressure during adjustments, mimics the symptoms of worn components but stems entirely from technique.
How to Fix Your Unstable Tripod Jib
Quick Checks and Immediate Adjustments
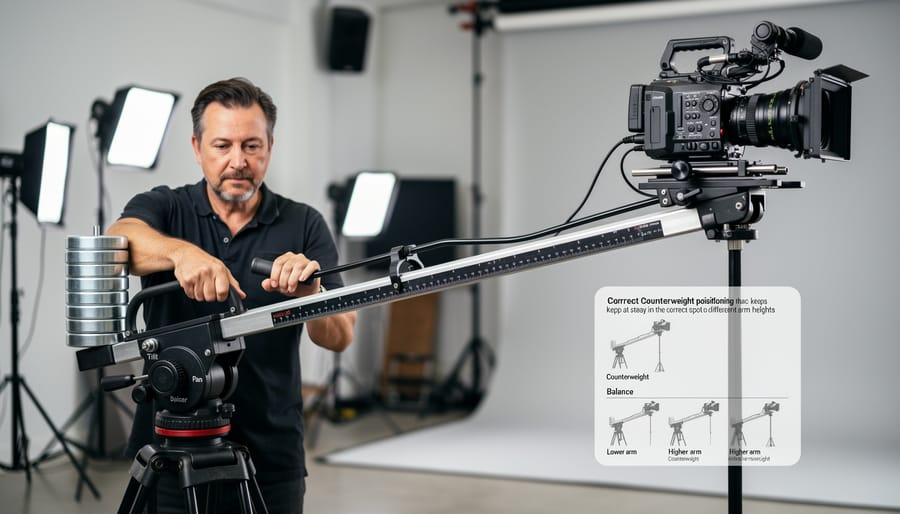
Start with the fastest wins, these checks take minutes but solve most instability problems on the spot.
Verify All Locks Are Engaged
Walk around your tripod and physically test each leg lock. Twist-locks should resist turning; flip-locks should lie flat and tight. A single loose section three segments down can telegraph wobble all the way up to your jib arm. Don’t just look, grip each section and try to collapse it. If it moves even slightly, tighten it.
Check your tripod head lock too. Pan and tilt controls sometimes loosen during setup, allowing the jib to drift. Engage them fully, then test by gently pushing the jib arm, it shouldn’t budge.
Assess Leg Spread and Footprint
Narrow leg angles create a tall, unstable platform. Spread your tripod legs to their widest practical position for your shooting height. The broader the base, the more resistant to tipping. On uneven ground, extend the downhill leg farther than the uphill ones to level the head and increase stability.
Press down on each foot. If any leg compresses into soft soil or carpet, you’re losing rigidity. Add rubber feet for hard surfaces or spiked feet for earth.
Confirm Jib Mounting Security
Check that your jib’s mounting plate sits flush against the tripod head with no gaps. Tighten the mounting screw until snug, overtightening can strip threads, but loose mounting telegraphs every movement into wobble.
Rebalance Counterweights
Extend your jib arm to your typical working length and release it gently. It should stay put, not drift up or down. If it rises, add counterweight; if it drops, remove some. Recheck balance whenever you change arm extension or camera position.
Cleaning and Lubricating Jib Mechanisms
Before performing any mechanical work, power down connected equipment and remove batteries from motorized jib components to prevent accidental activation. Start by extending the jib arm to access all pivot points and joints, then use a soft brush or compressed air to remove loose dust and debris from around bearings, hinges, and mounting plates. For stubborn grime buildup in hard-to-reach areas, wrap a microfiber cloth around a plastic tool or wooden dowel, avoid metal implements that could scratch precision surfaces.
Clean each pivot point individually with isopropyl alcohol (90% or higher concentration) applied to a lint-free cloth, wiping away old lubricant residue and accumulated dirt. Pay particular attention to the main arm pivot, counterweight adjustment tracks, and any cable routing points where friction occurs. The same principles that apply to cleaning system care for lenses work here: work from cleanest to dirtiest areas to avoid spreading contamination.
Once surfaces are clean and dry, apply a precision lubricant designed for camera equipment or low-dust environments. White lithium grease works well for load-bearing pivots and friction points, while PTFE-based dry lubricants suit bearings and frequently adjusted mechanisms. Apply sparingly, a small dab at each point is sufficient. Cycle the jib through its full range of motion several times to distribute lubricant evenly, then wipe away any excess that migrates to exterior surfaces. This prevents dust adhesion during field use and keeps controls smooth without attracting contaminants that would reverse your maintenance efforts.
Tightening and Replacing Hardware
Loose hardware is one of the most common yet overlooked sources of jib instability. Even components that felt secure during setup can gradually loosen through vibration and repeated movement.
Start with a systematic visual inspection of every bolt, screw, and clamp on your jib assembly. Work from the tripod mounting plate upward to the arm tip. Use appropriate hex keys or wrenches, never force ill-fitting tools that can strip bolt heads. Tighten each fastener using a crosshatch pattern (alternating opposite sides) rather than going around in sequence, which prevents uneven pressure distribution.
Pay special attention to the main pivot bolt where the jib arm connects to the mounting base. This critical junction bears tremendous stress and should be snug but not over-tightened. If your jib manufacturer specifies torque values (typically 3-5 Nm for smaller jibs), use a torque wrench to avoid crushing components or leaving them too loose. Hand-tight plus a quarter turn is a reasonable guideline when specifications aren’t available.
Check all washers for flat spots, cracks, or thinning. Damaged washers allow bolts to gradually loosen and should be replaced immediately with identical sizes. Nylon or brass bushings in pivot points wear over time and develop play, if you can wiggle a joint more than a millimeter, replacement bushings are likely needed.
Keep a small hardware kit with spare bolts, washers, and bushings specific to your jib model. These wear items cost little but prevent shoots from being derailed by a single failed component.
When to Upgrade Your Tripod or Seek Professional Repair
Sometimes instability signals that you’ve outgrown your current setup. If your tripod’s maximum load capacity is within 20% of your combined jib and camera weight, you’re operating at the edge of stability, upgrade to a sturdier tripod with at least 50% more capacity than your heaviest configuration. Carbon fiber legs significantly reduce flex compared to aluminum at similar price points for jib work.
Certain damage requires expert intervention. Stripped mounting threads, cracked pivot housings, or bent structural components on the jib itself rarely respond to DIY fixes and often worsen with continued use. Worn bearings that cause grinding or binding after cleaning need replacement with precisely matched components. For these issues, professional repair costs typically run $75, $200, which makes sense for quality jibs but may exceed replacement cost for budget models.
Calculate the math: if repair estimates approach 60% of a new jib’s price and your current model is several years old, replacement often delivers better long-term value and improved performance.
Preventing Future Instability: Maintenance Best Practices
Routine Inspection and Cleaning Schedule
Establishing a consistent maintenance routine prevents most stability problems before they occur. Just as regular camera maintenance tips keep your gear reliable, systematic jib care ensures smooth operation when you need it.
After every shoot, wipe down all jib surfaces with a microfiber cloth to remove dust, moisture, and fingerprints. Check that all locking mechanisms release and engage smoothly, and inspect cables or tension systems for obvious wear. This five-minute habit catches emerging issues early.
Weekly (for frequent users) or before important shoots, perform a more thorough check. Test all pivot points for smooth movement without grinding or catching. Verify counterweight security and mounting bolts remain tight. Extend the jib arm fully and check for wobble or looseness at maximum reach, where problems become most apparent.
Monthly, clean pivot points and bearings with a soft brush and compressed air, then apply appropriate lubricant. Inspect mounting plates and brackets for cracks or deformation. Check tripod connections where the jib attaches, since wear here directly affects stability.
Quarterly, conduct a comprehensive inspection following the same maintenance secrets that preserve any precision equipment. Disassemble accessible components to check for hidden wear, replace any questionable hardware, and verify all specifications match manufacturer guidelines. This deeper maintenance extends your jib’s working life significantly and maintains professional-grade stability.
Proper Storage and Transport
How you store and transport your jib between shoots directly impacts its long-term stability. Improper storage causes pivot points to seize, hardware to corrode, and components to bend, problems that manifest as instability later.
Always disassemble your jib before storage. Remove counterweights separately and store them in padded compartments to prevent impact damage. Store the jib arm horizontally on a flat surface, never leaning against a wall where it can warp over time. If you’re using a case, choose one with custom foam cutouts that immobilize each component; generic cases allow shifting during transport that loosens hardware.
Keep stored equipment in climate-controlled environments between 50-70°F with moderate humidity. Extreme cold makes lubricants stiff, while heat and humidity accelerate corrosion on metal parts. Coastal photographers should be especially vigilant about moisture, as salt air attacks hardware aggressively.
During transport, secure your tripod legs in their collapsed position with Velcro straps. Loose legs bang against each other, wearing down locking mechanisms. A hard-shell case for your jib is worth the investment if you’re traveling frequently, soft bags offer minimal protection against the impacts that cause hidden damage.
Pre-Shoot Setup Checklist
Before you head out to your shoot, run through this simple checklist to catch stability problems while you’re still in a position to fix them, not when your subject is ready and the light is perfect.
- Verify all tripod leg locks are fully engaged and secure
- Check that legs are spread to maximum stable width for your shooting surface
- Confirm jib is properly mounted with all attachment bolts tight
- Test counterweight balance at your planned extension range
- Inspect pivot points for smooth movement without excessive play
- Look for any loose hardware, frayed cables, or visible damage
- Clean debris from joints and moving parts
- Confirm your tripod’s load capacity exceeds your jib’s weight plus camera rig
These checks take less than five minutes but can save you from discovering a wobbly jib mid-shoot. Pay special attention to the counterweight balance, test it at both minimum and maximum arm extension, since what feels stable at one position may drift at another. While you’re doing your pre-shoot prep, the same mindset that applies to cleaning lenses applies here: a few preventive minutes now beats scrambling to fix problems when you should be shooting.
If anything feels off during this check, address it before you start. A gentle shake of the jib arm should produce minimal wobble, and the arm should hold position when you release it.
Common Questions About Tripod Jib Stability
How much weight can a tripod jib safely handle?
Weight capacity depends on both the jib’s rated maximum and your tripod’s load capacity, whichever is lower becomes your working limit. Most entry-level jibs handle 5-10 pounds, mid-range models manage 15-25 pounds, and professional units can support 40 pounds or more. However, these ratings assume proper counterweight balance and a tripod rated for at least double the jib’s weight capacity. Exceeding these limits creates the exact instability problems we’ve been troubleshooting. Always check both the jib manufacturer’s specifications and your tripod’s maximum load rating, then stay at least 20 percent below those limits for a safety margin during dynamic movements.
Do I need a specific type of tripod head for jib stability?
Fluid heads work best for jib mounting because they dampen vibrations and allow smooth positional adjustments, but a sturdy video head or even a robust ball head can work if it’s rated for the combined weight. The critical factors are the head’s load capacity and its mounting plate compatibility with your jib’s base. Some jibs include proprietary mounting systems that bypass the head entirely, attaching directly to the tripod’s mounting platform. Whatever configuration you use, the head must lock completely solid with zero play, any looseness in the head translates to visible shake in your jib movements.
Does tripod material affect jib stability?
Carbon fiber and aluminum tripods can both provide excellent stability when properly sized for the jib’s weight. Carbon fiber offers better vibration dampening, which helps settle movements faster and reduces resonance from wind or nearby vibrations. Aluminum tripods are typically heavier, which can actually improve stability on solid ground by lowering the center of gravity, though they transmit vibrations more readily. The material matters less than the tripod’s overall build quality, leg diameter, and whether its weight capacity matches your jib setup. A well-built aluminum tripod will outperform a flimsy carbon fiber model every time.
How long should a tripod jib last before needing replacement?
A quality jib with regular maintenance should provide 5-10 years of reliable service, though professional units under daily use may need bearing replacements or hardware overhauls around year 3-5. Lifespan depends more on maintenance habits and usage intensity than the calendar, a jib used monthly with proper cleaning will outlast one used weekly without care.
Can I use my photography tripod for video jib work?
Photography tripods can work for lightweight jibs if their load capacity is sufficient, but most lack the stability needed for smooth video movements. Video tripods feature wider leg spreads, rubber feet for grip, and often include mid-level spreaders that dramatically improve rigidity under the dynamic loads jibs create.
Why does my jib wobble more at full extension?
Extended arm positions magnify any instability because physics works against you, the moment arm increases, placing exponentially more stress on pivot points and the tripod base. Even minor looseness or imbalance becomes visible shake at maximum reach, which is why proper counterweight positioning and rock-solid tripod support matter most when you’re shooting at full extension.
If your jib continues experiencing stability problems after working through the troubleshooting steps and these considerations, the issue likely involves component wear beyond DIY fixes or a fundamental mismatch between your jib and support equipment. Professional camera shops can assess bearing wear and structural integrity, helping you decide whether repair or replacement makes financial sense. Sometimes upgrading to a heavier-duty tripod solves persistent problems more cost-effectively than replacing a jib that’s actually fine but simply under-supported.
Key Takeaways
Tripod jib instability frustrates photographers and videographers, but it’s rarely a mystery once you know where to look. Start your diagnosis with the foundation. Check that your tripod can actually handle the combined weight of your jib and camera rig, verify all leg locks are fully engaged, and confirm your legs are spread wide enough for a stable base. These simple checks solve more problems than any other fix.
Balance matters more than most people realize. An improperly positioned counterweight creates the wobble and drift that ruin smooth movements. Take the time to rebalance whenever you change camera position or add accessories. The five minutes you invest in proper counterweight adjustment saves hours of unusable footage.
Maintenance isn’t optional if you want consistent performance. Inspect your jib and tripod after every shoot, looking for loose hardware, worn components, or debris in moving parts. Clean and lubricate pivot points quarterly, or more often if you shoot in dusty or humid conditions. Catching a worn bushing or loose bolt early prevents the cascading problems that lead to expensive repairs.
Know when to upgrade or get professional help. If your tripod lacks the weight capacity for your jib, no amount of tightening will create stability. When you find cracked components, stripped threads, or damage beyond basic repairs, professional service or replacement becomes the smart choice. Your equipment should support your creativity, not limit it.
Most tripod jib instability doesn’t signal the end of your equipment’s useful life. As we’ve covered, the wobbles and drift that plague your shots typically trace back to fixable issues: loose hardware, poor balance, inadequate tripod support, or simple wear that responds well to cleaning and lubrication. Running through the systematic checks in this guide will resolve the majority of stability problems you’ll encounter.
The key shift is viewing jib maintenance as part of your creative process, not emergency repair work you tackle after something fails mid-shoot. A five-minute inspection before you pack your gear, quarterly cleaning sessions, and proper storage between jobs keep your jib performing reliably when it matters most. These habits cost far less time than troubleshooting failures on location or living with compromised footage.
When you do encounter persistent instability despite proper maintenance, you’ll now recognize whether you’re pushing your tripod beyond its capacity or facing damage that warrants professional attention. That knowledge alone saves frustration and prevents throwing money at the wrong solutions.
Your jib is a precision tool, but it’s also a mechanical system designed to be maintained by its user. Treat it well, and it’ll deliver the smooth, controlled camera movements that elevate your work from shaky to cinematic. The stability you’re chasing is within reach, it just requires the same attention to detail you bring to your compositions and lighting.
Understanding Tripod Jib Terminology
Understanding the equipment you’re working with makes troubleshooting and maintenance much easier. Here are the essential terms you’ll encounter when dealing with tripod jibs and stabilization gear:
- Counterweight
- A mass (usually adjustable weights or sandbags) mounted opposite the camera end of the jib arm to balance the load and prevent tipping. Proper counterweight adjustment is crucial for smooth movement and stability.
- Pivot Point
- The central fulcrum where the jib arm rotates vertically and horizontally, typically mounted on the tripod head. Wear or looseness at this critical junction causes most jib instability issues.
- Load Capacity
- The maximum safe weight a tripod or jib can support, including camera, lens, accessories, and counterweights. Exceeding this limit compromises stability and risks equipment damage.
- Moment Arm
- The effective length from the pivot point to the camera or counterweight, which determines the leverage forces acting on the system. Longer moment arms require more counterweight and stronger tripod support.
- Bushing
- A cylindrical bearing or sleeve that reduces friction at pivot and rotation points. Worn bushings create play and wobble in the jib’s movement.
Familiarizing yourself with these terms helps you communicate more effectively when seeking advice, ordering replacement parts, or following manufacturer specifications for your specific equipment.



 By
By